Walking Cane: Episode 4
Posted 20 November 2013
This is an episode in a free series. Want to watch it? It is free to do so, you just need to log into the site, and you can enjoy this video and many other videos we think you will love.
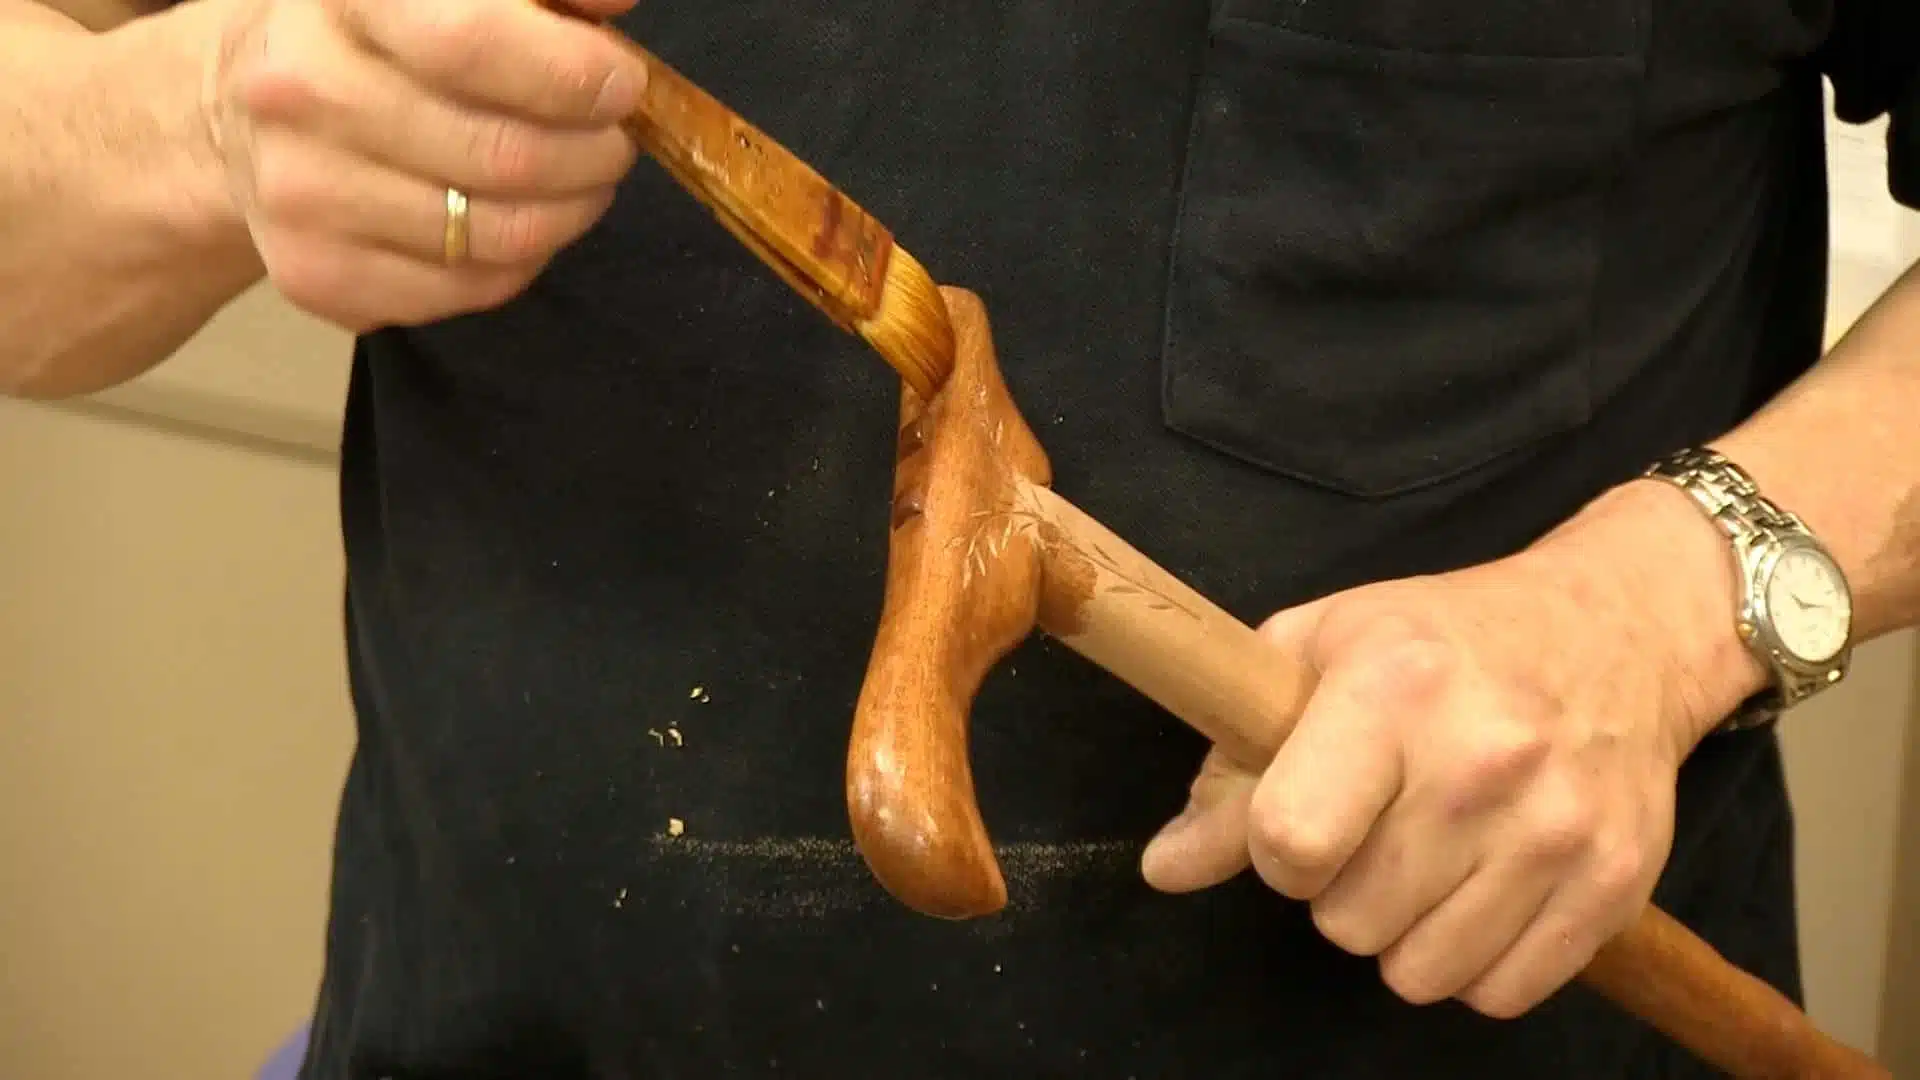
In this concluding episode, Paul goes through some of the different designs for walking canes and walking staffs. He shows us how to do the double through tenon, shape a double twist, and shows how to apply a stain and a brush on finish.
Another awesome video, thanks!
This has been a really fun project Paul. Many thanks!!
Thanks for covering as much as you did. I have enjoyed watching the videos and making the canes.
What are your thoughts on using the shellac sanding sealer but then applying polyurethane over the shellac to make more weather durable?
Thanks Paul and staff ( no pun intended ) I really enjoyed this series as well. I so look forward to these video’s and can’t wait for the next one. I am going to be making a few of these along with the spoons, boxes, wall clocks. Yep I am going to be busy.
Thanks again !
Steve
Thanks Paul!
A relative sometimes needs some extra stability while walking. I’m planning for one of these to replace the telescoping aluminum Chinese thing she has.
Thank you. A fun and useful project to add to my growing repertoire.
Thanks everybody. I enjoyed passing this along. We also have a couple of added extras to kind of cap off some other thoughts on stick and cane making for YouTube, but we’ll let you know when we get that done
Nice project Paul, I will have a go at making at least one , I just need to pick up some wood
Thanks
brilliant ,really enjoyed these . i am just wondering what is quilted mahogany ?
Thanks Paul. I note that you do not utilize any rubber stops on your sample canes. I know that can be difficult in the store with tiles or slick surfaces. Any thoughts on attaching some anti-slip devices?
I bought these from Home Depot in the US – http://www.homedepot.com/p/Shepherd-7-8-in-Black-Rubber-Leg-Tips-4-Pack-89127/100180300#.Uo4Uv8RDtBk
Just about every pharmacy in the US including Wal-Mart carry push on cane tips in different diameters.
Love this series. Keep ’em coming Paul. I’m excited to try as well, but there is one thing I’m unclear about. I didn’t quite catch the subtle difference between the execution and the result of the “twist” and the “double-twist” methods. I like to think that I’m no moron, but for some reason the nuance just escaped me. If anyone can think of an easy way to make the light come on for me, I’m willing to accept and thank you for your input. Good luck to you all.
Take two canes, one with a single twist and one with a double twist. Use a non-permanent marker, such as a pencil or a finger, and start in the grove at one end. Then rotate the cane in a continuous motion until you get to the other end while keeping the marker in that one grove. You will find that the single twist fills in all of the groves while the cane with the double twist will fill in only half of the groves. It will miss the “other” grove. That “other” grove is the “double” in double-twist The double-twist is essentially a parallel grove from one end to the other.
Hope that helps…it took a while for me to figure it out as well.
John
It is possible to end up with a single twist using the method shown for double twist. You have to make sure the angle is steep enough that the top groove ends up under the bottom groove when you get all the way around the first time. If it meets it instead you end up with a single groove. The difference is subtle enough that it probably doesn’t make a huge difference as long as the angles and spacing look right to you, but if you’re set on the double twist, you do have to be a little careful with the method to actually get a proper double twist.
Great series! Thank you for sharing!
Thanks for this series. Very useful.
I’m interested in how the handle is attached for the ‘back packer’s’ version. I thought it was similar to the first one, but when Paul was cutting the notches, right at the end, there was a drill hole in the shaft. Is it screwed in and then plugged – or a dowel joint – or a round tenon? It wasn’t covered and I’d love to know as I would like to make one of them
Can anyone help?
Claire, I believe the handle on the hiker walking stick is morticed and tenon in the same way the handle is done on the cane. The little hole I think is to attach a lanyard.
Thank You for the great video. Can’t wait to get started
Where can I find how to do the chip leaf design?
This should help: https://paulsellers.com/2011/09/saw-handles-and-more/
Best, Phil
This is a timely project for me as I recently had Knee surgery and I need a cane that does not look clinical. The design with the twist and the wedged tenon is the one I like and will be making for myself. Thank You So much Paul.
Paul, in tapering the shaft from 1-3/8 inch to 7/8″ I noticed that you left some small flat sides (4 of them) from top to bottom. Even the bottom tip had a squarish aspect to it. I assume that this is intentional, and that (1) the bottom can be reshaped to accommodate a metal or rubber cane tip, and that (2) several inches at the top can be cut dead parallel to accommodate the tenon for the handle mortise.
Question: is the top parallel section best cut after the shaft is cut from the board, to allow a straight rip cut, and then the parallel section created afterward?
Secondly, modern oak has large pores, red oak larger than white oak. I roughed out handles in red oak (the American red oak) and see (and feel) the definite need for somehow filling the pores. You used sanding sealer, which can be shellac.
QUESTIONS: Was that sanding sealer a thicker, more viscous cut than normal shellac finish? And, did you add dye to the sanding sealer? Would we also be all right using wood pore filler that is either neutral or dyed to the color of the wood? If so, what would be the order of application of different layers (filler or dye or sanding sealer or shellac and finally a water tolerant overcoating finish)?
Thank you. So much to do, and so little time… — Jeff
I was careful to obtain wax-free shellac flakes so I could have the most freedom in selecting additional coats. It was an adventure in research. I also prefer shellac, and everything else is so complicated. I just have to plan for rain in choosing the top coat of finish.