Am I bad or got a bad batch of diamond plates?
Welcome! / Forums / General Woodworking Discussions / Tools and Tool Maintenance/Restoration / Am I bad or got a bad batch of diamond plates?
Tagged: Diamond Plates longevity
- This topic has 17 replies, 10 voices, and was last updated 6 years ago by
markh.
-
AuthorPosts
-
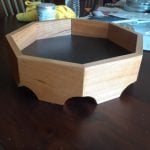
Few years ago I decided to take on woodworking. I like working quietly so decided to go hand tools route. More an after hours hobby than serious commitment. Watching some Paul’s videos I understood that the key to any woodworking projects are sharp tools. As I like to fix things, decided to go “get some used stuff and sharpen it”. So I got myself 2 No 4s, 1 No 5, 1 No 6, some Aldi chisels and spokeshave. As I understood I will be sharpening almost every day, so decided to not skimp on sharpening stuff. Purchased recommended EZE-LAP set, my first woodworking project was diamond plates holder (yeah, the three slotted one).
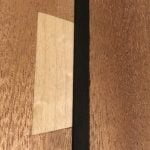
Ad rem. I was able to make flat and square and sharp two irons (from No4 and one from No 6) and 4 chisels. While working on the No 5 blade – plates basically stopped cutting. I did a glass test – there were some streaks on the glass after rubbing it against those plates, but making No 5 iron flat (which wasn’t too much off) took me almost 4 hours. I cleaned those plates, during sharpening I was using some automotive glass cleaner, water, oil. Didn’t help. Morning sharpening No. 4 iron that was previously done to mirror finish was taking 15 minutes. It was much faster just to glue 3 strips of sand paper to the granite plate and do it there – minute or two job. However frustration came. And I don’t like to have a hobby that frustrates me. So ditched it for 2 years. Two weeks ago there was a warehouse sale and I bought Faithfull double sided diamond plate for 20 quid – basically cheapest one on the market. Took an old spokeshave iron in pretty bad shape. Took me 20 minutes to get it to flat and razor sharp.
That got me thinking. What did I do wrong? What I am missing here? Was it me? Technique? Did I destroy those 200 quid expensive plates somehow? When I was reading that those EZE-Lap plates last people 15 years or more I was like “how? If I knew they will last few hours I would just invest in new irons and use them only for resharpening”.
So can someone explain it to me, please?PS. Sorry for the long post
2 April 2018 at 12:59 pm #516116Not sure what you did wrong, maybe too much pressure for too long? Maybe expecting sharpening stones to flatten? Putting oil on them? I invested in diamond plates too but I dont use them to flatten or grind chipped blades. I use wet/dry sand paper for that, and the diamonds saved for honing. I dont bear down hard either, but let the diamonds do the work. Maybe I’m being to easy on them?
2 April 2018 at 2:14 pm #516165I have had a virtually identical experience with diamond plates. Initially I invested in the 3 EZElap plates as Paul recommends and after a few weeks, same thing, coarse plate just stopped cutting. Tried cleaning etc but, having read around the subject, I believe I was using too much pressure and effectively de-bonded the diamonds from the resin used to attach them to the steel. Once that happens they are just very expensive paper weights!
I have since tried a DMT extra coarse plate and have been extra light with pressure (weight of arms only) but I would still say that after a couple of weeks or so the cutting action was severely reduced. To be fair the manufacturer states there will be a drop off in performance but I wasn’t expecting it to be this bad. It is definitely way to slow for re-grinding a bevel on an old tool.
Like you I tried wet and dry sandpaper (60 grit stuck to float glass) and got much more rapid results.
I believe these plates are hopeless for grinding bevels beyond the initial bedding in period and would definitely not use them for flattening. In my opinion, if you are restoring old tools then forget about diamond plates, they are best suited for honing once a blade is in good condition. Even then, I am not hugely impressed considering the cost of these things!
Since I have had such success with wet and dry on glass I am thinking of switching to a mix of wet and dry and 3M microfinishing film (scary sharpening). Will probably use a grinder if there is too much material to grind away.
2 April 2018 at 2:37 pm #516173I’ve used diamond plates (DMT) for years and not had a problem. Make sure you are not using a heavy or viscous oil for lubrication. The plates will not cut. I use water or a thinned household spray cleaner, diluted with a bit of water. Yes, after a long period of use, some of the larger diamonds will wear off, effectively lowering the grit of the abrasive, but it’s barely noticeable. When you’re flattening the back of a tool, you actually have to remove quite a bit of steel. For plane irons, I gave up and started using the ‘ruler trick.’ If you aren’t familiar with it, Google it or search on YouTube. When you consider how a plane iron wears, this method makes even more sense.
 3 April 2018 at 1:18 am #516543
Kodi,
I could read your post and swear I wrote it about myself, minus the two years off part. I use the diamond plates in a plate holder a la Paul Sellers. I have found that anything beyond soapy water while grinding/sharpening/honing creates a lubricating layer. I also routinely clean off the plates when I finish my use of the plates. I don’t go fancy, but I always give one last spray of water to raise the swarf and wipe it off with a lint free towel. There is some of the towel left on the plates, but when they dry you can blow the lint off and you’re good to go.
A thought occurred to me, though. When I hone or grind a new bevel, I rarely touch more than the last 1/4″-1/2″ of the metal of the flat side. I don’t cut the wood with any part of a plane iron beyond the first fraction of an inch so why waste the time and effort with anything beyond that? As an example I have a Stanley 605 1/2 Jack plane with the original iron from 1911. The iron was considered junk by the seller on eBay. I got the iron and scrubbed the rust off then went through the sharpening process for the 1/2″ closest to the wood and it cuts beautifully now. I even leave the minor pits in the iron just for “patina.” The bevel and flat behind it are mirror shiny, though! Hope this helps!Kodi,
Do those EZ-LAP diamond plates still grab your fingernail if you rub the tip of your fingernail across the diamond plate. If so, particularly on the coarse plate, then the diamonds are still there. If it is smooth and does not grab your fingernail then maybe the diamond has de-bonded from the substrate or steel and the plate is irretrievably damaged. You should still feel some resistance to rubbing the fingernail down the finer plates too as they bite into your nail. You mention in your post that “there were some streaks on the glass after rubbing it against the plate” – what did you mean by this? You didn’t rub the glass plate against the diamond plate I hope. Diamonds are hard but they can be damaged. Glass is a hard material.I must admit, like the others above, I use coarse wet and dry paper (with light machine oil/3in1 oil or sewing machine oil -or even baby oil if I’ve run out of the others) to do the hard flattening work on the back of the iron and a wet grinder to do the hard work on the bezel. If I didn’t have the wet grinder, I would also use the wet and dry paper on glass plate for the bezel too. I only use the diamond plates for the actual honing, not reshaping the iron.
All the best!
MarkThanks everyone for their input. I had some spare time today and got my EZE-LAP some cleaning. Some detergents finished with isopropanol to make sure no residue is left. Then I tried a piece of glass (bottom of the glass bowl) on them (and yes, Mark – I know that the glass is hard – that’s how I wanted to see if the diamonds are still there 🙂 ). In all three cases there were marks on the glass, so diamonds are still there. However those scratches were inconsistent with the grit of the plates – scratch marks from 250 grit plate were almost similar to what you get when honing on 2000 grit. On piece of metal 250 grit plate left almost a mirror finish after few strokes. So looks like I broke the diamonds to much finer grit. Expensive lesson learned.
Regarding the flattening work – I did only about 10-15 mm of the back of the irons plus about a millimeter out of square correction. I did flatten four Aldi chisels on them, though, as I saw multiple times people on Youtube doing that routinely. Heck – a few days ago I was watching a video “Buying & Restoring Hand Tools with Ron Herman ” where he was doing exactly that – flattening the back of a chisel on diamond plate saying that this plate will last you a lifetime.
So what I learned:
– diamond plates are not made equal.
– if you are not sure how to use diamond plate, let someone show you (not on video), otherwise save yourself a lot of trouble (and money) and assume that your diamond plate is the lesser quality and will break if you increase a pressure too much
– to be on the safe side, flatten only on abrasive paper glued to flat surface and use diamond plates only for honing or final touch flattening. Don’t use too much pressure.From what I see not only me had this issue. Maybe someone can make a video how to use diamond plates properly (or maybe such video exists already?) explaining how to apply pressure, when it’s too much etc. Those plates are ranging 200 quid ((for the set of three ) and in my case survived about two and half hours of use.
PS. Can someone recommend which sandpaper to use? I remember someone mentioning how to select the one designed for work on metal, but I can’t remember what that was exactly…
@kodi This probably won’t be particularly helpful but here goes: Remember that our hands and arms experience force, but the blade and stone experience pressure. In other words, for the same sense of pushing down on the work, the effect is very different if you have only 1/4″ of the blade on the stone vs. an inch. The 1/4″ will have four times more pressure than the one inch. Also, a narrow blade will experience more pressure than a wide plane iron, both with the same applied force.
It sounds like there isn’t much use on your stones. I’d expect the ends not to have been touched very much. Does the grit feel different on the ends vs. in the middle or along the sides?
Some people (and some companies) say that, if you use a diamond plate for lapping water stones or other stones, that will remove or fracture the diamond abrasive. Whether that is true, I don’t know, or if it is DMT trying to sell fancy, expensive lapping plates which they claim has a special “coating” to protect the abrasive. Did you lap any water stones on your plates?
@ed I fully agree with force vs pressure, as by definition pressure is a force applied to some area 🙂 . Same force – smaller area = bigger pressure. However no one ever said what pressure/force should be applied when flattening backs of the chisels. Should I press it hard? Or just light touch and let diamonds cut?
I do indeed have small areas of different texture on the edges, they do feel totally different – more abrasive.
No I didn’t use them on waterstones as I don’t have any 🙂 Some irons and 4 chisels – that’s all I did on them.
@koki Yeah, that’s why I said my reply wouldn’t be particularly helpful. I’ve never seen a good description of how much pressure. Some people say to press hard, but the manufacturers say to keep it light and “let the diamonds do the work.” I suspect the manufacturers are right and the answer is to use as little force as is needed to achieve abrasion.
The problem here is that sometimes it isn’t obvious whether it is cutting and it takes a number of strokes before you see any particles. Often, I wonder if different steels oxidize at different rates and so become visible in the water sooner or later. Also, when you first put a tool down and the surface is bumpy (on a microscopic scale), the cutting feels fast and crunchy as you hit the hight spots. This is really a higher-pressure situation because less of the work is truly in contact with the plate. The problem is that, as you grind and flatten the surface, it seems like the cutting is slowing down, but really there’s just so much more metal to remove to change the appearance of the edge. I think there’s a tendency to make up for that with more force.
Sorry, but I really don’t have any guidance for how hard to push. It’s a puzzle why some find their stones last and others don’t. Is it pressure? Type of steel being worked? Only sharpening vs. using it for lapping, too?
If you made me guess, I’d say “keep it light” is the right answer and I suspect many of the supposedly dead stones are perfectly fine and all that has happened is that the stone has broken in and lost its initial aggressive feel (which isn’t really it’s working state).
@kodi
Regarding your question about what “sandpaper” to use – just ordinary Silicon Carbide paper, sold as “wet and dry” paper (dary grey colour) is what I have always used. But buy quality papers as they will have properly graded Silicon Carbide particle sizes which the cheap papers will not (they will have coarse particles mixed in with fine and a poor quality binder for the particles). The SiC papers wont last forever but will last longer if you lubricate the paper with light machine oil (3in1 – even baby oil will do!) or just tap water (thus the wet and dry). I have used these to prepare metallurgical microstructural specimens since I commenced my metallurgical training over 35 years ago. The sequence used was 180 grit, 240 grit, 320grit, 400 grit and 600grit with water lubricant. We then went to diamond paste for the ultimate polishes to study microscopic metallurgical structures – so very fine polishes are achievable. Certainly far more than are needed for planes and chisels. You can also get Silicon Carbide in 1200grit and possibly finer, which I have used in tool polishing. What I have never used are the 3M polishing films which are touted by others as being very good – but which are VERY costly and, to my way of thinking – totally unnecessary for this line of work. Stick to your finer diamond plates and polishing strop charged with compound for fine polishing.Your other question about how much pressure to use on the diamond plates. Use only as much pressure as you need to remove metal, which won’t be as much pressure as you think. Use a black marker pen (sharpie)to coat the blade before you put metal to the diamond plate. Start lightly and check progress by removal of black marker ink on the blade. You will be surprised by how little pressure you really need to remove metal. Excessive force only serves to deform the metal and often results in uneven removal of metal from the blade. Concentrate on refined application of force evenly across the blade rather than heavy force which will tend to produce uneven grinding.
I hope that this helps
MarkH@markh it’s nice to have a metallurgist here! I’m a physicist, but never study metallurgy. Maybe you could answer a question about strops? An acquaintance, who happens to be a mathematician, did an extensive study of strops, formulating about 50 combinations of various abrasives and greases on several substrates. He found that while finer grits gave good, polished results, they did so very slowly (no surprise). He found that a mixture of 600 silicon carbide grit and red rouge was a good balance between speed and polish. Now, his 600 grit is about 10 microns, so I wouldn’t expect a polish. He agreed and wondered whether, by being in the grease on a soft leather substrate, the particle size was effectively reduced.
So, my question to you is whether you think any of this makes sense? For example, do you think it is possible that the 600 grit SiC is really achieving a polish, or is this maybe the result of a subjective experiment that didn’t use microscopy to examine the surface? Remember, it’s a mixture of 600 grit and red rouge, so maybe the rouge is giving the mirror appearance and the 600 grit is leaving scratches that are hiding behind the polish of the rouge? Second, does it make sense to mix two grits of such different sizes?
 9 April 2018 at 4:57 pm #520920
To chime in about wear on our plates that have been abused through various classes and used for many tool restorations and flattening. Those coarse plates certainly loose that initial abrasiveness quickly, but are still in our experience coarser than the other plate. You can generally tell from the sizes of the scratches on the iron when sharpening. They do get less coarse with time, but as mentioned, cleaning is essential.
We certainly apply a fair amount of pressure once they have been used for a while, perhaps more than recommended. They don’t cut as quickly as new 250 grit wet and dry, so can be a bit slow when flattening a surface as large as the base of a plane or a chisel that is a long way out, or an edge with a large nick in it.
I think that sometimes the expectation doesn’t line up with the end results, which can be disheartening when you’ve spent a lot on them, but they should last you years.
 9 April 2018 at 7:57 pm #521014
This type of stuff is hard to learn, a guitar teach will tell a student to use a firm but relaxed grip, how do they know if it’s too firm? Other than your knuckles turning white you might not quite notice until you get tendinitis in your elbow that you’re squeezing too hard.
-
AuthorPosts
- You must be logged in to reply to this topic.