Cap iron question
Welcome! / Forums / General Woodworking Discussions / Tools and Tool Maintenance/Restoration / Cap iron question
- This topic has 12 replies, 5 voices, and was last updated 6 years, 5 months ago by
deanbecker.
-
AuthorPosts
-
27 October 2017 at 7:14 pm #342821
I bought an old plane off ebay and tuned it up, or thought I did. But the shavings get between the iron and blade stopping it from working. I flattened the blade, and the cap iron appears tight. However it is very flat with only a hump at the front.
I thought i would try and put a small arc in it to tension it and the first tap , and it was a tap, put a real bend in it. It should not be so soft, I do not believe. Has anyone run into this before? The cap iron almost looks homeade.
My other stanleys have a different crease in them but i never felt the need to bend any of them.It looks like many of my cap irons. As long as there is enough curve that tightening the bolt leads to pressure along the front edge, that’s all that is needed. Once that is established without twist, put the cap iron sideways to your coarse diamond plate and rest the tail of the cap iron on the bench. You’ve just arranged a way to keep the cap iron at a fixed angle to the coarse stone. The goal here is to establish a dead flat bezel on the end of the cap iron that is relieved just a bit so that you are guaranteed to have the very front of the cap iron make contact with the back of the iron. Use that idea to decide if you need a spacer on the bench. The cap iron is moved along the length of the stone to grind the bezel. In the photo, I just pulled the other stones out of my holder. I grind until I get a bur across the whole width and then remove the bur. Make sure not to undercut when taking off the bur or that will spoil it!
That’s how I do it. Oh, as for being soft…as long as the cap iron is springy enough to put tension on the front of the cap iron with repeated tightenings and loosenings, I’d think it would be fine.
Btw, yes, you can cut yourself on the cap iron, although the goal isn’t to make it sharp.
Attachments:
You must be logged in to view attached files.28 October 2017 at 3:55 am #343165I have it fit to the cutting iron flat and well set. There is no ,as in zero,spring in the cap Iron. It makes full contact with the iron. When it loads with wood between, the cap iron doesnt set tight. I can bend it by hand to reset it.
It’s okay for the arch to squeeze out and for the cap iron to make full contact with the cutting iron as long as it springs back when you release the screw. If it springs back, you know that tension is being applied. If there’s no tension squeezing the tip against the cutting iron, then I agree its not doing its job. I’ve not encountered that before.
I have had this issue. It seems like the previous owner ground the edge of the cap iron too much and basically leveled the front edge of the cap iron with the rest of the cap iron. Thus, there was insufficient pressure being applied to the cutting iron and I had a lot of issues planing.
You could try to bend the cap iron to get some of that tension back, but I have not tried. I ended up buying a new cap iron.
To clarify: I’ve definitely given a bit of bend to a cap iron before to reestablish pressure at the tip, but I’ve never had one that was so soft that it would not retain the added bend when the screw was loosened. If you can see a gap with the screw loose, see the gap close when you tighten the screw, and then have the gap come back when you loosen again, my bet is that the cap iron is fine and there is a shaping issue at the tip. There might be a gap. There might be a bur. There might be no gap, but the cap iron hump meets the cutting iron too steeply, or even forms a corner (yet with no gap) that catches the shaving. It’s worth polishing the top of the chip breaker.
That’s a nice simple sharpening stone set up you’ve got there. The stones aren’t recessed into the base are they?
@franiel it’s as simple as it gets. I built when I first started, so it needed to be simple. It is a hunk of 3/4″ ply 12 1/2″ wide x 11″ deep and two paint stirring sticks from the hardware store. Also, cut another strip of ply 12 1/2″ x 1″. Glue and screw that strip to the underside of the ply to form the cleat that goes in the vise or just butts up against the bench edge. Next, cut a pain stick to length and glue and tack it flush to the near edge of the top side of the ply. Now take two of your stones, or all of your stones, line then up along that tacked down stirring stick, and use that to place the second stirring stick, trapping the stones gently between the two sticks. Ise glue and tacks for that second strip, of course. That’s it. Done. You can put some finish on if you like. I did it this way because it required no tools other than a hand saw, a hammer, and a drill. If you use drywall screws, you may not even need the drill to countersink, but it’s better if you do and woodscrews are better. I thought it would be temporary but I’ve used it for about 8 to 10 years now and I don’t see any reason to rebuild it. I would never want the stones to be mortised and would absolutely never want them to be glued in. I slide them around to reach the edge to do various kinds of sharpening and often take the out for various purposes, not the least of which is to take the to the sink and scour them. The biggest risk to your plate holder is water from the glass cleaner, so I’d definitely use ply, not press board, MDF, etc., but, really, use what you have. Go ask for two pain stirring sticks at the hardware store and you’ll have a plate holder in an hour.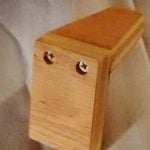 29 October 2017 at 6:00 pm #344133
[quote quote=344060]That’s a nice simple sharpening stone set up you’ve got there. The stones aren’t recessed into the base are they? Paul’s sharpening holder is on my to do list, but the thought of all the routing pushes it further down on the list.
[/quote]
Hello, If you use a flat granite block, lay a piece of paper towel on it, then place your stone on top of the paper towel, the towel, and more so when it is wet from the glass cleaner, will hold it in place for sharpening. The towel also absorbs the liquid so it will keep your bench dry.
-
This reply was modified 6 years, 5 months ago by
 Anthony Rich.
You mention that you have other planes. Have you tried switching in the cap iron from one of them? IE take a cap iron from another plane and see if the plane works with the substitute cap iron. That way you will know for sure if the plane is not performing because of a faulty cap iron or if it is something else.
8 November 2017 at 3:30 pm #359454I got a new chip breaker , fettled ot and put it on.
Problem solved. The iron was soft and had. no spring in it
The new / old iron has spring anddefinately works differently.
The old one looked like it may have been in a fire or something i didnt have another 4-1/2 to try. -
This reply was modified 6 years, 5 months ago by
-
AuthorPosts
- You must be logged in to reply to this topic.