Embarrassing Mistakes – 'Hall of Shame'!
Tagged: goof ups, Hall of shame, joke, mistakes
- This topic has 31 replies, 19 voices, and was last updated 9 years, 10 months ago by
 David Perrott.
-
AuthorPosts
-


[quote quote=23715]When I was doing my month long course with Paul he mentioned that some of us would have shorter tool boxes than others…mine was one of the short boxes because I made a Z shaped box and had to cut off the dovetails and start over on one side
 You can see Paul got a kick out of it Good times.
 Then the other day, I was a little to aggressive cutting a mesquite log and pulled the saw out to far, it got stuck and bling! There goes my 100 year old Disston.
Still learning.
[/quote]
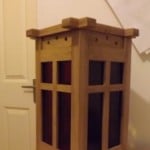
Okay, who says boxes have to have four sides, you could have kept going and met up with the first corner several sides later 🙂
That saw is just painful to look at. I am truly sorry about that, you can probably salvage it by getting it cut down to 20 inches or so. Would make a nice bench top saw. Looks like a lovely handle on it.
-d
[quote quote=24020]Here’s mine, I call it the “torsion strip” purposely inlaid to disperse the internal torsion forces caused by wood expansion and retraction. That’s my story and I’m sticking to it.[/quote]
Dave I have one of those torsion strips. HaHa I just love your technical explanation for it, much better than what I called mine. 😉

[quote quote=24041]It took a little while but I spotted it. At least the doors look like they fit. I guess this is why an artist steps back from the easel from time to time to have a look.[/quote]
It’s also taking a little while to figure out just how to go about replying to someones post.

If not exactly embarrassing, this one was frustrating.
I got a rough slice of an oak trunk from the lumber yard to make a cutting board. I started by trying to plane a 1’x4’x1″ board flat, which got me already below the thickness the project was supposed to have which in turn made me ignore smaller glitches in accuracy.
Anyway, after hours of planing and cutting the pieces, I ventured into making the groves and tongues. I tried the saw and chisel approach to the groves and tried to make do with a tiny router plane for the (2″ because of the through tenon) groves which took a huge amount of time. Since the boards wer still slightly cupped, that got transfered to the tongues. The mortises were not an exact chisel width, due to less width of the board.
Cutting the tenons went okay, but fitting them took another bunch of hours. I had to remove a bit of the connecting faces of the two boards, but it was too much, which means there is a visible gap between the boards. The result is not very satisfying since I cannot reasonably plane it to fit (even ignoring the gap), since it would remove too much mass from the breadboard-ends. *sigh*
I don’t know yet, whether I will redo some parts, try to round it up or just put it in the oven. I am happy with some of the other projects I made, and maybe it’s soothing for someone to know not all projects are successes for other woodworkers, too.
David
Attachments:
You must be logged in to view attached files.
Another one from this cutting board: I managed to break out a small pice of the backside by hammering the dowel against the inside of the mortise. I was not happy. However, I finished the board, learned a lot and got something useful. What else do I want? 🙂
David
I built a cedar pergola for a client last summer. Pegged mortise and tenon joinery–I was really proud of it. As I was fitting the tenons of the angle braces on site, one was a bit snug so I pared either cheek a bit. Still too tight, so more paring. After a few rounds of paring I couldn’t fathom why it was still not sliding in. Before long I had a thin, sickly looking tenon that still wouldn’t fit. For some reason I hadn’t thought to check the “short” cheeks (for lack of a better word), the cheeks opposite the wide cheeks that I had been paring. I took a few slivers off the the short checks and it fell into place…now loser than a child’s front tooth. I didn’t have the materials to make a new angle brace, so I cursed under my breath and cut a shim to match the reduced width of the tenon and shoved it all in place. Luckily the mistake is hidden inside the mortise, but it was SO frustrating at the time. The project had about 30 tenons so it’s not that I didn’t know how to fit a darn tenon, I just had a mental lapse and forgot to check the most basic sticking points on one lousy tenon! Live and learn 🙂
Attachments:
You must be logged in to view attached files.13 January 2014 at 10:20 pm #25891Martin we all have been there done that, and for me more recently with hand tools. When I was using power tools I got it figured out with the jigs etc. Now with hand tools I have to slow down and re think my process, my hand cut dovetails were less than steller but are getting much better.
When I built my bench I have a couple gaps where I made my mortices to big or my tenons to small, but I made them work, oh and one of my legs I had to re make entirely. Oh well that is how you learn and I really do enjoy working with hand tools and will not let this beat me.
I am also starting to like the wood from Home Depot much better because when I mess up I haven’t lost to much money LOL.
Steve

Hi!
A few moths ago, an old and neglected classic (cheapo one) guitar came to my hands.
And i started wondering… could i restore/bring it to life again?
And my youngest step-daughter the moment she saw it ask-me if i could fix it for her.
In that moment i knew I was in trouble.It took me a few moths in order to read, study and DO it.
My path took me thru:
-animal glues – fish, rabbit, hot glues)
-knowing what was a LUTHIER and traditional guitar makers. There’s some around here.
-music stores for compatible strings and “hardware”
-(almost)french polishing (my 1st time).
-and of course overcame my fear of ruin completely it!Making that makeover was a lot of fun. I forgot to take pictures at the beginning stage.
That guitar was ready this week for her birthday and we were both very, very happy. Its not pretty, very smooth and functional!
Now my BIG “goofiness”.
After my 7th or 8th layer my shellac was gone. So i made more for the final coats…. and when i was putting in my pad it seems “different”. THE flakes were from a different color, different manufacturer and with a lot of wax. TOO LATE.
I only had a few hours to her birthday. So i improvise A LOT. I gave it a bit of light sanding, applied a thin coat of wax and polished until my wife came downstairs told me to stop because “…This is great and smooth and you need a big shower…”
The next morning with sun light the defects seemed bigger to me.Pros and cons. A lot of learning, a lot of fun, live music at the house.
No cons actually. Well, I felt like Goofy for a while but, when she smiled all passed.
One of this days i just need to do it again.António
Attachments:
You must be logged in to view attached files. -
AuthorPosts
- You must be logged in to reply to this topic.