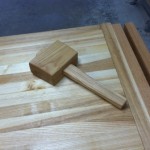
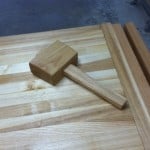
Made a Marking Gauge
Welcome! / Forums / General Woodworking Discussions / Tools and Tool Maintenance/Restoration / Made a Marking Gauge
Tagged: marking gauge
- This topic has 23 replies, 15 voices, and was last updated 8 years, 7 months ago by
 trooper82.
-
AuthorPosts
-

 23 August 2015 at 12:58 am #129638
@sandy1man – Sandy, you hit the nail on the head. I love using tools even more knowing that I made them myself.
@kevinjames – I drilled a 5/64″ hole for a 5/64″ nail shank. The nail was probably very slightly bent, which made it fit very snug in the hole. I don’t think that thing is going anywhere anytime soon. I just hope I never have to sharpen the point.I had thought about using the marking point (there’s probably a better name for it) of a combination square – I never use those things anyway. It’s probably hardened steel and will stay sharp. Like Sandy said – there are other ways of keeping it set if it has come loose. If the gauge you spoke of is nicely made, then by all means salvage it.
23 August 2015 at 3:24 pm #129671@mattmcgrane Unfortunately mine has been turned into firewood some time ago. You inspired me to try again though. Love when people share what they’ve made. Thanks again ?
Kevin
Turned out great Matt. I had been looking in here for others that might have made one of these. I have made a couple, experiments really. I want to make a beam that is convex on one or two sides. My problem is getting the hole to match up to the beam. Have you or others in here figured out an accurate way to transfer the profile to the fence? I was thinking about cutting a 1/4″ off one end on the next one and go from there.
trooper I would make the hole in the fence to the shape you want and then make the shaft fit the hole. That’s what I did in my panel gauge. You could file the crown into the hole with a 1/2 round file or if your good with a coping saw that would work. A combination of the two would work.
Very nice Matt. I’m needing another mortise gauge and am put off by the prices and condition of most you see on Ebay and at car boot sales etc. I have been thinking of making my own with a beam longer than the usual 8″ or 9″, but like you I cant think of how to do it. I do have the sliding brass insert from an old rosewood gauge, the stock split on it and I have kept the parts. I cant figure out how to run the shaped rebate – an upside down “T” – to hold the brass strip in the beam. I was thinking of tapping the stock to take a machine screw to clamp the brass strip in place when setting the position of the moveable pin, but its shaping the rebate that has me stumped.
Success. After much thought today I solved the “how to clamp the sliding pin in place” question. I’d run a rebate with the stanley 45 that was a tight fit on the narrow part of the sliding bar, then use a countersunk screw of the required size to make the wider part of the rebate. Its amazing the influence perception has on your thoughts. Tonight when i looked at the sliding brass bar I realised its not an upside down T, its cross section is the same as the sliding dovetail in Pauls shaker style stool. The light bulbs went on all over the place. Using the same techniques as Paul shows I managed to get the bar installed in a piece of wood. It will be easier to run the rebate and shape it in some oversized stock then rip this down to the size required for the beam of the gauge rather than cut the beam to size first. You could do this form scratch using a piece of strip brass and filing the bevels by hand to give the dovetail cross section. Here are some pics to show the effect.
Attachments:
You must be logged in to view attached files. -
AuthorPosts
- You must be logged in to reply to this topic.