Pennsylvania Maple Table and Chairs restoration project
Welcome! / Forums / General Woodworking Discussions / Projects / Pennsylvania Maple Table and Chairs restoration project
- This topic has 18 replies, 4 voices, and was last updated 8 years, 4 months ago by
ehisey.
-
AuthorPosts
-
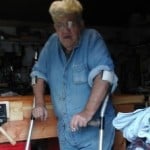
April 2011, my home was demolished by a tornado and only a very few pieces of furniture survived. Unsurprisingly all of them were older solid wood joinery built pieces. Since finding Paul’s site and really learning how to use the woodshop I got with my current house I have begun to repair the damage. The best pieces being a 1957 Pennsylvania maple dining set that had belonged to my grandmother.
The table and four chairs that went with it supported a collapsed wall and roof of the building after the storm had based. At the time everything looked okay except for the finish, but time showed that many of the glue joints had failed. Today while the table is still solid,four chairs are unusable, one the table leafs is split and one side of the split cupped.
Attachments:
You must be logged in to view attached files.Started with what I thought was the easy stuff, two chairs with loose legs. The first one went according to plan. After a bit of joint clean up and light sanding to expose fresh wood, the chair glued up like a champ.
The second had other thoughts… Turns out as the legs came free so did the seat seams and joints for the back of the chair.
Attachments:
You must be logged in to view attached files.Given how smooth the original joints were I am going to try and re-join the seat using a rub joint. Paul showed this in a video a while back, but I can’t seem to locate it to day, anyone remember were it is?
Attachments:
You must be logged in to view attached files. 26 October 2015 at 10:55 pm #131728
Wow, this seems like a project that gets more involved the further you progress with it. It will be worth it, though. That cup (or bow) on the leaf board looks really bad. I’ve no idea how you’ll fix that without replacing the bowed portion.
Sorry, I don’t know about the rub joint. And glad you’re back on your feet after a devastating tornado.
 28 October 2015 at 5:38 am #131825
The rub joint is simple,, put glue on only one side. Put the two boards together and Rub them back and forth a few inches 3 to 4 is good the glue will spread out and create a suction between the two, wipe off squeeze out don’t use a lot of glue just a even light layer. Then clamp If it’s light or small boards you don’t need clamps, say 12 or shorter? You will feel the suction grab .
Good luck
FrankjSecond joint off to a good start. But for some reason the edges of the break do not line up perfectly. Probably some slight warping as an after effect of the exposure. So while the chair seat is curing, I made a home built scraper roughly fitted to the seat from scrap sheet metal I had. Slightly thinner than a tenon saw plate, but works out pretty well and is easy to sharpen
-
This reply was modified 8 years, 5 months ago by
Attachments:
You must be logged in to view attached files.The rub joints turned out very solid and stable so far. And I was able to use a bit of super glue to prevent the last split from becoming an issue. A bit of work with the spoke shave, #4 and a scraper I have nice smooth seams in the seat and ready to move on to re-assembly of the chair.
-
This reply was modified 8 years, 5 months ago by
Attachments:
You must be logged in to view attached files.
5 November 2015 at 7:16 pm #132057You have done good!,keep going.its worth it. Today’s stuff isn’t half as good
good luck
Frankj
7 November 2015 at 4:46 am #132106When you are ready to start refinishing it call me. I have done a few of those sets there are a few tricks to it
856 381 2437 EST,,I am in the shop most days 8 am to 9 pm
Frankj
No picture to day, but weather dried enough to glue the legs in. And had to re-repair a split that showed up. got smart with the clamping and made sure to square the feet during glue up to reduce any need to re-level the feet on this one.
Frankj, thanks for the offer, I will most definitely take you up on it as the refinishing was a bit of a concern for me.
Second Chair assembled and re-repaired after a most frustrating break. Had the seat re-glued, legs attached and as I reset the back a new section of chair split-off on an old glue seam. I was able to get to re-glue pretty clean with out taking the whole apart again.
Attachments:
You must be logged in to view attached files. -
This reply was modified 8 years, 5 months ago by
-
AuthorPosts
- You must be logged in to reply to this topic.