Prototype Plane
Welcome! / Forums / Project Series / Bench Stool / Prototype Plane
Tagged: Bench Stool, plane
- This topic has 32 replies, 12 voices, and was last updated 10 years, 3 months ago by
 Sandy.
-
AuthorPosts
-

 30 November 2013 at 5:34 pm #22694
Jon did you just lite the coals and let burn or did you apply blow torch as well?
I do not have a hair dryer but I do have a small compressor I would think it would do the trick.
I would like to do this at some point like so many other things on WWM. I just don’t get the time.
A couple of notes in here on hardening. All steels are not created equally and heat treatment is as much an art as woodworking. I heard Paul in a couple of his videos mention “oil hardening tool steel” (O-1). But there are many other steels available and for those who don’t do it a lot there is Air hardening Tools steel (no need to keep find the oil). Hardening tool steel is an art in its self. However if you have a local welding supply company close by they have some simple aids that can help you attain the proper hardnesses such as temperature sensitive markers. Oil hardening too steel needs to be heated to about 1450-1500 degrees and immediately quenched in oil… That temp range is critical to get the right hardness… Being careful to have enough volume of oil to keep it from heating up too much.. Sorry guys I am an Engineer/machinist….tempering is whole nother ball game. If you put a lot of time into building a nice plane you might want to consider taking your iron to a machine shop for the HT process. They have the equipment to complete the process in a environmentally controlled furnace and avoid the scaling that you are going to have to fight with otherwise… Jon, I like the design of this plane…
Just a suggestion Jon, you need more oil. You should get the temp down to touch temperature within about 20-30 seconds. And if you want to avoid warpage you should suspend your iron and drop it into the oil lengthwise. You can re-heat-treat several times if you need too without going through the annealing process.
 1 December 2013 at 8:37 am #22734
I’d love to have a go at this but am a bit apprehensive since I live in an apartment and don’t have the space to do this outside in a safe/responsible way. Does anyone know if you can buy O1 steel that’s already been hardened/tempered?
That’s interesting to know Sandy, thanks. The steel may well have been cool in the first half minute but I was just being cautious. As you say, this process is as much of an art as any other. I took about five minutes to clear things up a bit and make sure the fire was safe before I turned my attention to the blade. By this time, the oil was tepid and the blade was warm to the touch. I’ve got to admit that that if I’d know there was an air cool version I’d have opted for that over this. Still we live and we learn.
1 December 2013 at 10:55 am #22741You could buy block plane irons for smaller size or buy bench plane irons a no. 3 1 3/4″ would be nice. Just remember that it would be hard on a file and may make it dull very quickly. A grinder would be more suitable just make sure you do not over heat you’ll loose temper. When grinding have a container with water in it so you can dip iron as you grind.
 1 December 2013 at 6:52 pm #22753
Most old bench and moulding planes in the UK were made out of Beech. Beech is straight and tight grained quite hard easy to work.
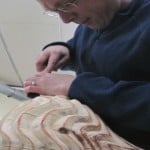
This plane build was mostly about learning technique so I built it out of a scrap of Cedar. I’ve got a nice bit of White Oak that’s rough sawn to 3″ square an about 18″ long left over from my dining table build that I’ve often thought would make a nice plane but my plan for my next proper build is to use some Beech that’s sitting in my loft. It was part of a lovely Ercol dining table that my brother-in-law butchered. I’ve not worked with Beech before; I’m looking forward to it.
I completed the tempering of my plane iron last night. There was a Casserole on the top shelf and my iron on the bottom shelf. Both needed an hour in an oven pre-heated to 150C. Dinner was delicious and the iron came out and went into a large Pyrex bowl filled with warm water. By the time we’d eaten diner, the water was cool. I suppose I now have to polish the blade but I kind of like the matt-black look. It looks very ‘designery’.
Attachments:
You must be logged in to view attached files. 2 December 2013 at 10:15 am #22787
Nice job Jon… she looks splendid. I agree about the blackened iron. I would probably keep her as she is and name her like a ship.
Jon, you probably would have been better off quenching into a tin of oil with a bit more depth like a paint tin or small bucket. Too much surface area to the oil in the shallow tray – it just ignites the oil with all of that air around.
Guys, For the tempering – if you use the oven method as Paul advocates – the hot water is only to cool the iron down quickly to allow you to handle it quickly – there is no more quenching going on!
If you wish to do tempering the traditional way, you would have to polish up the back of the blade a bit after hardening, so that you can see the tempering colours as they progress up the blade. Hold the blade in a pair of tongs whilst gently playing the flame on the thick end of the blade. Watch the colours closely and when the straw (yellowish) colour reaches the pointy end of the blade – dip the blade straight into cold water – in this case you must stop tempering the steel. But this treatment is a bit more tricky if you haven’t seen the tempering colours before – linger a bit long with the flame and get the blade edge to the blue shade and its all over red rover! I hope that this helps you make up your mind as to which way to go! Cheers
Markh -
AuthorPosts
- You must be logged in to reply to this topic.