Sofa Table
Welcome! / Forums / General Woodworking Discussions / Projects / Sofa Table
- This topic has 15 replies, 5 voices, and was last updated 8 years, 10 months ago by
 Salko Safic.
-
AuthorPosts
-

 22 June 2015 at 3:49 am #127927
And so you should be, the fact that you done it all by hand is something to be proud of and it looks beautiful. I can’t wait till you put some oil or whatever your going to put on it to make it look like something out of a gallery. Even those galleries hold beautiful items but machine made to make it look hand made. Your one step ahead of them all and in my view yours is better than theirs.

 22 June 2015 at 4:03 am #127930
Dutch Oil? Do you mean danish oil? I make my own batch using 100% tung and citrus solvents without the poly and then I use shellac over the top. Certain timbers look really good and other look dirty as it pops the grain way too much, I know that’s the idea but it is what it is.

 22 June 2015 at 4:33 am #127932
Danish oil is 1/3 linseed oil 1/3 mineral spirits 1/3 poly but I use Tung oil it’s richer and the citrus solvent is also 100% natural and gives off a pleasant smell. To me shellac looks better if you know how to apply it than poly but it will not stand up to alcoholic drink if spilled on it. Then your better off giving it a few coats of varnish. Some people say why use oil under varnish but these people don’t spend more than a minute looking at something and are usually machine buffs who are always in a hurry. I’ve experimented with nearly every product out there and have found something works for me. I think the old fellas back in the 18th century have pretty much perfected it and we went ahead and changed it. If it worked for them and these polishes still hold up and look good today so why not still use them I say. Just remember that Tung oil takes 2-3 days to dry but there is another method which that’s quicker and it’s called wet sanding.

Yes we always have to improve on things. :-). I may try your recipe. I have a project in the back of my mind (a scary place) that would be great to try it on. I’ve never used Varnish but because of where this table will be used, maybe a more durible finish might be better. Or maybe some trivits to sit coffee mugs on. I know that will happen. Thanks for the finishing tips. Pictures will be posted soon!
 22 June 2015 at 3:24 pm #127945
Hi Sandy
A good finish for hard use is
1 a sealing with a 1 lb cut of shellac 2 to 3 coats this seals and helps give a even finish
2 thin coats of varnish cut it from the can in a small jar 1 cup of varnish cut by 1 or 2 table spoons of sprites buy a good varnish, it will be thick. Add just enough sprites to let it flow and level test on scraps till you get a flow you like ,light sand between coats.
3 let the finish harden for a few days then rub it down with four o wool and wax, load the wool with wax then rub the item down use circular motions No lines on flat areas.
this is a time tested finish it’s nothing new it makes a little more work but it’s worth it it holds up for years of use
good luck the base looks very nice
Frankj


Thank you Brianj. There are a few boo boos that don’t show in the picture but that just proves it’s hand made. :-).
I put some med walnut shaded Danish Oil on it today and it looks even better. I’m thinking I will like the Varnish finish and then wax. I can’t get the rest of the material till next week. Darn work is getting in the way. 🙂
 23 June 2015 at 5:00 am #127950
Go for something like wipe on poly by minwax or make your own by mixing 50/50 oil based semi gloss poly by minwax and mineral spirits. Either way it doesn’t matter whether you make it or buy it you’re really not saving any money. I mention using the wipe on poly because it will be easier for you achieve a better look than brushing a thicker coats of varnish. This way you will eliminate brush marks. A little trick I’ve come up with and like all my discoveries someone else usually discovered it before I did and it’s most probably lost somewhere in the world wide web is to use two coats of thin 1 pound shellac as sealer. This will help you build up coats of poly quicker. In fact so quick that you will only need 2 coats of it. Without it you’ll be applying 8 or more coats to get the same build. Well good luck to you which ever direction you take and I look forward in seeing the end results and remember it’s yourself you have to please. You are your own best critique.
 24 June 2015 at 6:05 pm #128011
Looking good, Sandy. Can’t wait to see the finished table. It looks like some serious figure in the apron. I’ll bet that was challenging to get planed right.

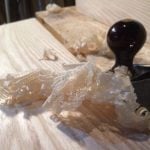
Matt, it is 1/4 sawn Oak. And yes there were some challanging spots in it. The pictures don’t show the bad places but there was dome tare out that a cabinet scrapper almost couldn’t get out. I got called out of town again so it may be a few more days for the top.
Thanks for the kind words!
-
AuthorPosts
- You must be logged in to reply to this topic.
