Stanley No. 4 – what am I doing wrong?
Welcome! / Forums / General Woodworking Discussions / Tools and Tool Maintenance/Restoration / Stanley No. 4 – what am I doing wrong?
- This topic has 57 replies, 16 voices, and was last updated 5 years, 6 months ago by
Samuel Colchamiro.
-
AuthorPosts
-
17 September 2018 at 9:06 pm #551666
I am so frustrated and haven’t a clue what I’m doing wrong! Bought an old Stanley No. 4 plane from Tooltique and it has been working great on my workbench build (first ever woodworking project). I sharpened the blade a couple of times and it has started skipping/jumping across the wood leaving horizontal lines. It happens both with and against the grain, and doesn’t matter how shallow I set the blade. So I’m thinking it’s either something wrong with my sharpening, or with the way I’m putting it together. I don’t have a honing guide so am sharpening freehand on 240, 600 and 1200 grit sandpaper taped to a flat bathroom tile. I wondered if the angle was too steep so tried to sharpen again really trying for 25 – 30 degrees but it hasn’t made any difference. Should I buy a honing guide and try again?
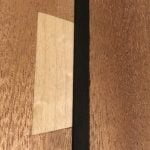
The only other thing I’ve noticed is that the lever cap is set way off centre which just seems wrong to me, but the screw is off centre so are they all like this? I’ve attached some photos to try and explain my point – the lever cap is pretty much touching the side of the plane on one side, but it’s a good 3mm off the other side. How can this be right? Having said that, I wasn’t having any problems at the start so I know it’s something I’m doing.
I’m stumped, and any advice would be greatly appreciated.
Kirsty
Attachments:
You must be logged in to view attached files. 17 September 2018 at 10:02 pm #551677
Hej,
From photo 20180917_204650 it looks like the corners of the blade are quite sharp. Rounding the corners off a tad might be good. There’s a plane sharpening video (or maybe it’s the plane restoring video) where Mr. P. Sellers shows one way to do it.If what you are experiencing looks like a washboard, then there are not that few explanations and suggested remedies. When it happens to me I check the angle of the bevel with a protractor; usually finding the it way off from the desired 25 – 30 degrees. Getting the angle back is a tedious job, but it has this far resulted in normal plane behaviour
/Sven-Olof17 September 2018 at 10:12 pm #551678It might just be sharpness of the blade Kirsty. You should be able to push the blade into the edge of a sheet of paper and have it cut cleanly or do the thumb nail test and see if the blade bites if you touch it to your nail (be gentle!). Make sure everything seats – mainly make sure that the slot in the blade/chip breaker is siting down over the tab and the lateral adjuster pin. Don’t worry too much about the lever cap being perfectly centered. There’s a fair amount of slop in all of that and you can twist those lever caps around quite a bit. Just make sure the cutting iron is razor sharp. If it isn’t, you’ll dig holes instead of cutting shavings.
(edited)
And I also meant to say that the bevel angle really isn’t very critical. The cutting angle is fixed at 45 degrees by the frog regardless of the bevel angle. If the angle gets too shallow, the edge becomes fragile and dulls quickly. If you’re too steep, the heel can get in the way and actually hang up on the back edge of the throat of the plane. As long as you stay somewhere in the 25 to 35 degree range, you should be fine. I try for 25 degrees only because that’s what Stanley has been recommending for a couple of hundred years now.-
This reply was modified 5 years, 7 months ago by
harry wheeler.
17 September 2018 at 10:25 pm #551679Thanks both for your replies. Maybe the blade isn’t as sharp as it should be. So I guess the first thing is to buy a honing guide and get the bevel perfectly angled and sharp, and reassess. It’s just strange how it’s ‘skipping’ over the wood with literally every stroke, even when the blade is set so shallow it’s barely taking anything off. I’ve tried adjusting my hold on the plane, doesn’t make a difference.
I only started using the plane a couple of weeks ago, and I used for a good few hours before I sharpened at all. I knew the blade was getting very blunt because I was getting a lot of tearout – and after sharpening I was amazed at the difference. But now it’s not particularly causing any tearout, I just can’t get a single smooth cut. It’s maddening!
In any case, I’ll get a honing guide and go from there. Thanks again. 🙂
17 September 2018 at 10:41 pm #551680Hi Kirsty,
For what its worth here’s my (somewhat inexperienced) two pence worth!
The lever cap screw does look like it has been cast off centre. Never seen that before! If you are worried you can pick a replacement frog up on ebay for about a fiver but to be honest, if the plane was working initially it probably wasn’t having a negative effect on your planing anyway.
Have you checked the lever cap screw is set correctly? With everything in place, the lever on the cap should firmly snap in place. If it is too loose you might be getting chatter ie the plane feels like its bouncing along the wood. It shouldn’t be too tight either or you will struggle to use the depth adjuster. Once set, you rarely need to touch the lever cap screw. Also, when backing off the cut using the depth adjuster, always remove the excess play from the adjuster by turning it back until its starts trying to tighten again.
If that’s all set ok, I think it’s possible you aren’t applying enough downward pressure on the planing stroke. You need to press down on the front of the plane when starting the stoke, balance the pressure through the stroke and put pressure on the rear of the plane at the end. Some people describe it as trying to plane a hollow in the middle of the board.
With regards to sharpening, If you have gradually created a steeper bevel it could make the plane harder to push through the stroke and could be causing a lack of control. Veritas do a cheap(ish) brass bevel guide which I find very useful for checking angles. You could probably benefit from picking up an eclipse style honing guide. They are dirt cheap, easy to use and will give you an idea of what the bevel should look like. You can always try freehand sharpening later but many people stick with the guides permanently (no shame in that!). Paul has a canny video on using the Eclipse guides somewhere in the video library.
I’m sure others on here will have other suggestions to help too.
Cheers
John
We’re jumping to a lot of conclusions here: On the face of it the plane looks OK from the pictures. At least the base seems to be flat and unmarked.
1 – What does the important bits of the blade look like – Pictures? (back and front)
2 – What ‘stones’/ technique are you using to ‘sharpen’? – Picture? Hand sharpening was good enough for Jesus Christ, so it should be good enough for the rest of us; in these cases, a bevel guide for honing can be a complication instead of a solution. They certainly introduce more work than they are worth.
3 – What is the assembled gap at the mouth? – Picture? Measured distance?
4 – Is the chip-breaker honed and set tight? Check for shavings getting under the nose of the chip-breaker.Work through your problem logically. I think that this is a good little plane and it’s trying to tell you something……………
Good luck 18 September 2018 at 12:13 am #551683
Well, I’ve restored a great many planes over the years and I always initially use the Veritas honing guide to get the angle on the bevel correct; it also ensures the plane edge is perpendicular to the side of the plane. So many of the blades I sharpen have obviously been done (badly) by hand so for an inexperienced woodworker I would highly recommend a honing guide. Once you get it all set then for a quick sharpen you can do it by hand – but I will still go back to a honing guide periodically to get that angle back to perfection.
Don’t worry about the capping iron being a bit skewed and the frog looks OK; as howardinwales says above check that the chip breaker seats tightly to the iron and there should only be about 1 to 2mm of distance from the end of the chip breaker to the plane iron.

I agree with what @stevebrookes says above.
I too have restored many planes. If the bevel angle is waaaaaay out (as it very often is when I get them!) a honing guide will help but you may find it a lot quicker (and less tedious) to take it to a local sharpening service provider. If they offer plane blade sharpening they will be able to quickly regrind the correct bevel angle using a Sorby ProEdge (or equivalent) with a ceramic belt.
Used correctly, the ceramic belts do the job quickly without heating up the steel.
You can then use the honing guide to maintain the bevel angle and refine the edge how you like.
Hope that helps.
18 September 2018 at 11:51 am #551702Firstly thanks everyone for the input, I really appreciate the help!
1. I’m fairly sure the lever cap and screw is set correctly – it’s definitely not too loose, if anything I set it too tight and had to loosen it to allow me to adjust the depth.
2. I’ve tried varying the way I’m planing, more pressure, less pressure, across the grain, nothing seems to make any difference. I must admit though I am a little confused about the correct planing technique – I’m sure I saw a blog post by Paul where he says the exact same thing as you John, about putting pressure on the rear of the plane at the end of the stroke. But watching his videos, he talks about lifting the plane at the end of the stroke to avoid lines in the wood caused by an abrupt stop. Maybe it’s an understanding I’ll pick up with practice.
3. John your comment about lack of control was interesting – now that I think of it before I started having this problem I did notice that sometimes the plane was kind of wiggling/squirreling around (if that makes any sense!). I thought it was just the wood grain but perhaps it was the first sign my sharpening was incorrect. Thanks for your suggestions, I’m off to find myself an Eclipse honing guide (whatever that is!)
4. I’ll take some photos later of the blade etc. Howard, I’m using 240, 600 and 1200 grit sandpaper taped to a flat tile and trying to follow the technique on Paul’s sharpening video. I’m sorry but I’m not sure what is meant by the chip-breaker being honed – again I’ll take some more photos and hopefully you can enlighten me on this!
I don’t think the bevel should be too far out as I bought the plane reconditioned from Tooltique and I think they have a good reputation, and I’ve only sharpened it myself 3 or 4 times. Surely I shouldn’t have changed it so much so quickly… but then what do I know!
Many thanks again,
Kirsty
Kirsty,
After a sharp edge, the chip breaker is the most important part of the plane and can, if not fitted correctly, lead to some of the problems that you describe.
First, you have not mentioned the back of the blade. It too needs attention. It needs to be dead flat and ideally shiny. It forms one half of the cutting edge. The chip breaker is the plate with the curved nose and deflects shavings as they emerge from the mouth. It is the back of the blade that the chip breaker engages. It is this mating edge that is crucial to a working plane.
When you loosen the centre screw, remove it all very gently and look for any minute strands of wood between it and the blade. If you have any, there is work to be done because this fouling will always give a bad cut.
When all is clean, put it back with about 1 – 2 mm distance from the front of the nose to the edge of the blade. With the screw tight, hold it up and look through the gap between the breaker and the back of the blade against light. It must be a clean fit for the entire width of the blade with absolutely no gaps. It is this mating point that we ‘sharpen’.If you look at the section of the removed chip breaker plate sideways on, you’ll see that it forms a curve, the ‘nose’ and the edge of the part turned over that is in contact with the blade should be bevelled backwards so that it only makes contact along a narrow section at the front. It is this that needs to be dead straight and a clean contact all along.
The turned over section should be flat and coming from the factory will probably have grind marks. It’s normal to rub this surface on a flat stone to get a clean edge. It’s hard to describe the technique in words, you need to see it done, but if you search you tube or even some of Paul Seller’s vids you may find something that describes how it is done. Generally you only do it once, get it right and then just keep it clean.Good luck.
I have just found this rather lengthy video from Paul Sellers on restoring planes. He refers to the Chip Breaker as a ‘cap-iron’…. same thing. The relevant section begins at about 52 minutes in and explains in pictures what I outlined above.
Regards
 18 September 2018 at 1:03 pm #551725
the plane was tuned and fettled from the seller, sounds like a dull blade to me. did it work when you got it?
you may not be reaching the cutting edge or possible rounding it over with the sandpaper method.
I’d get an Eclipse sharpening guide and see what happens. My bet is sharpening. When learning Paul’s method, it is easy to give a little lift at the end of the stroke that causes the tip of the bevel to be at a steeper angle. You can make this error on the strop, too. The bulk of the bevel will be fine, but then the tip is too steep and there’s no clearance. If you use a protractor, you’ll see a bit of light at the tip.
Joyner is right that the back of the iron being polished, the chip breaker, etc., are important to the quality of cut and jamming, but I don’t think they will cause skipping over the wood. To me, that’s a hallmark of not being sharp, especially if you find that you absolutely no engagement with the wood, so you lower the blade, lower it some more, and then suddenly you can catch the wood, but you don’t really get a shaving-the plane just digs in or skips or rips up hunks. This means it is either grossly not sharp or the bevel angle is wrong (too steep). I once had bizarre wood that produced this behavior even with a sharp plane, but let’s assume you are using reasonable stuff.
I prefer the eclipse. It is cheaper, simpler, and will do most things. I’d not fuss over the back or the other items just yet. Put the blade in the guide, work to the edge on your coarsest stone so that you feel a burr, then work through your other two stones (those go very quickly), remove the burr and give it a try. You can make a big change in the bevel with 120 grit sandpaper and the guide if you like, but I wouldn’t use paper on the back unless you have a flat surface and **glue** the paper down. Once you can get shavings, then go back and take care of the stuff Joyner mentioned.
18 September 2018 at 1:57 pm #551733@howardinwales, I hate to disagree with you but the chip breaker isn’t part of the cutting edge and it’s one of the most misunderstood parts of a bench plane. The name given to it by Stanley wasn’t even chip breaker. Technically it’s called the cap iron and it’s sole purpose is to provide stiffness to the cutting iron to reduce chatter. It’s important that the edge of the cap iron be made flat so that it presses against the blade with no gaps but that’s actually only important in keeping little shards of wood from getting caught in a gap if one is present. It doesn’t need to be sharp at all. It doesn’t cut anything, but in the process of flattening it, it will end up sharp by default. That hump you see on a Stanley cap iron is purely to provide stiffness. More recent designs don’t even have that. My Woodriver, for instance, has a dead flat but very thick cap iron with a slightly raised edge on the underside.
18 September 2018 at 2:24 pm #551739I think you’re right Kirsty. You haven’t changed the bevel angle by very much in 3 or 4 sharpenings. Again, that bevel angle can vary quite a bit with no effect on the way the plane works. Anywhere in the 25 to 35 degree range works but try to stay around 25 to 30 if you can. Paul likes a camber on his blades so technically, his blades have no defined bevel angle. I like a microbevel on mine so I hone the primary bevel at 25 degrees and put a 3 degree microbevel at the tip. In other words, my cutting edge ends up at 28 degrees. None of that matters very much though. At any bevel angle less than 45 degrees, the cutting edge has to be at 45 degrees to the work surface. That’s set by the frog and it can’t be changed. So don’t worry about raising up when you’re sharpening. All you’ll be doing is cambering the blade or creating a microbevel and either way will work.
-
This reply was modified 5 years, 7 months ago by
-
AuthorPosts
- You must be logged in to reply to this topic.