tabletop woes
Welcome! / Forums / General Woodworking Discussions / Projects / tabletop woes
- This topic has 12 replies, 6 voices, and was last updated 10 years, 3 months ago by
Jason.
-
AuthorPosts
-
I’m having problems with a tabletop using the techniques Paul demonstrated in the coffee table build. Its for a kitchen table, 3 foot by 6 foot.
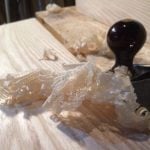
For one, I actually got tear out from my #80 scraper. I had to use a card scraper to remove the damage. I’ll have work with the scraper, but I think I have too much hook on my burr. Does anyone have that same experience?
Second, I have marks that looked like either plane or cabinet/card scraper jumped. The results are patches of parallel lines about 1/16th apart that are dug into the surface. I guess I can use the card scraper and attempt to clean it up.
And the third, and this might actually be nothing, I can see seams where the boards are butt jointed together. The joints are actually tight, but when I started adding finish, I started to see some of the seams when I look across the joint with a reflected light on the top. I’ve never done a solid top, so I don’t know what to expect. Is this to be expected?
Unfortunately I didn’t notice any of this until I started to add finish. I’m real close to pulling out a power sander. Any advice?
Thanks!
 24 January 2014 at 8:02 am #26449
Hello Jason. None of what’s happening here should be happening if the scraper is set and sharpened properly. If you believe that then we can start to dismantle things.
Here is a check list.
1: When you turned the edge did you feel you had to really force or press super hard. On the burnished? It’s not necessary to do that and you can create the wrong shape and angle if you do. Better to very gradually ‘turn’ the edge with a few successive strokes.
2: did the scraper cut and bite into the surface as soon as you started to use it? It should. If it did, how much of a bite? Did you have to use a lot of force? It may be that you have too much of a burr. In other words you turned the edge too much. On the other hand you may have too much iron protruding. When you set the iron to the throat and flat face of the scraper it should be dead flush to start. That is, when you set the two screws to the locking bar, the blade is flushed to the bottom by sitting the tool on something dead flat and cinching up the setscrews. Make sure also that the wing not is not protruding into the steel blade when you do this. The wing screw is the only way to set the depth of cut and not by allowing the blade to protrude like a plane iron. Once the blade is secure , turning the wing screw half a turn or so should be enough to set the depth of cut. 24 January 2014 at 8:09 am #26450
Jason,
Re the marks that look like plane marks. Sometimes, when the edge is turn too much but very close to the angle of presentation, the iron will cut but just barely. Often, in this case, the scraper skids and cuts intermittently. Leaving the kinds if marks you describe. I have also found that as the scraper dulls it causes these marks too. Best to re sharpen and take care not to turn the edge too much. Don’t need very much at all.
Re the seams. It’s hard to comment without seeing what you have. Sometimes the grain direction will more highlight the joint line by the way the light reflects off the grain surface, but I really don’t know without seeing. 24 January 2014 at 8:11 am #26451
Lastly, don’t give up and reach for that sander. Once you get the #80 scraper you will not be able to live without it. It is pure joy to use and should not be giving you any of these problems.
24 January 2014 at 2:13 pm #26455I’m just finishing a small oak side table and have been using a no 80 on the top. The top is 500mm x 300mm and is made up of two edge jointed pieces.
It’s my first use of the no 80 on an actual project but so far it’s been great. I just wanted to mention that I too managed to get some tear out but after resharpening and setting the burr it behaved very well
I also find it useful to go with the grain where possible – although not technically necessary I guess.
Cheers
Bill
Paul,
I definitely applied a fair amount of pressure when turning the burr. I used the same pressure I used when consolidating the steel before. Now that I’m thinking about this, maybe I use too much when consolidating the steel. I’ll have to reread your blog.
The #80 does bite right away, but I did have to turn the thumb screw a bit to do that. It did take a bit of persuading to get it moving. And now that I recall this, it left tracks as it cut. At the time, I knew I would do some sanding, so I didn’t worry.
When I was reading your blog before I set it up the first time, I didn’t find a suggestion of how much to turn the burr. I think I ended up around 90 degrees to the flat face. Too much I guess?
One thing I hate the most about this is I was on the home stretch with this project, and I’m really looking forward to finishing. It’s frustrating to have to go back a couple of steps. I have to remind myself that in a few years when its done and being used every day, as long as I get this resolved, I won’t have any physical evidence of the problem, and the memory of this ordeal will fade. But still… Grrr… 🙁
I’ll see if I can’t capture the butt joint seam in a picture. Might be hard, but I’ll try. I don’t think I mentioned that the top is cherry, if that makes a difference.
Bill, thanks for sharing your experience with your #80. Maybe I have hope afterall. 😉
Thanks!
Jason


I have been doing an oak coffee tabletop and found that using a scraper, you really have to develop a ‘feel’ for direction , depth and sharpness of blade, how hard to push. I did not read how much experience you have with the tool, so I hesitate to suggest lack of experience be at least part of the issue. For myself, after learning to use the scraper I will not be grabbing for any type of power sanders soon. Hope you get some resolution.
BrianBrian, I’m definitely new to the cabinet scraper. So you have me pegged. I’ve used a card scraper a bit, but this is a different animal.
@paul-sellers, I sharpened my #80 again and barely put a burr and found that I didn’t get tear out. I scraped the top down again, actually just the high and ugly spots. It already had a coat of shellac and varnish, so it wasn’t very fun. I almost grabbed the sander a couple of times until I talked myself down. I wiped it down with alcohol and didn’t see any problems, so I put a coat of shellac. Hopefully it will still look ok in the morning.As for the lines, I think you were being nice to me. 😉 I appreciate that. I now think the problem is that I wasn’t holding the scraper confidently enough. That, and I also believe I was taking too big of a bite, so it rotated in my hands and skipped.
Hopefully this isn’t premature, but I think I’m back on track.
Thanks everyone!
 25 January 2014 at 8:40 am #26506
ou don’t need to remove all of the shellac, just sand into it. hat area will take a longer to ‘fill’ that’s all. I would wad some shellac into the bare area first followed in an hour by a second wad of shellac, just overlapping the edge of the other shellac an inch or so. Then you can build up the coats by a pad or a brush, whichever you are using.
-
AuthorPosts
- You must be logged in to reply to this topic.
