Woodworking and Sportive Archery
Welcome! / Forums / General Woodworking Discussions / Projects / Woodworking and Sportive Archery
- This topic has 5 replies, 2 voices, and was last updated 6 years, 9 months ago by
Hugo Notti.
-
AuthorPosts
-
30 June 2017 at 1:11 am #313349
I hope, this subject kind of fits into this forum. It can actually go anywhere, from making simple bows or arrows up to the making of furniture, bow stands, bow wall mounts and possbly some extra gear. It might even contain some leather working (tabs, quivers, grip covers etc.).
About six weeks ago, I got into the sports of archery. this is all Paul Sellers fault, who got me into wood-working, and if you research about woodworking on the internet, you will sooner or later find people making bows… Well, all forgiven, I like archery 😉 This topic will deal with the woodworking parts of archery mostly, but I have to include some aspects of archery as well to explain, why certain things are necessary. If you read along, it might be useful to get into archery yourself (on the internet at least), but I will eventually drop appropriate links rather that explain things by myself. After all, I am a newbie to archery and even less to bow-making and fletching…
I need to explain a few archery terms here, so it gets easier for me to write and easier for you to understand. The order is will be kind of random, as I will add to the list while writing.
A simple bow can consist of just two parts, a stick and a string. But there are quite a few terms to describe a bow in detail.
Handle: The center part of the “stick”, where you hold the bow when shooting (also called “riser”, especially on take-down bows, where you have a center piece where the limbs and perhaps a lot of extras are mounted)
Limbs: The parts of the “stick” above and below the handle
Tips: The ends of the limbs
Nocks: Groves at the tips to secure the string
String: The string of course
Backing: A layer of material to reinforce the back of the bow, to make it stronger, prevent it from breaking, for decoration, etc.
Draw-weight: The equivalent in pounds to the force you need to draw the bow 28″ wide (the most common definition)
Brace-Height: The distance between the handle and the string, when the bow is strungMy very first project was a “longbow” from a length of 1x3cm oak from a local DIY shop. I will post a picture of the finished bow later (perhaps tonight already). Oak is not well suited for a bow, but it is okay for a flat bow with low draw-weight. I looked at all available pieces and took two, which had exceptionally straight grain and no knots at all. I started with almost zero knowledge about bowmaking! The piece was 240 cm long (about 8″). I cut off 2′ and glued it onto the center to have some more meat for a handle. Then I tapered the top and bottom of the handle to feather it into the limbs as smoothly as I could, using a wide chisel first, then spokeshave, file and scraper. Then I tapered the limbs to a width of about 1/2″ at the tips, starting a bit away from the handle – spokeshave and chisel. I also broke the edges on the back. To finish the raw bow, I cut two groves at the ends of the limbs to hold the string. This is usually done with a round file, I used a saw for the rough work, then sandpaper.
The next step is tillering, which is the process of working on the limbs until they bend evenly towards the string and nowhere else. for this, I had to make a simple “tiller-tree”. I used a piece of scrap-wood, hammered some nails into it to hold the string at various brace heights and secured it on my small workbench (should have a picture, will be supplied later). And I used some 2mm string that seemed to be strong enough. This is not a safe setup! When strapping the bow onto the tiller-tree, I used my common sense to anticipate, what could go wrong, whereto parts could be flying etc. and fortunately nothing happened. So, the bow is mounted on top of the “tiller-tree”, the string pulled down onto the first nail. Then you have to watch, how the limbs are bending (and listen for breaking noises), look for inconsistencies and mark the areas. Then the bow is unstrung and the areas, where the limbs don’t bend enough are thinned with a file or card scraper – this is, where woodworking comes in again. You need to observe the grain of course, and NEVER touch the back of the bow. You only remove material from the belly, and only, where the bending is too weak. Normally, the back of the bow consists of an unharmed annual ring, perhaps even the very first one right under the bark of the tree. English longbows were often made of yew, where the outer bright wood is very resistant to pull and the darker inside wood very resistant to compression. If the fibres on the back are not continuous, the back is weak and might break. My first tillering work was pretty bad, but at least the limbs only bend towards the belly, no twisting, and no breaking. I eventually measured the draw-weight, and it is about 18 pound, bood for a beginner bow. Warbows had up to 120 pounds, sometimes even more, contemporary sport bows go up to around 45 pounds (the coumpound bows, with additional string-work and wheels are a completely different class, and the crossbows as well – both can have much higher poundage). I also shaped the handle a little bit, basically rounded the edges. Then I wrapped a piece of scrap leather, cut it to size and stitched it on.
Bracing the bow (putting the string on with real tension) was quite scary! Fortunately, I had seen some efficient techniques already and so I didn’t end up with a tip in one of my eyes. Actually, I put on a second string, while the bow was mounted on the tiller tree and pulled out to match a brace height of 7″, which is supposed to be a good starting point. Instead of pulling the bow with my bare hands, I then added a few more nails, up to 28″, which is a good draw length (the actual draw length depends on the body measurements of the archer).
At this point, I decided to buy a “real” bow, in order to get a better idea of what I should aim for. And, of course, I needed something to shoot with and at, arrows and a target. I got a reasonably cheap 70″ long “recurve longbow” with a draw-weight of 30 pounds and a couple of wooden arrows, an arm protector (no, I got that one later, when I had learned what these are good for) and a heavy straw-target.
From here, my archery woodworking deviates into various strands. I had to make a stand for the target, arrows broke quickly, so I learned to assemble new ones from the pieces – shaft, tip, nock (a plastic piece at the end of the arrow, that sticks on the string) and feathers, and I tried to harvest staves (raw pieces of wood) from a tree to make another bow.
I also made a simple rig to make strings. A string consists of several strands of fibres with an “ear” at each end. Traditionally, people made one ear by splicing one end, and attached the other side with a know. Today, strings are often made by looping one strand around two poles until you get the number of strands you like. Each end automatically has an “ear” then, which is wrapped with “binding”, another thread, to protect the string from abrasion at the nocks. Another binding is applied to the center of the string, where the arrow is show and you hold it with your fingers. This can be done free-hand, but the jig is much more convenient.
For now, I will post the images that I already have, then I will post this post and get my camera…
The first picture one shows a fletching rig and some unfinished arrows. The tips are simply screwed on, the nocks are glued onto the other side that has to be tapered with a big pencil sharpener, then the rig is used to glue on the feathers. The feather that is being glued on is held in the clamp, the button to the right holds the nock of the arrow. It can be rotated to three positions, so three feathers can be glued onto the shaft with the same angle towards the tip of the arrow.
The second photo shows an arrow that I have hit (accidently of course) Robin-Hood-style, i.e. I hit the nock of the arrow with another arrow. It did’t split completely, so I glued it together. After taking the photo, I cut off the rest of the nock and glued on another one.
The last photo shows my “shooting range” in the garden. To the right is the entrance to another house, in the back, there is another garden, behind the camera is a street, so this is the only direction, where I can only damage my own property. I consulted a few archers and informed all people who live in my house. They consider it “not perfect but safe enough”.You can see the target stand, and if you look carefully, you will also see the third beam, which is hidden by the bush. The bow is the one that I have bought.
There might be some serious bow-making underway. I have a nice hornbeam tree that might contain one or even two bows. I will remove the bark and try to split it this or next weekend. I also harvested some spruce for arrows. And I will take the second piece of oak and make another simple DIY-wood bow, slightly shorter with hopefully a bit more poundage.
I hope, you enjoyed this first part of the story. I had to make many comments about archery, which might seem distracting, but so far woodworking had a very low profile. And this topic revolves around archery, so some explanations are absolutely necessary to explain, what I am trying to do and what is to be expected later.
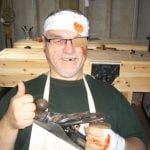
Dieter
Attachments:
You must be logged in to view attached files.30 June 2017 at 1:57 am #313353Oh, that was a lot of text. Here some more pictures!
It is hard to take a photo of a bow, but I also took some details.
On the third photo, I highlighted a problem area. At this area, the laminated handle fades out, and the glue didn’t hold. This appeared after a few shots, the glue probably gave in to the compression, when the inside of the bow was bent. The last shows the other side, which is fine.
On the second photo, you can also see the string, that I have made for this bow. It is 12 strands of Dacron (for those, who know), spliced the flemish way. It is actually just two bundles of fibres twisted together in a special way, which is amazingly strong!
By the way, I used linseed oil on the bow, and it really enhanced the look and feel!
Dieter
Attachments:
You must be logged in to view attached files.30 June 2017 at 2:44 am #313358Here comes the string jig and the tiller tree, as well as a spine tester.
The jig is made from an old “sprung slats” (which according to my dictionary is the correct translation of “lattenrost”, a frame to support the mattress in the bed. All parts can be rotated to store it away. The beams with the aluminium rods need to be rotated while making the string. This jig is used to make an “endless loop string”. There are several holes to move these beams for different string sizes. I made a recess on the “legs” to accomodate the screw heads.
The tiller tree is just a piece of wood with nails and a recess on top, so the bow cannot slip forward. The bow is pulled to a height of 40 cm, which is about 16″. This is as much as I dared to pull it when I built it. Now, that I am shooting it, I pull it out to 29″, which is my regular draw length. The lower limb (left side) is bending way too much near the handle. Both limbs don’t bend at all at the ends. I think, the upper limb is okayish though. Working more on it would have decreased the draw-weight a lot, and I didn’t want that, it is less than 18 pound now, and that isn’t much. The bow actually shoots straight and consistantly. For a first try, I am happy! By the way, it is important to have many stops for the string, because you need to work in small steps. Otherwise, the wood might stay bent and the bow will be weaker. The aim is not to make the strongest bow possible, but to get to a draw weight suitable for the bow and for the archer that will use the bow. English longbows were incredibly heavy, up to 120 pound, but they were intended to penetrate heavy armor of grouped frenchmen. If you shot enough arrows, some would eventually hit and this would hopefully intimidate some of the other side. Aiming was quite difficult, because you cannot hold such a bow for seconds. Well trained sports archers today use bows up to 45 pound only, which is a good compromise between precision aiming and a predictable flight of the arrow. A beginner’s bow should have a draw-weight of no more, better less than 25 pounds. And even that is a challenge to many completely untrained people, men and women alike!
The last image shows a make-shift arrow-spine-tester. The spine of an arrow is a measurement of its flexibility. The arrow is supported on two sides, distance 26″ and pulled down with a weight of 2 pound (in this case a bottle filled with water). The bending is measured in inches x 100, and that is the static spine of the arrow. My ruler measures centimeters, but I only wanted to compare the arrows that I got, and they are all the same (19 mm). Spine, weight, center of mass and length of an arrow are very important values and need to be adopted to the bow and archer. If the values are too far off, the arrow will wobble a lot and might even break on impact, it will not hit the target and it can be quite unpredictable. A too weak arrow will break, when shot. This is dangerous for the archer and also for the bow.
I am not telling you this to brag about my knowledge about archery, but to demonstrate, that it is important to know something about the use of a device, before you make it. This also applies to any field of crafting. A spoon that is beautifully light, carved to a thickness of 1mm, might look fantastic, but will probably not survive the first bite. I didn’t know much about archery when I made the tiller tree, and so it is way too short. At least, it was strong enough… The other two devices were made with more knowledge and they do their job just fine. I’d say, even an industrial high-end string rack won’t produce better strings than mine. It only looks better and has more comfortable adjustments. But it also costs about 20 times as much as mine!
Dieter
Attachments:
You must be logged in to view attached files.18 July 2017 at 10:10 pm #313835The main project is started, I have found a suitable trunk of hornbeam (ironwood). Hornbeam isn’t perfect for bows, but it has been used by many people and they succeeded. The profile will be D-shaped, but not as thick as an English longbow. It will be flat on the back (the side facing away from the archer) and slightly round on the belly (other side – obviously). Hornbeam can stand compression fairly well, so the back can be fairly narrow. But anyway, the next step is months ahead, because the stave needs to dry first. I have felled and split the tree two weeks ago, shortly after starting this thread, removed the bark and cut it a bit closer to the final dimensions. It split nicely in the center, but I had to put wedge against wedge to force the fibres apart. I have heard, that splitting hornbeam is very difficult, once it has dried, so I am glad, I did it right away. Having the stave pre-dimensioned also lets it dry faster, because there is less wood to dry.
I also found some straight poplar branches that might be suitable for arrows. They will dry much faster than the stave for the bow, so perhaps, the next post will be about making arrows from scratch. I have already started to collect feathers…
Dieter
 19 July 2017 at 9:11 am #313854
I bet Robin Hood never went to as much trouble…..Hah!
Seriously, I am still amazed at some of the stuff you woodworkers out there produce and marvel at the level of your skill.
If you become as good an archer as you are a woodworker, you could be a very dangerous man. Deer beware!
Mind you, a very useful friend to have if there is an apocalypse and we’re reduced to having to hunt for our food.
-
This reply was modified 6 years, 9 months ago by
 Paul Dallender.
20 July 2017 at 8:11 pm #313920er, being as “good” an archer as I am a woodworker could result in serious injuries – to myself 😀 Learning the basics of archery isn’t that hard. My only advantage in an apocalypse is, that I already have a bow and don’t need to resort to my basic woodworking skills in order to make one. I don’t even have suitable hunting arrows… And killing a wild animal with a bow is quite difficult, they can run off easily, because the arrow is so much slower than the sound of the shot.
I had another look at the hornbeam stave (I think, the singular should be “staff”, but everybody says “stave”), it looks fine, no cracks, no twisting, no unwanted biological matter. This will be a nice task for next winter.
Dieter
-
This reply was modified 6 years, 9 months ago by
-
AuthorPosts
- You must be logged in to reply to this topic.