@elvishefer
Forum Replies Created
-
AuthorPosts
-
1 February 2016 at 6:22 pm #134395
Thanks Matt!
Thank you Martyn! The handles get a lot of positive attention, and they make the tray easier to carry, too. I like it when form and functionality come together.
29 January 2016 at 3:42 pm #134308“Beautiful projects!
I really love the coasters. How did you make those?Korneel”
1) Figure out the color pattern you want and the woods to make it. I started with .75 inch thick pieces of scrap about 11 inches long. The pieces can be as long as you like, I wanted to make six coasters of each pattern (3.5 inches x 3 = 10.5 inches + .5 inch for kerf)
2) Target dimensions of a single coaster is 3.5 inches square, but can vary slightly
3) Plane wood strips down to desired width. I used three widths: 1 inch, .5 inch and .25 inch.
4) Glue the strips together in the desired pattern. The result should be a 3.5 inch x 11 inch x .75 inch thick patterned piece.
5) Plane flat on both sides.
6) Resaw the piece in the middle and plane the cut faces parallel with the existing flat face. Goal is two pieces 3.5 inches x 11 inches x .25-ish inches
7) Crosscut each piece twice so you end up with six 3.5 inch x 3.5-ish inch coasters.
8) Plane the end grain clean on a shooting board. Each coaster should be close to 3.5 inch x 3.5 inch.
9) Mark out the rounded corners and use a chisel, rasp, files, etc. to round them over.
10) Round the edges with sandpaper.
11) Sand with 220.
12) I used one coat of Tung oil and three coats of rub on Polyurethane for color and protection against booze spills 🙂-
This reply was modified 8 years, 2 months ago by
elvishefer.
29 January 2016 at 3:19 pm #134304Thanks Salko for your kind words!
I discovered Paul’s workbench build videos on YouTube about 3 years ago and the bench was my first project. I’ve been learning ever since.
-
This reply was modified 8 years, 2 months ago by
-
This reply was modified 8 years, 2 months ago by
-
This reply was modified 8 years, 2 months ago by
15 December 2014 at 4:01 pm #122195Thanks for the kind words everyone!
The cabinet is still holding up… The wood may not be the best but the joinery techniques are solid (thanks Paul Sellers).
Happy Holidays,
Jeremy19 July 2013 at 9:33 pm #15085Hi Piotr,
The model of saw is Stanley Fat Max 20-047 (20 inch, 9 tpi)
It is $30 before tax here in Canada.
Good:
- It did the job
- Did not bind
- Cleared sawdust reasonably well on the rips, but the boards were only 3 3/4 inches wide
- Works great for plywood, reasonable at cross-cutting, etc. so it’s not a one-trick pony
Bad:
- It’s not a dedicated rip saw, and I feel confident that a proper 9 tpi rip would out-perform it
- Thick kerf
- Cannot be sharpened (it’s disposable)
It should be ok for pine but will require some patience.
Good luck!
18 July 2013 at 12:28 am #14991Very nice!
I hope this marks the start of a long woodworking adventure!
12 July 2013 at 7:36 am #14683Serhiy – I have some scrap wood spanning my bench on which I pile a lot of the wood I have. It gives an extra bonus of adding more weight to the bench, making it more stable. I also put some on top of two book cases and sometimes leave some piled in the hallway. I bribe my girlfriend into letting me do so by making her as many things as I can. 😉
The bench pile:
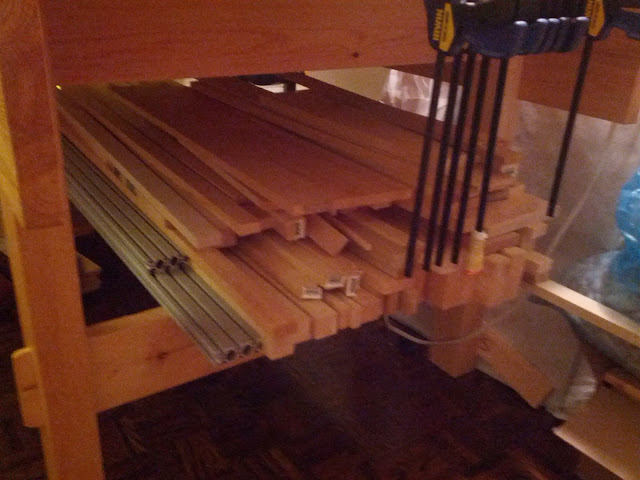
The drill press is a bench top model and runs relatively quiet, making it a great alternative to hammering mortises and it keeps the neighbors from complaining. relatively cheap from HD, too. Hopefully we’ll be moving to a house soon and I’ll have more space.
David – I have two shop assistants, both Bengals. The one pictured is usually very well behaved and will hang out while I work. Her sister will attack the sharp edge of a chisel, so I have to keep my eye on her at all times. I usually appreciate the company though; they make quite tolerable supervisors.
Cat two, drawer inspector:
 10 July 2013 at 10:59 pm #14647
Johan, I used Minwax Pre-stain conditioner, two coats of Minwax English Chestnut stain with a good soak time, three coats of Minwax Rub-On Poly (satin), and for kicks, sanded the outside (400 grit) and rubbed in some bee’s wax to kill the shine a bit and give it some depth.
The wax was an experiment, and I’m not convinced it was worth it/required.
Again, thank you everyone for the kind words!
22 May 2013 at 6:50 pm #12352I’d really like to see the technique(s) for building a base frame for a cabinet or dovetail box. I imagine it would be pretty much the same either way.
And second for the donkey ear shooting board. Or alternative methods of accomplishing the same tasks it’s suited for…
-
This reply was modified 8 years, 2 months ago by
-
AuthorPosts