Workbench builds at full steam
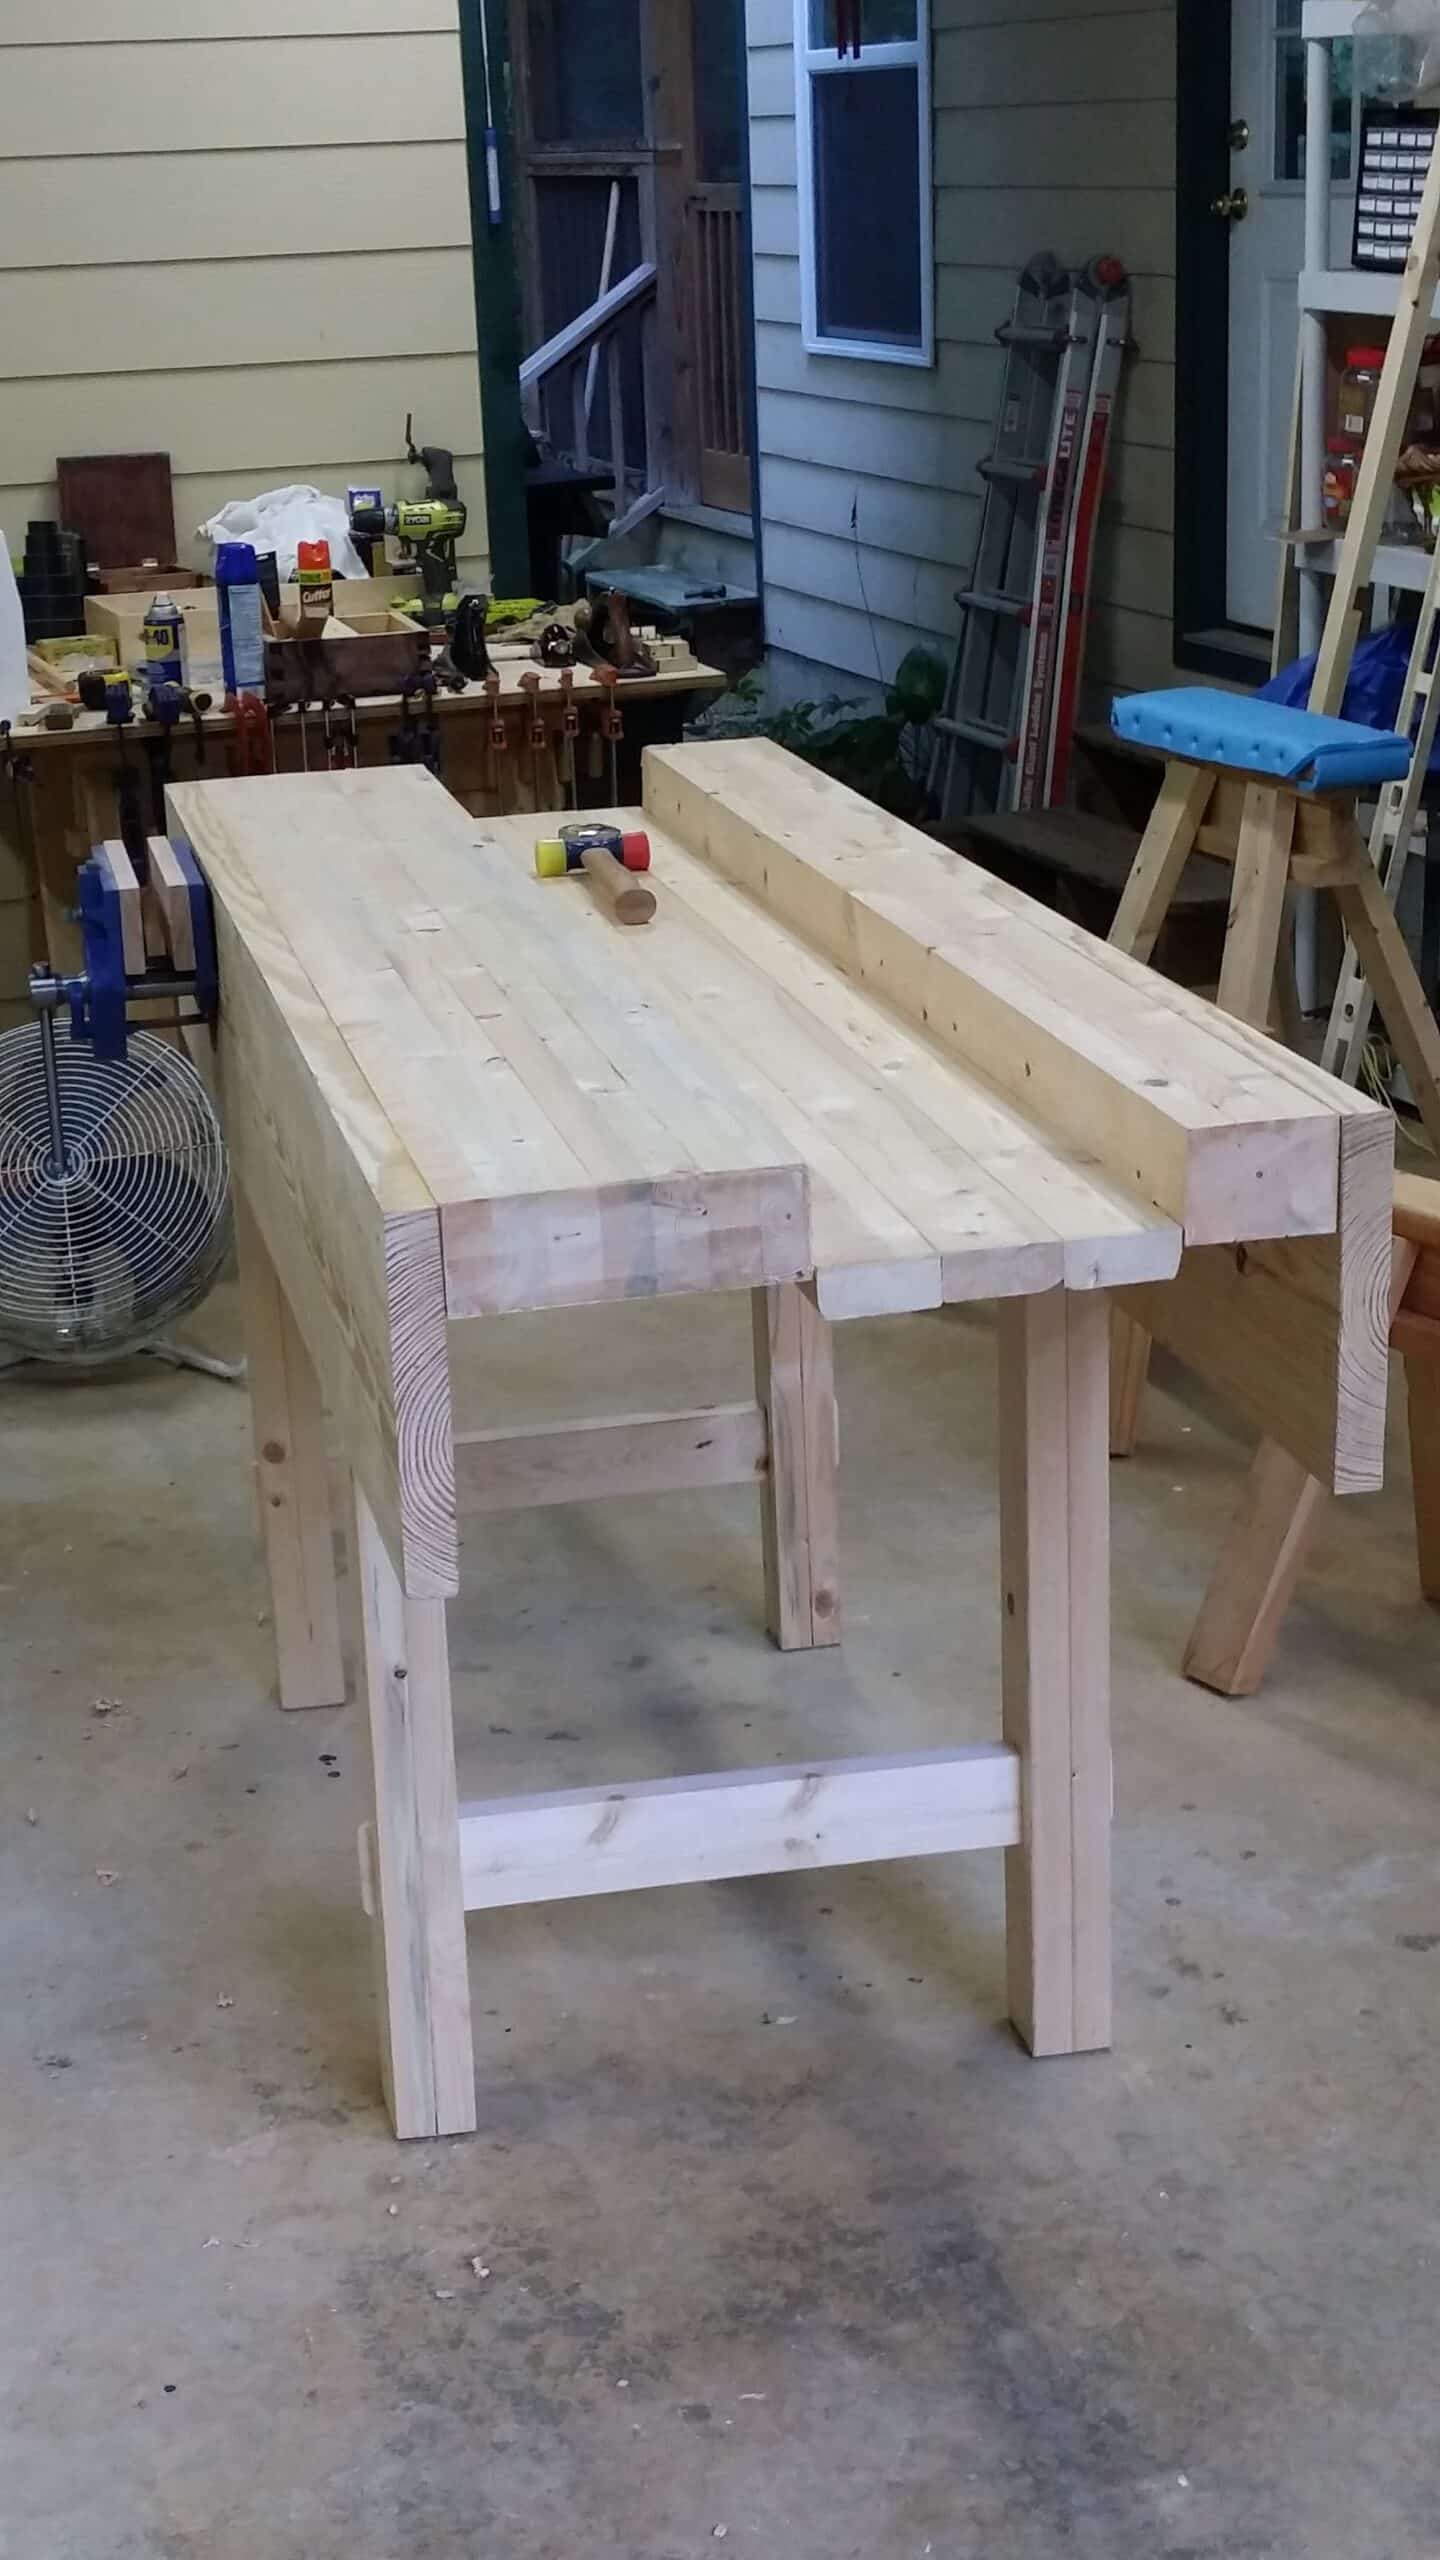
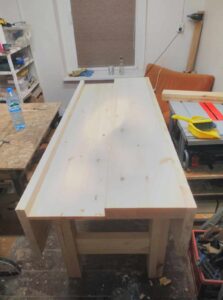
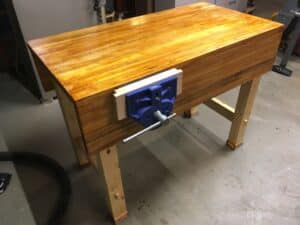
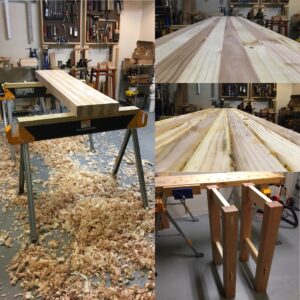
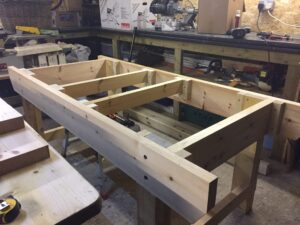
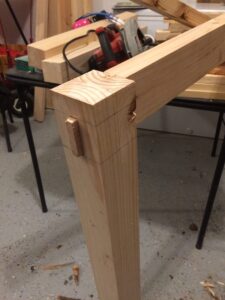
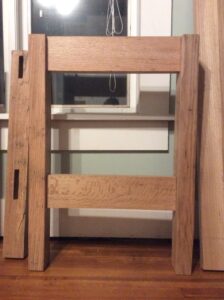
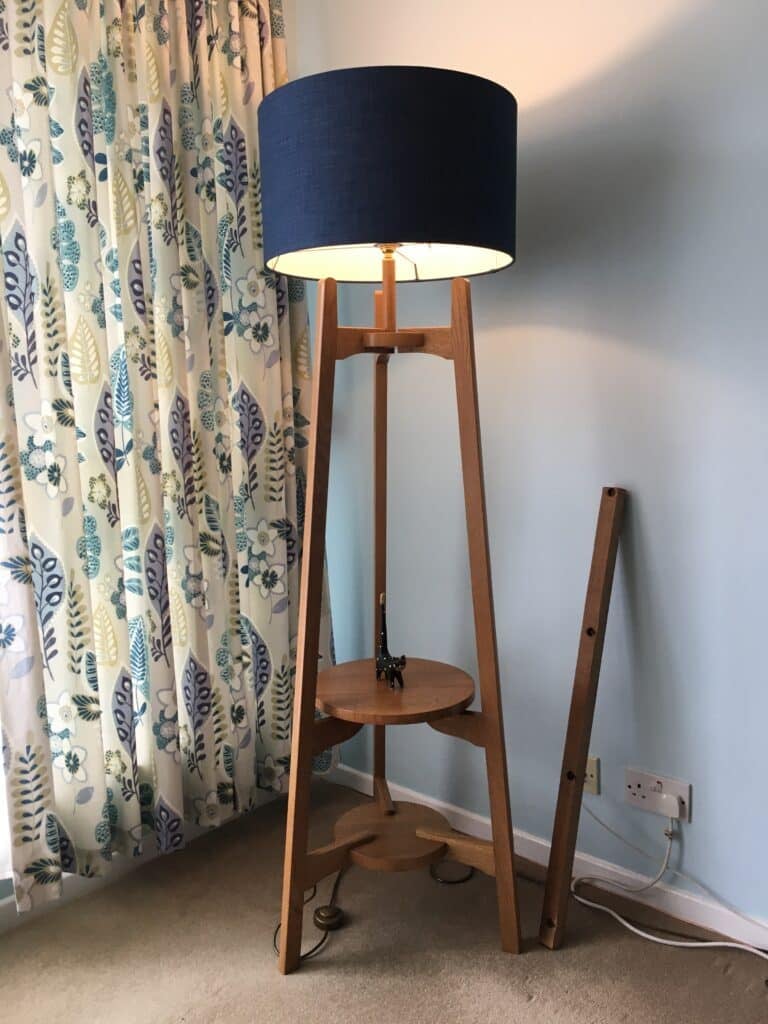
We had a great response to our recent workbench survey. It’s exciting to see how many of you are following along with the workbench build and thank you so much for sending in your images and questions. I have included a few images of your builds at the bottom of the post.
We had a whole range of questions that came in, so much so that we have decided to add an FAQ here on Woodworking Masterclasses. That will help with common questions, so you may find your answer there, but we also wanted to answer some of the specific questions below.
[toggle title=”Stock Sizing Questions“]Jeffrey Freeman
Biggest problem I am having is adapting US dimensional lumber to the project. I don’t know how close is close enough, especially for the legs. I glued up 2 US 2×4’s but came up somewhat short on the dimensions. I hope they are big enough.
A: There is room for adjustment on most the sizes as long as you work through any changes to the joinery sizing. For the legs, anything from 3”x3” up will work, so 2 US 2×4’s will make a 3”x3 ½” leg, so work fine.
Glenn Latour
I am in Australia, and we don’t have timber that matches the width and thickness that is specified in the workbench build. Do I need to use multiple lengths of timber and laminate them together? If I use 4×4 for the legs, and then 2×4 for the rest, how many 2×4 would I need?
A: You certainly can laminate together pieces to make up the correct width as Paul does as long as they are long enough. The benchtop can be over or slightly under what Paul used and work fine. However there will be adjustments that need to be worked out which we can’t help you with. As the exact sizes of stock that is available to you locally will vary due to different international standards, we can’t give a list specifying exactly what you will need to buy.
Peter Gaffney
I can’t find 5/8″ stock at my local lumber yard. Can I make this from 3/4″ stock and plane it down or have the lumber yard power plane it down? Not used to trimming stock yet.
A: You will be able to plane it down without an issue. It is only for small items and you will only have to remove ⅛”.
James Zublick
No one in my area sells 3x4s. I had to get 4x4s for the legs. In what ways do I need to change the plans for the surrender in dimension?
A: The distance between your shoulders on your rails will be around 2” less, but you will use your actual leg stock when laying out to determine this. You will need longer bolts for bolting the legs to the aprons.
Chason Hayes
I would find it helpful to have a list of stock size and quantity needed to make the component pieces. The dimensions of the final components are given but not how to make them. I ended up choosing 2x4s for everything but I suspect there is a better way.
A: The reason that we don’t have a list is that it is so dependant on the exact sizes of stock that is available to you locally due to different international standards. The stock sizes we give are as a guidance. For those who aren’t as experienced, it might be more straightforward to get the stock milled to those sizes locally.
Hassan Mian
I am making this bench as out of 2 by 4 lumber in the US. i.e. 1.5” by 3.5”. I was wondering if the apron could be 4 X 3.5″ and could the legs be just two pieces glued to give a dimension of 3.5” by 3”?
Also I am using a 10” vise from eclipse. Is a wider apron advisable?
A: For the apron, you could glue 3 ½ – 4 pieces of the 1 ½” stock edge to edge to give you at least 11”. Somewhat wider, such as 14” isn’t an issue. You don’t need a wider apron for the 10” (254mm) vise.
Adam Lininger
I have a bunch of recycled 2×4 boards that I have been planning on using for this project. They are reasonably straight and solid, but many have splintered areas or a waned edge that would mess with the smooth surface. Would filling the gaps with epoxy after the bench top is made be a viable answer? Or do I need to just find some better wood?
A: Paul prefers not to use epoxy, but instead use a name brand wood filler. Wood fillers shrink and expand with the wood whereas epoxy doesn’t. Applying after the top is laminated and has been initially planed is best.[/toggle][toggle title=”Wood Choice“]Jorn Slump
I live in Holland and I am thinking of making a workbench. I don’t have any woodworking skills (yet), I am learning as i go. I really learn a lot from the workbench video’s, but one thing I cannot get clear is the choice of wood for a workbench. Do you have some suggestions of (european) woods?
Bernhard Wedl
I’m from Austria and even we have a lot of forests, hard wood is quite expensive here. Is spruce or fir also an option for building a bench? Could you suggest some sorts of woulda for the bench?
A: Try to get dry wood, or if uncertain, store the wood at home in a dry place until it is dry. One way of testing whether the humidity level of wood you have bought is stable, is to weigh it regularly until the weight stays the same.
Concerning type of wood, Paul has used CLS studs, recycled timber and scandinavian redwood here in the UK, and spruce and southern yellow pine in the US, as they are affordable and readily available. Expensive hardwood is not necessary.
Kenneth Lawrence
I’m using Douglas Fir but it’s not vertical grain. Will the flat sawn surface be adequate for hand tool projects and will I be able to plane it flat enough with a hand plane?
A: The flat sawn surface will work fine. You should be able to plane it flat with a hand plane as long as you are careful to work with the grain and persevere. This is a great learning piece for developing your planing technique.[/toggle][toggle title=”Workbench Sizing“]
Steve Hawkes
What is the average width and length of a good woodworking bench?
Anonymous
Why did you decide to make this workbench smaller (less deep in particular, with just the one bench top surface and well board) as compared to your previous, deeper workbench build from YouTube? I’m trying to decide the depth of my own bench and whether 2 top surfaces would be needed instead of just the 1 on this build.
A: The 5’6” x 2’3”/168 x 68cm bench that Paul made here is his recommended size which will suit most people. You can scale down a little if your space demands it, or lengthen it and add another work surface as in the previous version of the workbench if you want significantly more space from the same bench, but that does make it more difficult to move.
Andy Finn
I need to make my bench less deep to fit the shed. Is there a best area to lose the depth from?
A: Preferably loose some width off the well, not the work surface.
Rob Totorica
How do I get the right bench height for me?
A: We’re using a mean height of 5’10” (1778mm) and found that most people that height prefer a bench height of 38”. That being the case we suggest that you add or subtract inches according to your personal height. To be on the safe size you could make the bench an inch higher and then work at the bench for a short while, see how it feels and cut it down accordingly.[/toggle][toggle title=”Planing“]Adomas Vysniauskas
I’m a beginner in woodworking and am struggling a lot in getting a planed and straight surface on my workbench parts. I only have a stanley No 4 hand plane. Could You show more specifically which are the aspects to consider when planing to make sure that the surface will be straight? And then, at what point it has to be precise in its “straightness”?
A: The best thing I can recommend is to have a look at our stock preparation videos: https://woodworkingmasterclasses.com/videos/stock-preparation/[/toggle][toggle title=”Joinery“]Paul Dring
Is there an easy way to adapt this design, so that the legs can be folded up for easier storage. I live in a small ground floor flat with a small yard, so I need to store it inside without taking up a lot of space.
A: Not that we’ve tried, but the leg assemblies can be taken foo by removing the bolts and wedges and make sure you leave the two lag screws in the top of the back apron accessible for removal.
Oscar Visser
The bench uses a bolt method for attaching the aprons to the legs. Did you do that because it needs to be disassembled in the future or would you use it anyway, so also on a fixed bench?
A: You could use either bolts or coach screws, it’s just a matter of personal choice. If you don’t plan to take it apart, you can glue and screw it together. Even then it could be taken apart if necessary.
Trevor W
I have already started building the bench from Working Wood 1/2, so it was fortuitous this series happened now. I’m at the point of cutting the dados in the aprons for the legs and wanted to use the wedges. Can they be used without the bolt? and if I can ask another, why are the legs placed where they are, and how was that figured out. The book only instructs to place the legs 42” apart. On my 5′ bench I was planning on the legs being 5 1/4″ from the ends. My legs are 3 6/8”
A: The bolts hold the aprons on to the legs, whereas the wedges hold it tight, so we would not advise skipping the bolts.
For the legs, Paul has placed them where he considers them most convenient for work. There has to be enough resistance on the outside of the housing to give structural integrity.
Roy Richardson
Wondering if it is possible to place the wedges on the outbound side of the legs? Also, why might I not want to move the wedges outbound of the legs? I seems it might make the vise side more solid.
A: You could place the wedges on the outbound side of the legs. Paul prefers to have them on the inside of the legs as it applies force towards the outside.
Edward Kopczyk
With regards to the wedge. Is this put in place to facilitate the bench being taken apart in the future?
Why not just put the legs into a joint which is square on both sides or is this to account for when the wood shrinks that the wedge will always be pushing against the square face?
David Roberts
Are the wedges needed if the bench will never be taken apart?
Rodger Brown
Why do you have to put a wedge in with the leg? Why not two straight edges with the bolt?
A: The benefit is that it means the joinery can be tightened if there is any movement. If you eliminate the wedges there is no way to tighten the joinery in the event of shrinkage.
Ken Smith
Why aren’t we using a haunched tenon on the top rail for this bench like the previous?
A: Paul felt like it complicated the joinery and didn’t add any intrinsic value in terms of strength. So not using a haunch simplified the joinery.
Paul Bowes
I was wondering why the underside of the bench top was not given a housing joint to accept the cross rail for additional stability?
A: This is because it’s not necessary and it complicated the whole procedure. Paul has done this when the well board is thicker than necessary to ensure the well wasn’t too shallow.
Richard Noonan
One of the mortices split, although the joint seems pretty sound. Does it matter?
A: If you glue it up well it shouldn’t be an issue, depending on how badly split it is.[/toggle][toggle title=”Well board“]Samuel Parker
I am interested in alternative methods for attaching the well board. The groove is very elegant, but I don’t have a plow plane. I have cut grooves with my router plane, but it’s not stellar for it, and that’s a very long groove. Any suggestions?
A: You can do without the grooves and fit some edging where the well board buts up against the apron and benchtop. See the old YouTube series here for details.[/toggle][toggle title=”Vise details“]Anonymous
Why is the vise not flush with the bench.
A: It leaves space to handle pieces when placing them in the vise.
Charlie Voss
How to integrate different styles of vises?
Jonathan Crichfield
I’m not finding any bench vises that I am willing to purchase. I am researching various wooden vises to be attached to the wooden bench. Any ideas on the type to use? I am leaning toward a wooden moxon vise or maybe a wooden leg vise.
Emery Miller
There seem to be many types (end vice, leg vice, etc.) of vices. What are the advantages of various vices, and would you recommend any other vise other than the one you usually use?
A: Paul has tried other styles of vise, but has always come back to these quick release bench vises, as they holds everything he wants them to hold without issue. Therefore it is difficult to go into the details on other options
Mick Fitzpatrick
Fitting a 7” Axminster quick release vice. The apron will restrict the fixing of the vice. I may have to recess the apron to accommodate.
A: The fitting of the vise is covered in episode 6 of the workbench. There will be variations over the different brands as well as designs of vise which we may not be able to help with, but for specific questions, please do get in touch.[/toggle][toggle title=”Clamps“]Gleb Dmitriev
I don’t have long clamps for glueing up bench top and aprons. They are too expensive here in Russia. I have an idea to use clamps that Andre Roubo used (click here). Would it be good enough and not compromise the quality of joinery?
A: There is nothing wrong with doing it this way, it should work fine.[/toggle][toggle title=”Other“]Emery Miller
Would you recommend putting castors on the bottom of a workbench, to make it more mobile? Or does that introduce some instability to the bench?
A: Permanent castors are avoided as they make the bench much less sold and stable. However, Paul has put some castors on his current bench which can be raised when not needed:
https://paulsellers.com/2015/02/lift-off-add-some-sidekicks-for-greater-movability
How do you recommend finishing (oil, shellac, polyurethane, etc.) a bench?
A: Paul has used both and outdoor water based fence finish and an outdoor furniture oil based finish.
How often do you check a bench top for flatness?
A: A new workbench will likely settle over the first year, and then need re-flattening. After that, it should be more stable, so you just check it from time to time as you work with it.
What is the little metal stop on your bench called (you use it from time to time as a stop for planing material)?
A: Paul blogged about it here: https://paulsellers.com/2015/03/adding-a-flush-bench-stop/
Matt Hirst
Any tips on cleaning and then greasing an old vice?
A: You can use a power wash that you might use to wash your car, and use that to clean off the vise first. Remove any rust with abrasive paper such as wet & dry and then apply a thin film of grease.
Jonathan Ard
Not sure how he plans to attach the bench top to the aprons, but on previous versions he used glue. My work requires I move regularly. Does he have any solutions that would make a stable attachment of top to apron without glue?
A: Paul does glue the apron to the bench top The apron attached to the benchtop would be the biggest piece, which is not huge. May be difficult to attach the bench top if not glued to the apron.
Bill Odom
Plans or dimensions?
A: The drawing and cutting list can be accessed here. https://woodworkingmasterclasses.com/videos/workbench-introduction/
Xavi Molina
How could I modify one side of the bench to place a moxon tail vise?
A: We don’t use the moxon vises, so can’t really comment on how to make them work.
James Hutchison
How critical is the apron width? The drawing specifies 11 1/2″, but in reality the precise dimensions are likely to be determined by the wood available to laminate together to make it, unless we rip one to width (a daunting job with beginner sawing/saw sharpening skills). Mine are both coming up a bit under 11″ which I presume is fine, but I would be interested to know what you would consider to be an acceptable range. Presumably there’s a trade-off between bench rigidity vs clearance for things like tool storage cabinets beneath the bench?
A: The minimum to use would be 9”/230mm and the ideal is slightly wider. However, you have to make sure that you have enough width to bolt through the apron below the crossrails. Wider doesn’t cause an issue.
I’d be interested to know if you have any tips for sawing a beam precisely in half? I’ve left my legs a bit long to start with, which meant that I could just get 4 out a single 3.6m 3×4″ timber. This meant cutting the beam into quarters (i.e. half and then halves), but inevitably these ended up a few mm out meaning that I now have different length legs, and I’m finding it a challenge to plane the end grain down to length on such a large piece whilst still keeping the end square. I’ll probably trim them down to your suggested length eventually so as long as those cuts are accurate it shouldn’t be a problem, but I’d be interested to know if you have any tips, either for the initial cut or for final trimming to length.
A: Paul shows how to crosscut accurately in this video. When you are using the pieces either side of the saw cut, make two knife walls a few mm apart for the saw kerf plus a tiny bit extra, then you can plane to the lines: https://woodworkingmasterclasses.com/videos/stock-preparation/preparing-stock-joinery/
Alexander Dergachev
I’ve watched the old videos of a workbench build and now I’m following this new build which has a slightly different design. I’ve also watched a lot of videos with Paul showing different techniques and I noticed that Paul at some point was working on a bench which is the old youtube series design with two bench top parts with a well in between, but on more recent videos he works on a different bench. For me it looks like a bench with the new design (size wise) but the bench top is wider and covers the well part as well, and the well itself is screwed to the side of the bench instead of being a part of the bench top. Was the current design a result of Paul working on that bench of his and he just changed it slightly to incorporate the well into the bench top instead of screwing it to the side, or does he have his bench top wider since he needs more space and the current design is for less experienced audience who most likely won’t need such a big bench as Paul has?
It was a long message so sorry hope it makes sense 🙂 Im just curious because I currently have a bench which is more or less the same width as this current design but without a well, and I have concerns if a bench top which is just a half of what I have now will be enough, or should I modify the design slightly and build something similar to what Paul uses in the videos.
A: Paul has made and used benches as shown in the new series for some time and are the ones we use when we have classes. The double sided bench allows you to work on larger pieces, gives you more surface space or allows two people to use it. The bench used in many of the videos with the full width top was made in order to get the camera closer to the work, but is not otherwise particularly recommended. Paul misses having the well space for tools, which is why he added it.[/toggle]

Phil Adams
Manager of Woodworking Masterclasses


Paul; Would you recomend having a stretcher between the legs?
having housings in the aprons (that hold the legs perpendicular to the top) essentially eliminates the need for the stretcher.
a slight correction: housings + wedges (since the wedges play very important role here)
Awesome! Thanks guys for answering! Even though I’ve already settled with the current design I still appreciate a lot that you took your time answering so many questions!
Phil, I am truly impressed how well and courteous you answer everyone’s questions. If people paid even a minimal amount of attention to the videos; 90 % of the information they seek, is already covered in the videos. Your patience and cordial demeanor ought to be applauded.
Thanks Tad, that’s very kind of you. We want to help everyone to get started with their woodworking, as I know it can be very intimidating. So anything we can do to help people feel prepared is worth the effort.
Thanks for this update. I’m in the process of making the second a frame, but got delayed with the cold weather. Where can I share pictures of my bench?
Nevermind my question, I saw the link to share pictures in the e-mail.
Phil, i built this work bench using a combination of resources. Paul’s book was my main ref but the videos both on YouTube and her on WWMC were used, chosing the methods and features that fit me, my skills, and the tools that were availible. Although I have seen and read many articles on how to improve this type bench, I kept mine as basic as pissible. I haven’t run into a single situation where this bench didn’t work without any of those modifucations. I used a Wilton quick release vice and have been very happy with that choice. Now that I’ve had that practice, maybe I’ll make a few more for my sons and G’kids.