Skip to content
Woodworking Masterclasses
Facebook Instagram
  • Register Now
  • Video Library
  • GalleryExpand
    • Bedside Cabinet GalleryExpand
      • Assembly Table Gallery
      • Bathroom Cabinet Gallery
      • Bench Stool Gallery
      • Blanket Chest Gallery
      • Bookends Gallery
      • Book Shelves Gallery
      • Breadboard-end Cutting Board Gallery
      • Carrying Tote Gallery
      • Chess Board Gallery
      • Chest of Drawers Gallery
      • Christmas Gallery
      • Coasters Gallery
      • Coat Rack Gallery
      • Coffee Table Gallery
      • Corner Shelf Gallery
      • Craftsman-style Lamp Gallery
      • Dining Chair Gallery
      • Dovetail Boxes Gallery
      • Fly Swat Gallery
      • Frame Saw Gallery
    • Foot Stool GalleryExpand
      • How to Make a Table
      • Joiner’s Mallet Gallery
      • Joiners’ Toolbox Gallery
      • Keepsake Box Gallery
      • Laptop Desk Gallery
      • Leaning Wall Shelf Gallery
      • Mitre Box Gallery
      • Occasional Table Gallery
      • Picture Frames Gallery
      • Rocking Chair
      • Sawhorse Gallery
      • Shaker-Style Bench Seat Gallery
      • Shaker Stool Gallery
      • Sofa Table Gallery
      • Stepladder Gallery
    • Trestle TableExpand
      • Tool Cabinet
      • Tool Chest Gallery
      • Walking Cane Gallery
      • Wall Brackets Gallery
      • Wallclock Gallery
      • Wall Shelf Gallery
      • Winding Sticks Gallery
      • Wooden Plane Gallery
      • Wooden Spokeshave
      • Wooden Tray Gallery
      • Workbench Gallery
      • Other user projects vol. I
      • Other user projects vol. II
      • Submit Photos to Gallery
  • About Us
  • News
  • FAQsExpand
    • General FAQs
    • Workbench FAQs
  • Contact
Account Login
Woodworking Masterclasses

Fitting Wedges

Search
Previous Back to: General Woodworking Discussions11 Replies

Welcome! / Forums / General Woodworking Discussions / Fitting Wedges

  • This topic has 11 replies, 5 voices, and was last updated 9 years, 3 months ago by Mark Armstrong.
  • Author
    Posts
  • Ken
    3 November 2013 at 3:34 pm #20745

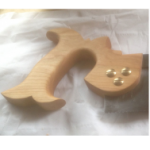
    When you fit wedges to a through tenon, dose it matter witch way round you put the wedge, as one side is straight. Pic might explain it better. pic is just for an example not the actual wedge.

    Cheers 😉

    Settings
    cpetersen1970
    3 November 2013 at 4:25 pm #20747

    Ken, from what I’ve seen perusing as many pics as I could find, it seems that nearly all of them have the “straight” side against the rest of the piece, with the “slanted” side facing outward towards the end of the tenon.

    Gustav Stickley also shows them with the flat side in and the slanted side out in several of his designs in a book of 62 craftsman furniture plans…they are shown this way in the plans/diagrams for several designs in this book.

    Paul or one of the others may have something else to say on the matter, but from what I can tell, this seems to be fairly standard.

    I think this begs another question, however. Does the mortise itself need to be slanted on one end as well? It would seem to me that this would be the case, but perhaps not.

    Settings
    Greg Merritt
    3 November 2013 at 4:55 pm #20748

    This is the way I understand it…

    http://hillbillydaiku.com

    Settings
    Ken
    3 November 2013 at 5:08 pm #20751

    Chris, Greg, thanks guys. Ok I’m not explaining this very well, this is what I’m thinking of

    Settings
    Greg Merritt
    3 November 2013 at 5:17 pm #20753

    OK got it…sorry Ken…cut your wedges as shown and you don’t have to worry about it…

    http://hillbillydaiku.com

    Settings
    Ken
    3 November 2013 at 5:21 pm #20755

    Greg, thanks buddy, nice one 😉

    Settings
    Greg Merritt
    3 November 2013 at 5:30 pm #20756

    Your welcome Ken.
    Generally speaking, if you have an asymmetric wedge, the sloped side should face the direction in which you want to apply the force. In this case, towards the wall of the mortice. The only issue in cutting asymmetric wedges is that during assembly it can really slow you down looking at every wedge to see which way to install it.
    Hope that helps.

    http://hillbillydaiku.com

    Settings
    Ken
    3 November 2013 at 5:39 pm #20758

    Thanks again buddy, yes that explains it perfectly.

    Settings
    Jason
    3 November 2013 at 6:16 pm #20759

    Hate to play devils advocate, but does it really matter? I’ve never really paid attention to it.

    Settings
    Greg Merritt
    3 November 2013 at 6:33 pm #20760

    It depends on the scale and application. As the joint increases in size then it becomes much more important to have the orientation of the wedge as stated above. If the wedge is being used in an application similar to my first drawing then it always matters. The wedge is used to apply force perpendicular to the direction in which is inserted. In order to stay inserted the wedge relies on friction. To have this friction, you need to mate the surfaces of the wedge as closely as possible to the mortice in which you are inserting it. In small wedged tenons, like Ken asked about, the wedge is generally inserted into a saw kerf. As the joint increases in size you need to actually saw out a wedge area in which to insert the wedge. Thus making the orientation and/or shape of the wedge very important.
    http://hillbillydaiku.com

    Settings
    Jason
    3 November 2013 at 8:30 pm #20769

    Cool! I’ve only wedged small stuff, and added glue so it wouldn’t work its way out. I’ll keep the grain orientation in mind in the future.

    Settings
    Mark Armstrong
    3 November 2013 at 9:50 pm #20772

    Wedges have the straight side against the tenon and the angled edge to edge of mortise. As you normally make mortise slightly wider the side you nock wedges in.
    If putting wedge in from each end of tenon down a saw kerf keep angle facing the edge of mortise in fact the same way as above as the angle of the wedges above this pushes tenon out to edge of mortise.

    Also remember to tap one wedge then tap the other wedge until you have got enough of both wedges down to make a good fixing. DO NOT drive one wedge all the way in then the other.

    You can also put wedges in a blind mortise and tenon joint. Make mortise slightly angled so wider at the bottom. Then putting saw kerf from each side of tenon. Do not make wedges too long as could split timber. Insert wedges into saw kerf and assemble joint. As end of wedges hit bottom of mortise the wedges spread the tenon almost giving a dovetail effect. This is normally a one shot operation once assembled would be very difficult to get apart. This joint known as fox wedged mortise and tenon.

    Tusk tenons like what Greg showed firstly. I was taught to do that in a similarly way that you would draw bore pin. In that you would offset mortise by say 1/16th” through the extended bit off the tenon.

    I did learn some stuff at college

    Dagenham, Essex, England

    Settings
  • Author
    Posts
  • You must be logged in to reply to this topic.
Log In

Security and Payments

Payments on this site are processed using stripe.com and gocardless.com. Customer's credit card details or bank details are stored on the secure servers of stripe.com or gocardless.com This entire site is secured by SSL.

About Our Company

Woodworking Masterclasses is a trading name of Rokesmith Ltd

Rokesmith Ltd


About Rokesmith Ltd | Privacy Policy | Terms and Conditions | About Us


Useful Links

© 2023 - Rokesmith Ltd

Loading...
  • Register Now
  • Video Library
  • Gallery
    • Bedside Cabinet Gallery
      • Assembly Table Gallery
      • Bathroom Cabinet Gallery
      • Bench Stool Gallery
      • Blanket Chest Gallery
      • Bookends Gallery
      • Book Shelves Gallery
      • Breadboard-end Cutting Board Gallery
      • Carrying Tote Gallery
      • Chess Board Gallery
      • Chest of Drawers Gallery
      • Christmas Gallery
      • Coasters Gallery
      • Coat Rack Gallery
      • Coffee Table Gallery
      • Corner Shelf Gallery
      • Craftsman-style Lamp Gallery
      • Dining Chair Gallery
      • Dovetail Boxes Gallery
      • Fly Swat Gallery
      • Frame Saw Gallery
    • Foot Stool Gallery
      • How to Make a Table
      • Joiner’s Mallet Gallery
      • Joiners’ Toolbox Gallery
      • Keepsake Box Gallery
      • Laptop Desk Gallery
      • Leaning Wall Shelf Gallery
      • Mitre Box Gallery
      • Occasional Table Gallery
      • Picture Frames Gallery
      • Rocking Chair
      • Sawhorse Gallery
      • Shaker-Style Bench Seat Gallery
      • Shaker Stool Gallery
      • Sofa Table Gallery
      • Stepladder Gallery
    • Trestle Table
      • Tool Cabinet
      • Tool Chest Gallery
      • Walking Cane Gallery
      • Wall Brackets Gallery
      • Wallclock Gallery
      • Wall Shelf Gallery
      • Winding Sticks Gallery
      • Wooden Plane Gallery
      • Wooden Spokeshave
      • Wooden Tray Gallery
      • Workbench Gallery
      • Other user projects vol. I
      • Other user projects vol. II
      • Submit Photos to Gallery
  • About Us
  • News
  • FAQs
    • General FAQs
    • Workbench FAQs
  • Contact
Login Account

Insert/edit link

Enter the destination URL

Or link to existing content

    No search term specified. Showing recent items. Search or use up and down arrow keys to select an item.
      Search