Handyman Tool Box Build
Welcome! / Forums / General Woodworking Discussions / Projects / Handyman Tool Box Build
- This topic has 24 replies, 10 voices, and was last updated 11 years, 2 months ago by
 Ron Harper.
-
AuthorPosts
-
 25 April 2013 at 12:15 am #11348
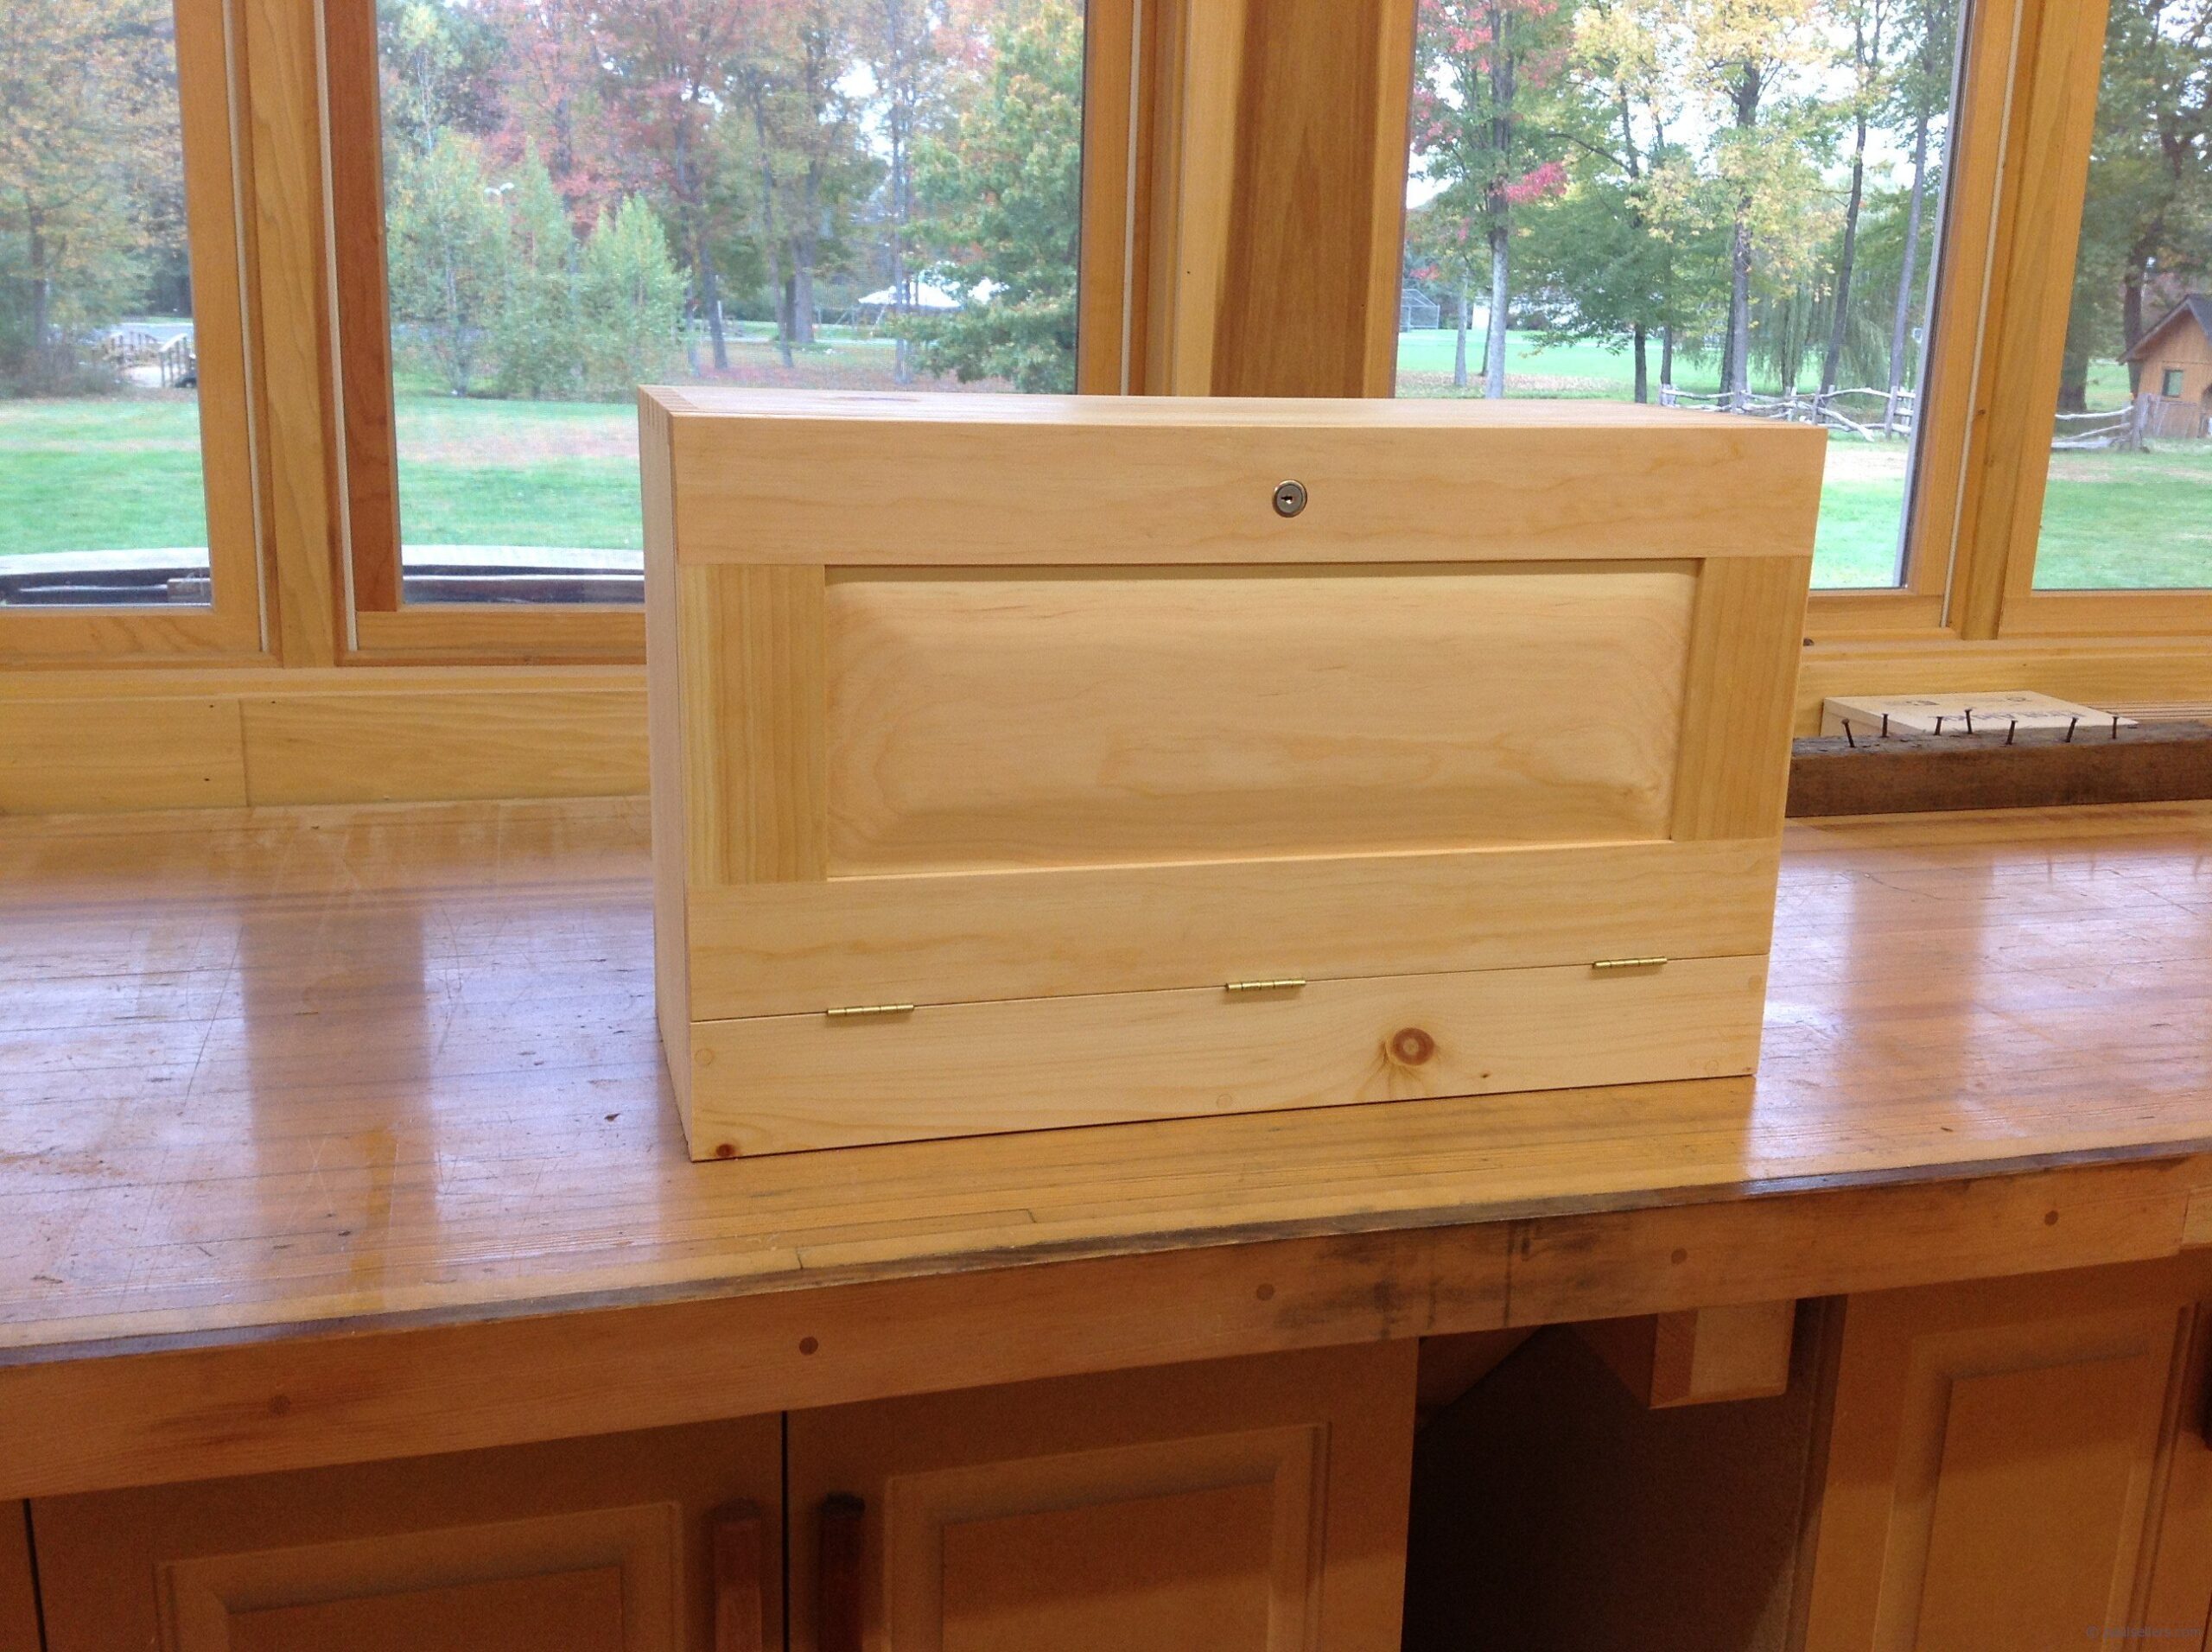
I’m called on quite a bit by family and friends to do what I consider handyman type jobs. Mostly because I work for free I think. I have a set of tools handy that I keep for these jobs. I’ve tried keeping them in a bucket and I’m currently using one of those tool bag contraptions. When I saw Paul’s version of a journeyman chest, I knew that is what I wanted for these tools. So a couple of weeks ago I was given several pieces of offcut pine. I purchased one longer board and jumped in with both feet. It’s something of a trial by fire but its coming along pretty well. I probably should have waited for Paul’s series on this type of tool box but I couldn’t wait. The dimensions are as follows: 26″(W) x 10″(H) x 7 1/2″(D)
Attachments:
You must be logged in to view attached files.


 25 April 2013 at 8:05 pm #11384
Greg
I dont think you have lost much by not waiting it looks pretty dam good to me.
What are the plugs showing on the lid?
25 April 2013 at 8:26 pm #11386David…thanks…and I think your looking at the back panel. 1st photo shows the front and the lid/door and the 2nd photo shows the rear panel. The rear panel is glued and screwed into place. The screws are countersunk and plugged. The bottom rail on the front is treated the same. I guessed at this by looking at this photo on Paul’s website.
 26 April 2013 at 10:51 am #11393
Great job as usual, Greg. Considering you didn’t have a plan it’s turning out very well indeed!
I was looking at the Cabinetmaker’s Tool Chest (which is actually more of a handyman tool box) in Tom Fidgen’s book (Made By Hand) the other day, which takes an entirely different approach to Paul’s design. Have you seen that one? There are some details and a SketchUp plan here if you fancy checking it out to compare and contrast: http://www.theunpluggedwoodshop.com/made-by-hand/project-1
George.
26 April 2013 at 12:21 pm #11395Thanks George…I looked really hard at Tom Fidgen’s tool chest. He did a video series showing him building one on youtube, here. It didn’t quite meet my needs though. I needed this tool box to hold a 2 foot level and a full size framing square.
In the end, I just like the looks of this style better.
30 April 2013 at 3:25 am #11424Done! Finally got this tool box completed. It turned out pretty well. Learned a lot and had fun. Used the cheap hardware from the home center. The worn thru areas of paint started as an accident and then I decided to go with. I’ll be less worried about the first scuff or ding this way I think. The finish is soldier blue milk paint with shellac and wax. It’s got that “lived in” feel to it.
What I learned:
1. Work flow is very important. When Paul presents his tool box the work flow is the important thing with a project like this. Several times I back tracked to complete something.
2. Build the rear panel and door a little oversize so you can trim them to fit. You don’t want to have to take a couple thousandths off the entire case, trust me I know.
3. Installing three hinges is a pain!Attachments:
You must be logged in to view attached files.
30 April 2013 at 9:02 am #11430Wow Greg, very cool, just simply beautiful, colour and small ornament, very nice))
-
AuthorPosts
- You must be logged in to reply to this topic.