Skip to content
Woodworking Masterclasses
Facebook Instagram
  • Register Now
  • Video Library
  • GalleryExpand
    • Bedside Cabinet GalleryExpand
      • Assembly Table Gallery
      • Bathroom Cabinet Gallery
      • Bench Stool Gallery
      • Blanket Chest Gallery
      • Bookends Gallery
      • Book Shelves Gallery
      • Breadboard-end Cutting Board Gallery
      • Carrying Tote Gallery
      • Chess Board Gallery
      • Chest of Drawers Gallery
      • Christmas Gallery
      • Coasters Gallery
      • Coat Rack Gallery
      • Coffee Table Gallery
      • Corner Shelf Gallery
      • Craftsman-style Lamp Gallery
      • Dining Chair Gallery
      • Dovetail Boxes Gallery
      • Fly Swat Gallery
      • Frame Saw Gallery
    • Foot Stool GalleryExpand
      • How to Make a Table
      • Joiner’s Mallet Gallery
      • Joiners’ Toolbox Gallery
      • Keepsake Box Gallery
      • Laptop Desk Gallery
      • Leaning Wall Shelf Gallery
      • Mitre Box Gallery
      • Occasional Table Gallery
      • Picture Frames Gallery
      • Rocking Chair
      • Sawhorse Gallery
      • Shaker-Style Bench Seat Gallery
      • Shaker Stool Gallery
      • Sofa Table Gallery
      • Stepladder Gallery
    • Trestle TableExpand
      • Tool Cabinet
      • Tool Chest Gallery
      • Walking Cane Gallery
      • Wall Brackets Gallery
      • Wallclock Gallery
      • Wall Shelf Gallery
      • Winding Sticks Gallery
      • Wooden Plane Gallery
      • Wooden Spokeshave
      • Wooden Tray Gallery
      • Workbench Gallery
      • Other user projects vol. I
      • Other user projects vol. II
      • Submit Photos to Gallery
  • About Us
  • News
  • FAQsExpand
    • General FAQs
    • Workbench FAQs
  • Contact
Account Login
Woodworking Masterclasses

Making a headboard

Search
Previous Back to: Projects17 Replies

Welcome! / Forums / General Woodworking Discussions / Projects / Making a headboard

  • This topic has 17 replies, 8 voices, and was last updated 8 years ago by George Fulford.
Viewing 15 posts - 1 through 15 (of 18 total)
1 2 →
  • Author
    Posts
  • jude
    30 August 2015 at 9:15 am #129869

    Here are some photos of me making a headboard for a bed.

    First up: Making a rough mock-up. Testing the mock-up against reality.

    • This topic was modified 8 years, 1 month ago by jude.
    Attachments:
    You must be logged in to view attached files.
    Settings
    jude
    30 August 2015 at 9:17 am #129873

    Next up I modeled the mock-up in Sketchup and changed some things around.

    I changed the amount of upper slats to see how that looks.

    • This reply was modified 8 years, 1 month ago by jude.
    Attachments:
    You must be logged in to view attached files.
    Settings
    jude
    30 August 2015 at 9:19 am #129877

    Next I changed the lower slats to line up with the upper slats. Then it was off to the lumber yard to do some shopping.

    Attachments:
    You must be logged in to view attached files.
    Settings
    Salko Safic
    30 August 2015 at 12:18 pm #129880

    I like the model I think it’s gonna look great.

    Settings
    George Fulford
    30 August 2015 at 6:29 pm #129889

    Looking good, Jude 🙂 Just have one question, though. Why does it look like there is a half-lap on the bottom of the legs? I don’t think I’ve ever seen that before.

    Settings
    jude
    30 August 2015 at 9:53 pm #129896

    @georgeinnwfla George, those bits on the ends of the legs are a couple of bits of plywood I screwed on so that I could get the overall height figured out. I adjusted the height by just unscrewing the plywood and attaching it up or down until I got it right.

    Settings
    George Fulford
    31 August 2015 at 7:17 pm #129970

    That’s brilliant! I never would have thought of that 🙂 I didn’t notice the shadow line at the top of the ply or the screwheads, probably I need to wear my glasses more often. 🙂

    • This reply was modified 8 years, 1 month ago by George Fulford.
    Settings
    jude
    3 September 2015 at 12:00 am #130039

    Next thing I did was go buy some lumber. I squared it up and planed it flat.

    I chopped out some mortises with a guide block as an aid. The rails needed tenons cut and these had to be done at the bench and sawed by hand. It was a bit of a job handling these as they’re nearly six feet long.

    One of the tenons was cut a bit thin, so I glued on an extra piece of oak on the cheek and then pared it down to shape.

    I dry fit the rails into the legs. The tenons needed to be hammered home but they weren’t too tight. The frame of the headboard can hold itself together without glue, so I am happy about that.

    Attachments:
    You must be logged in to view attached files.
    Settings
    jude
    3 September 2015 at 12:07 am #130043

    Next I cut up the lower slats and ran grooves in each one on the table saw to hold plywood.

    The legs also needed a groove to hold plywood. I did this groove with a Stanley 50 plane and chisel.

    I dry fit the lot to check before I went any further.

    Attachments:
    You must be logged in to view attached files.
    Settings
    jude
    3 September 2015 at 12:10 am #130047

    The upper slats needed tenons cut on them too. I used the table saw along with knife walls etc to keep them clean.

    Also, each tenon needs a mortise. I cut them out with a Forstner bit on the drill press as I had never tried that approach before. They still needed cleaning up with a chisel.

    With this all done I was able to dry fit the lot.

    Attachments:
    You must be logged in to view attached files.
    Settings
    jude
    3 September 2015 at 12:18 am #130050

    Gluing up was a job in itself. Not too hard, but I had to keep cool when doing it.

    The two top rails were glued first with the small slats between them. W

    After setting up overnight, I glued in the lower slats with the plywood, and the lower rail.

    The next day I glued on the legs. I wanted to let a day go between glue-ups as I had to hammer a lot of joints home and was afraid of having some joint open up.

    With everything set up, I wiped on about five coats of thinned out polyurethane with plenty of time between each coat.

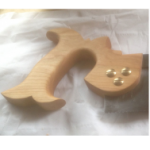
    I finally got around to installing the headboard and I’m pretty happy with the result and having a design come from my head and be fully realized.

    Attachments:
    You must be logged in to view attached files.

    Settings
    Greg Merritt
    3 September 2015 at 12:24 am #130053

    Looks fantastic Jude! Very nice work.

    Settings
    Mark Armstrong
    3 September 2015 at 12:07 pm #130058

    Well done Jude??

    Settings
    Matt McGrane
    4 September 2015 at 1:49 am #130065

    That’s great, Jude. Nice design and execution. I’m sure the glue-up phase was nerve-wracking.

    Do I see carpet end strips (strips of wood with many small nails protruding) under your project as the poly dries? That’s an interesting solution to keeping the project off the bench and letting air circulate.

    Settings
    jude
    4 September 2015 at 8:14 pm #130091

    Thanks, guys. It means a lot.

    Matt, the finished wood was set on carpet strips. You are correct.

    Settings
  • Author
    Posts
Viewing 15 posts - 1 through 15 (of 18 total)
1 2 →
  • You must be logged in to reply to this topic.
Log In

About Our Company

Woodworking Masterclasses is a trading name of Rokesmith Ltd

Rokesmith Ltd


About Rokesmith Ltd | Privacy Policy | Terms and Conditions | About Us


Useful Links

© 2023 - Rokesmith Ltd

  • Register Now
  • Video Library
  • Gallery
    • Bedside Cabinet Gallery
      • Assembly Table Gallery
      • Bathroom Cabinet Gallery
      • Bench Stool Gallery
      • Blanket Chest Gallery
      • Bookends Gallery
      • Book Shelves Gallery
      • Breadboard-end Cutting Board Gallery
      • Carrying Tote Gallery
      • Chess Board Gallery
      • Chest of Drawers Gallery
      • Christmas Gallery
      • Coasters Gallery
      • Coat Rack Gallery
      • Coffee Table Gallery
      • Corner Shelf Gallery
      • Craftsman-style Lamp Gallery
      • Dining Chair Gallery
      • Dovetail Boxes Gallery
      • Fly Swat Gallery
      • Frame Saw Gallery
    • Foot Stool Gallery
      • How to Make a Table
      • Joiner’s Mallet Gallery
      • Joiners’ Toolbox Gallery
      • Keepsake Box Gallery
      • Laptop Desk Gallery
      • Leaning Wall Shelf Gallery
      • Mitre Box Gallery
      • Occasional Table Gallery
      • Picture Frames Gallery
      • Rocking Chair
      • Sawhorse Gallery
      • Shaker-Style Bench Seat Gallery
      • Shaker Stool Gallery
      • Sofa Table Gallery
      • Stepladder Gallery
    • Trestle Table
      • Tool Cabinet
      • Tool Chest Gallery
      • Walking Cane Gallery
      • Wall Brackets Gallery
      • Wallclock Gallery
      • Wall Shelf Gallery
      • Winding Sticks Gallery
      • Wooden Plane Gallery
      • Wooden Spokeshave
      • Wooden Tray Gallery
      • Workbench Gallery
      • Other user projects vol. I
      • Other user projects vol. II
      • Submit Photos to Gallery
  • About Us
  • News
  • FAQs
    • General FAQs
    • Workbench FAQs
  • Contact
Login Account
Search