Making Recess for Paul's Diamond Plate Holder
Welcome! / Forums / General Woodworking Discussions / Making Recess for Paul's Diamond Plate Holder
- This topic has 9 replies, 8 voices, and was last updated 11 years, 5 months ago by
 Justjoe.
-
AuthorPosts
-
13 February 2013 at 3:37 pm #7854
Hello everyone,
I am in the process of making the diamond plate holder that Paul uses in his sharpening setup and have a few questions that maybe someone can help with…
I know the recess is 1/8″ deep, but how are they made? I understand the concept of making a hinge mortice,s topped dado, housing dado, etc, but all these have one end open to determine the depth . I assume the recess is made the same way, but can someone walk me through the steps when all four sides are closed? I assume you use the same tools – router plane, chisel, and marking knife.
Since this is just a shop applicance, I would pull out the router with a template and do this, but figure its good practice with only hand tools and its only a shop accessory
Thanks for your help.
 13 February 2013 at 3:50 pm #7855
Hi Michael,
I made mine by marking out where I wanted the stones to go, making a knife wall along the cross-grain sides of where the recesses were to go, chiselling down to deepen the knife wall, then removing a lot of material from the middle with the chisel before going all the way to depth with the router plane. You can’t really make a knife wall on the ends of the recess if they’re parallel to the grain direction so to get a clean recess you can deepen the knife wall at the sides, making the wall really shallow but long (1.5″ at each side if your stones are 3″ wide).
I hope this makes sense. It’s effectively just chopping a double-stopped dado.
George.
13 February 2013 at 4:44 pm #7876George,
This helps greatly -Thank you for the detailed explanation.
13 February 2013 at 5:01 pm #7878Question: Wouldn’t it be less work to get a piece of wood flat and then add stops on top to keep the stone in place?
I guess that wouldn’t look as good though, but if someone’s in a hurry I can’t see there would be too many problems with it?
J-P
I’m with George on this one ,made mine using the same method.I used 18mm ply for the base and a tenon saw cut on the knife wall to deepen it.I let the cuts run through to the outside of the board in each case as these can act as channels for water run off as you are sharpening.
 13 February 2013 at 5:33 pm #7882
I did it the same way George described. Knife walls, chisel, then to the router. I made mine with 4 recesses and added an “extra course” stone. I didn’t silicone my plate in yet, becasue I wanted to make sure all was good before comitting. I found it works great, but the plates will, on occasion, walk out of the recess. I guess that will be resolved when I silicone them in place today. If you don’t want to use silicone, make your recess just a bit deeper. Make sure to add a bench hook too.
In emails with Paul, I learned it is important not to put the strop in this appliance. Keep it as a stand alone piece. That way, you can turn it perpendicular to your body and get tons of downward pressure as you do the final polishing.
Paul’s technique and this holding system has created a better edge, in substantially less time, than anything else I have ever used. THANKS!!!
Attachments:
You must be logged in to view attached files. 13 February 2013 at 6:15 pm #7888
I took the lazy man’s way out. I got a piece of 1/8″ plywood. I then layed out in pencil the dimensions of the stones using the “feet on the underside of the stones” for the dimensions so that the stones would stand proud from the surface of the plywood. Drilled a hole and keyhole sawed the space to receive the stone. (You can scroll saw or jig saw too.) Then just glue the plywood to whatever else you would be useing for the bottom of the recess whether it is a piece of 1/4″ ply, pine, poplar, etc…
Easy. Functional and didn’t take much time. It is going to get wet and dirty. I suppose you could topcoat it, but, I didn’t bother sinc eit is only a tool and I could build another easily severla times over for the price of the tipcoat.
Hope that helps.
Jim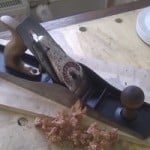 13 February 2013 at 7:54 pm #7896
That edge looks sharp to me David 🙂
I also took the lazy route by screwing dividers on a piece of plywood. It looks like recesses 🙂 I painted it too so it will live longer. Works exceptionally well. Some things don’t have to be fancy.

[quote quote=7896]That edge looks sharp to me David I also took the lazy route by screwing dividers on a piece of plywood. It looks like recesses I painted it too so it will live longer. Works exceptionally well. Some things don’t have to be fancy. [/quote]
Almost exactly what I did. Just glued and pinned down the dividers with panel pins onto plywood. To stop the dividers spiting I pre-drilled the holes by cutting of the end of the panel pin and using that as a drill bit. A trick Paul teaches on his course. I screwed a beam along the bottom as a stop. Then I painted jusr the top with acrylic. I think sealing the top is a good idea, it stops all the dirt getting in all the pores and is just really easy to clean off.
-
AuthorPosts
- You must be logged in to reply to this topic.