Making the same error ripping boards
Welcome! / Forums / General Woodworking Discussions / Tools and Tool Maintenance/Restoration / Making the same error ripping boards
Tagged: `
- This topic has 16 replies, 12 voices, and was last updated 8 years, 9 months ago by
 Matt McGrane.
-
AuthorPosts
-
 2 May 2015 at 6:40 pm #126934
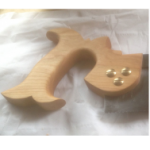
I’ve been trying to rip a 2X4 to make a quick saw vice. The first cut went perfectly, over two feet of rip staying less than 1/8 of an inch from my gauge line, allowing me to quickly plane down to the line. Then I tried the cut in the middle to fit the saw plate into.
And I keep making the same mistake and I can’t figure out what it is. Sooner or later the cut starts to turn to the Left. I’m Left handed. And it doesn’t just take on an angle, it cuts a curve as the photo should show. This last board I didn’t try to correct, I just kept cutting, paying careful attention to my body position but otherwise not fighting the saw. I’ve tried dropping the saw hand, cutting one side of the board, then turning the board around to cut the other side, etc. I get the same result.
As you can see, the cut starts off looking quite straight. Then it starts to pull away, creating a 5/16″ variance in the first 11″. Over the next 11″ that becomes a 1 11/32″ (one and eleven thirty seconds inches) creating not just an angle but a curve with a flat panel saw.
Interestingly I’ve TRIED to cut curves and to reverse the curve with this saw but have been unable to do either.
Because the first cut went perfectly I’m confident it’s something I’m doing. I’m keeping my saw arm swinging cleanly and the plate isn’t binding in the cut much but I’m quite consistently getting these curves.
HOW am I doing this???
Attempting to add multiple pictures so you can see what I’ve done.
[attachment file=”20150502_094419.jpg”]
[attachment file=”20150502_094432.jpg”]
[attachment file=”20150502_094454.jpg”]
Part of the reason I’m doing this project is for the practice in ripping but at this point I feel I’m practicing my errors.
Any insight appreciated.
Attachments:
You must be logged in to view attached files. 2 May 2015 at 8:22 pm #126938
That’s a pretty pronounced curve! Have you tried sawing from one side then the other to try to balance any tendency of the saw to go off the line? That might help.
How’s the set on your saw? One side may have more set, throwing you off.
 3 May 2015 at 8:33 am #126950
I had exactly the same trouble on exactly the same task. So I sharpened and set my saw a little more aggressively, so I didnt need to use so much force, let the saw do the work….my next effort was much better.
3 May 2015 at 3:57 pm #126954Can you show us the amount of sure or bend in your saw plate via a picture?
3 May 2015 at 4:23 pm #126955Hi John,
I was wondering have you seen the ‘A tip for sawing straight” under the forum woodworking videos. It has a link to a youtube video that has some interesting comments on sawing.
After watching that youtube I was wondering if you could film yourself or get somebody to film you making the cut. If it is a ‘wobble’ in your arm/wrist/technique the film may show it up and it would be something to work on.
Cheers David
 4 May 2015 at 3:30 am #126968
They say that if your saw cut curves to the left, then the left side of the saw has more set than the right. You can try “stoning” the left side, that is, lightly rub the left side of the teeth with a diamond stone or other sharpening stone. Go from heel to toe, and not too heavily. Then make a test cut. Check the result. If the curve is still there, but less, then take another pass with the stone and try again.
Good luck and keep us posted.
 4 May 2015 at 4:36 am #126971
I have trouble sawing a straight line too. Tried to blame it on the saw settings but I did the same thing with all of my saws.. so I’ve tried to go slower and keep the saw lighter in the hand and also be very aware of my master eye and keeping it in the same place. Things are going much better but I’m still always trying to find something to practice on.
Cheers

 4 May 2015 at 6:25 pm #126982
Do you have another saw you could try? I assume you have already tried sighting down the plate to check for kinks, bends, and other obvious defects.
Gripping the saw handle too tightly can tend to push a cut in the direction of the dominant hand, so in your case to the left. Try it, hold the saw in your hand gently then squeeze tight, you will probably see it turn to the left. Frustration can cause you to grip tighter so it is possible that your first cut went well because you were relaxed, and then tension crept in when things started going wrong.
Perhaps you have someone to watch you saw? Or could set up a video? It’s embarassing I know but often it’s much easier for an observer to see our technique defects.
It could well be uneven set, but of course if you start down the path of stoning one side to sort it out you run the risk of creating the uneven set you were trying to correct. I’d try to rule out other possibilities first, but this is definitely something to try once you have.
A little more set may solve the problem; for some of my saws there is a definite “butter zone” where the saw cuts straight, but a little more set creates an unnecessarily jagged cut and a little less produces problems like yours. Some subtle defect I guess causes these saws to veer and a little extra room in the kerf keeps things peachy.
Gun to my head, I’d say too little set, with the clincher being that your saw followed the same curve from both sides of the board when a defect in technique or other saw defect would be less likely to do this.
Matt
What really helped me get better sawing to the line is dropping my hand low every so often to create a kerf. Then once you have a couple inches of kerf raise up again to a better angle and saw till you catch up and just keep repeating that process till done. Give this a try if you aren’t already doing so. I haven’t built a saw bench yet so generally for long rips i am clamping the board to my bench. A lot higher than optimal. I have a much harder time staying true when sawing vertically like Paul does quite a lot. It looks so easy in the videos!
Something else I notice when my technique is getting sloppy is the tip of the saw flapping around when I pull back. I know I’m not centered very well if that starts happening.
11 May 2015 at 2:32 am #127077You say that the first cut went perfectly. Are you using the same saw for subsequent cuts? Can you tell us about the saw you are using (perhaps a pictures)? Are you using a sawyers bench or holding the wood in the vise? As you cut, is the saw plate (and kerf) perpendicular to the face of the board? Are you using the same length of the saw for both the first cut and subsequent cuts? (I ask this because maybe the set is just fine on part of the saw but incorrect on other parts.)
Also, I note that there is a pretty serious knot in that wood. Does the same thing happen in clear wood?
 18 May 2015 at 8:58 pm #127234
Your saw is out of whack.
Also check your stance line you nose along the saw plate, hold the saw very lightly. Let the saw teeth do the work. When more confidant more force can be applied. Once you get into a cut properly you can put some real force behind saw and you put both your hands on handle.
I would try another known good saw.
Get a barometer for how a saw should work.
As suggested above lowering your saw to a lower angle creates a kerf for the saw plate to follow. Once that has been done for a few strokes, you can raise the angle of saw to optimum of 60 degrees. Repeat above proccess as you go along timber. Will help you adjust to keep to line.
On timber 2″ and thicker, I would probably work from both sides of timber, saw about 6 inches then flip over timber, equal the cut that side, flip over repeat along length of timber. I would use two gauge lines just over the thickness of saw kerf, and saw in between gauge lines.
You are using construction lumber by the look of it. I would re sharpen and over set the saw. Test it in a cut it may feel a little sloppy, but see if it track straight. You can always take a little of the set away using PS’s hammer trick.
For rip sawing best to do on a saw horse or saw bench as downward strokes are the way the saws are properly intended to be used.
Less set on a saw for hard woods, more set for softwoods.
Hope helps 15 July 2015 at 9:44 pm #128546
Just a follow up. I found a video (link below) that mentioned the problem I was having and attributed it to too much set as several other people above mentioned. The narrator suggested that using a small diamond sharpener to reduce the metal on the side that was over-set was not an ideal solution but that it worked.
I put my panel saw in my vice leaving about 2″ of plate sticking up and I ran my coarse diamond stone down it (with about 2lbs of pressure) three times. Then I tried ripping with it again. I seem to be able to cut just fine now.
I’ll do some more extensive testing and if anything comes up I’ll follow up here but for now I’m calling this “fixed”.
Thank you everyone who replied. I learned a lot on this thread both related and unrelated to my problem.
John Purser
Lie-Nielson saw sharpening video.
 16 July 2015 at 2:44 am #128550
Hey, that’s great John. Glad that worked out for you. There is a wealth of info online – you just have to be choosy about which info you trust. I’d trust Lie-Nielsen.
If you haven’t seen it, you should also see the video on saws and sharpening for Western saws by Andy Lovelock. It is very comprehensive and Andy is a fantastic teacher. I’ll warn you, though – it’s two hours long. Here it is.
 16 July 2015 at 3:20 am #128554
Yeah Matt, I’ve watched about half of that one in chunks. Good video.
John
-
AuthorPosts
- You must be logged in to reply to this topic.
