Skip to content
Woodworking Masterclasses
Facebook Instagram
  • Register Now
  • Video Library
  • GalleryExpand
    • Bedside Cabinet GalleryExpand
      • Assembly Table Gallery
      • Bathroom Cabinet Gallery
      • Bench Stool Gallery
      • Blanket Chest Gallery
      • Bookends Gallery
      • Book Shelves Gallery
      • Breadboard-end Cutting Board Gallery
      • Carrying Tote Gallery
      • Chess Board Gallery
      • Chest of Drawers Gallery
      • Christmas Gallery
      • Coasters Gallery
      • Coat Rack Gallery
      • Coffee Table Gallery
      • Corner Shelf Gallery
      • Craftsman-style Lamp Gallery
      • Dining Chair Gallery
      • Dovetail Boxes Gallery
      • Fly Swat Gallery
      • Frame Saw Gallery
    • Foot Stool GalleryExpand
      • How to Make a Table
      • Joiner’s Mallet Gallery
      • Joiners’ Toolbox Gallery
      • Keepsake Box Gallery
      • Laptop Desk Gallery
      • Leaning Wall Shelf Gallery
      • Mitre Box Gallery
      • Occasional Table Gallery
      • Picture Frames Gallery
      • Rocking Chair
      • Sawhorse Gallery
      • Shaker-Style Bench Seat Gallery
      • Shaker Stool Gallery
      • Sofa Table Gallery
      • Stepladder Gallery
    • Trestle TableExpand
      • Tool Cabinet
      • Tool Chest Gallery
      • Walking Cane Gallery
      • Wall Brackets Gallery
      • Wallclock Gallery
      • Wall Shelf Gallery
      • Winding Sticks Gallery
      • Wooden Plane Gallery
      • Wooden Spokeshave
      • Wooden Tray Gallery
      • Workbench Gallery
      • Other user projects vol. I
      • Other user projects vol. II
      • Submit Photos to Gallery
  • About Us
  • News
  • FAQsExpand
    • General FAQs
    • Workbench FAQs
  • Contact
Account Login
Woodworking Masterclasses

My first piece of furniture – sidecar cot in walnut and ash.

Search
Previous Back to: Projects10 Replies

Welcome! / Forums / General Woodworking Discussions / Projects / My first piece of furniture – sidecar cot in walnut and ash.

Tagged: ash, dovetails, drawboring, hand tools, mortice and tenon, poplar, sidecar cot, steambending, walnut, wedged tenons

  • This topic has 10 replies, 8 voices, and was last updated 6 years, 6 months ago by prbayliss.
  • Author
    Posts
  • markdennehy
    28 February 2017 at 2:25 pm #309609

    Original plan

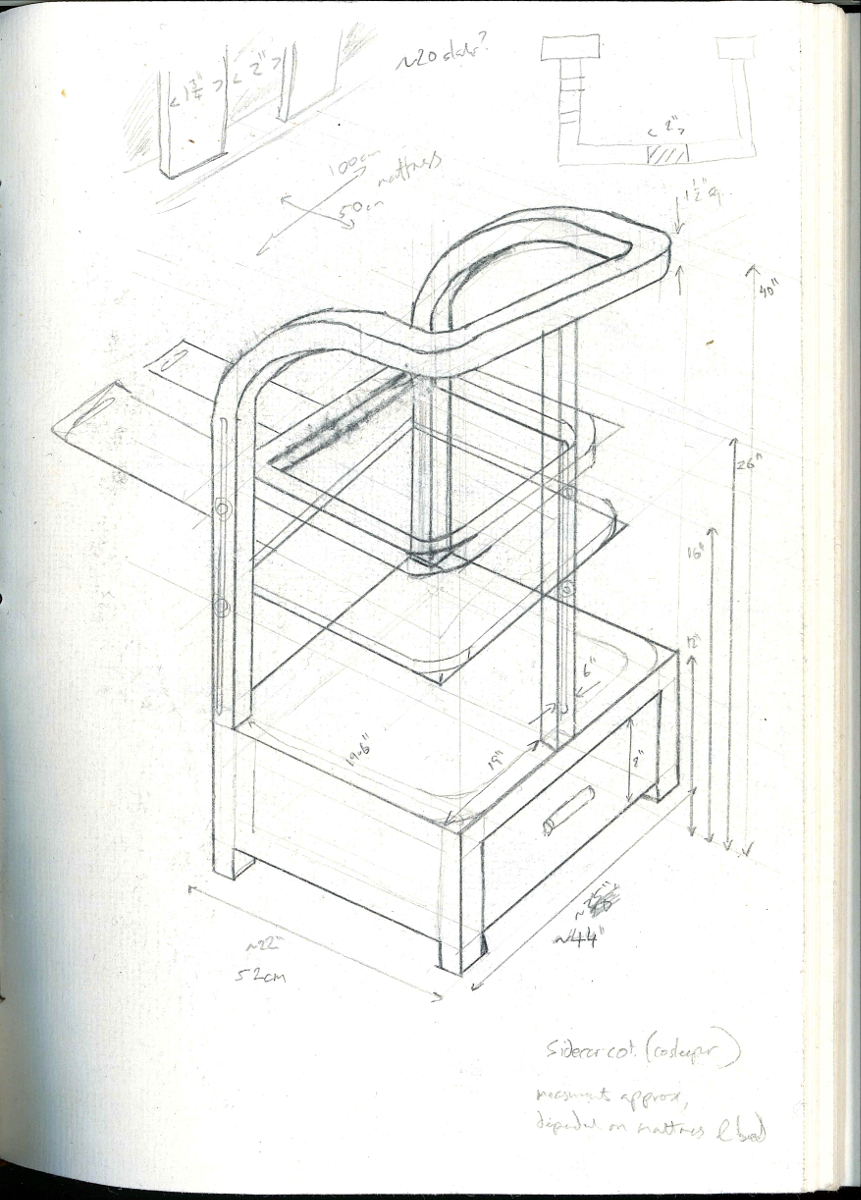
    Started off with this idea and this rough-sawn timber:

    Original timber

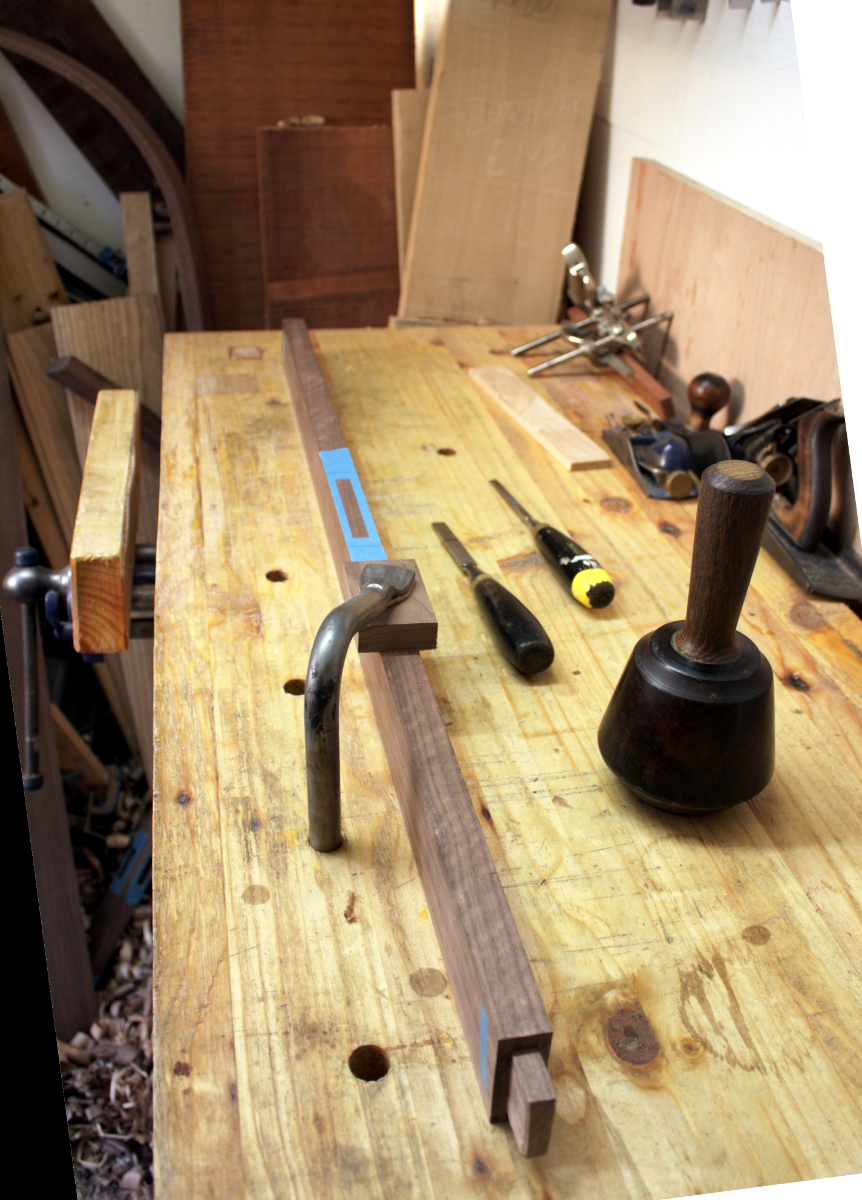
    Insert five months of learning how to do stuff, buying new tools, and at least two months spent learning how to be a bandsaw and a planer thicknesser, and you get this:

    Finished cot

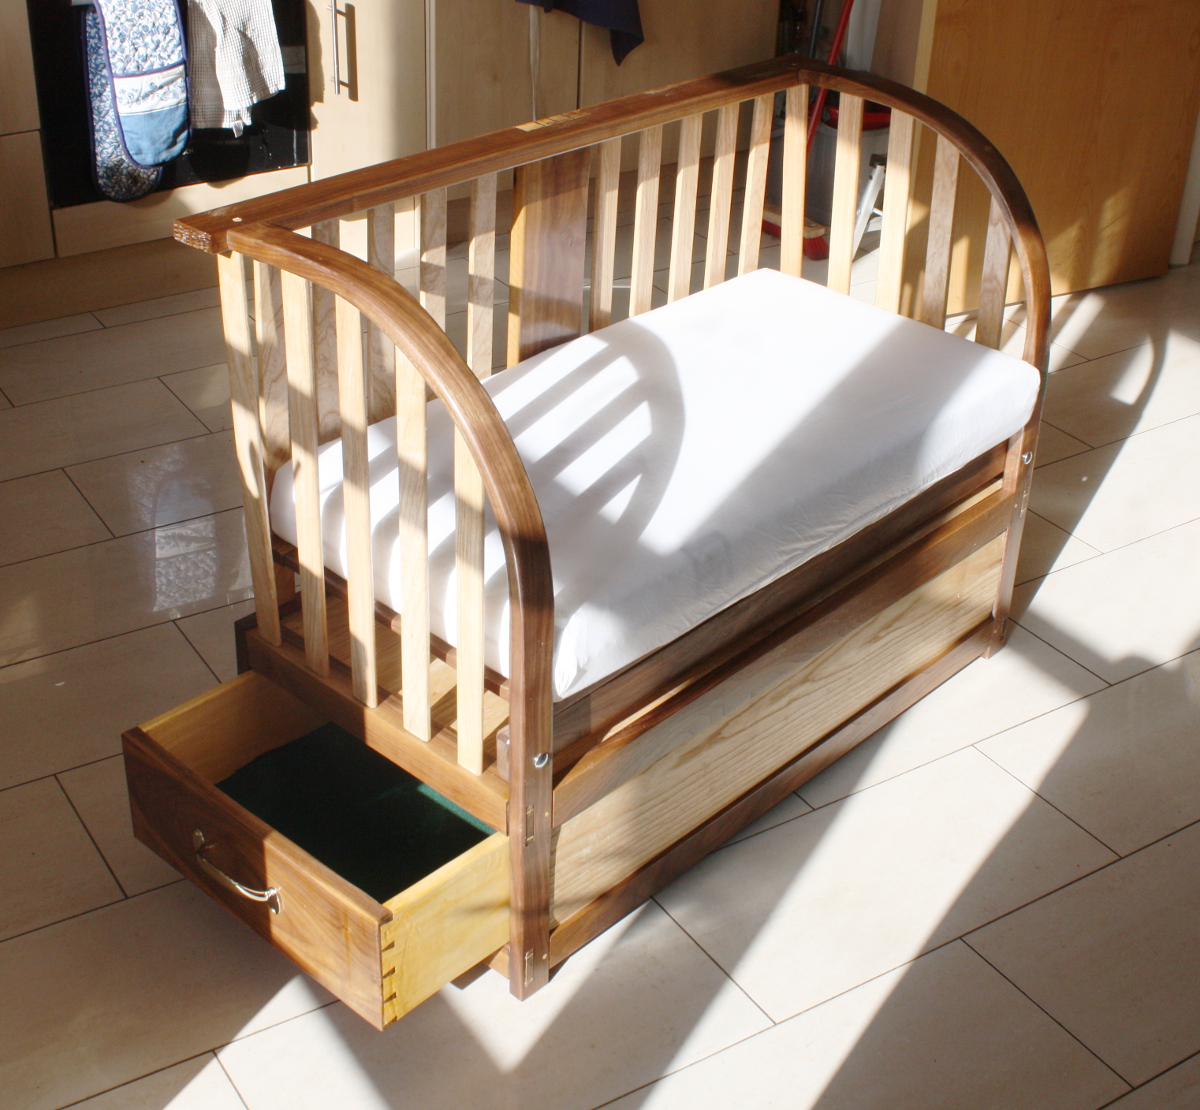
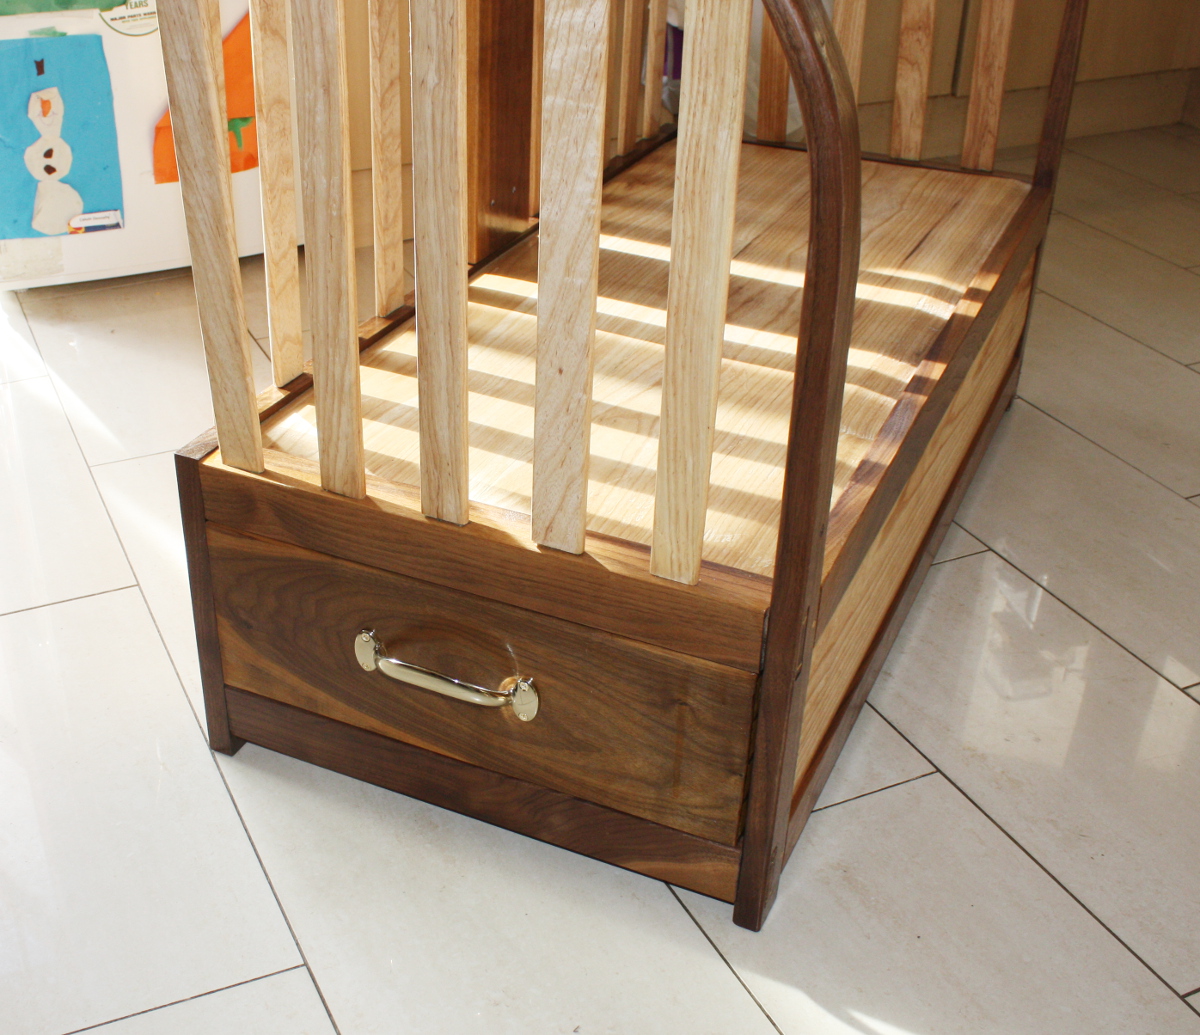
    Steambent (kiln-dried because I couldn’t find air-dried) walnut for the frame, ash slats and panels, poplar for the drawer sides and slips. Hide glue all round. Fifty-seven hand-cut mortice and tenon joints (one of which wound up in the wrong place and I hadn’t learnt that you could just plug the mortice and recut it). Drawbored some of the frame, wedged tenons for other bits. Dovetailing (through and half-blind) for the drawer. And glue blocks in various places.

    All I can see at the moment are the small errors all over the place, but as a first piece, I’m happy with it. Learnt a metric butt-load from Paul’s videos (and some tricks from other places), so just wanted to say thank you to him for making them and passing on the knowledge to everyone.

    Settings
    David B
    28 February 2017 at 4:09 pm #309618

    Fascinating piece of furniture–I’ve never seen anything like it. You should be very proud of yourself. I know, I look at my own work and see the flaws but that’s because we are the creators and we take pride in what we do!

    Settings
    Matt McGrane
    28 February 2017 at 4:55 pm #309631

    That is remarkable for a first piece. How in the world did you attach the slats to the steam-bent side rails?
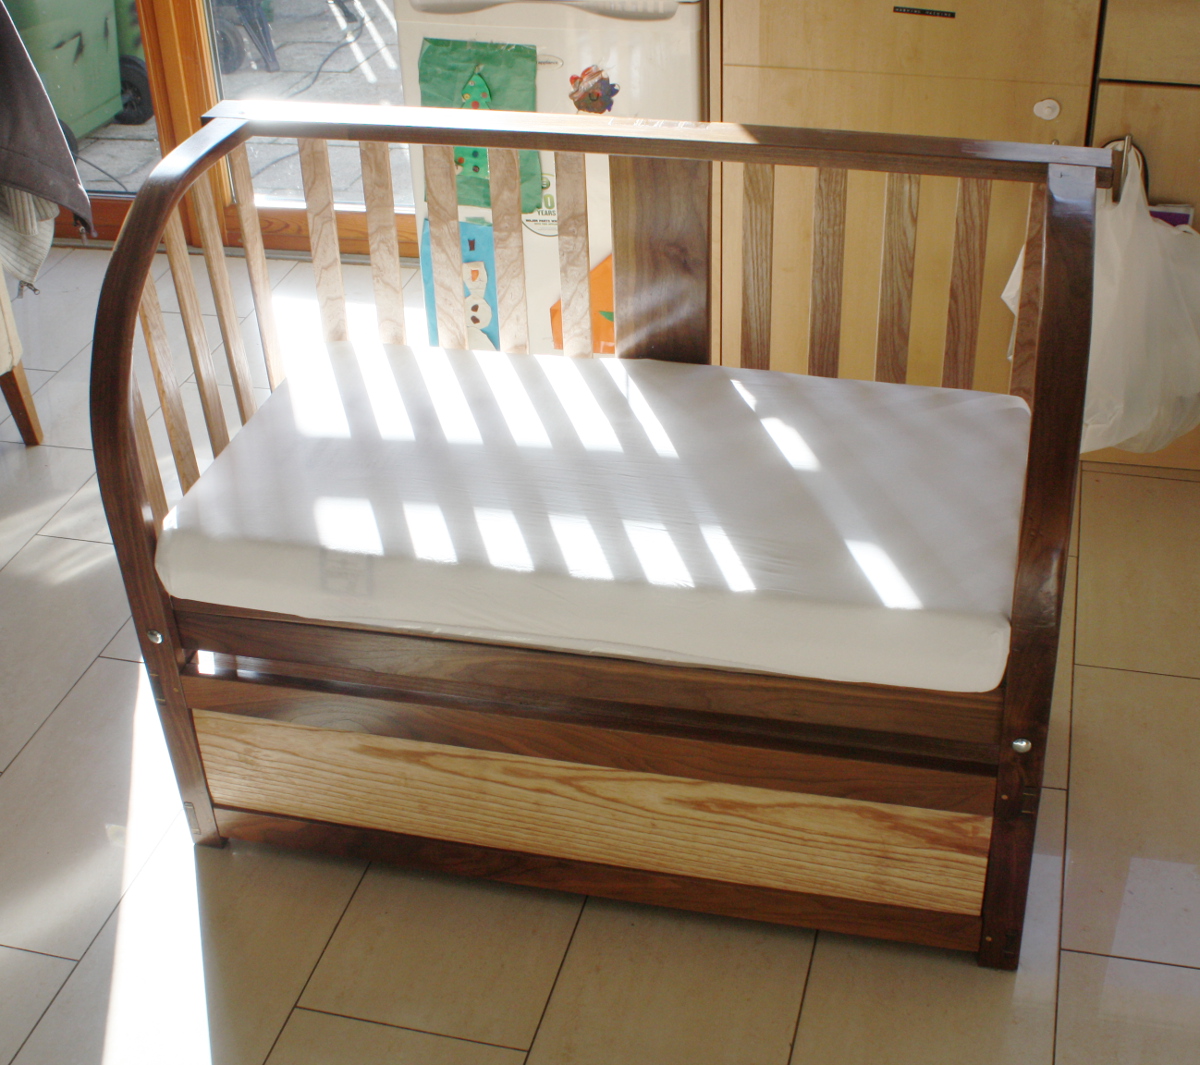
    Settings
    markdennehy
    28 February 2017 at 6:55 pm #309638

    Mortice and tenon joints with curved tenon shoulders (and straight tenons at a tangent to the curve) Matt. And then lots of fettling to match the curves. The match isn’t perfect though.

    Cutting mortices

    Like that, only on the inside of the curved piece. It was fiddly, but it helped that the mortices are only three-sixteenths wide.

    Slats fitted

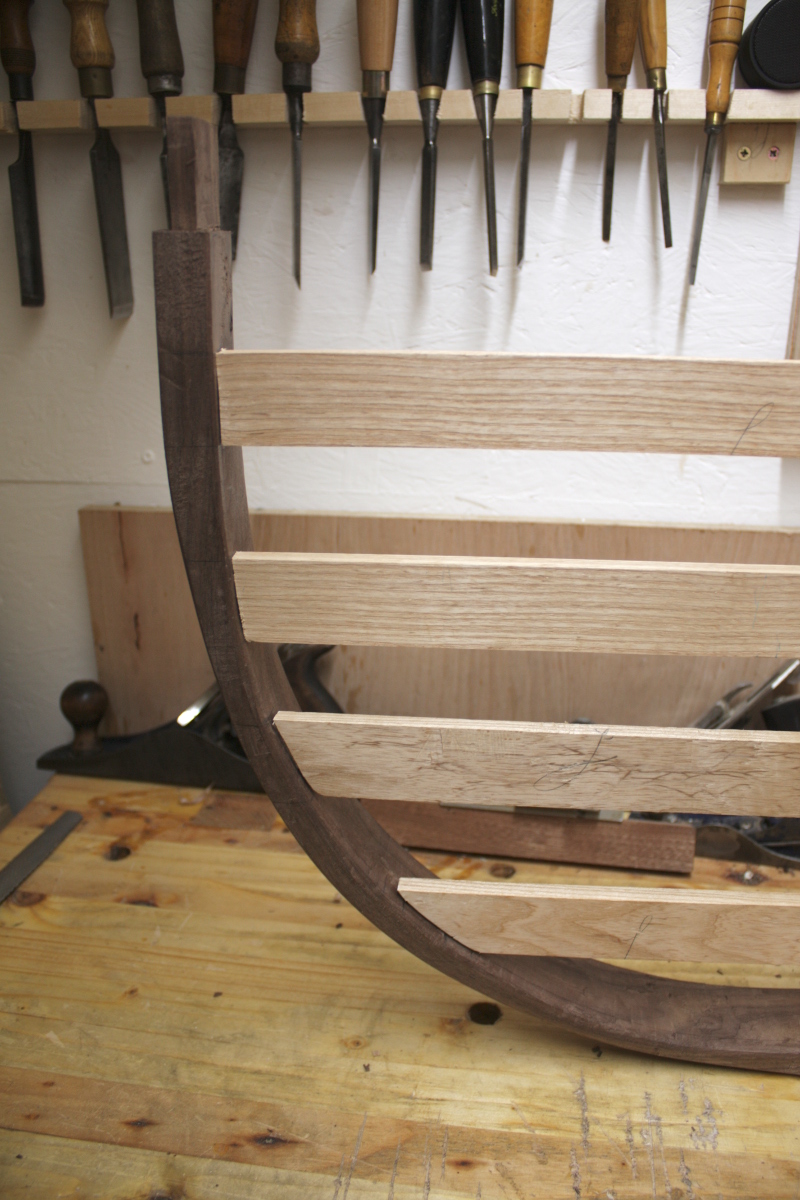
    Unfortunately, final assembly introduced some twist into the piece and the fit wasn’t as perfect as that in the end (there’s a good 2mm of gap in the worst spot).

    Settings
    entitydigital
    28 February 2017 at 7:08 pm #309639

    Wow, that’s a great job! I’d be interested to know what you’d do differently if you built it again? Also it’d be good to know more about how you did the steam bending?

    Rob

    Settings
    markdennehy
    28 February 2017 at 7:31 pm #309642

    I wouldn’t make it so darn complicated 😀
    Or so big – the thing is just the wrong side of “this is too big to build in this shed” (I work in an 8’x6′ shed in the garden).

    And I stole the steambending-in-a-bag idea from here: https://www.youtube.com/watch?v=50uXPPt8-VI

    More details on that here : http://www.stochasticgeometry.ie/2016/12/03/properly-bent/

    Settings
    Mike I
    3 March 2017 at 4:27 pm #309763

    Very interesting and well done!

    The Walnut looks lovely and the curved rails look very artistic.

    What finish did you use, if any?

    Settings
    markdennehy
    3 March 2017 at 5:09 pm #309769

    Thank you! The walnut pieces all had had four coats of shellac, sanded back after the second coat as per Paul’s description here; then the cot was assembled and the entire thing had three coats of Osmo thin wood wax. The drawer though just had three coats of shellac over both the walnut and the poplar sides. The shellac was made up as a two-pound cut — only it was a 24 gram cut because I’m a bit metric 😀
    metric cuts for shellac

    So 24g of button shellac from liberon and 80g of isopropyl alcohol (because kitchen digital scales and the tare button make this a lot easier to measure out).

    Settings
    Derek Long
    3 March 2017 at 7:05 pm #309770

    Very nice!

    Settings
    ehisey
    13 March 2017 at 9:23 pm #310133

    That is a really nice piece of furniture.

    Settings
    prbayliss
    27 March 2017 at 12:55 am #310580

    If that’s your first piece then you should continue! You have talent!

    Settings
  • Author
    Posts
  • You must be logged in to reply to this topic.
Log In

About Our Company

Woodworking Masterclasses is a trading name of Rokesmith Ltd

Rokesmith Ltd


About Rokesmith Ltd | Privacy Policy | Terms and Conditions | About Us


Useful Links

© 2023 - Rokesmith Ltd

  • Register Now
  • Video Library
  • Gallery
    • Bedside Cabinet Gallery
      • Assembly Table Gallery
      • Bathroom Cabinet Gallery
      • Bench Stool Gallery
      • Blanket Chest Gallery
      • Bookends Gallery
      • Book Shelves Gallery
      • Breadboard-end Cutting Board Gallery
      • Carrying Tote Gallery
      • Chess Board Gallery
      • Chest of Drawers Gallery
      • Christmas Gallery
      • Coasters Gallery
      • Coat Rack Gallery
      • Coffee Table Gallery
      • Corner Shelf Gallery
      • Craftsman-style Lamp Gallery
      • Dining Chair Gallery
      • Dovetail Boxes Gallery
      • Fly Swat Gallery
      • Frame Saw Gallery
    • Foot Stool Gallery
      • How to Make a Table
      • Joiner’s Mallet Gallery
      • Joiners’ Toolbox Gallery
      • Keepsake Box Gallery
      • Laptop Desk Gallery
      • Leaning Wall Shelf Gallery
      • Mitre Box Gallery
      • Occasional Table Gallery
      • Picture Frames Gallery
      • Rocking Chair
      • Sawhorse Gallery
      • Shaker-Style Bench Seat Gallery
      • Shaker Stool Gallery
      • Sofa Table Gallery
      • Stepladder Gallery
    • Trestle Table
      • Tool Cabinet
      • Tool Chest Gallery
      • Walking Cane Gallery
      • Wall Brackets Gallery
      • Wallclock Gallery
      • Wall Shelf Gallery
      • Winding Sticks Gallery
      • Wooden Plane Gallery
      • Wooden Spokeshave
      • Wooden Tray Gallery
      • Workbench Gallery
      • Other user projects vol. I
      • Other user projects vol. II
      • Submit Photos to Gallery
  • About Us
  • News
  • FAQs
    • General FAQs
    • Workbench FAQs
  • Contact
Login Account
Search