Proper plane settings and technique to true a board
Welcome! / Forums / General Woodworking Discussions / Proper plane settings and technique to true a board
- This topic has 7 replies, 4 voices, and was last updated 11 years, 8 months ago by
Anonymous.
-
AuthorPosts
-
I’m in the process of building a sawbench after a plan released by Chris Schwarz.
The wood I’m using is construction grade pine that’s been rough sawn and acclimating to my shop for a month or two.
I find that I’m struggling a bit to much with my plane settings trying to true the stock to final dimensions.
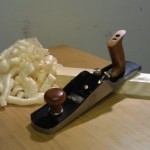
Using a Veritas Low-angle Jack plane I have three different irons to choose from: 25deg, 38deg and a toothed at 38deg.
I try to keep the plane irons sharp to eliminate that from the equation…
So for my questions:
1. Which angle is the “best” when working with pine? I find that the 25deg iron (computing to a 37deg attack angle) gives me nasty tear-outs when increasing the blade protrusion.
2. What thickness should I aim for when setting the jack plane up for truing stock? I realize that probably want a bit thicker than the finest shaving I can, as that is for the smoothing phase.
3. How should I go about to correct a discrepancy in the edges being parallel. That is: I true one face of the board first, then true up one edge referencing the true face. Then I scribe the desired witdh of the board and start to work on the other edge. This usually means removing more material on one side in order to achieve a parallel surface to the other edge.
In one of the Wall Clock videos Paul describes how he applies more preasure to the “high” side of the edge when truing it to 90deg to the face. Is the process similar then performing what I describe above? That is just pressing harder on the part where I need to remove more material, or should I simply take more shavings in that localized area of the edge and then take full lenght shavings to remove any bumps or hollows.
A lot of things going on in my head right now, and it just doesn’t add up to a repeatable and stable process for now 🙂
Hopefully some of you can give some insight to the way you work!
Thanks in advance
Anonymous8 November 2012 at 9:15 am #3045Hi Jesper,
Paul is spot on when describing how bias of a plane to the left/right/centre of your work positively affects the way you can control the resultant surfaces.
Tearout can be minimised by reducing blade protrusion and therefore the amount of material removed with each stroke, but tear out related to changes in grain direction (Reversed grain) can also be reduced if you employ stopped shavings (Stopping when you reach the point where grain changes direction) and reversing your planing action, as well as by skewing your plane when approaching and/or working through the problem areas.
I’ve never been one to measure shaving thickness, but normally gauge plane settings by how easily the plane shaves the timber I’m working on. If I’ve a lot of material to remove, the blade setting will be for heavy shavings until I’m within reasonable reach of my intended finish surface.
Sharp tools/blades are a must when aiming for accuracy and fine finish work.
Once you’ve trued both face side and edge, it’s normal to gauge from each face before reducing stock to final dimensions. Stock reduction can be by sawing, chopping (Hatchet) or using a heavy setting on your plane to bring you within reach of finish size via smoothing plane. 🙂
I tend to stick to one angle setting when prepping my plane irons. Nominally working with 25 deg grind and 30 deg hone/whetting angles for all but the most argumentative timbers.

” Which angle is the “best” when working with pine?” — the angle that gives you the desired result. The real key is knowing what kind of result is appropriate for the task at hand (e.g. flattening vs. smoothing for example).
But seriously, for your work with the Jack Plane, dimensioning and flattening (not smoothing), your 25 (37 included angle) should be fine. For hogging off material quickly, work across or diagonal to the grain. As to shaving thickness, whatever thickness gets the job done.
You are building sawbenches from pine, not a fine French lady’s writing desk from Cuban Mahogany so don’t fret the tearout. However this is an opportunity to learn about controlling it, just don’t obsess over it. If you want a tearout free sawbench, choose your material accordingly so that the grain is better behaved across the surfaces and edges.
The toothed blade for the LA jacks is a clever toy and they work well perpendicular to, diagonal to, with and against the grain. But you will likely want to come back with a straight blade later and knock down the tiny ridges.
As far as spending a lot of time making your stock “4-square” for the saw bench. Don’t. What you need to concentrate on is those faces/edge that are part of the joinery, not the “show side”. Those you can do at your leisure either before gluing or after. It is only the mating surfaces you need to fret over. And even then, they just have to be flat and true, not “smooth”. A small bit of tearout inside a joint on that bench design isn’t going to matter at all.
Thanks for your advice Gary and Rob!
I’ll just keep at it and hopefully somekind of insight will start to grow into my hands (or mind?!).
Thanks also for the wake-up call Rob:
You are building sawbenches from pine, not a fine French lady’s writing desk from Cuban Mahogany
You are 100% correct and I’m probably overworking every surface at this point… I’ll use your words as a mantra in the shop to try and keep it at a sane level 🙂
 8 November 2012 at 5:05 pm #3056
If you’re after some more information, Robert Wearing gives great guidance on how to get a board tried and true in his book “The Essential Woodworker”. He does most of it with a standard Stanley 5 or 5 1/2. It’s something I’m still practicing as well!
George.
Anonymous8 November 2012 at 5:05 pm #3057Rather than invest in a specialist toothing blade, you could always tooth an old blade by notching it’s edge using a fine triangular file (Needle or saw file).
Regardless of material in use or object being crafted, I’d tend to approach each item with the same degree of care and your skill set develops. A pieces finished condition is a reflection of your own workmanship and learning how best to deal with a variety of Pine is just as important as manipulating Indian Rosewood and can sometimes prove just as challenging.
@george, thank’s for the tip about the book. I’ve looked at it several times but it hasn’t made it to the checkout basket yet 😉 Next time!
@gazpal, I understand your philosophy and of course one want’s all pices to be as good as possible. For me right now I think that it is better to get going with the project and finish it – then learn a few lessons 🙂 Otherwise I’m still going to be polishing this sawbench when summer arrives again…
Sharpened up the toothed blade today as I have some heavy stock removal coming up next. It is a bit more difficult to evaluate the sharpening process with this type of blade but on the other hand it isn’t super critical for the type of rough work it is intended for.
Anonymous9 November 2012 at 7:28 am #3076Hi Jesper,
I understand the concept behind your reasoning, but it’s typically easiest to learn correct form and technique from day one than try to rush through things and potentially re-learn things.
————
Speed and improved output come with practise.
-
AuthorPosts
- You must be logged in to reply to this topic.