Small Wall Cabinet
Welcome! / Forums / General Woodworking Discussions / Projects / Small Wall Cabinet
- This topic has 16 replies, 14 voices, and was last updated 10 years, 6 months ago by
Magnus.
-
AuthorPosts
-

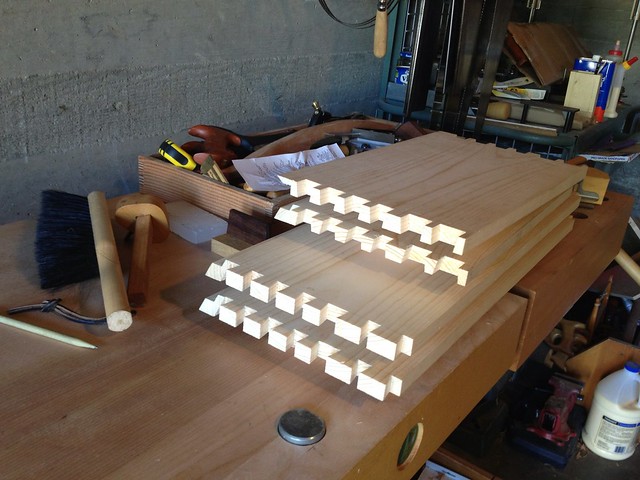
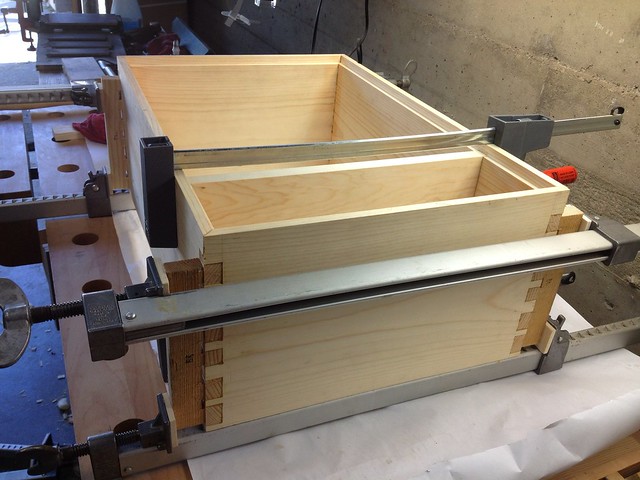
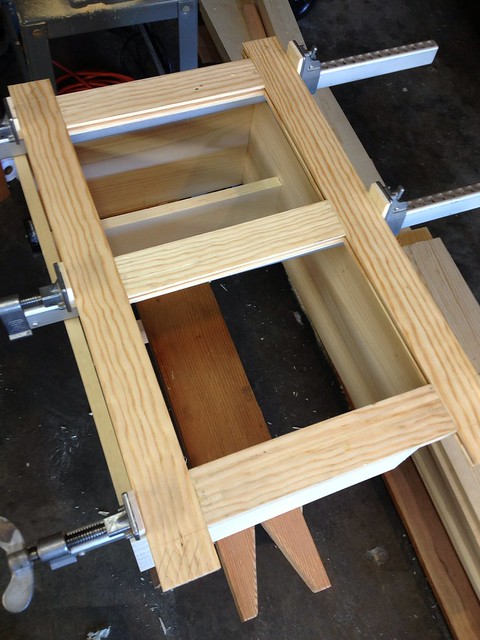
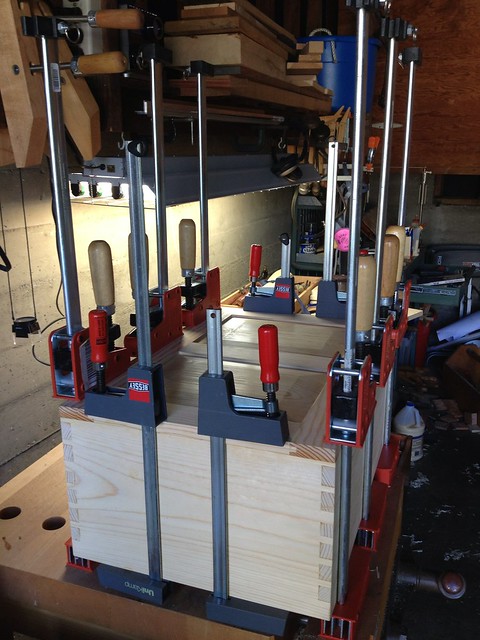
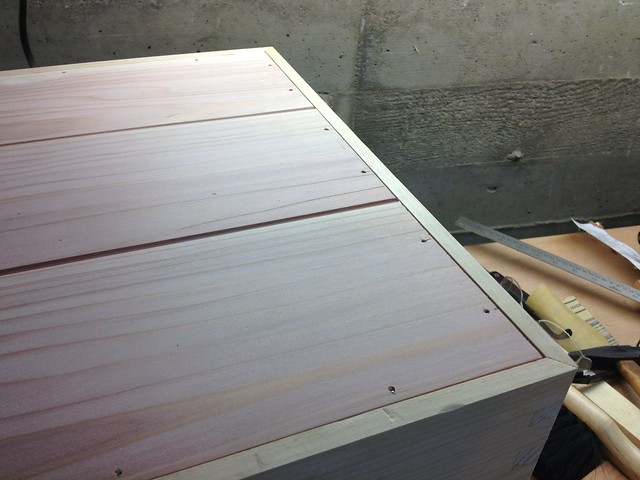
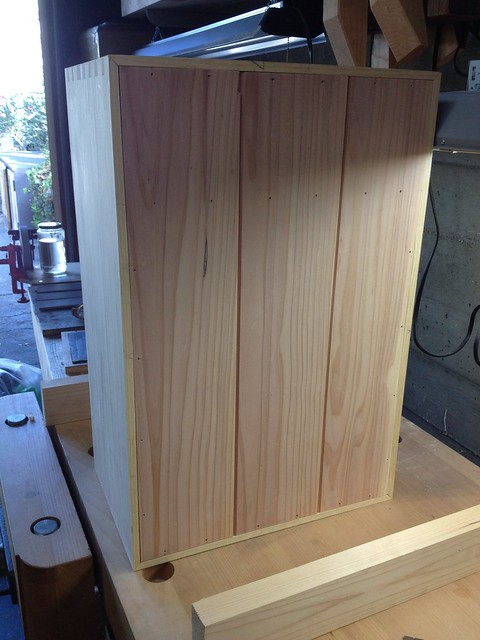
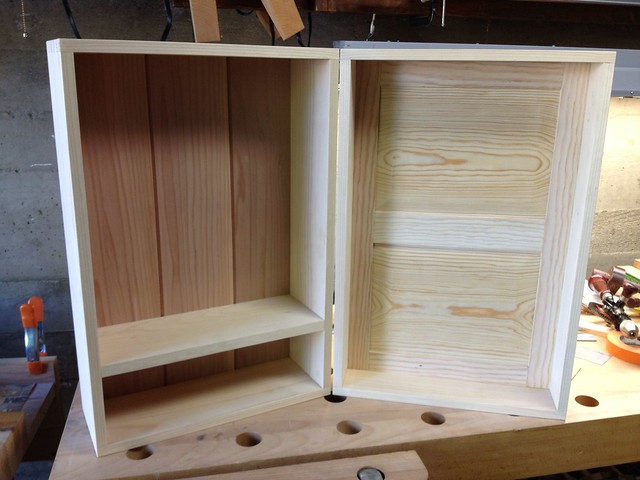
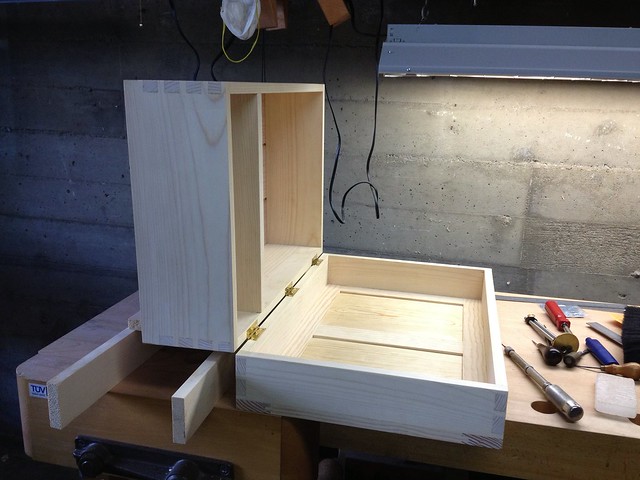
While waiting for my cherry boards to acclimate for the tool chest project, I decided to use some pine and redwood to build a small wall cabinet. This gave me a chance to practice some of the skills that I will need before tackling the tool chest.
I am nearing completion. I am not sure if I will build a drawer or not. Probably not. I only have hinges to install and finishing. I have never installed hinges before, so that part should be very interesting (terrifying). I will probably wait for Paul’s lesson.
Here are some construction photos.


 29 September 2013 at 3:44 am #19437
Amazingly beautiful cabinet. You have milled the parts so well. By the way, what exactly is red wood?
30 September 2013 at 3:27 pm #19455Nice job on the cabinet, looks great. You shouldn’t have many problems with the tool chest now.
Steve
Thanks all for the kind comments. It has been fun and a bit challenging.
I am still waiting on some hinges that I ordered, so the cabinet is set aside until those arrive.
@indranil – The Redwood I used is specifically California Coastal Redwood ( Sequoia sempervirens ) that is sustainably grown/harvested in California for use as lumber. Redwood is pretty soft, but has a pretty color and handsome grain. Most people here use it for decking, planters, and outdoor furniture such as picnic tables. It is reported to be very stable, rot resistant and relatively fire resistant. It is not usually used for fine furniture due to its softness, but can be suitable for secondary wood such as cabinet backs.
@dborn – My intention was to hold my smaller essential tools, like chisels, marking gauges, squares, knives and small joinery planes. This plan could change. The cabinet was built using only material on hand, so it came out woefully smaller than a proper tool cabinet.
I installed my first set of hinges this past weekend. It went smoother than expected, but with more experience the process will hopefully be faster and the hinges will be even better aligned.
After an unsuccessful search for a 1/16″ drill bit, I remembered that I had a small collection of Yankee drill/drivers, and one in particular had in its handle a full set of bits in very fine increments. I discovered that the bits were covered with some loose bits of rust that came off quite easily.
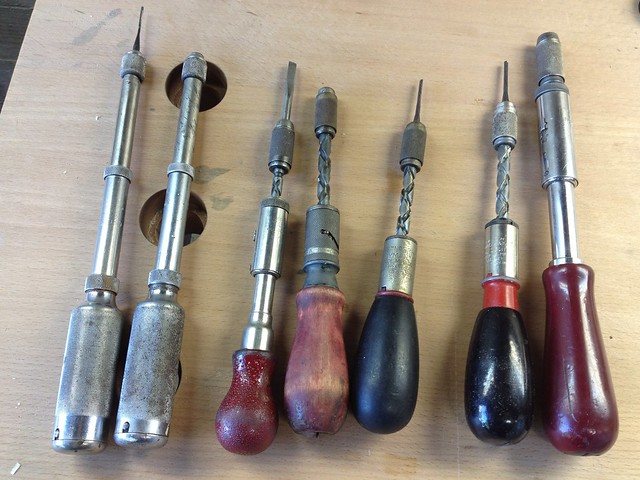

I drilled a few test holes by pumping the handle ten times to full depth. The drill works fast, fairly clean, and offers an excellent line of sight when positioning and starting the bit. The bits do wander to the right slightly as they start turning, so I had to compensate.
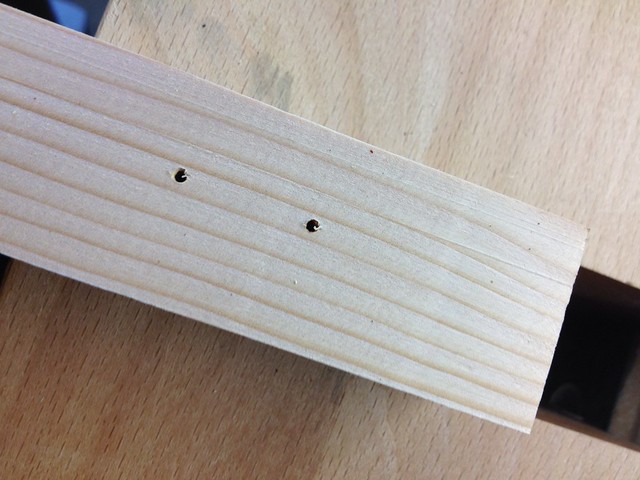
These test holes in some scrap confirmed that I had to be very careful with these soft, brass screws. The 1/16″ bit was too tight, even with some wax (note the broken heads), so I opted to use what must be a 3/32″ bit which worked out perfectly.
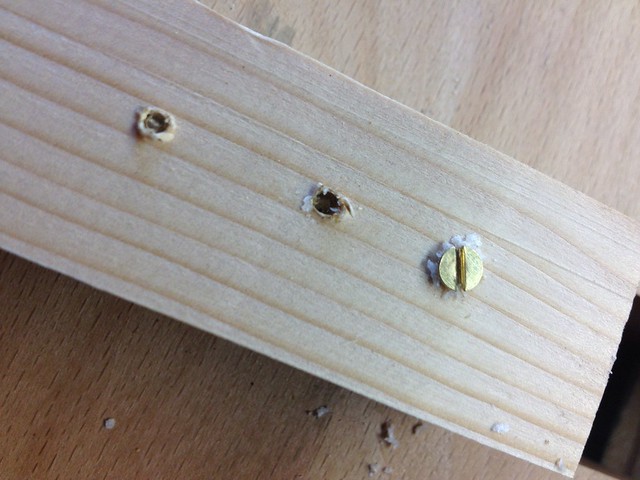
Here are the progress pics:

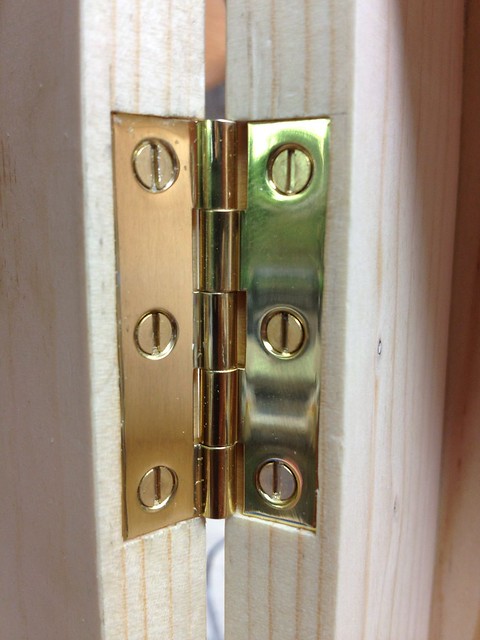
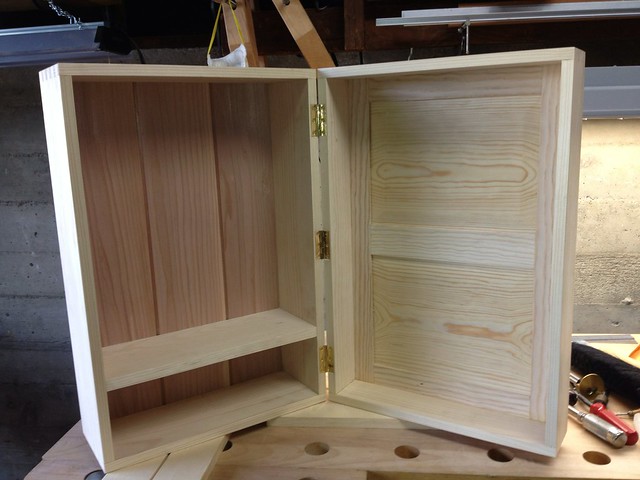
Paul probably has some techniques for installing hinges that may make me regret jumping ahead before his episode arrives, but this installation came out pretty well for a first attempt.

-
AuthorPosts
- You must be logged in to reply to this topic.