Skip to content
Woodworking Masterclasses
Facebook Instagram
  • Register Now
  • Video Library
  • GalleryExpand
    • Bedside Cabinet GalleryExpand
      • Assembly Table Gallery
      • Bathroom Cabinet Gallery
      • Bench Stool Gallery
      • Blanket Chest Gallery
      • Bookends Gallery
      • Book Shelves Gallery
      • Breadboard-end Cutting Board Gallery
      • Carrying Tote Gallery
      • Chess Board Gallery
      • Chest of Drawers Gallery
      • Christmas Gallery
      • Coasters Gallery
      • Coat Rack Gallery
      • Coffee Table Gallery
      • Corner Shelf Gallery
      • Craftsman-style Lamp Gallery
      • Dining Chair Gallery
      • Dovetail Boxes Gallery
      • Fly Swat Gallery
      • Frame Saw Gallery
    • Foot Stool GalleryExpand
      • How to Make a Table
      • Joiner’s Mallet Gallery
      • Joiners’ Toolbox Gallery
      • Keepsake Box Gallery
      • Laptop Desk Gallery
      • Leaning Wall Shelf Gallery
      • Mitre Box Gallery
      • Occasional Table Gallery
      • Picture Frames Gallery
      • Rocking Chair
      • Sawhorse Gallery
      • Shaker-Style Bench Seat Gallery
      • Shaker Stool Gallery
      • Sofa Table Gallery
      • Stepladder Gallery
    • Trestle TableExpand
      • Tool Cabinet
      • Tool Chest Gallery
      • Walking Cane Gallery
      • Wall Brackets Gallery
      • Wallclock Gallery
      • Wall Shelf Gallery
      • Winding Sticks Gallery
      • Wooden Plane Gallery
      • Wooden Spokeshave
      • Wooden Tray Gallery
      • Workbench Gallery
      • Other user projects vol. I
      • Other user projects vol. II
      • Submit Photos to Gallery
  • About Us
  • News
  • FAQsExpand
    • General FAQs
    • Workbench FAQs
  • Contact
Account Login
Woodworking Masterclasses

Thicknessing The Old Fashioned Way

Search
Previous Back to: Woodworking Videos8 Replies

Welcome! / Forums / General Woodworking Discussions / Woodworking Videos / Thicknessing The Old Fashioned Way

  • This topic has 8 replies, 6 voices, and was last updated 9 years, 5 months ago by RL.
  • Author
    Posts
  • Ken
    25 July 2013 at 9:25 am #15256

    Originally published 3/8/2009 this video is in response to a viewer question about how to thickness a board using nothing but hand planes.

    I know we have Paul’s version of this, and it is excellent, but never hurts to see how someone else dose the same job. 😉

    Settings
    lwreinhart
    25 July 2013 at 12:21 pm #15258

    Ken,
    Again, very nice video.
    I agree with you, it is really good to see someone else does it.
    Thanks for this one.
    Larry

    Settings
    Ken
    25 July 2013 at 12:28 pm #15259

    Thanks Larry 😉

    Settings
    Ken
    25 July 2013 at 3:13 pm #15265

    Just a quick note on this, when Paul made his video he picked the worst piece of timber / lumber you will find it had many faults bowed, twist, cup it had the lot.

    Shannon did a great job, but he had it easy really, if thicknessing with hand planes can ever be easy. 🙂

    Settings
    David Gill
    25 July 2013 at 8:36 pm #15279

    Wow Ken good video, but boy does that look like hard work!

    Wigan, Lancs. England :

    Settings
    Ken
    25 July 2013 at 8:51 pm #15281

    Thanks buddy, yeah hard work Indeed but so rewarding don’t you think. 😉

    Settings
    Mathbone
    19 August 2013 at 6:46 pm #16756

    Paul’s video was more on flattening than on thicknessing per se. I am curious how he would go about getting say 1/2″ material from 3/4″ or 1″ boards. I would assume based on his blogs that he has no problem using a powered thicknesser for the grunt work of stock removal, or maybe resawing on his bandsaw at the Castle, but how does that translate for those of us who don’t have space or money for power tools? (My shop is in a corner of our living room at the moment.

    Settings
    George Bridgeman
    19 August 2013 at 10:35 pm #16768

    Hi Brandon,

    You can thickness down from 7/8″ or 3/4″ by hand with a plane but the problem is waste. You pay for that wood only to have most of it end up in the bin.

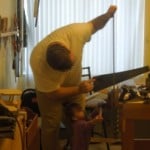
    Another way to get 1/2″ thick stock is to get a much thicker board (2″ or so) and resaw it by hand to get 5/8″ or so thick boards. You can then plane it down to final thickness, removing the saw marks in the process. I’ve done this before, resawing 2×6″ redwood. Get the most course saw you can – I used a 3.5 PPI rip saw. Just make sure it’s very sharp and keep the work to a minimum by crosscutting to length and ripping to width first!

    Resawing is as much work as thicknessing with a plane, if not less. The big bonus is that the only wood that goes to waste is what’s in the saw’s kerf.

    Another option is to ask your timber supplier if they can resaw it for you. A lot of yards will have a band saw that will do this in seconds and most won’t charge you for the time if you buy the timber there.

    Hope this helps!

    George.

    "To know and not do is to not know"

    Settings
    RL
    20 August 2013 at 12:43 am #16778

    Brandon,

    A lunchbox thickness planer is well worth having at some point. In the meantime, I would pay a little extra to have the lumber yard thickness the rough timber for you- not necessarily to final dimension but somewhere close, maybe within 1/8″?

    I didn’t start out with a thickness planer but it was one of my earlier purchases. I still don’t have a table saw or a jointer, and I haven’t missed them yet. I do use a Festool tracksaw however.

    I have hogged off a lot of material in the past when necessary- for this I use a low angle jack plane. It’s a light plane but with a sharp blade and a wide mouth, it can really motor through hard and soft woods.

    Richard.

    Settings
  • Author
    Posts
  • You must be logged in to reply to this topic.
Log In

Security and Payments

Payments on this site are processed using stripe.com and gocardless.com. Customer's credit card details or bank details are stored on the secure servers of stripe.com or gocardless.com This entire site is secured by SSL.

About Our Company

Woodworking Masterclasses is a trading name of Rokesmith Ltd

Rokesmith Ltd


About Rokesmith Ltd | Privacy Policy | Terms and Conditions | About Us


Useful Links

© 2023 - Rokesmith Ltd

Loading...
  • Register Now
  • Video Library
  • Gallery
    • Bedside Cabinet Gallery
      • Assembly Table Gallery
      • Bathroom Cabinet Gallery
      • Bench Stool Gallery
      • Blanket Chest Gallery
      • Bookends Gallery
      • Book Shelves Gallery
      • Breadboard-end Cutting Board Gallery
      • Carrying Tote Gallery
      • Chess Board Gallery
      • Chest of Drawers Gallery
      • Christmas Gallery
      • Coasters Gallery
      • Coat Rack Gallery
      • Coffee Table Gallery
      • Corner Shelf Gallery
      • Craftsman-style Lamp Gallery
      • Dining Chair Gallery
      • Dovetail Boxes Gallery
      • Fly Swat Gallery
      • Frame Saw Gallery
    • Foot Stool Gallery
      • How to Make a Table
      • Joiner’s Mallet Gallery
      • Joiners’ Toolbox Gallery
      • Keepsake Box Gallery
      • Laptop Desk Gallery
      • Leaning Wall Shelf Gallery
      • Mitre Box Gallery
      • Occasional Table Gallery
      • Picture Frames Gallery
      • Rocking Chair
      • Sawhorse Gallery
      • Shaker-Style Bench Seat Gallery
      • Shaker Stool Gallery
      • Sofa Table Gallery
      • Stepladder Gallery
    • Trestle Table
      • Tool Cabinet
      • Tool Chest Gallery
      • Walking Cane Gallery
      • Wall Brackets Gallery
      • Wallclock Gallery
      • Wall Shelf Gallery
      • Winding Sticks Gallery
      • Wooden Plane Gallery
      • Wooden Spokeshave
      • Wooden Tray Gallery
      • Workbench Gallery
      • Other user projects vol. I
      • Other user projects vol. II
      • Submit Photos to Gallery
  • About Us
  • News
  • FAQs
    • General FAQs
    • Workbench FAQs
  • Contact
Login Account

Insert/edit link

Enter the destination URL

Or link to existing content

    No search term specified. Showing recent items. Search or use up and down arrow keys to select an item.
      Search