Wallclock 2024: Episode 3
Posted 1 August 2024
This is an episode in a free series. Want to watch it? It is free to do so, you just need to log into the site, and you can enjoy this video and many other videos we think you will love.
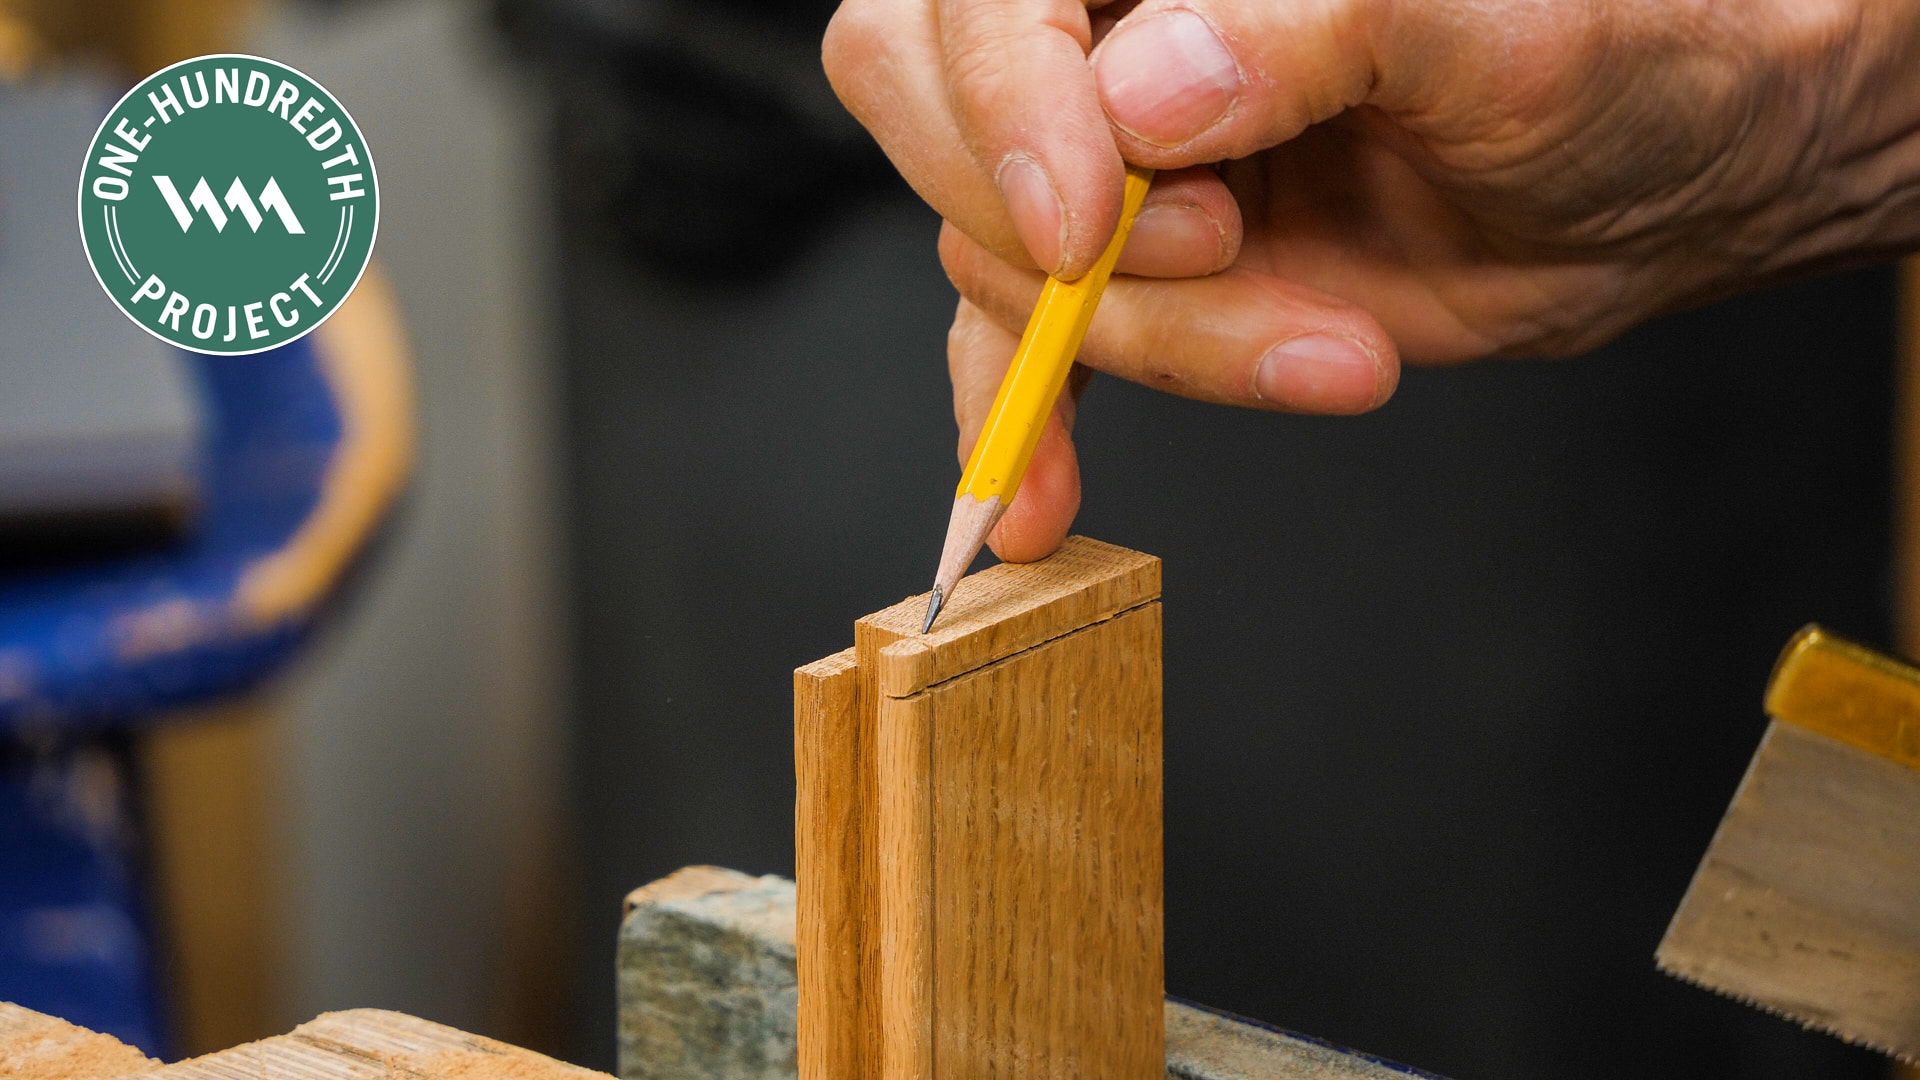
With the main body of the clock together, all the grooves formed, and the rails made ready, we now focus on the remaining four joints — the stub tenons fitting into the grooves. The precision needed here is essential, and the shoulder lines must be taken directly from the assembled clock to ensure no gaps at these intersections of combined joinery. Once done, we size, cut, and square the panel to size, ready for beveling or raising the panel later.
Paul, you are the craftsman who keeps on giving. Thank you. God bless you and your family.
As usual great content and clear instructions Paul . One thought i often have when watching you work is , you always square the end grain on your work piece in the vice ? i find it much easier and have more control when i use my shooting board , i just wonder why you don’t when you have done an instructional video on making one . is it because of space on your bench ? not a criticism only an observation Kindest regards Peter
I asked Paul and his answer is below:
As an apprentice the men I worked with planed end grain the way I do and also at a 45 degree angle for mitres. Free-handing this way, you get used to it and develop the skill which is 10x faster than using a shooting board where before you use it you have to clear your bench so on and so on. Lots of skills and techniques were done that way because of economy of motion. My vertical clamp in the vice is highly efficient and my way it works more effectively than a shooting board.
Thanks Paul. Enjoying the remake. I’ve made 7 or 8 of these clocks to give away as gifts. This episode reminded me of one of the challenges I’ve faced in the glue ups. I have found it hard to get both of the short pieces flush with the top and bottom. The first short piece isn’t that difficult to get flush as you can use the mallet before adding the clock face. The second short one (I guess we could almost call it a rail) can be a bit of challenge as there doesn’t seem to be a good surface to easily knock it in place. Even more so if the joints are tight. Curious if you will address this in glue up.
Really enjoying this project. Building it along with you and can’t wait for the next episode! Thank you for sharing.