TV cabinet
Welcome! / Forums / General Woodworking Discussions / Projects / TV cabinet
- This topic has 18 replies, 14 voices, and was last updated 9 years, 4 months ago by
 chemical_cake.
-
AuthorPosts
-
 29 December 2014 at 4:34 pm #122767
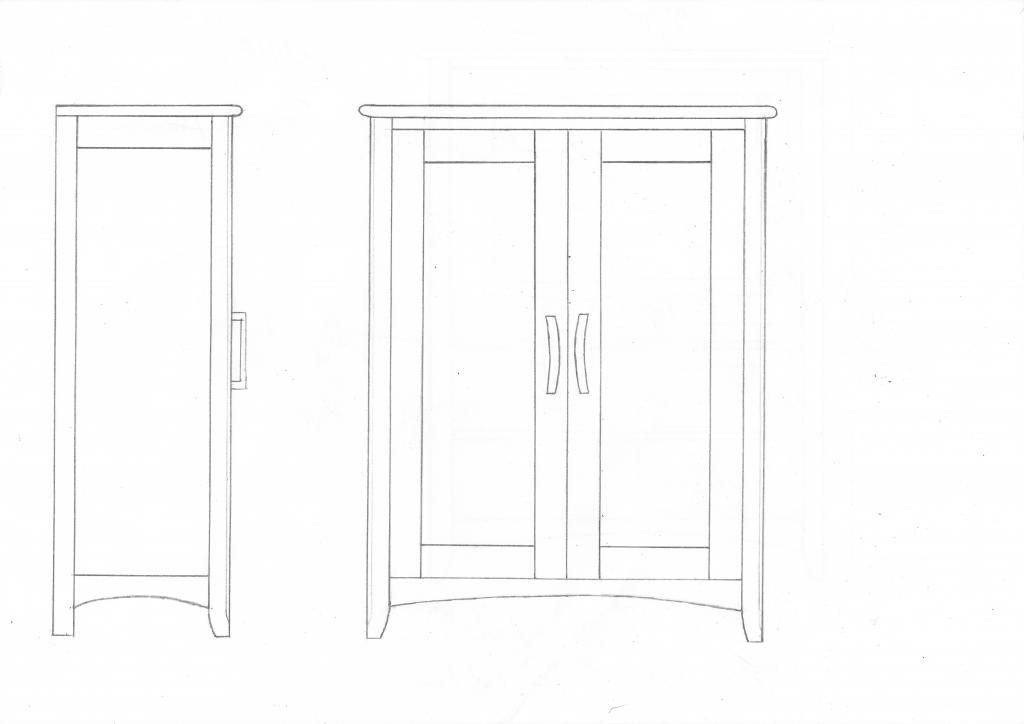
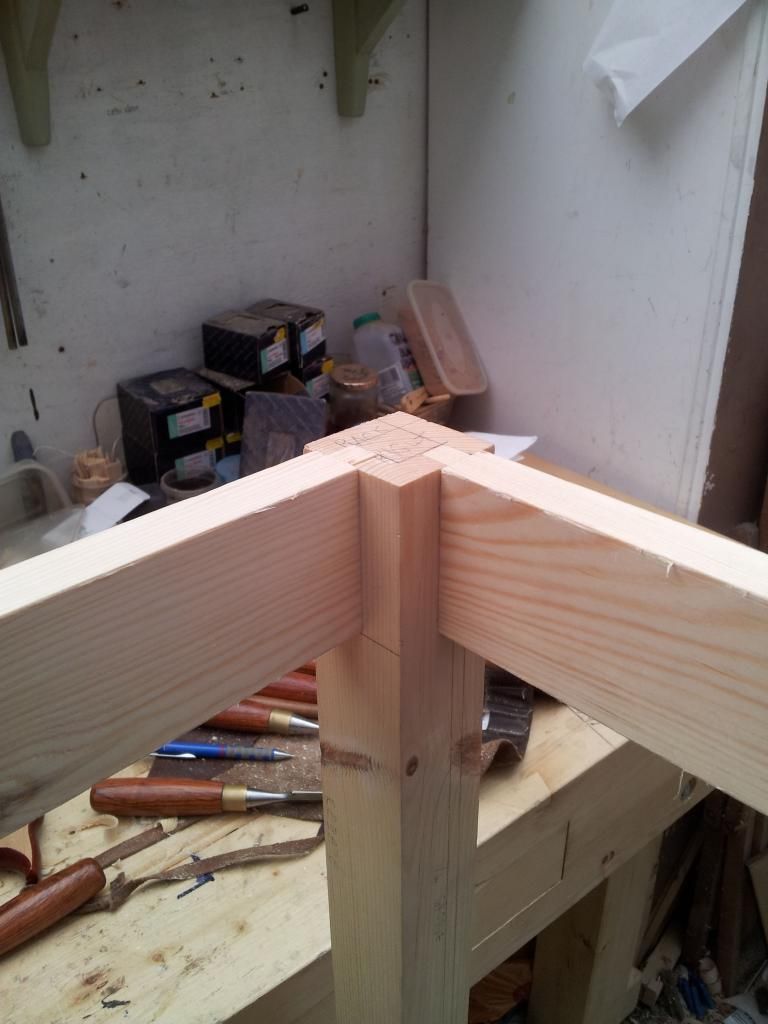
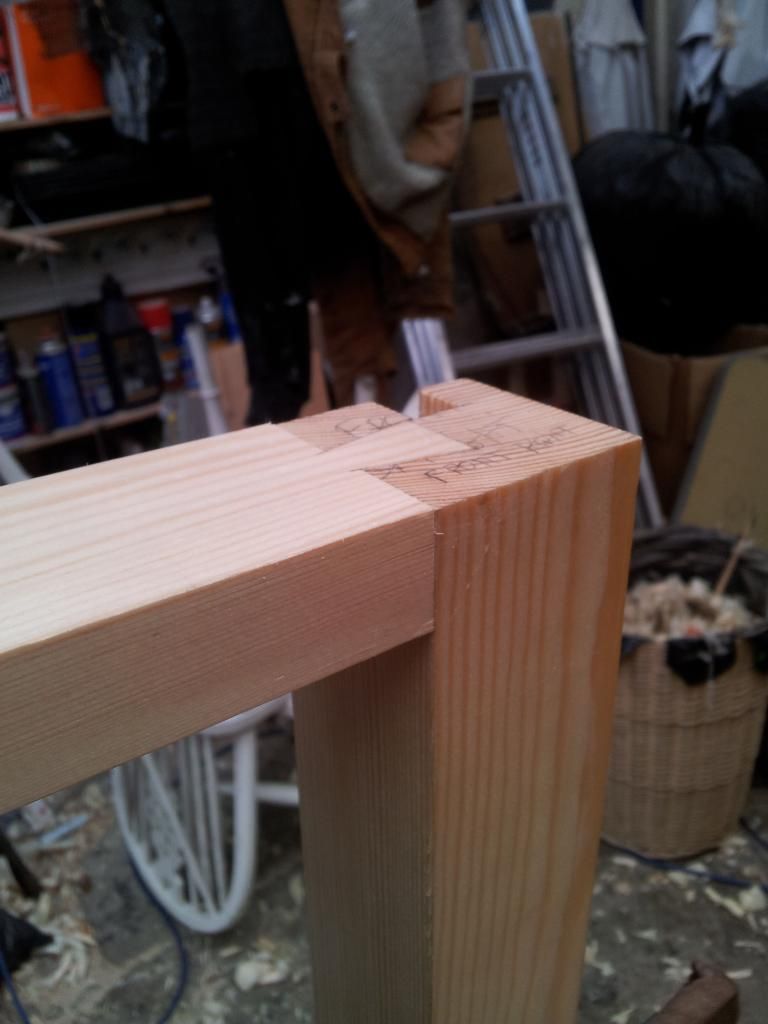
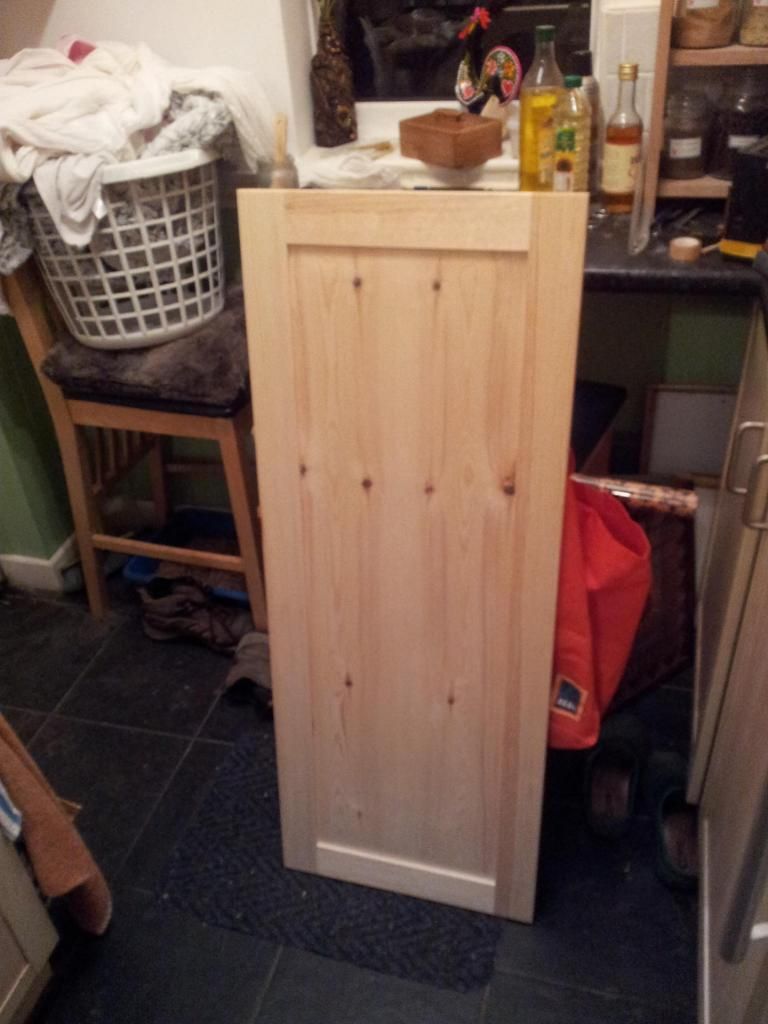
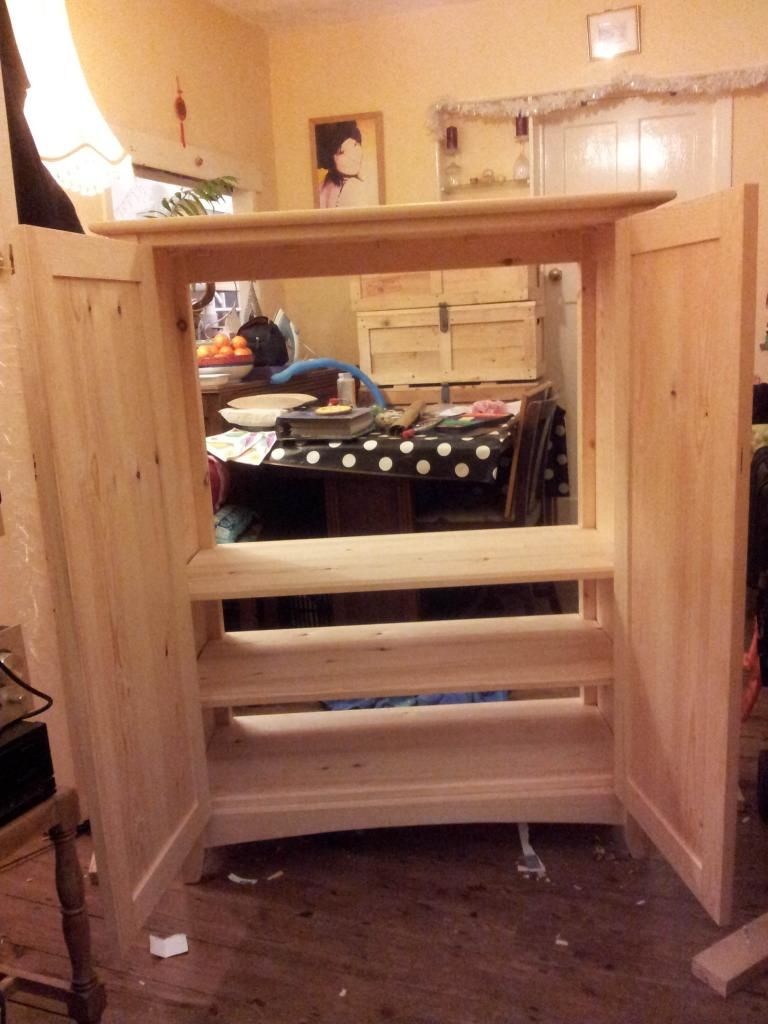
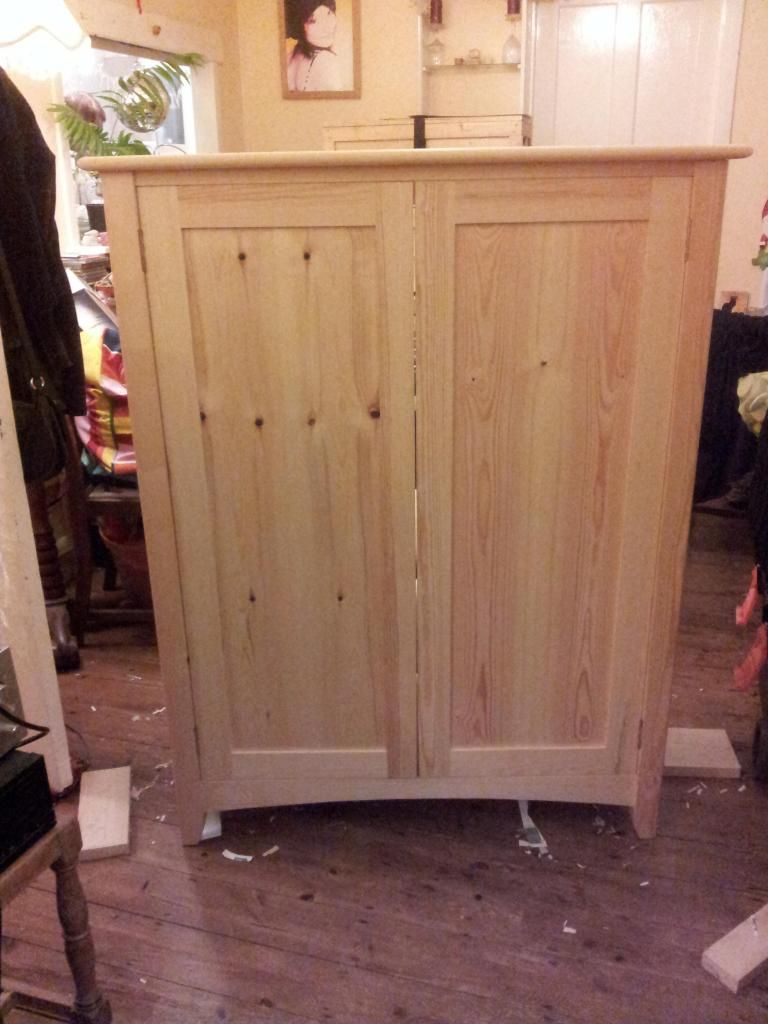
I’ve just finished a TV cabinet for a friend in pine (or rather, “unsorted softwood”, which from what I can tell was mostly some variety of pine). It’s solid frame and panel all round, with a plywood back.
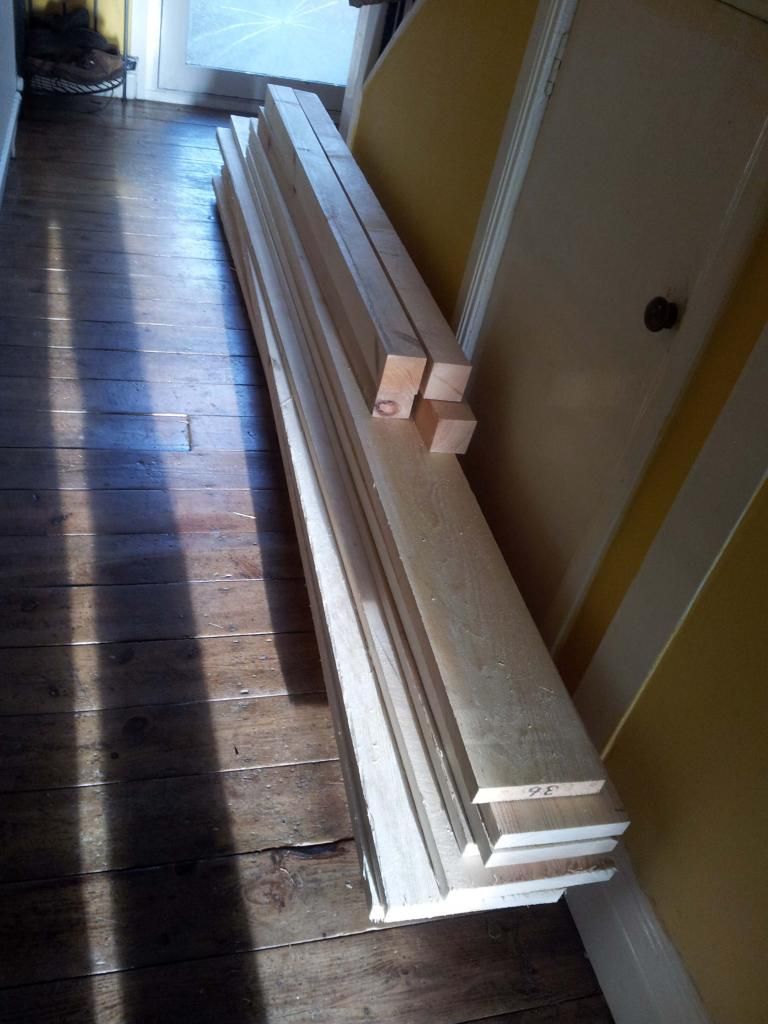
I wanted the full-height panels to add a vertical dimension to a rather stout form. The panels presented a big challenge and took more time than expected. They’re 3/8″ thick by 14″ by 38″ give or take, resawn from 8×1 rough boards. I can generally rely on my supplier having boards that actually meet these nominal dimensions, but even then I knew that was pushing it for what I could expect to get from them.
After flattening both sides and resawing I actually had two bookmatched boards just under 7/16 each. Unfortunately they were both cupped pretty badly once separated, in almost every case, and both away from the centre of the board; this is not what I would expect from acclimatisation, so I assume it was internal stress from drying.
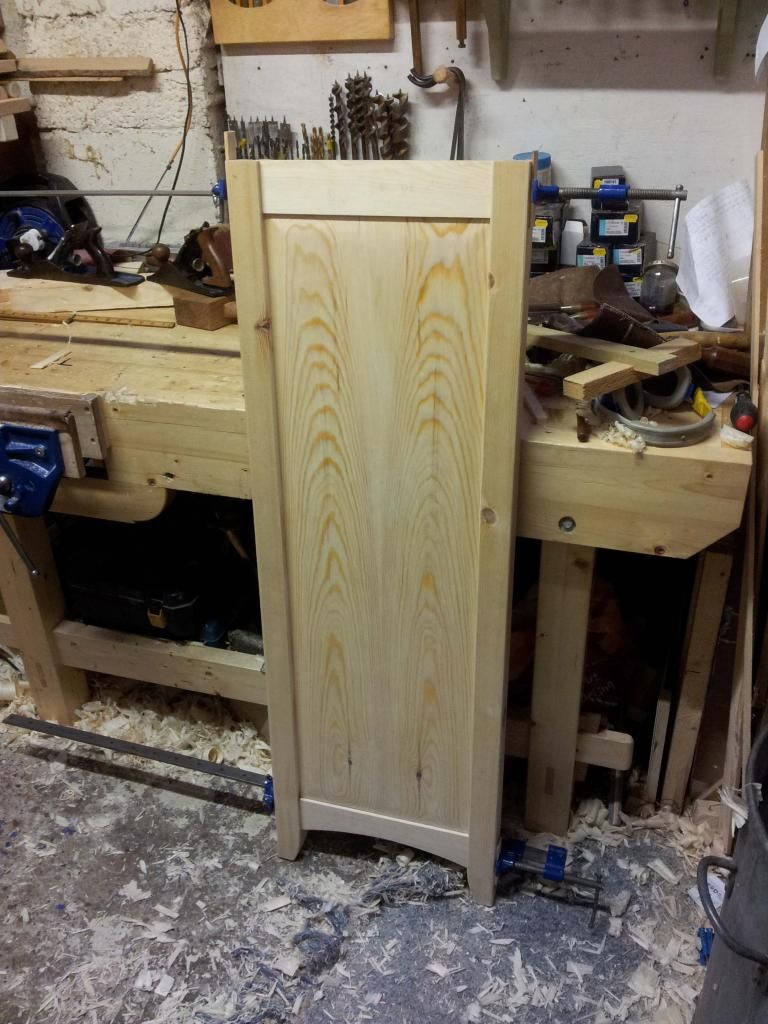
Rather than throw the panels away or plane them down to nothing, I managed to pin them down to the bench and smooth off both sides to a reasonably consistent thickness. I couldn’t clamp them flat enough to raise the panels crisply though and had to “pillow” the edges to fit the grooves instead (as Mr Sellers does in the wall clock project), not my intention but a small price to pay really.
I wouldn’t make panels this large and thin in pine again, at least not resawing from 1″ boards. The rest of the build was a doddle by comparison, all using skills demonstrated by Mr Sellers in his videos.
I do have a few WIP photos if anyone’s interested in a particular detail.
Does anyone have any constructive criticism to offer?
Thanks,
Matt
Attachments:
You must be logged in to view attached files. 29 December 2014 at 4:50 pm #122772
Lovely work, Matt. It’s a very well proportioned cabinet and looks nice and slender yet strong. The handles add a great detail – are they made or bought?
How did you attach the top and bottom of the cabinet?
George.


Lovely job. I think it looks great. As far as the wood warping problem, thin pine is going to do that on a large panel. I don’t know if there is a golden rule about how thin you can go per inches of width but from my short experience working with pine, I’d say about 8 inches or so is fairly safe, anything over that in my work has warped significantly. I even scrubbed both faces down equally on a 11 inch wide board and it still warped bad.
30 December 2014 at 2:09 pm #122819Thank you all for your kind words. I find it quite hard to judge my own work, by the end of a project I’m too close to it. I doubt I am alone in this.
@george, the top is held on with turn buttons in mortises as Mr Sellers demonstrates in the sofa table, or coffee table, or maybe both. It was my first time trying the cut-split-pare method and it really saves some work. The bottom just sits loose on top of the lower rails, the front rail has an extra batten glued to the back side to allow room for the doors to close and still provide support to the shelf.The handles are made, I have a couple of photos to show them in more detail. I cut the shape in one lump then sawed down the middle to make sure they matched, though honestly I think that wasn’t necessary and using a template would have been just fine.
Attachments:
You must be logged in to view attached files.
 31 December 2014 at 3:52 am #122848
Great looking cabinet. I agree, the handles really are a nice addition. I’m a big fan of making your own hardware.
Very nice work. I love the proportions, and (at least to my inexpert eye) the design is very true to the ‘Paul Sellers School’, both in form and joinery. It’s inspiring to see techniques from the projects here combined and applied to produce original work, and exactly what we are encouraged to do. I too would like to see WIP pics. Thank you for sharing this.
2 January 2015 at 1:34 pm #122947WIP photos, not the most comprehensive collection but will show a few more details and order of work.
Have we been limited to three photos per post now? I don’t seem to be able to add any more through the in-built attachment system. Back to Photobucket it is.
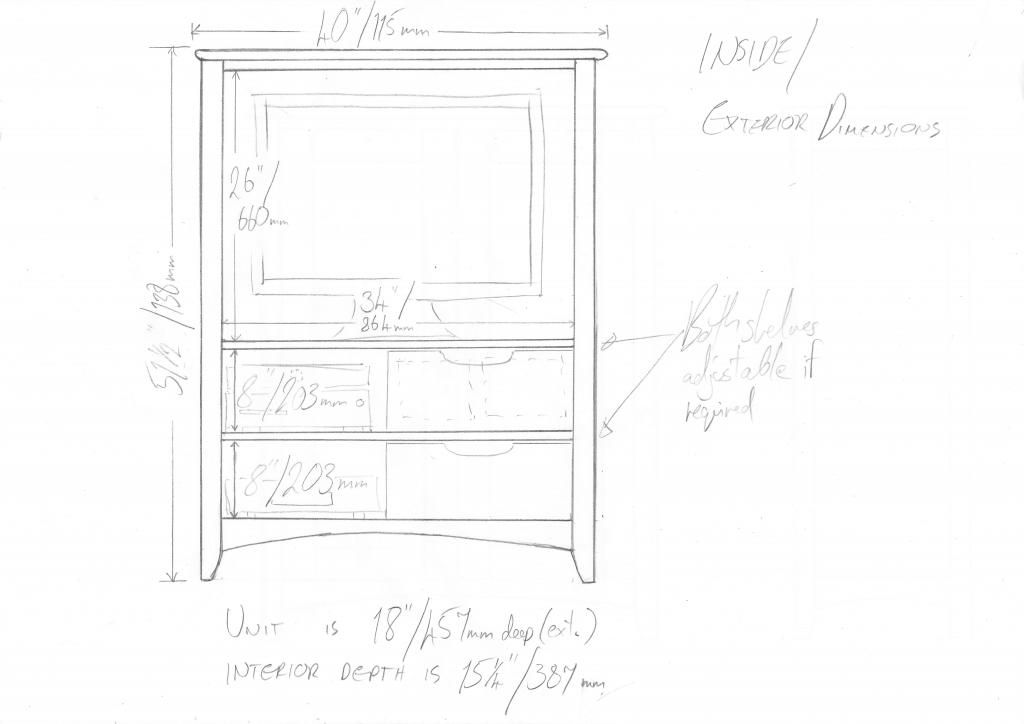
The interior could have done with a couple of inches more room, I only allowed two inches for cables. Twice that would have been more comfortable for some of the larger boxes.
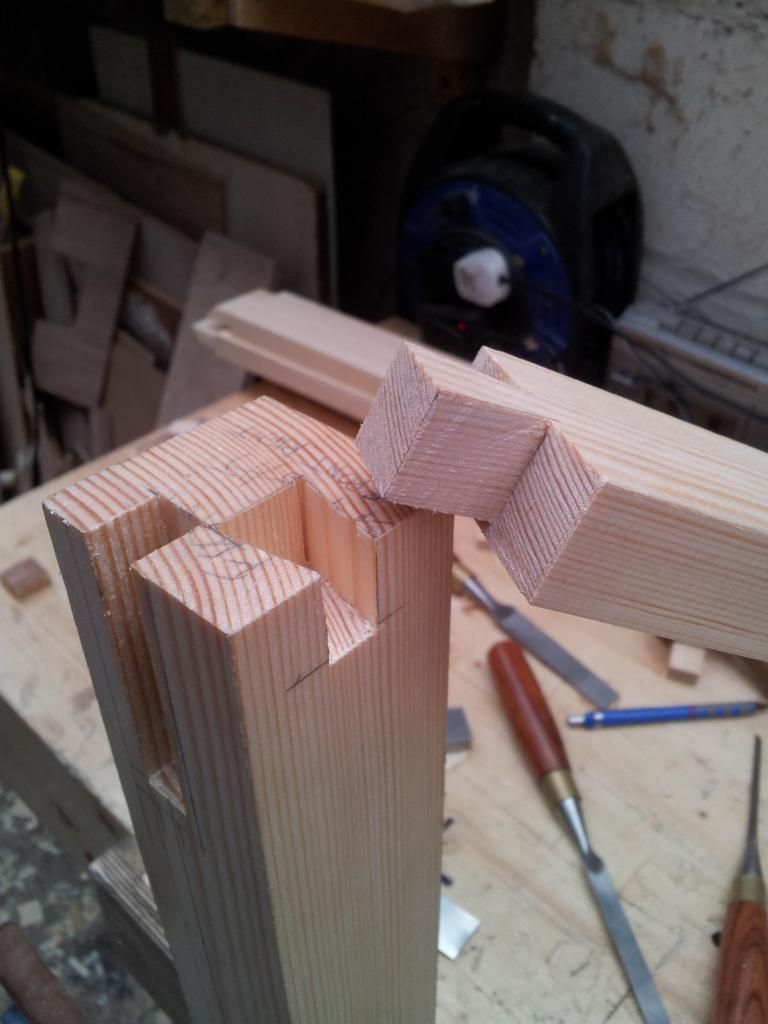
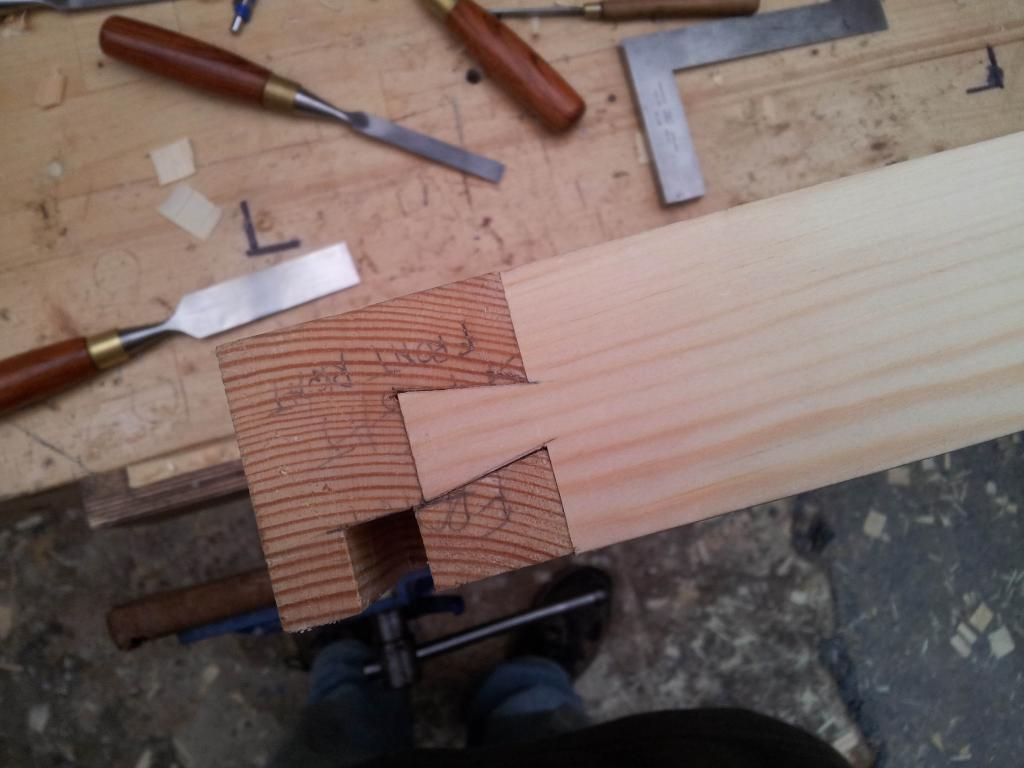
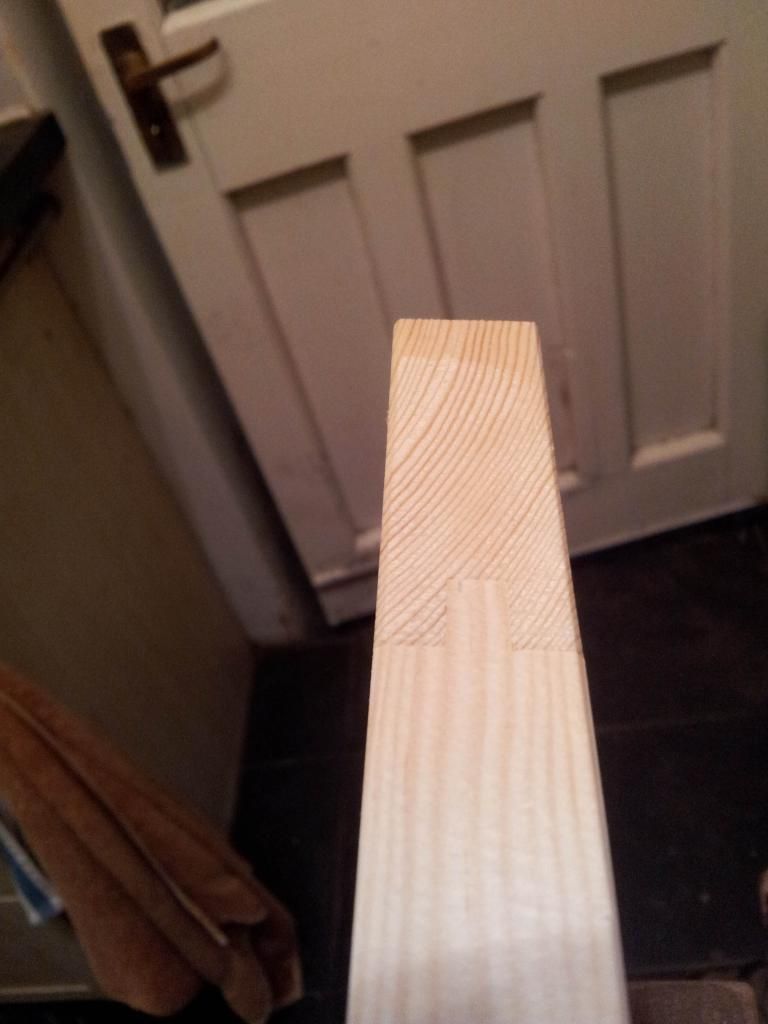
Not a perfect fit for the dovetail, the second one was better but foolishly I didn’t get a photo of that one!
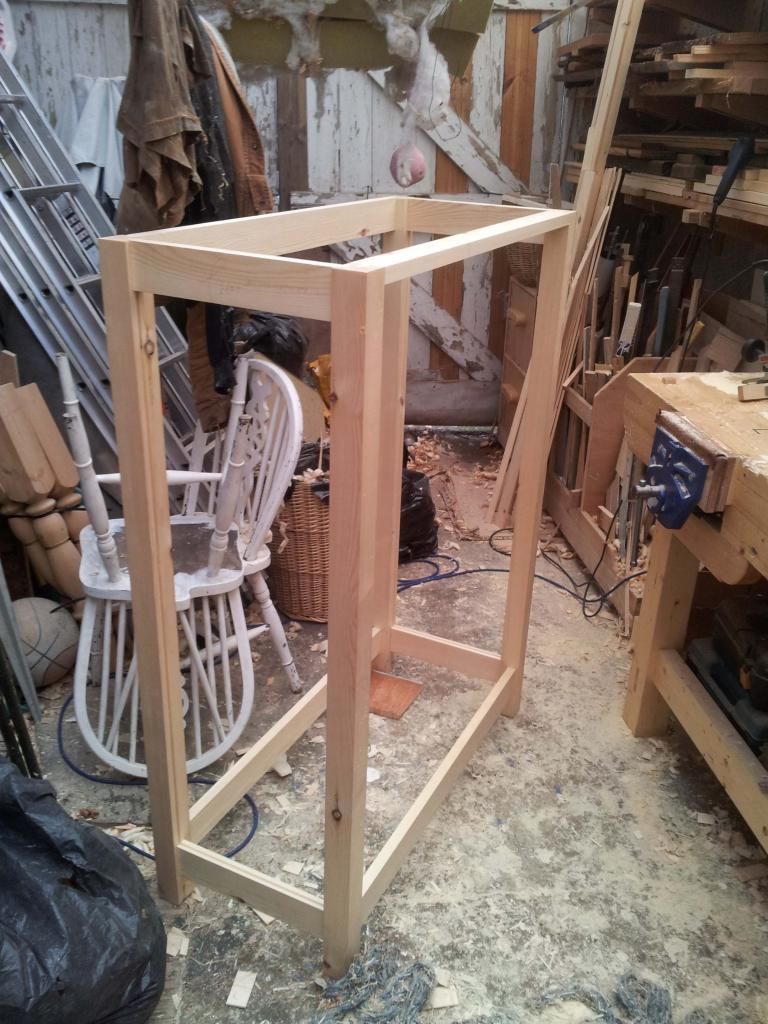
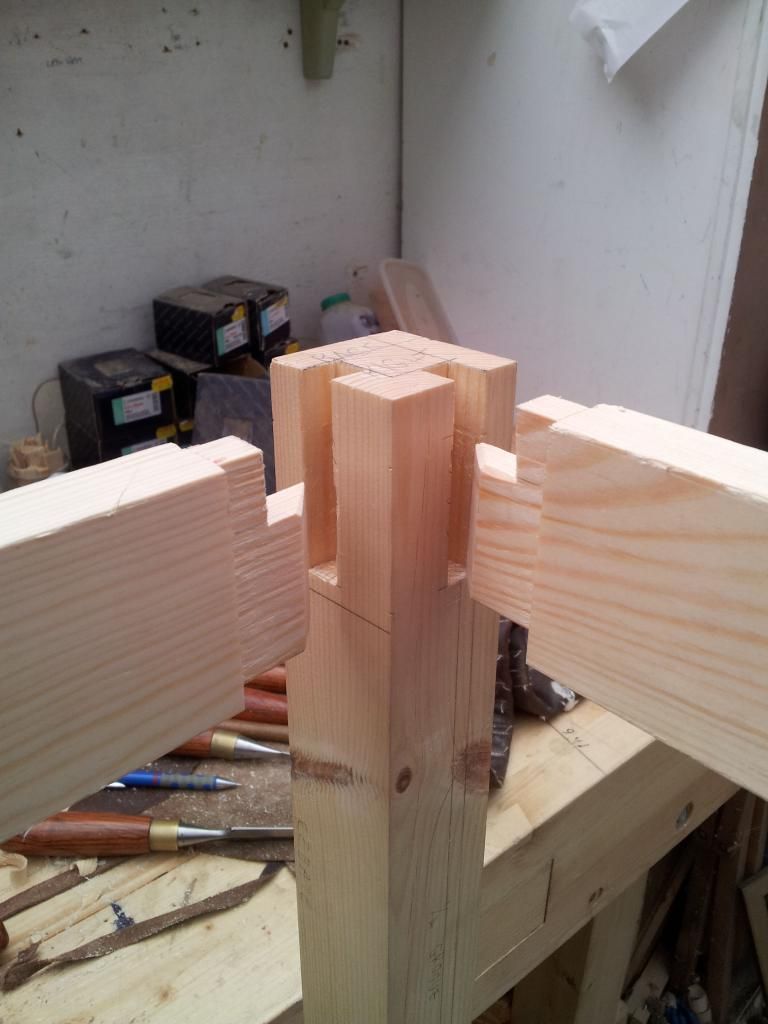
To line up the grooves on non-flush posts and rails, I cut the grooves in the posts first then stuck a rail in and knife-marked the position of the groove on that, before setting my mortise guage to those knife marks. I should confess to having used an electric router to cut the stopped grooves in the posts, to avoid making life too difficult; excepting that and the use of an electric drill a couple of times, the work was all un-powered.
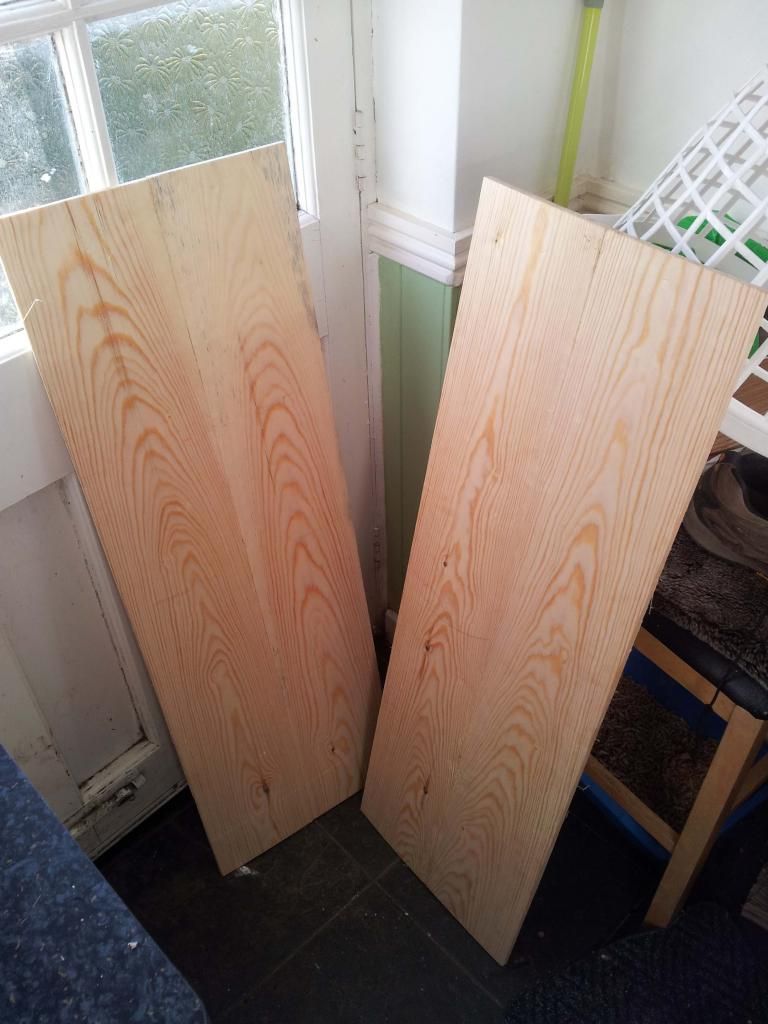
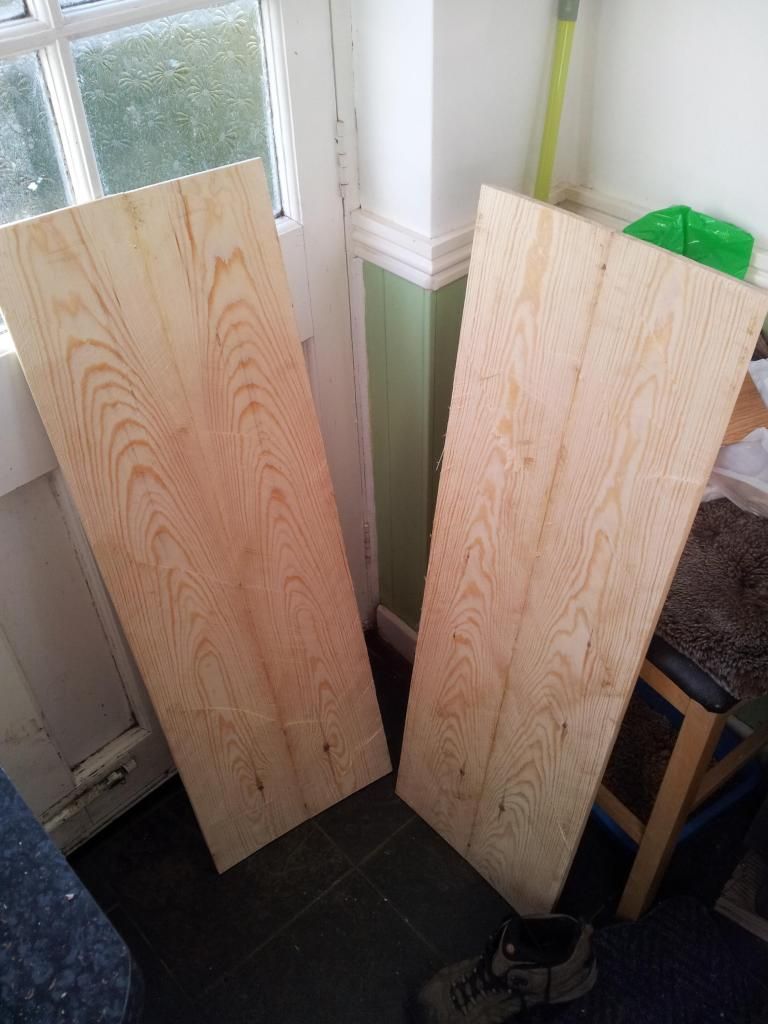
The photos don’t really convey the cupping, about 3/8″ I would guess.
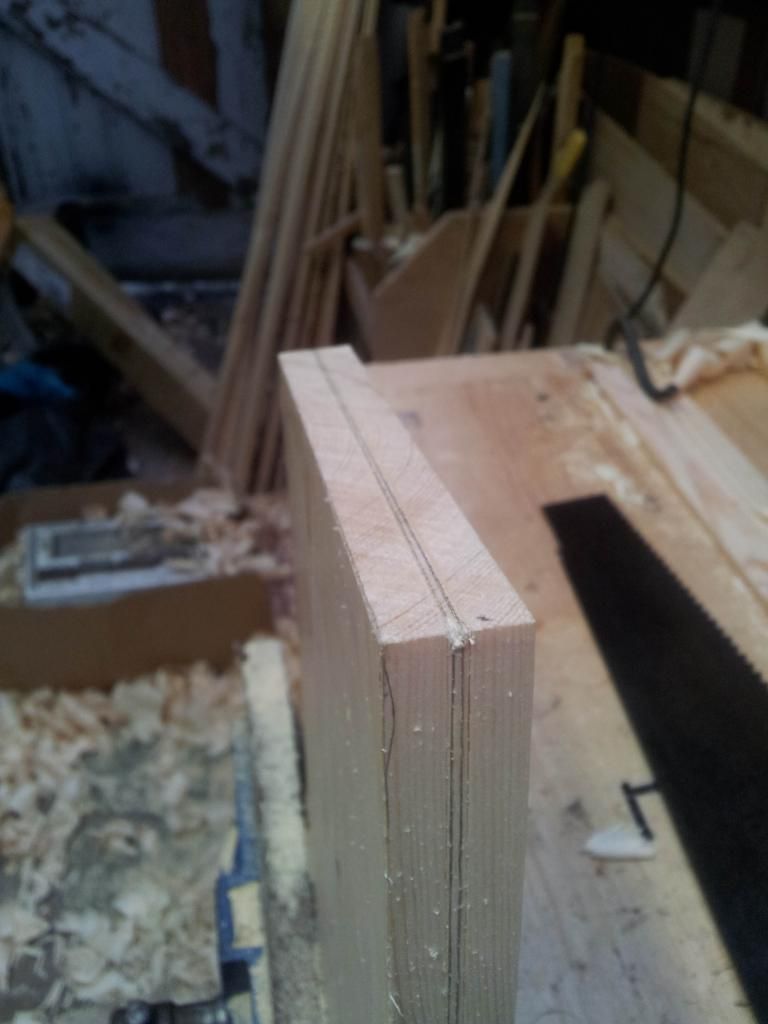
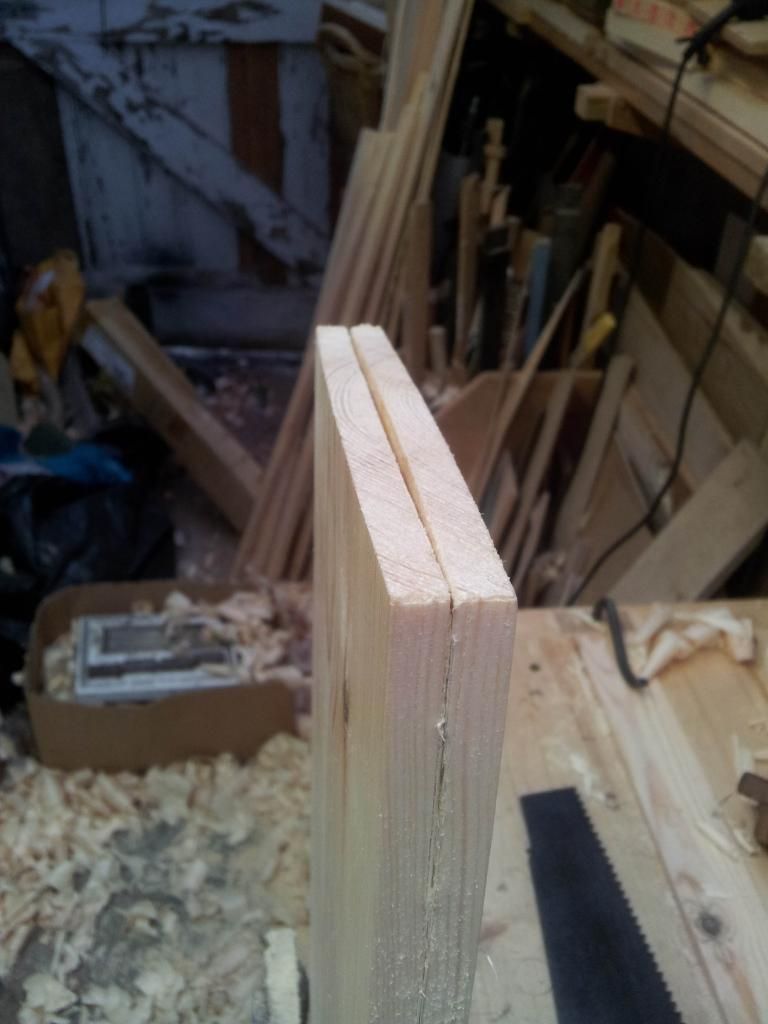
This “before and after” shows the cupping developed as soon as the resawing started.
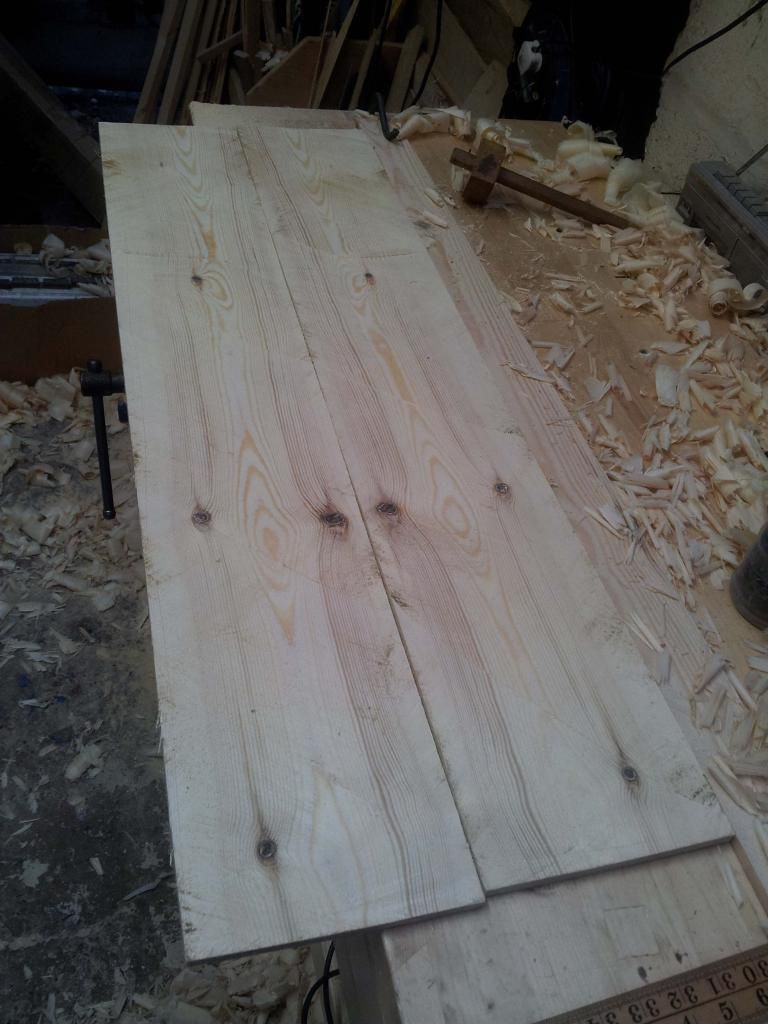
The pinkish/yellow colour contrast was very pronounced on the outside, but virtually gone after sawing. I hope that time and light exposure might reveal some of the intended pattern again.
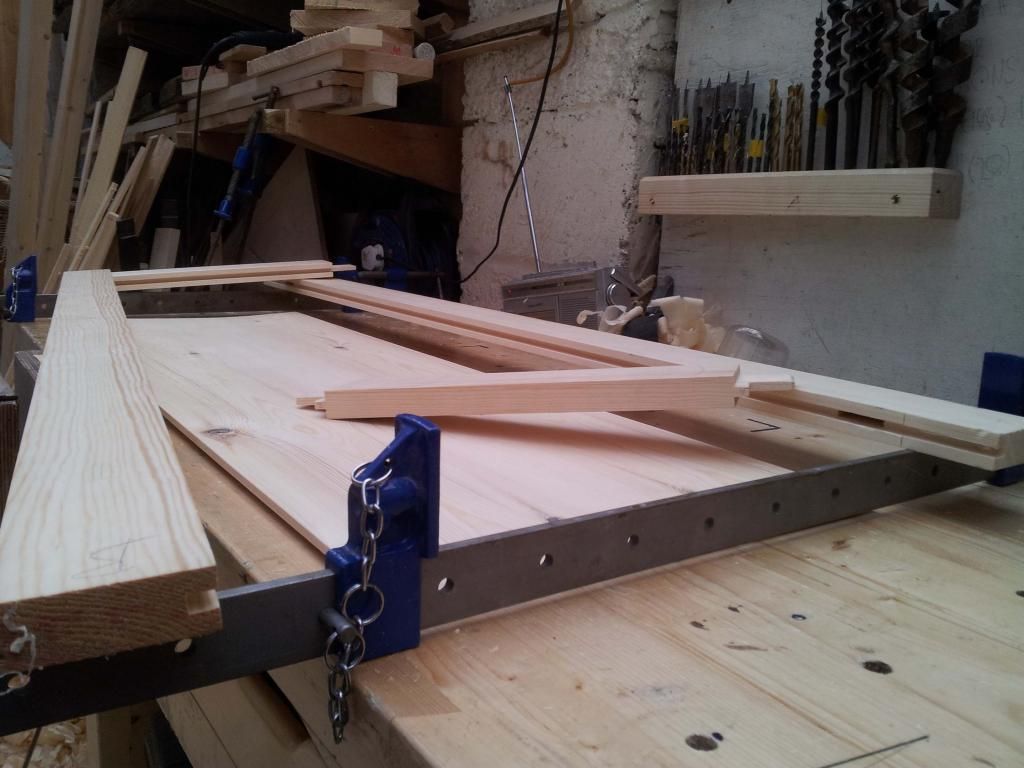
This photo shows one door frame pre-assembly, complete with grooves, haunched mortise and tenon joints and horns to be cut off after gluing.

Here the handles are stuck on with double sided tape, to determine a spacing and position that looked good. They ended up a little higher than this photo shows because they were a little low for a standing person to grasp without bending.
I hope this might be useful for anyone attempting a similar project, though of course the vast majority of the skills involved in making the cabinet have come straight from Mr Sellers’ videos and writings. A better resource for novice and even more experienced woodworkers could hardly be found.

 2 January 2015 at 7:01 pm #122960
Very well done. Some nice joinery and the handle a very nice touch.
2 January 2015 at 8:26 pm #122963Thank you Mark and Sandy.
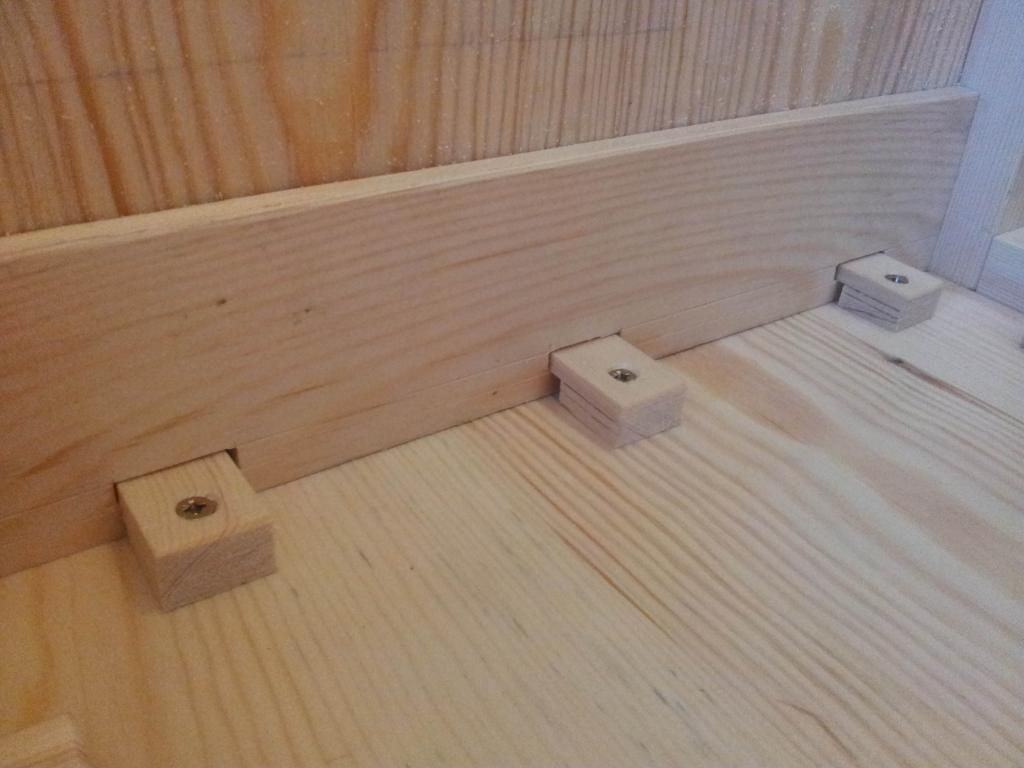
@alien8 Diego, thanks for your comments.My understanding is that at 7/8in (22mm) and 3ft span (about 900mm), the shelves should be able to accept quite a bit of weight without support. Having said that, the back edges are screwed to the back and the ends are supported along their whole width.
The finish is shellac rubbed out to a fairly low sheen, my crappy photos don’t make this clear.
Matt
-
AuthorPosts
- You must be logged in to reply to this topic.