Bookshelves: Episode 6
Posted 5 March 2014
This is an episode in a paid series. Want to watch it? You just need to sign up as a paid member, and you can enjoy this video and many other videos we think you will love.
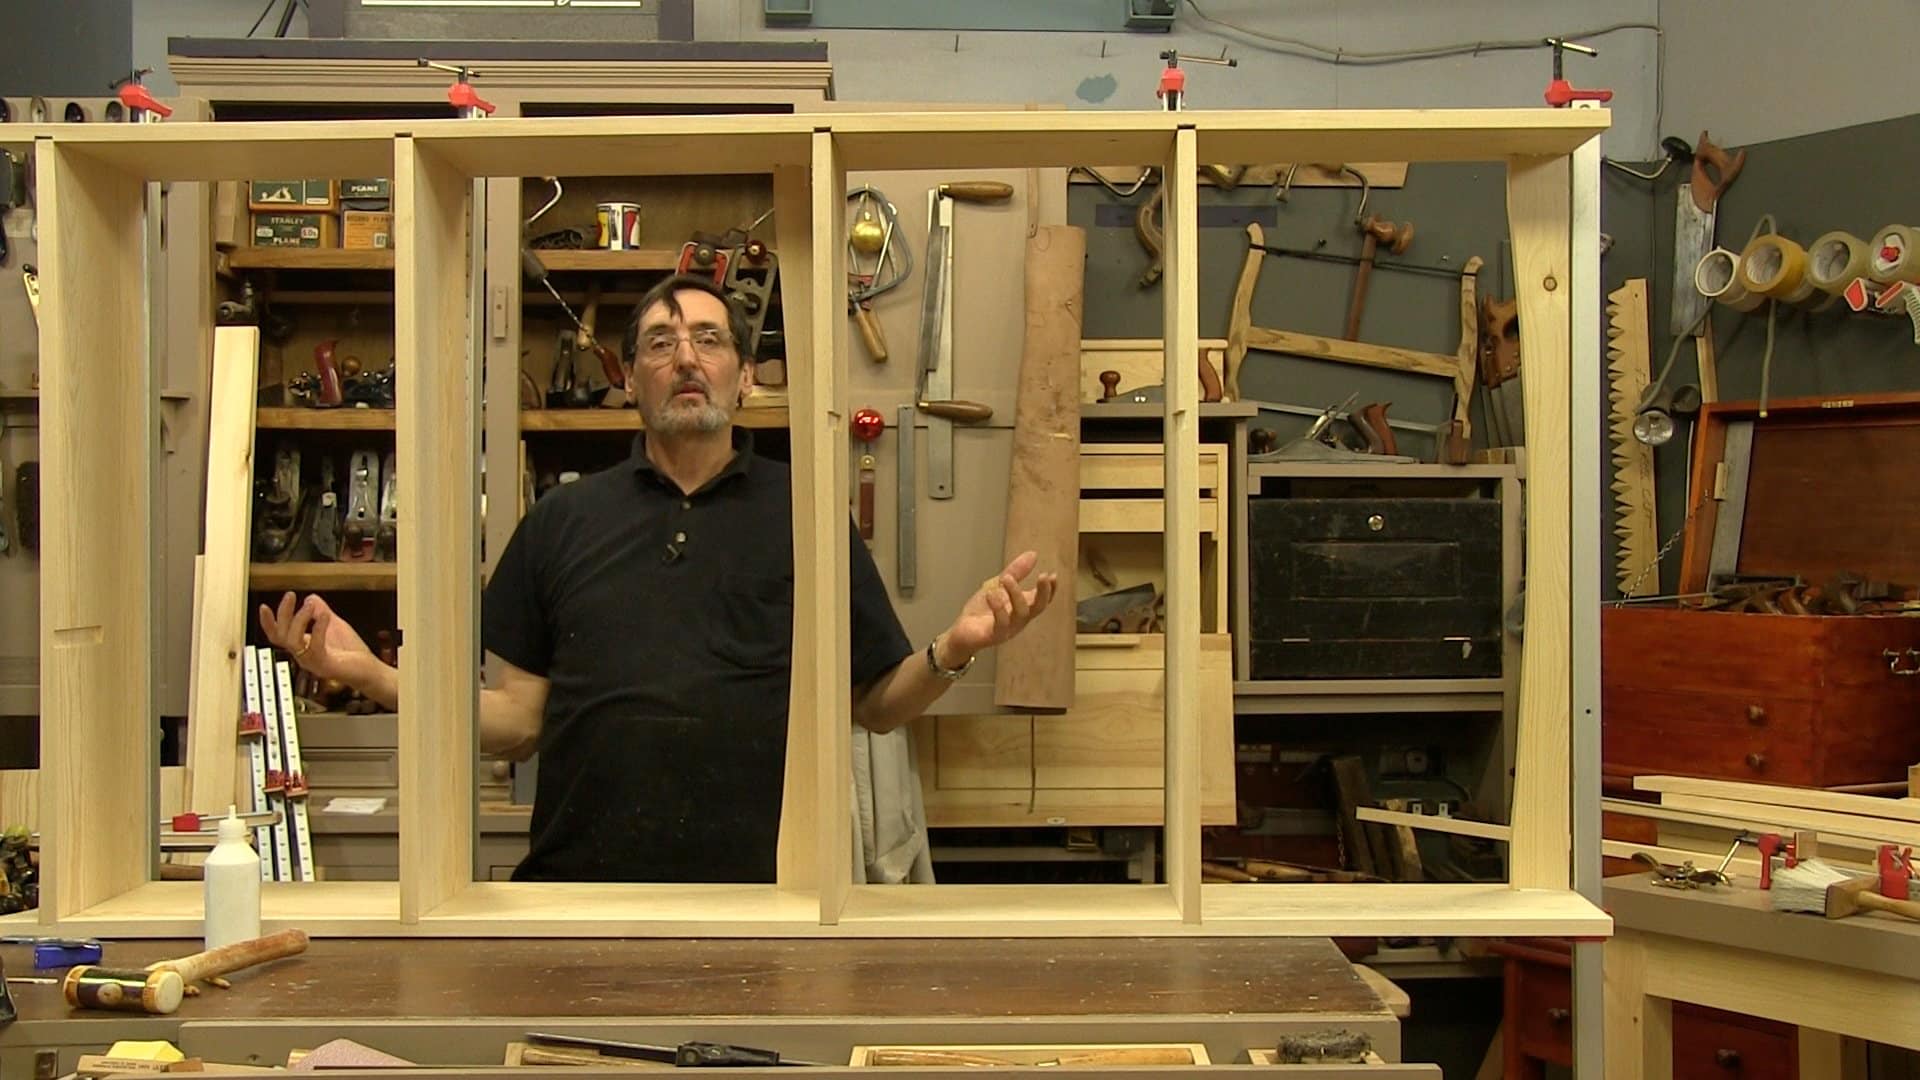
Paul takes us through a dry run, and then shows us how to fit optional dividers for the shelves. He then glues up and clamps the bookcase, showing what to keep an eye on. Next week we will start on the back frame.
Thanks for this one guys
Superb! Thank you once again! I always look forward to Wednesdays! 🙂
i never tire of seeing Paul glue up he always shows different little hints and tips to get the best out of each situation so we know what we could come up against, thanks .
Thanks Paul and staff for yet another very enjoyable video, I am not sure I have enough long clamps after seeing this glue up. Might need to p/u a couple more from HF, I do have my heavy Bessey’s though.
Steve
Thanks Paul & Crew for another great ep.
I’ve seen Paul cut many dado housings, yet I still find his method fascinating.
Is there ever a situation where Paul would use a sliding dovetail instead of a common housing? I would like to see how Paul would make a sliding dovetail for a shelf.
Scott
yeah scoot in the tool chest build .the divider between the two drawers i very interesting joint that complements the build
Yeah David, but that one is shallow – not a long and tapered dovetail housing like a typical sliding dovetail.
We plan that in the future joinery vids.
i am looking forward to starting this project .pauls laid back approach while at the same time been meticulous in his work oozes confidence for me to try.i was just wondering paul made a comment about the pine he was using was almost as good as the pine he worked in the USA .please excuse my ignorance but i always assumed the best pines came from the scandinavian countries here in europe or maybe its just a particular type if pine .only curious .hope they will do an episode on finishing
I don’t think that the best pines come from Scandinavia, they are just different. The US has Eastern White Pine and others of similar nature that are consistent and often more available as knot free pine. Southern Yellow Pine is often available knot free but it can tend to distort when force dried too quickly, which is all too often the case. Eastern WP is very even in texture with much less difference between the hard and soft aspects f the growth rings whereas our European Redwood Pine has much tighter growth rings and the wood is much harder and denser. I like all pines in equal measure and highly respect their contribution to the provision and wellbeing of societies worldwide.
Will there be additional episodes upcoming covering the back frame, tongue and groove back, and the optional upper dividers for the bookcase like the photos you posted on Facebook showing the finished, painted case?
I didn’t want to assume either way on this one…
Hi Rich, there will indeed be episodes covering this. The upper dividers will probably be in an additional free video, so people can choose if they want them or not.
Hope that helps.
Paul,
Your work always comes out square. What do you do if its not square? How would you go about resolving the problem?
This may be a silly question, but what is the difference between white glue & yellow glue? Here in the U.S., it seems that the majority of wood glues (i.e. Elmer’s, Tite-Bond) are yellow glues. Is one type preferable?
can you please give some details on the coping saw? I have one that doesn’t even come close to yours in terms of cutting speed…
thank you
Any alternatives to buying 10 clamps that big? Maybe they go for 7gbp in the UK, but i cant get for less than 35 GBP where I live. IF i find that many clamps …
How would they clamp it back in 18oo? (typical question I make when im out of money)
@betzaleldaniel there is a very inexpensive and compact alternative to large bar or pipe clamps. I have a microshop and no spare money so I use threaded rods and scrap pieces. Two treaded rods with nuts and washers through two pieces of scrap drilled to receive them. Pre-stage one end with a scrap piece and the two threaded rods, slip them over/under your assembly from one side, and add the second piece of scrap with the nuts and washers on the other side. As you tighten the nuts they act as two bar clamps at the same time! What a savings!
After your glue-up the threaded rods, nut, washers, and scrap pieces disassemble to store very compactly. Everything available to reconfigure for another job. I keep my components in a section of PVC pipe standing in a corner.
It seems I’m not able to attach photos here. I will gladly send you photos to an email address. If you have any questions drop me a line.
@betzaleldaniel there is a very inexpensive and compact alternative to large bar or pipe clamps. I have a microshop and no spare money so I use threaded rods and scrap pieces. Two treaded rods with nuts and washers through two pieces of scrap drilled to receive them. Pre-stage one end with a scrap piece and the two threaded rods, slip them over/under your assembly from one side, and add the second piece of scrap with the nuts and washers on the other side. As you tighten the nuts they act as two bar clamps at the same time! What a savings! It seems I’m not able to attach photos here. I will gladly send you photos to an email address. If you have any questions drop me a line.
@betzaleldaniel I forgot to mention that after your glue-up the threaded rods, nut, washers, and scrap pieces disassemble to store very compactly. Everything available to reconfigure for another job. I keep my components in a section of PVC pipe standing in a corner.
Will be glad to hear more details on the configuration. Looks like a lead to follow. What diameter rod? how do you quickly tighten the nuts? Do you use wing nuts or a wrench? Post a Google drive link for photos…
tks
And this is how I clamped it in the end: cargo straps!