Foot Stool – Episode 1
Posted 1 April 2015
This is an episode in a paid series. Want to watch it? You just need to sign up as a paid member, and you can enjoy this video and many other videos we think you will love.
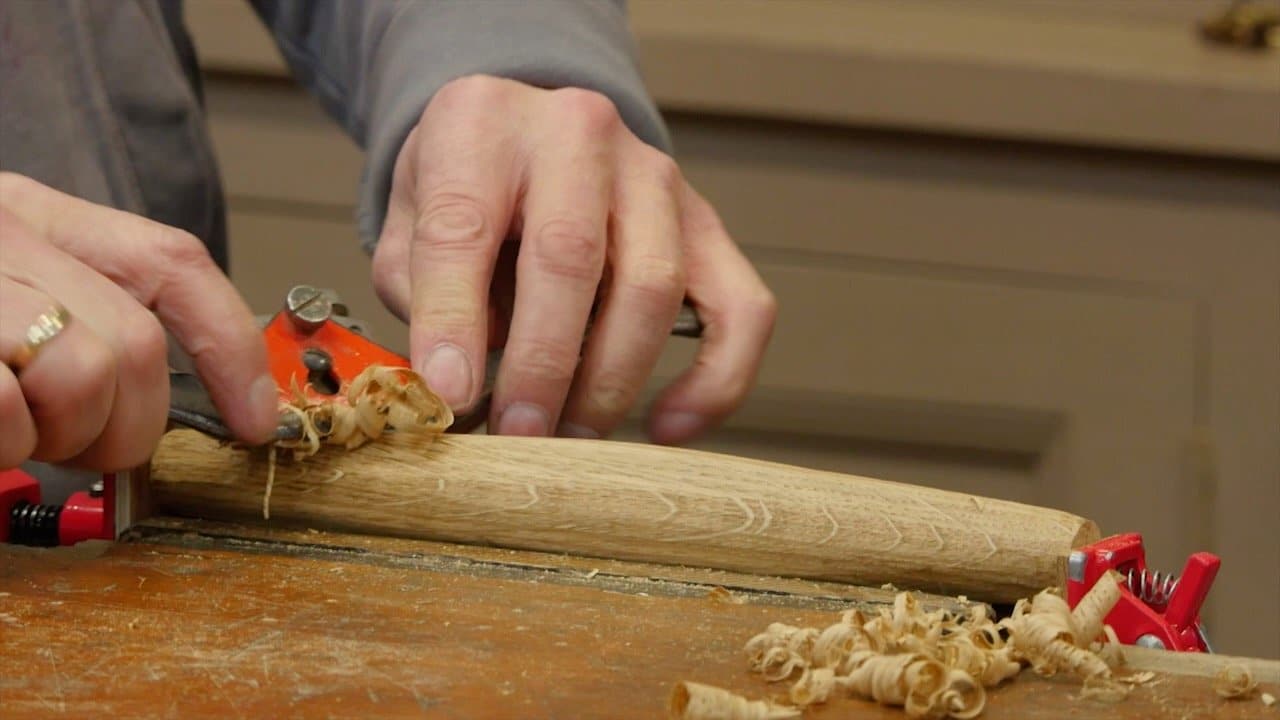
Paul lays out the position for the legs and shows how he ensures the holes are bored at the correct angle. He then tapers the legs using the plane, saw, and axe, refines the shape with the spokeshave before scraping and sanding to finish off the leg.
I know exactly where I can use this little project to get done local children involved. 🙂
I hate auto correct.
My daughter is too young yet, but I’ll make her one of these and one day she can make another one with me, too. Nice little project for a weekend summer day.
I have never seen the trick of using the brace and bit as the marking device for the leg tenon diameter but it makes perfect sense. Brilliant!
Thanks. Great little project.
This looks like a fun little project to work with my 8 year old Grandson with. Was there a given angle for the leg splay, if so I missed it ? My interenet keeps coming on and going off.
Steve
I think it is 1:7 (pronounced one in seven).
Someone please correct me if i am wrong.
The drawing on the project info page says 80 degrees, which is about 1:6, but I doubt a few degrees either way would matter too much as long as you’re fairly consistent.
Really enjoyed this video Paul, I will be getting my Grandson to make one when he is a bit older.
A small note – just before minute 3, the audio says 1 5/8 ” inset, while the text popop showed 1 5/16″.
Is it easy to correct the popup?
This is a great project, my girl ( age 9 ) loves it she has watched the video a number of times and picked out her wood 5/4 oak for legs and 6/4 walnut for the seat .
SHE is turning easter eggs from poplar for her two little cousins today, but can’t wait to make the stool for her bedroom
Frankj
Mighty, I’m after watching the shaker seat project so it’s great to see a scaled down version for the spindles.
It’s fantastic to hear about your wee girl making things 🙂
Thanks for another great video. I learn so much from you. What brand of clamp are you using to hold wood above your front vice?
Hi patricia take a look at this it may help you https://paulsellers.com/2011/11/4473/
Thank you, Eddy. That link was very helpful.
Thank you Paul. I see how this project can be used to make many different things. I love the simplicity of our work.
I made it with Oak. It came out beautiful, thank you Paul.
I have one only question, I used vinyl glue and in a leg it was a little too much and accumulated as a ream at the base of the leg. I was thinking of removing it later with a chisel, as Paul suggests. But tannin of the Oak turned the glue black and stained a little the wood. Not a big deal, I scraped the are and came out pretty nice anyway. Any suggestions to avoid the issue ? Maybe vinyl or water based glues are not the best ones for oak wood ?
For vinyl glue I meant the common white glue for wood…
The may well be a reaction between the water in the glue, tannic acid in the oak and steel from a clamp or similar. The other thing is to try not to have the excess of glue. I wouldn’t recommend using an alternate glue particularly, we use white wood glue for our oak projects. Hope that helps.
I have recently started using wet wipes (moist towels with isopropyl alcohol ) to wipe off
excess glue. Readily available, works like a charm and no staining.
Thank you for the answers, I might have a go with those wet wipes. Regarding trying not to have the excess of glue I think sometime it is almost impossible. In fact, I used a very few white glue for the legs of the stool, and in one case, the tolerance between the leg and it’s hole was so close that the glue joint froze immediately and I was not able to sit the leg completely in the recess. Overwhelmed from panic, I started hammering the leg out thru the top hole and I slightly damaged the wood of the stool (it was the last leg I was tying to sit, after three afternoons of work). Had I no lost my self control, I could have clamped the leg in the vise and turned the whole stool back and forth to “un-plug” the leg, as I understood later…
I didn’t have a piece wide enough for the seat so I edge jointed and glued two 5 inch pieces of sapele to make the seat. The seat is 1 inch finished thickness.
I was wondering if this would be strong enough (especially to stand on) or whether it would be better to add a cross brace of some kind underneath the seat. Perhaps something with slotted screws to allow for movement?
Any ideas appreciated
Cheers
Bill