Skip to content
Woodworking Masterclasses
Facebook Instagram
  • Register Now
  • Video Library
  • GalleryExpand
    • Bedside Cabinet GalleryExpand
      • Assembly Table Gallery
      • Bathroom Cabinet Gallery
      • Bench Stool Gallery
      • Blanket Chest Gallery
      • Bookends Gallery
      • Book Shelves Gallery
      • Breadboard-end Cutting Board Gallery
      • Carrying Tote Gallery
      • Chess Board Gallery
      • Chest of Drawers Gallery
      • Christmas Gallery
      • Coasters Gallery
      • Coat Rack Gallery
      • Coffee Table Gallery
      • Corner Shelf Gallery
      • Craftsman-style Lamp Gallery
      • Dining Chair Gallery
      • Dovetail Boxes Gallery
      • Fly Swat Gallery
      • Frame Saw Gallery
    • Foot Stool GalleryExpand
      • How to Make a Table
      • Joiner’s Mallet Gallery
      • Joiners’ Toolbox Gallery
      • Keepsake Box Gallery
      • Laptop Desk Gallery
      • Leaning Wall Shelf Gallery
      • Mitre Box Gallery
      • Occasional Table Gallery
      • Picture Frames Gallery
      • Rocking Chair
      • Sawhorse Gallery
      • Shaker-Style Bench Seat Gallery
      • Shaker Stool Gallery
      • Sofa Table Gallery
      • Stepladder Gallery
    • Trestle TableExpand
      • Tool Cabinet
      • Tool Chest Gallery
      • Walking Cane Gallery
      • Wall Brackets Gallery
      • Wallclock Gallery
      • Wall Shelf Gallery
      • Winding Sticks Gallery
      • Wooden Plane Gallery
      • Wooden Spokeshave
      • Wooden Tray Gallery
      • Workbench Gallery
      • Other user projects vol. I
      • Other user projects vol. II
      • Submit Photos to Gallery
  • About Us
  • News
  • FAQsExpand
    • General FAQs
    • Workbench FAQs
  • Contact
Account Login
Woodworking Masterclasses

Bench Stool Progress

Search
Previous Back to: Bench Stool78 Replies

Welcome! / Forums / Project Series / Bench Stool / Bench Stool Progress

  • This topic has 78 replies, 26 voices, and was last updated 4 years, 10 months ago by Edouard Poitras.
Viewing 15 posts - 46 through 60 (of 79 total)
← 1 2 3 4 5 6 →
  • Author
    Posts
  • Greg Merritt
    5 January 2014 at 11:46 pm #25340

    Thanks Denise…yep I think it will be a great addition to the shop. I left the back riser off because I know it will be pressed into service as a table. Actually it already was even before it was finished. It held my drawing board while I was building my turning saw.

    http://hillbillydaiku.com

    Settings
    BrianJ
    6 January 2014 at 12:56 am #25341

    Looks great Greg.

    Ontario, Canada

    Settings
    Greg Merritt
    6 January 2014 at 2:03 am #25344

    Thank you Brian.

    http://hillbillydaiku.com

    Settings
    frankpro
    6 January 2014 at 2:04 am #25345

    Great job Greg.

    Settings
    Greg Merritt
    6 January 2014 at 2:26 am #25346

    Thank you so much Frank.

    http://hillbillydaiku.com

    Settings
    Serhiy D’yachyshyn
    6 January 2014 at 5:05 am #25356

    Greg it’s beautiful)) I wait till moment when you post finished project)) Please don’t paint))It’s already beautiful)grain and forms)) Thanks for posting)

    Toronto, Canada

    Settings
    David Gill
    6 January 2014 at 10:22 am #25359

    Great job greg I like the way you have matched the grain on both sides at the front, It would be a shame to hide that detail with paint

    Wigan, Lancs. England :

    Settings
    Greg Merritt
    6 January 2014 at 12:33 pm #25362

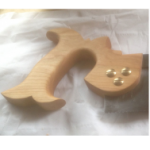
    Serhiy and David thank you for the kind words…the grain on the seat was just coincidence/function of the shaping process. While I agree that it looks nice, the rest of the stool does not. As far as grain and wood goes. This stool was literally made from scraps in the shop. There is 2x construction lumber left over from the bench build, pine and a piece of aspen. Consequently, it was always destined for a coat of paint. I’m sorry to disappoint.
    http://hillbillydaiku.com

    Settings
    Mark Armstrong
    6 January 2014 at 6:16 pm #25377

    It looks really comfortable nice job Greg.

    Dagenham, Essex, England

    Settings
    Greg Merritt
    6 January 2014 at 6:45 pm #25380

    Thanks Mark. It really is comfortable. I brought it inside last night to make sure that the glue dried, it was -12F here last night with the wind chill. The wife and son tried it out and both laid claim to it. They will have to wait though, this one I’m keeping. It looks like I’ll be getting some more practice in stool building in the very near future. 🙂

    http://hillbillydaiku.com

    Settings
    Greg Merritt
    10 January 2014 at 1:04 am #25649

    I thought I would post a photo of the milk paint process so that if you decide to try it you will know what to expect. This is Lexington green milk paint and as you can see it dries dead flat. The next step will be to burnish it with steel wool. This will impart a sheen and darken the color a shade. After that I will add 2-3 coats do shellac. Then steel wool the surfCe until smooth. Then paste wax.

    Also, since milk paint has almost no odor and is non toxic, I was able to paint the stool in my nice warm kitchen.

    http://hillbillydaiku.com

    Settings
    Steve Follis
    12 January 2014 at 7:59 am #25788

    I thought this was interesting if anyone wants to participate.

    Shop Stool Build-Off

    Memphis, Tennessee

    Settings
    Jason
    12 January 2014 at 2:48 pm #25794

    @gman3555 how easy is milk paint to use. I tried paul’s painting technique for a table base using latex paint. it was tricky to remove all the brush strokes, however i’m pleased with the results.

    Settings
    Greg Merritt
    12 January 2014 at 3:31 pm #25795

    @jason , easy is a subjective term. I use milk paint for several different reasons.
    1. non toxic (most important to me)
    2. it comes in powder form (I can mix just the amount I need)
    3. versatile (I can mix it as a paint or stain)
    4. durable (it dries hard but will expand and contract with the wood)

    I use cheap throw-away brushes or a rag to apply the milk paint and have had no issues with brush strokes. Milk paint dries very flat and has a rough texture. If you want a smooth surface you must lightly sand or burnish with steel wool. Milk paint also offers no real surface protection and must be top coated. Shellac and tung oil seem to be the most popular. I have only top coated with shellac and then wax. It usually takes me three days to apply the finish when using milk paint. Day one is milk paint, let dry for 24hrs. Day two is burnish with steel wool and shellac, let dry 24hrs. Day three is rub out the shellac with steel wool and apply a paste wax.

    Like I said, easy is a subjective term.

    http://hillbillydaiku.com

    Settings
    David Gill
    12 January 2014 at 4:45 pm #25802

    Greg Great job it looks great, why would you not clean the brushes out after use I would have thought they would clean in hot soapy water?

    Wigan, Lancs. England :

    Settings
  • Author
    Posts
Viewing 15 posts - 46 through 60 (of 79 total)
← 1 2 3 4 5 6 →
  • You must be logged in to reply to this topic.
Log In

Security and Payments

Payments on this site are processed using stripe.com and gocardless.com. Customer's credit card details or bank details are stored on the secure servers of stripe.com or gocardless.com This entire site is secured by SSL.

About Our Company

Woodworking Masterclasses is a trading name of Rokesmith Ltd

Rokesmith Ltd


About Rokesmith Ltd | Privacy Policy | Terms and Conditions | About Us


Useful Links

© 2023 - Rokesmith Ltd

Loading...
  • Register Now
  • Video Library
  • Gallery
    • Bedside Cabinet Gallery
      • Assembly Table Gallery
      • Bathroom Cabinet Gallery
      • Bench Stool Gallery
      • Blanket Chest Gallery
      • Bookends Gallery
      • Book Shelves Gallery
      • Breadboard-end Cutting Board Gallery
      • Carrying Tote Gallery
      • Chess Board Gallery
      • Chest of Drawers Gallery
      • Christmas Gallery
      • Coasters Gallery
      • Coat Rack Gallery
      • Coffee Table Gallery
      • Corner Shelf Gallery
      • Craftsman-style Lamp Gallery
      • Dining Chair Gallery
      • Dovetail Boxes Gallery
      • Fly Swat Gallery
      • Frame Saw Gallery
    • Foot Stool Gallery
      • How to Make a Table
      • Joiner’s Mallet Gallery
      • Joiners’ Toolbox Gallery
      • Keepsake Box Gallery
      • Laptop Desk Gallery
      • Leaning Wall Shelf Gallery
      • Mitre Box Gallery
      • Occasional Table Gallery
      • Picture Frames Gallery
      • Rocking Chair
      • Sawhorse Gallery
      • Shaker-Style Bench Seat Gallery
      • Shaker Stool Gallery
      • Sofa Table Gallery
      • Stepladder Gallery
    • Trestle Table
      • Tool Cabinet
      • Tool Chest Gallery
      • Walking Cane Gallery
      • Wall Brackets Gallery
      • Wallclock Gallery
      • Wall Shelf Gallery
      • Winding Sticks Gallery
      • Wooden Plane Gallery
      • Wooden Spokeshave
      • Wooden Tray Gallery
      • Workbench Gallery
      • Other user projects vol. I
      • Other user projects vol. II
      • Submit Photos to Gallery
  • About Us
  • News
  • FAQs
    • General FAQs
    • Workbench FAQs
  • Contact
Login Account

Insert/edit link

Enter the destination URL

Or link to existing content

    No search term specified. Showing recent items. Search or use up and down arrow keys to select an item.
      Search