Bootstrapping of a tiny workshop
Welcome! / Forums / General Woodworking Discussions / Projects / Bootstrapping of a tiny workshop
Tagged: splayed legs, workbench
- This topic has 16 replies, 6 voices, and was last updated 5 years, 7 months ago by
 Ecky H.
-
AuthorPosts
-

Hello,
I’d like to describe my process of building up a small hand tool woodworking workshop from scratch – with all successes and the mistakes I made.
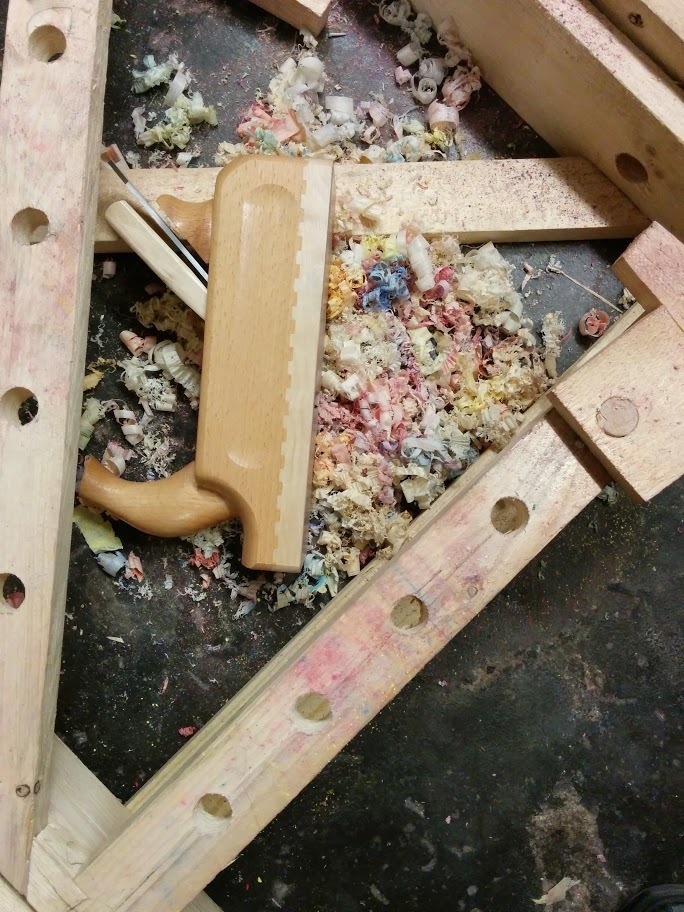
The very first project was a saw buck for my father – a german description of the build is here: http://www.outdoor-foren.de/threads/holzbau.3071/#post-32901
The cross and diagonal struts got some holes for taking the dowels of simple clamping devices: https://nerdpol.ch/uploads/images/scaled_full_eb616d0d0c52478f9f09.jpg
It was still very exhausting to work around 6″ above the floor, but better than on the card box and much better than nothing. With that I built a first saw bench:
https://nerdpol.ch/uploads/images/scaled_full_3c485ebbf7e1e5ca051b.jpg
This saw bench was a gift for my father.In the meantime I got a Bosch PWB 600 DIY workbench. It’s probably made for use with power tools. Under the forces of hand tool working (sawing and planing) it wobbles noticeably. So that was for the hand tool work surely a mistake.
Nonetheless it helped me to build the saw bench MkII: https://nerdpol.ch/uploads/images/scaled_full_42e4b37a5bc3731a7b2a.jpg
Two minutes of insufficient concentration lead to two mistakes. I made one recess on one leg in the wrong direction. The other one can be seen at the end of the bench top: didn’t care enough for the grain direction. So the grain is diametrically at the two parts of the top.
Some holes in the surface and dowels work well as planing stop: https://www.infixiert.org/img/hw/20170518_hw_0010.jpg
With a “real” planing stop: https://www.infixiert.org/img/hw/20170521_hw_0002.jpgWith the wedge driven clamping devices:
https://www.infixiert.org/img/hw/20170529_hw_0001.jpg
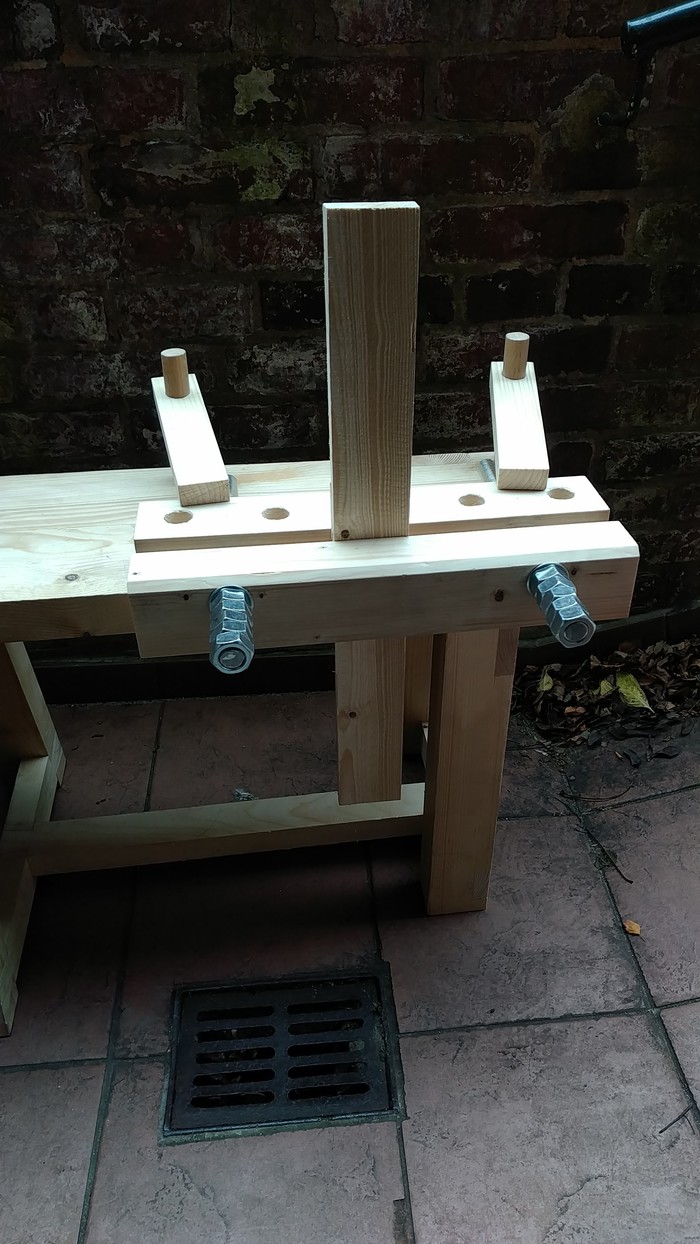
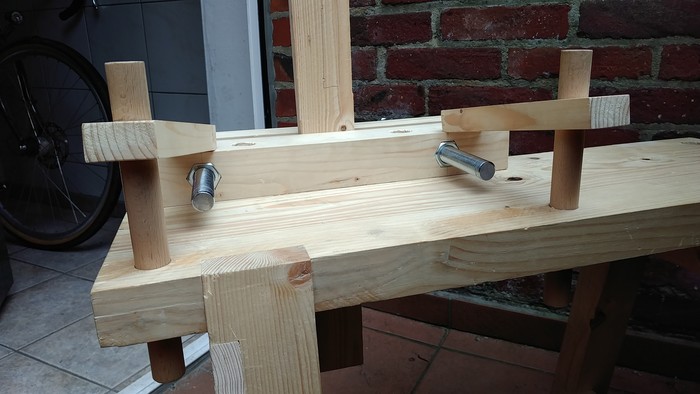
https://www.infixiert.org/img/hw/20170529_hw_0002.jpgIn the last weeks the saw bench got a real improvement – some kind of moxon vice:
https://nerdpol.ch/uploads/images/scaled_full_31775d2b47d5f4b62a9b.jpg
https://nerdpol.ch/uploads/images/scaled_full_8794cfda0d85d433db90.jpg
https://nerdpol.ch/uploads/images/scaled_full_d92091bae580455a83fb.jpg
The clamping force is stunning.
The whole box of 25 nuts doesn’t cost significantly more than the 10 nuts I wanted to buy. So it was the simplest way to screw 5 of them on the threaded rod and use it as a handle. But I’ll replace that with wooden handles as soon as possible. 😉
And of course I cut the threaded rods with a hacksaw by hand.The next project is to build two Krenov style sawhorses: http://lumberjocks.com/projects/65878
Due to the very uneven concrete floor in the workshop I’ll build them with three contact points to the ground so that they can’t rock.With the knowledge I gathered until now, I’m not sure to choose the same steps again to start from scratch. Probably I’d make two three legged sawhorses like this: http://www.iedu.com/ww/SawHorse/index.html
It is easier to build and remarkable higher than the saw bench. Planing, in particular milling stock by hand is exhausting and about 30 inches of working height instead of 20 inches can’t be underestimated. On the other hand – with the saw bench I can work inside the tiny cellar full of lumber (“lumbered”?), bicycles and the heating boiler.E.
Go for the sawhorse.
Two days ago I tried to prepare a 40x60x900mm sized raw sawn spruce bar (flattening, squaring, planing to size 37x55x900mm) on the saw bench. After around half an hour my back told me to seriously think whether preparing a lot of larger pieces that way is a good or a not so good idea…
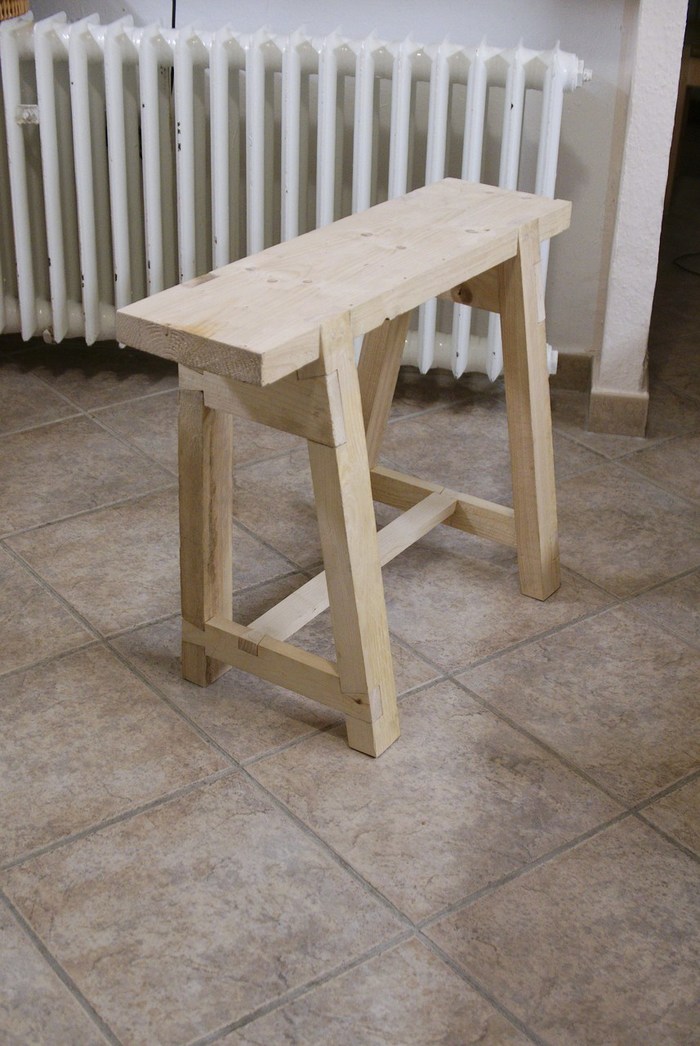
Yesterday I bought some prepared (planed to 40x95mm, the most massive stock the nearest “wood centre” had) wood and “quick and dirty” screwed up that sawhorse and finished it today.
I did some changes to the construction:
- higher than that “original” sawhorse: 910mm (for me with “ideal” workbench height according to Mr. Sellers around 38″/970mm) so I can try out different heights
- “chamfered” top ends of the rear legs to glue the legs to the vertical parts of the “sawhorse top”
- a low, slim stretcher between the rear legs
- a board from the front leg to the stretcher to add stability and to put a foot onto it (Mr. Sellers showed that technique in one of the new workbench videos)
- a “retractable” planing stop
The first passes with the plane on that sawhorse: what a difference 16″ make…
Much, much better than on the sawbench. Tomorrow I’ll be able to take some pictures and post them here.E.
PS: That sawhorse is definitely temporary. Therefore I didn’t care for accuracy or beauty. Ymmv.
 21 December 2017 at 11:52 pm #415387
Good sawhorses go a long way, IMO. You can butt long stock held on the sawhorses up against a wall or stud as a planing stop. Works fine for bootstrapping your shop.
@delong1974
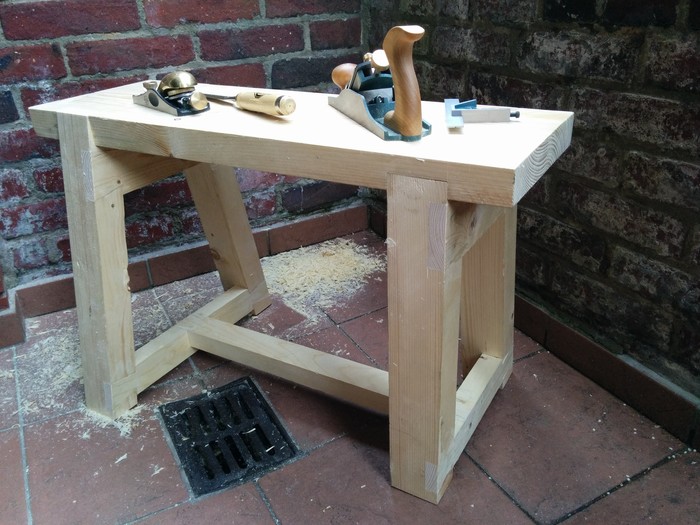
You’re right.But I already built that sawbench and the sawponies and they are pretty useful – for sawing and doing small stuff. And: I can put them under the workbench, which won’t be possible with a fully grown sawhorse. The cellar is 7m² (around 75sqft), of which 1.5mx1.5m (5ftx5ft) are left for woodworking.
So space usage really matters. That’s why I decided against permanent sawhorse(s).The temporary sawhorse and workbench is shown on the photos.
E.
Attachments:
You must be logged in to view attached files. 24 December 2017 at 1:50 pm #417172
Well, for temporary that looks pretty nice. I noticed a shorter saw bench there. (Or what i took to be such.) I have several sawhorses which are all knee high to me. When my kids were young and in 4H, they had a wood working class which I taught. We made these, they were my design. I still have 5 of them myself, if I remember correctly. They are great for sawing because I can put a knee on whatever I am cutting. They work well for younger kids because they can reach easily. In combination they work as a work surface (pretty low for a man, but good for kids). Several of the kids in that class have told me they still use their sawhorses.
21 January 2018 at 5:45 pm #446940Your saw buck and saw bench dog clamps present ideas new to me. They’re very cool – and I’m going to try them out on my saw bench.
Perhaps a saw bench is best for planing small pieces where one can sit on the bench while working.
Nice work
Rick
Some weeks later…
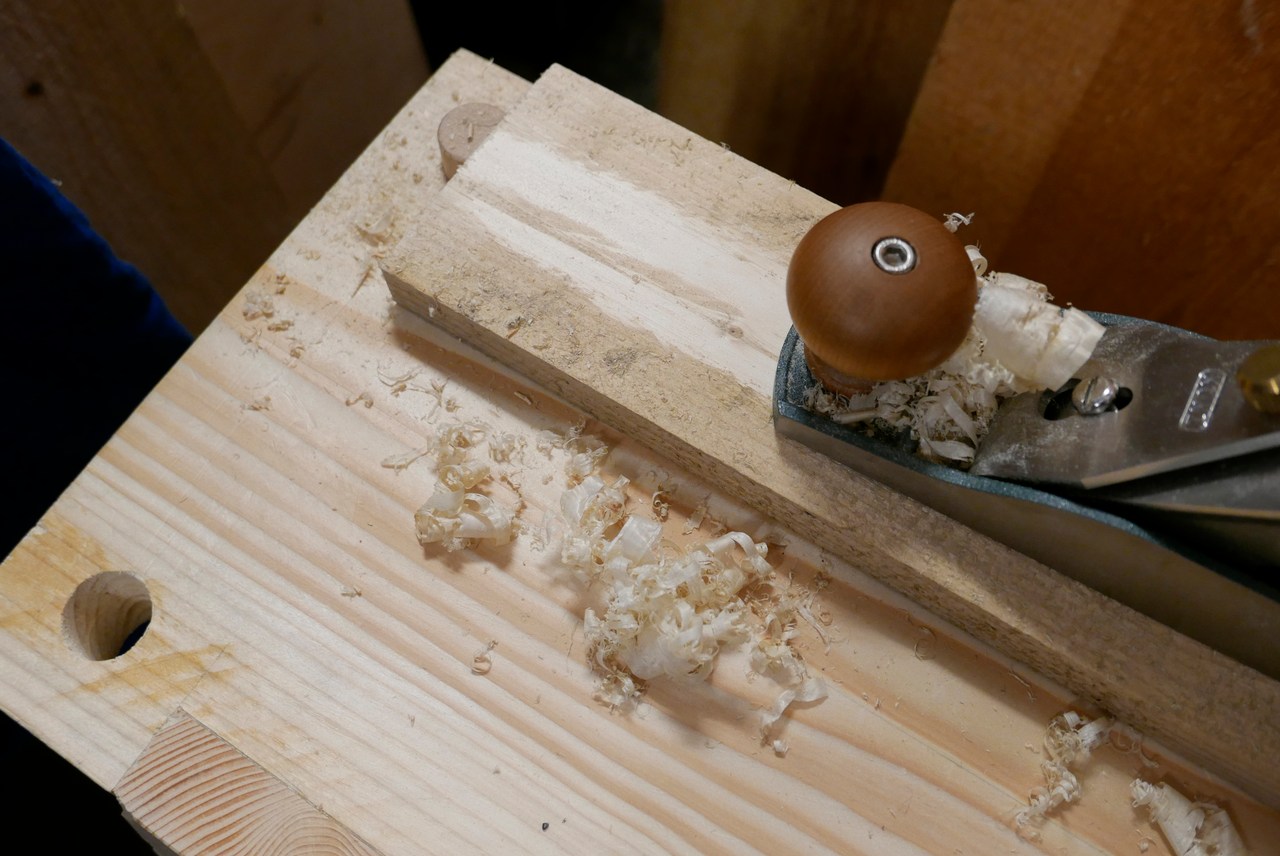
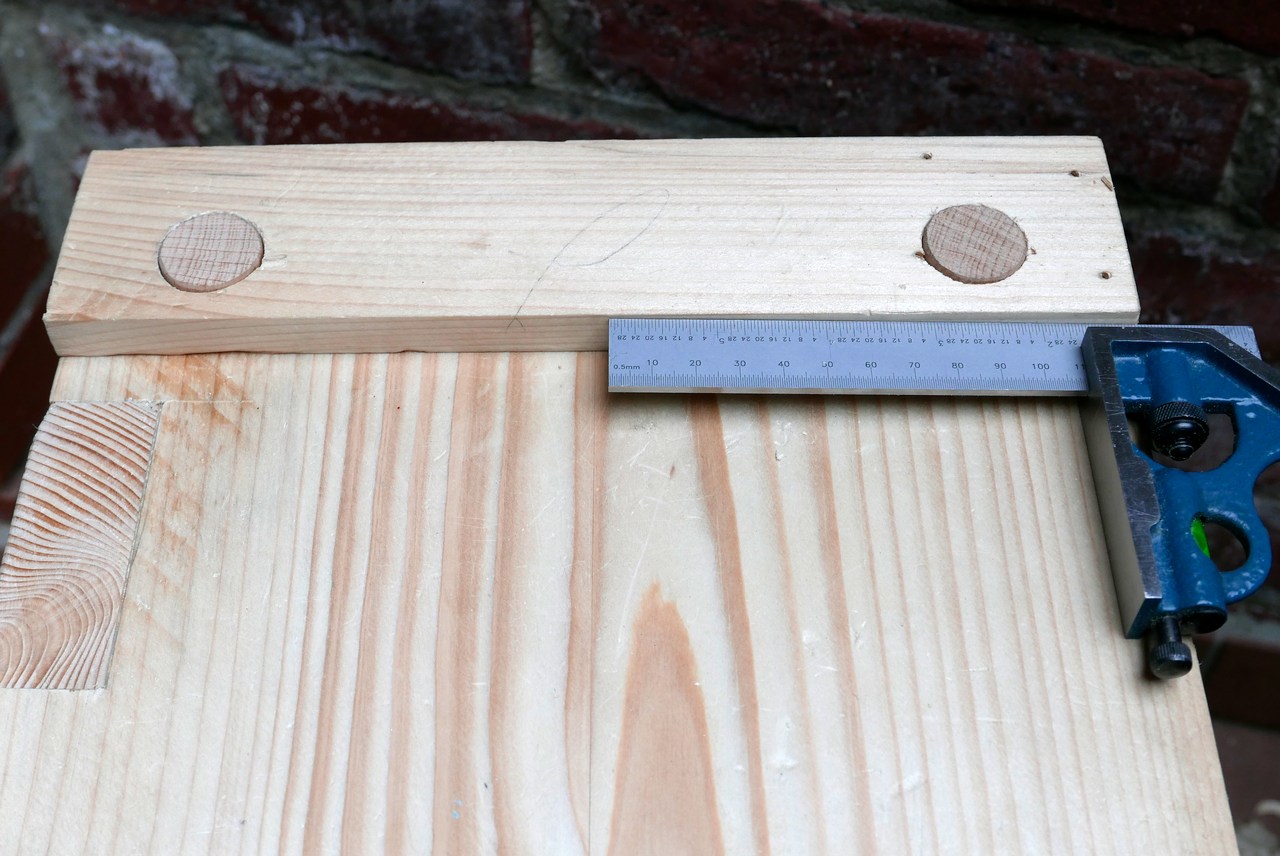
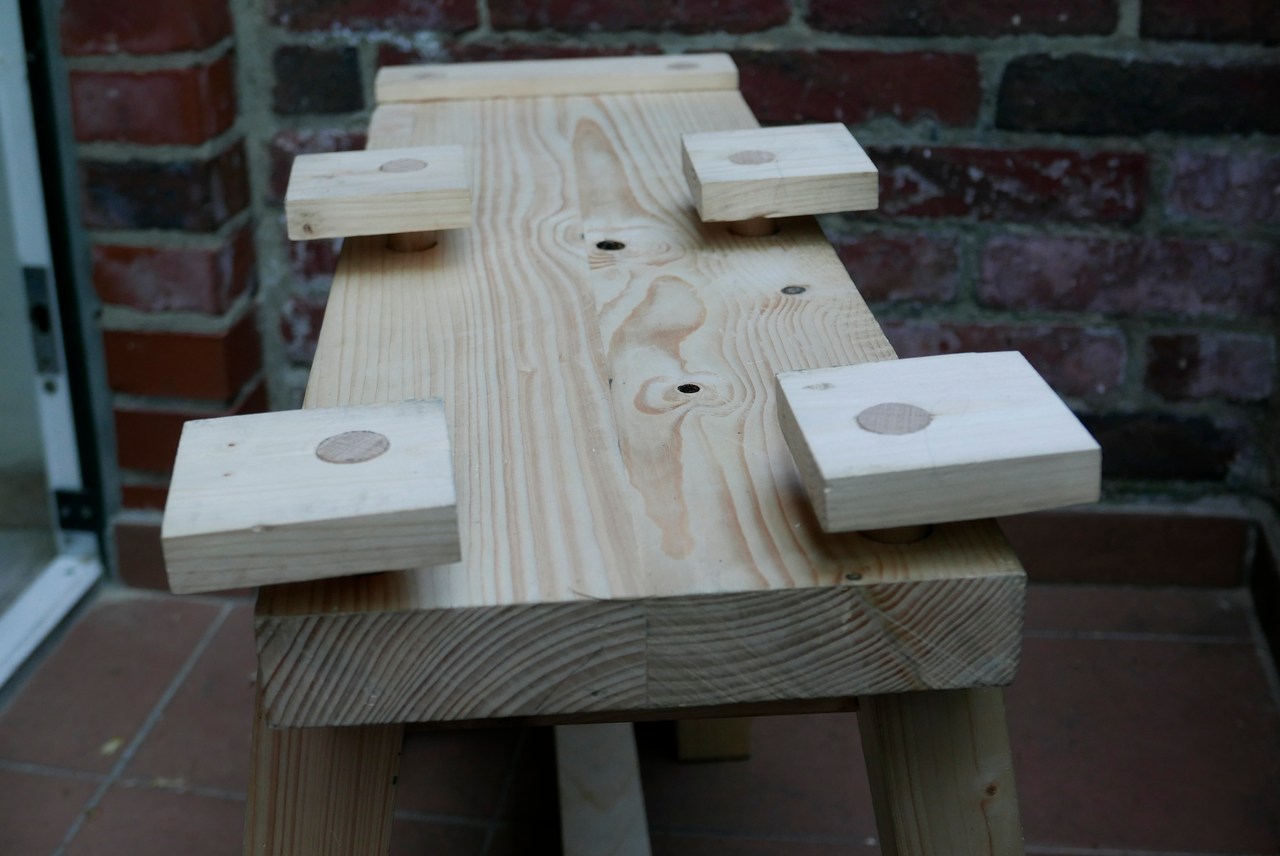
To gain some experience in making mortise and tenon joints, I decided to build the bar clamps needed for the workbench myself. Mr. Sellers’ method to do the markings with a router plane works fine – as long as we keep his words in mind, that a router plan is a tool for fine work. Now I have the proof that the wood will tear out in remarkable amounts when the router plane is set too deep. 😉
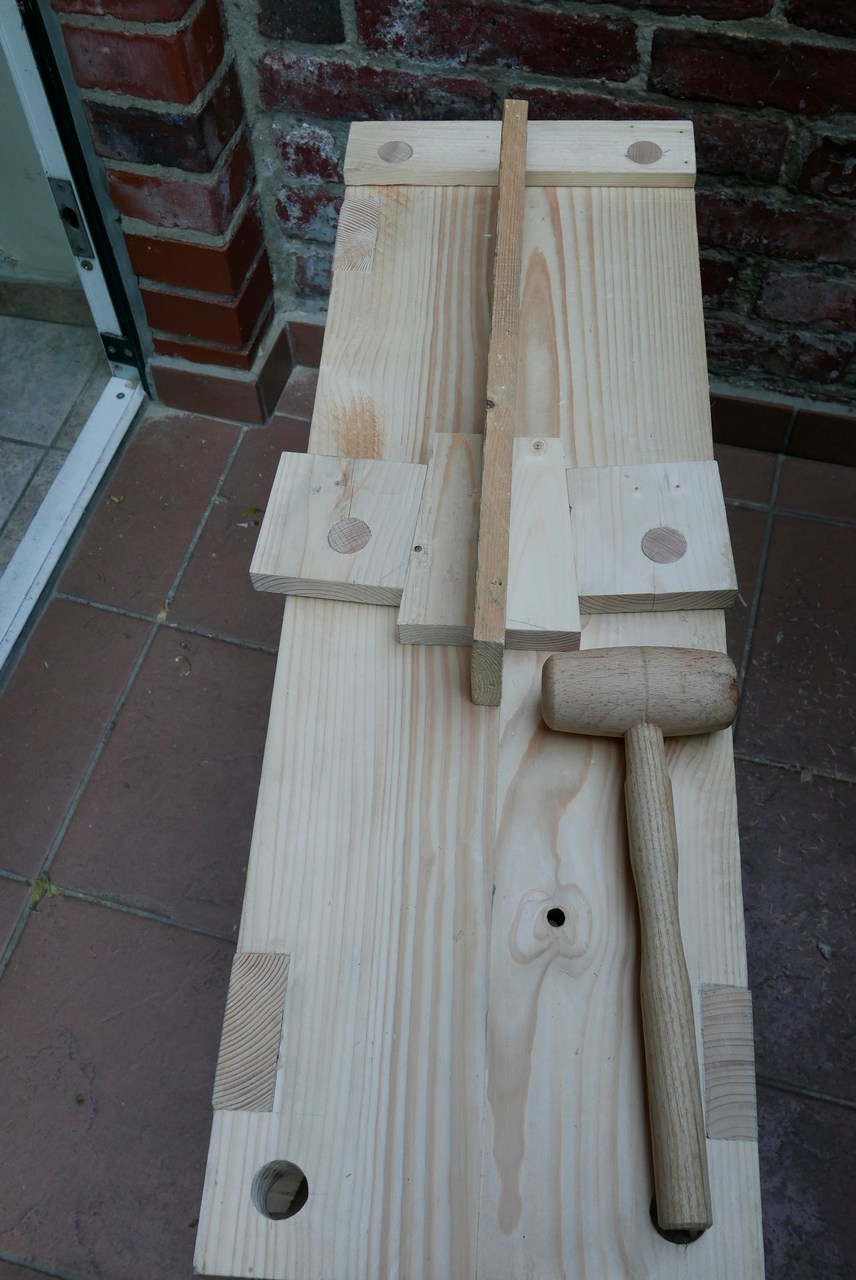
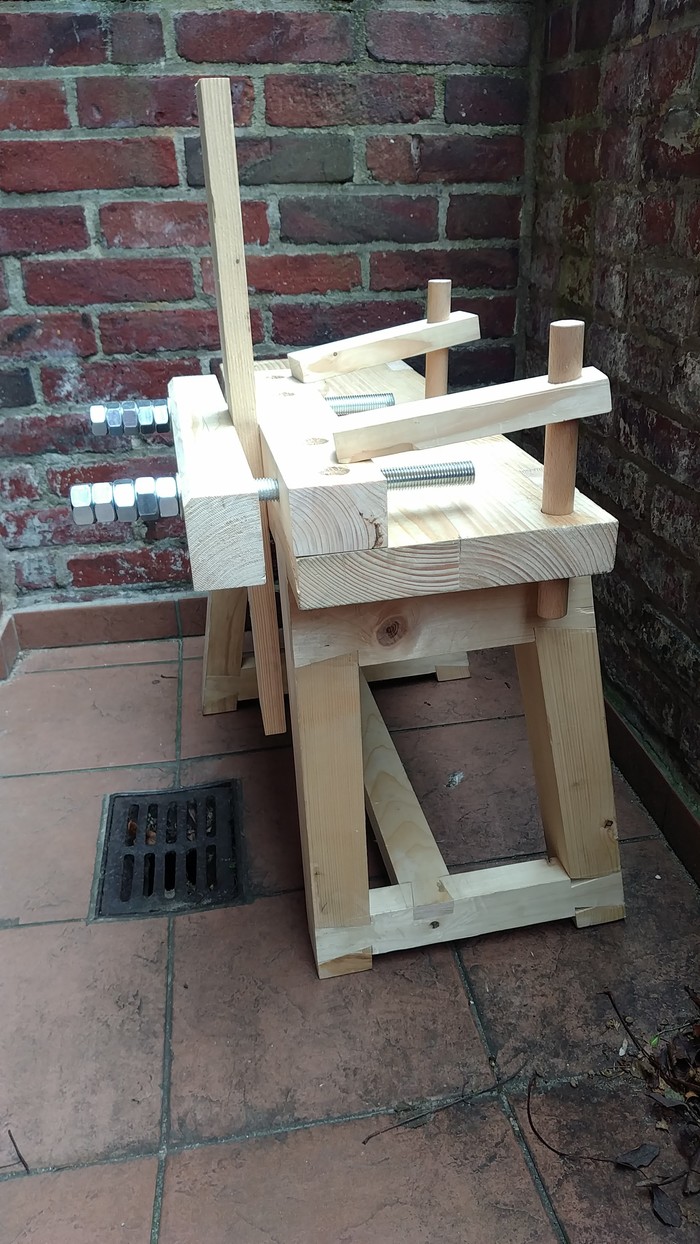
The bar is wide enough to keep the sliding part on track. Two nuts counter screwed press on a washer in that sliding part and two nails behind the nuts move it backwards (idea came from Matthias Wandel on youtube). Two other nuts (no need to glue them into the wood) in the fixed part guide the threaded rod and again counter screwed a hex nut and a wing nut to turn it.
The cork pads at the clamping surfaces are pieces of a 4mm thick cork “flagstone”.
Cost per clamp: around 3€.
The first test was successful: to fix the wood for the parts of the next bar clamp to the temporary workbench.
Ten more clamps to go. 🙂
E.
Attachments:
You must be logged in to view attached files.
For the workbench I’ve got some rough and flat sawn lumber.
In the “wood literature” at least one author (eg. Fritz Spannagel “Furniture Making”, an author with a very good reputation in Germany) wrote that the innermost part of the heart (of flat sawn lumber) isn’t usable.
Other authors (Paul Sellers “Working Wood 1 & 2”, Paul N. Hasluck “Working with Hand Tools”) don’t write that the heart is not usable.The desired thickness of the workbench top is around 5″. So I could get three strips out of a 17″ wide plank, but I’m not sure that I might get in trouble…
What do you recommend?
Any hints aprreciated.E.
I wonder if Spannagel is referring to the pith or very center of the tree. Flat sawn wood only includes the pith if the particular plank goes right through the center of the tree. I see that in carpentry lumber, but most flat sawn will not include the pith. There’s a difference between the pith, which is problematic, and the heartwood, which is desirable.
Thank you very much.
Hasluck refers to the pith as problematic for it’s tendency to split and because it decays relatively fast (unlikely in the woodshop)-
Luckily I’ve bought the lumber with some “anxiety reserve”, so if the situation occurs that I have to use that possible problematic part of the plank, it will be only one strip. So the plan is to laminate that strip as the inner end of the workbench top. If it won’t behave “good”, it should be relatively easy to rip it off later and to replace it with another piece of wood.
E.
Today I finished a couple of the bar clamps and two straight edges.
The straight edges are made of salvaged wood: clamped two pieces together in the vice and planed to be square. Afterwards I put the planed areas vis-a-vis and removed the high spots. Now the error of every straight edge is in the first approximation less than 0.25mm – should be good enough.E.
Attachments:
You must be logged in to view attached files.
Ripped down the first parts of lumber to get the parts for the laminated legs. I had much luck with that pine: very dense and nearly knot free. Now the rip saw is in a state where sharpening probably will help: shiny tips of the saw teeth.
So I built a saw vice with the idea of Jasper Homminga in mind: http://norsewoodsmith.com/?q=content/jaspers-wooden-saw-vise
here it is – waiting for the glue to dry.
E.
Attachments:
You must be logged in to view attached files. -
AuthorPosts
- You must be logged in to reply to this topic.