Card Scraper Sharpening
Posted 29 August 2019
This is a free video, want to watch it? Just log into the site, and you can enjoy this video and many more!
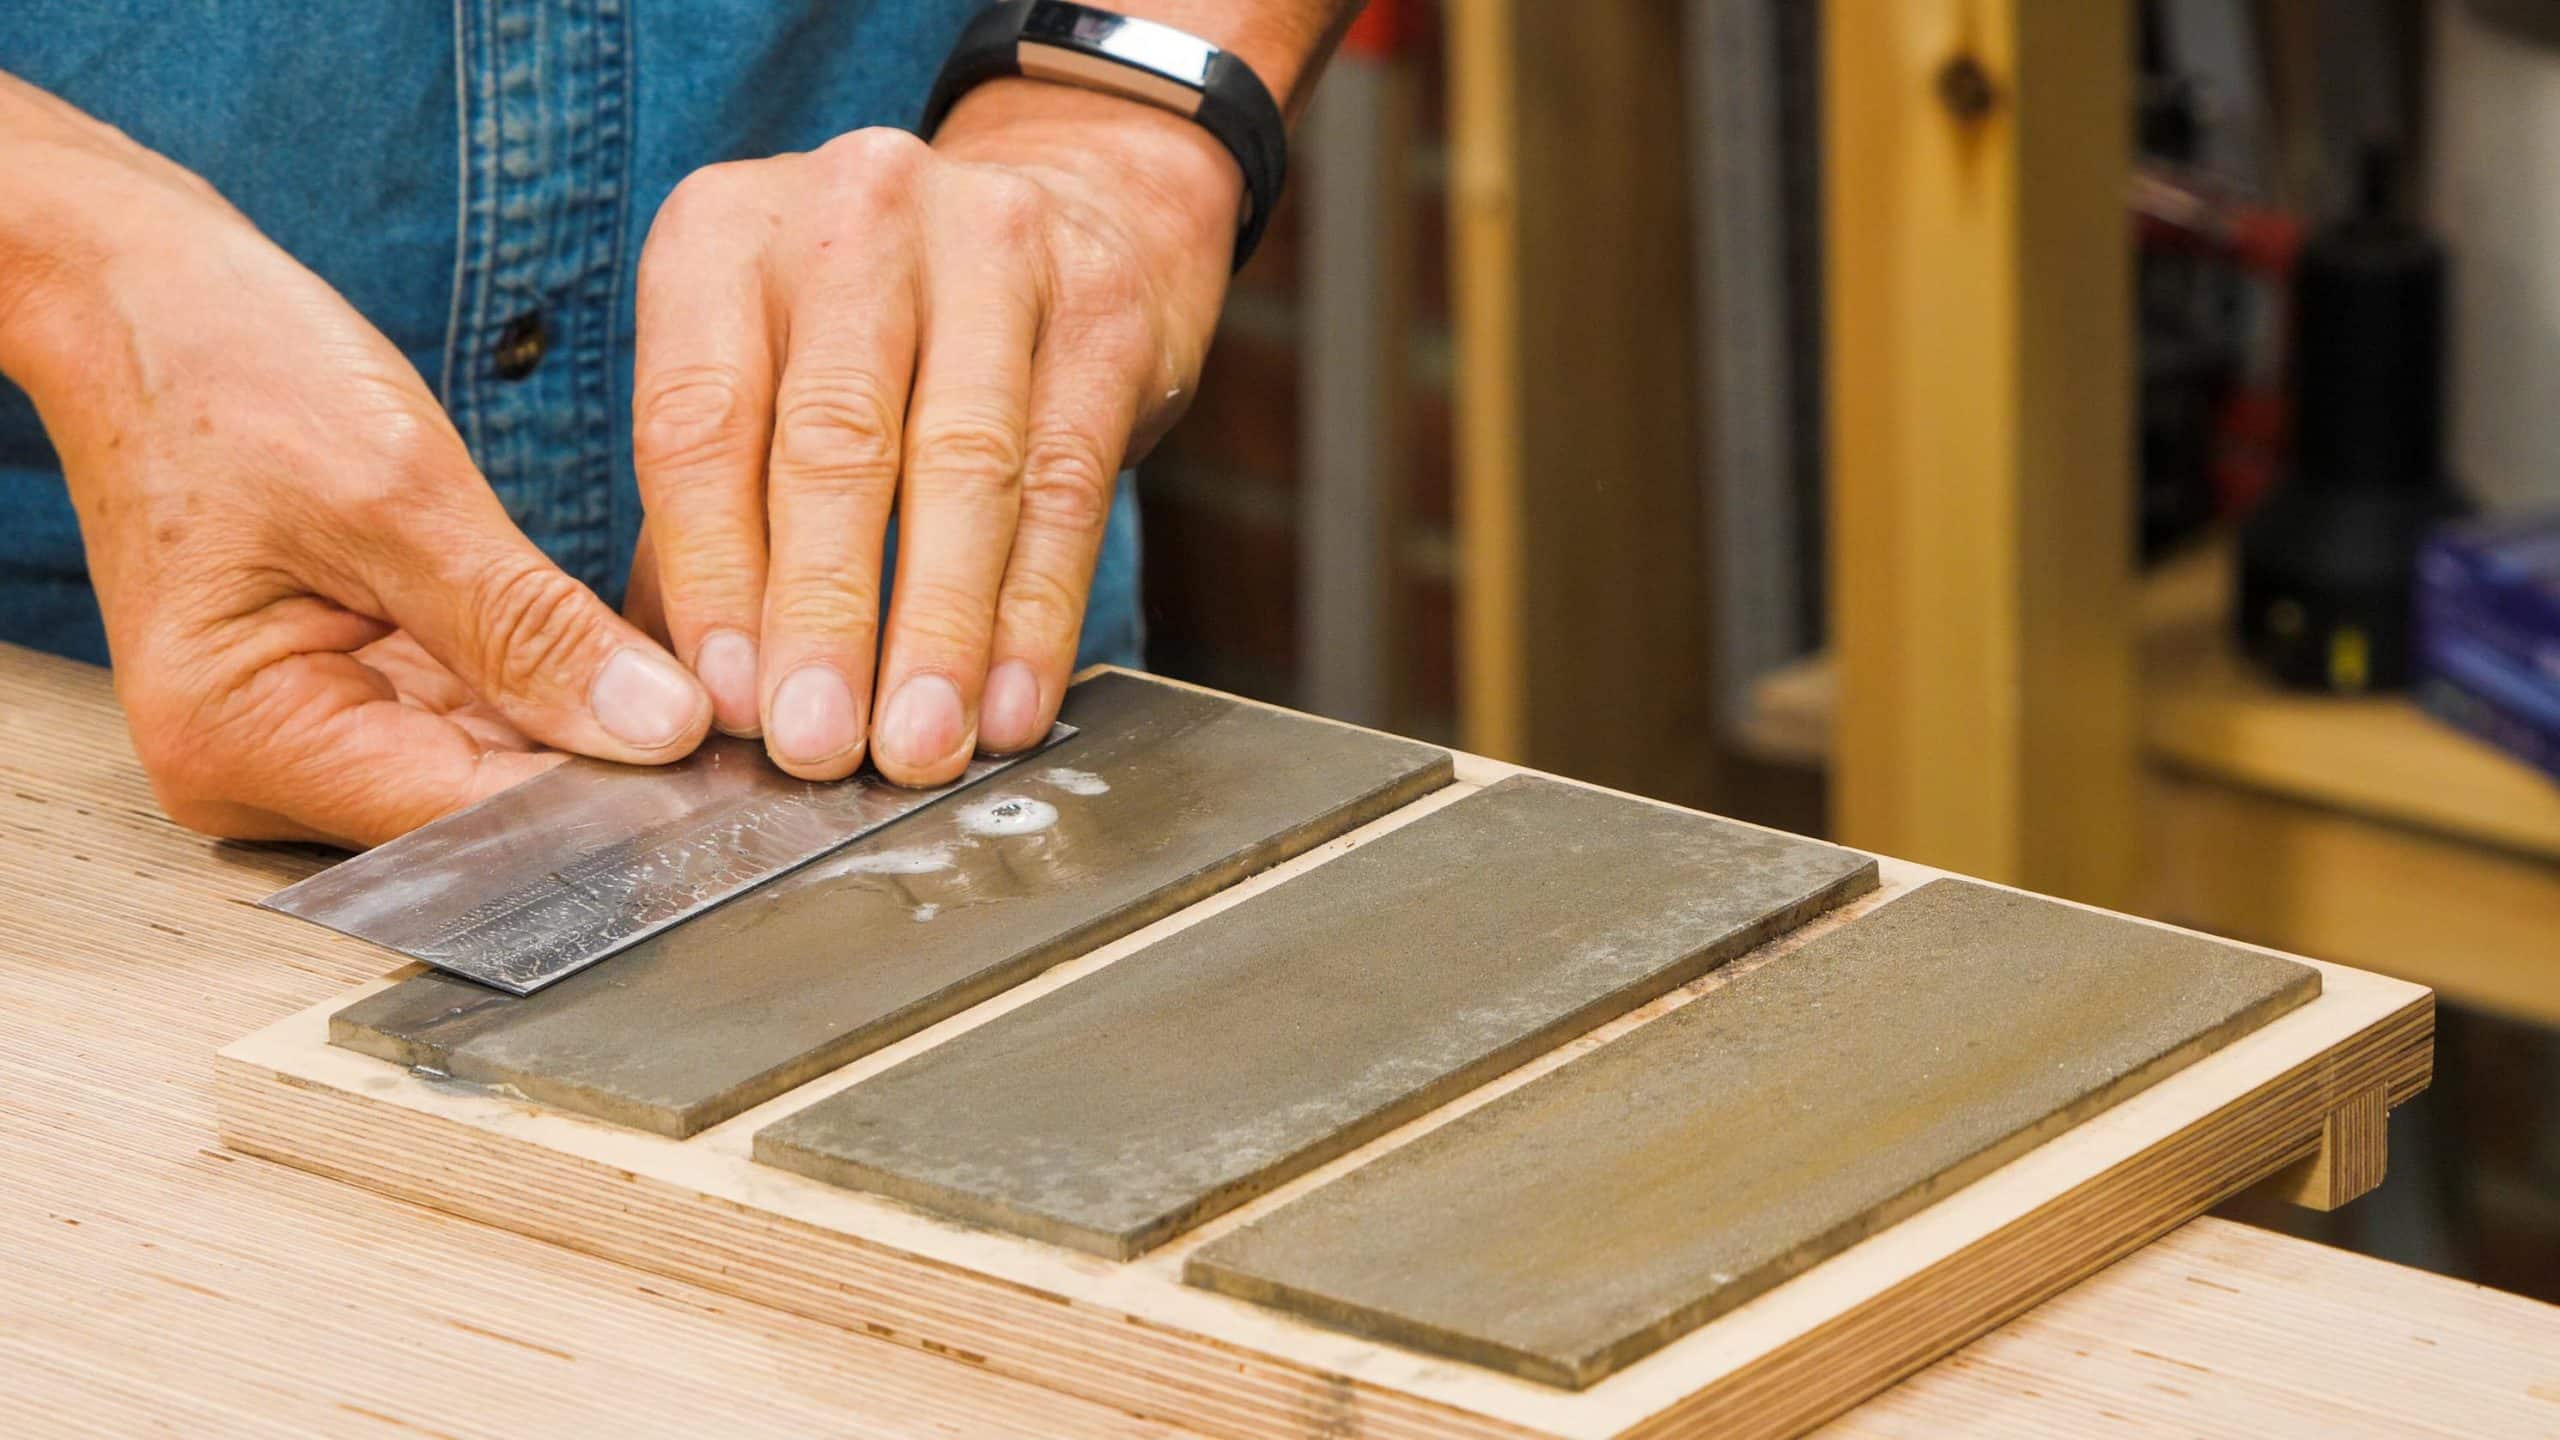
The card scraper is the least complex of all woodworking tools in that it comprises a single piece of plate steel with a highly refined cutting edge. Throughout history, this tool has refined even the very wildest grain to the ultimate pinnacle of refinement levels. In this video, Paul demonstrates how to sharpen this incredibly versatile tool.
Interesting departure from the usual video style.
That jig looks like a great method for helping with consistency. I’ll have to try it. Those shavings were impressive.
Always good to learn from the master….thanks Paul
Another first class masterclass Paul, thank you. I already had a fairly comprehensive card scraper sharpening guide from the 1947 edition of ” the handyman’s complete self instructor” but you have added even more detail, namely the final angling of the scraper edges.
For those who don’t have a burnisher, the back of a gouge is sufficiently hard to do the same job.
not sure about the gouge being hard enough or smooth enough to properly turn the edge
I used a screwdriver while waiting to get a burnisher and did not get a good edge. I then tried a couple of my carving gouges with only slightly better results . the burnisher worked so much better. also not sure what hardness is needed for a good scraper card . I do know the thickness of the scraper seems to affect the durability of the edge along with the finess of the cut.
Beautiful
Bless you Paul. Like always you taught us in a very logical and methodic way. You are a true master of this craft ,and we are so proud to have you.
Ah the sound of a well sharpened scraper in wood <3
Would love to actually see the evolution of the edges as you work on them, because I'm not sure about what's happening from the moment you use the burnisher. When you burnish for about 30 times while the scraper is flat on the table, are you "unrolling" the burr so you can then kind of fold it/recreate it again when you do the final burnishing in the jig? You mention consolidation of the edge at some point, so perhaps there is not much of a burr until the final burnishing at an angle..?
Thank you for sharing all this knowledge Paul
Hi Sebastien,
I passed your question on to Paul and he said:
No, we have removed the previous burr by filling but a burr develops which is a rough edge resulting from the file and this is not the kind of burr we want to develop therefore we generally, but not always, go to the sharpening stones to polish the skinny edge and then lay the plate of steel flat on the sharpening stones to finally remove the rough burr. We are now ready to consolidate the steel. We do this with the plate lying on the bench and rub back and forth, this would be the equivalent of a series of very long hammer blow but elongated along each face of the card scraper. Now we stand the blade on edge and again use the burnisher to effectively press the steel into itself. This form a T shape in the steel edge, you can’t see it and it’s at this point we start to turn that T into a hook along the full edge of the scraper on both corners.
Kind Regards,
Izzy
Paul is that a bastard cut file? And what brand?
Hi Scott,
This is the Bahco 10” file linked on Common Woodworking in the ‘Buying a File’ guide:
https://commonwoodworking.com/buying-a-file/
Kind Regards,
Izzy
I’m a rather new hand woodworker. Thanks for the jig technique. I’ve tried to sharpen my card scraper once but not so successful. I’m looking forward to putting your technique to use. By the way, I really enjoy your tutorials. They are very helpful.
From Japan!
David
Easiest, most straightforward method of sharpening a card scraper that I have seen!
Thank you, Paul.
I just tried this method on a LN. I agree withPMcC; not only are the results A1 but it is the fastest method I’ ever used
Concise and to the point. I always struggled before by just squeezing the card into a vise.
Big thank you.
“Wow, look at those shavings!” That was rather cheeky. Well, it is after you’ve watched some of the ‘masters’ with high-end planes and chisels who only seem to make fluffy shavings for a living. (you know who you are…) Great method, reduces the risk of cutting yourself. I have seen methods I barely dare to watch, let alone try it myself.
Once again Paul has made it dead simple.
Looks like this guy knows what he’s talking about…
Nice. You accidentally said oil stones instead of diamond stones, but will oilstones work? I only ask because I am traveling and only brought oilstones with me.
Oil stones would be fine, as long as they are flat and fine enough to remove the burr which is all you are doing with the scraper.
Yes of course. It was silly question. I posted it without thinking. My apologies.
of Course it will work. I use a whetstone.
If you have diamond paddles, or something similar, give them a try instead of the big plate. I find they are faster because they work locally to take off the burr rather than the big stone, which wants to level the whole surface perfectly, which isn’t needed. If you try the paddles, let me know how it goes: I’ve not seen others do this, but find it works better for me. Paul’s jig is nice and will help you get your first edges, but I’ll bet after you use the jig a dozen times and experience what holding the tools feels like, you’ll be able to freehand it. The jig’s a great idea. If you’ve made a saw holder for sharpening by running a kerf down a length of wood, I’ll bet that works for this, too.
I’m learning to love my scraper too Paul. After this I shall love it even more! Many thanks.
Nice technique to get a consistent edge. Used a card scraper for years and always sharpened “free hand”, will definitely try this way for fimer work. Thanks!
“This guy knows what hes talking about”
Yes siree
There is something mystical and magical about a card scraper. Paul is not exaggerating when he describes its usefulness. And who wouldn’t like to use a tool that in a few sweet short strokes eliminates the need for sanding with all of its yukkiness.
Sharpening is almost as mysterious. I have tried many methods, including Paul’s with variable success. With time, I came upon a technique that works consistently for me. My only advice is don’t get discouraged; persist in your efforts until find the way to sharpen this little gem that works for you.
In his post above, Sebastian mentions his desire to understand exactly what is happening to the edge during the various stages of sharpening, and indeed, that understanding was the turning point for me in starting to get really good results quickly and efficiently. It also helps to understand that, like a chisel, once you get the edge prepared, you can quickly burnish it back into shape when it starts to dull for a number of cycles before needing to go back to the full procedure. The best explanation I’ve seen of this is Peter Galbert’s article and video in The Nov/Dec issue of Fine Woodworking (Issue 271) that can be found online at https://www.finewoodworking.com/2018/09/12/sharpening-curved-scraper. Though he addresses the curved scraper, his comments and methods work just as well on a straight crd scraper.
Thanks for the link. You are right, beyond standard procedure it’s pretty individual based. For example “30 times with the burnisher” is to be adapted individually. Someone who tends to push hard will roll the burr too much with 30 passes, while someone who has a light touch night need 40 passes.
In any case, jigs for life!
as a stair builder and hand railer especially curved and wreathed rails, I can honestly say that without a good scraper, tis almost impossible to get a god finish without this tool. I have been using them since I began in 1955, and life without them is impossible. Plus, to get rid of sanding marks on doors, where the rails meet the stiles, the scraper is the only tool to get a good finish. Thank you Paul for your common sense approach to life.
David Lindsay, Stair builder
I’m new to scrapers and only have a Stanley#80 no card scrapers but I’m guessing that this would work for my #80 iron yeah????
Nope.
Cabinet scrapers are sharpened at 90° And then you can turn the burr on both edges.
the iron on your #80 is sharpened at a 45° angle and then you turn the burr. Paul has a video on the jig for that.
https://m.youtube.com/watch?v=84QebLrnats
But you don’t have to make the jig if you have an eclipse style sharpening guide. Just sharpen it on your stone of choice just like you would a plane iron, then turn the single edge.
And there is nothing magical about 45°. Tage Frid taught to sharpen the scraper at 30° like he learned in Denmark.
A discussion of that is here:
https://www.highlandwoodworking.com/sharpening80cabinetscrapers.aspx
I have always sharpened at that angle with consistently good results and I think the edge stays sharp a little longer
He has an in depth tutorial in his “Tage Frid teaches woodworking” ( book 3, I think)
No, that one needs a special sharpening. First you’d have to establish a 45° bevel and then fold the cutting edge. I believe Paul Sellers has covered this in his book…a friend of mine gave me Paul’s book and if I remember correctly, there was a chapter on cabinet scrapers.
Hi Tristan,
Paul says:
The scraper blade in a #80 is very different from a card scraper, whereas they can be used interchangeably as separate tools, they work very differently.
Kind Regards,
Izzy
So strange! So timely!
A few days ago I obtained my first scrapers and a burnisher and set off on youTube for a video on sharpening.
Now this!
Is some one reading my cookies?
Quite useful master class.
However, nothing is said about sharpening curved scrapers.
Although curved scapers of different shapes are more in demand when smoothening compex surfaces.
For curved scrapers, there is a nice video by Peter Galbert, on Fine Woodworking’s website. Not sure if you have to log in or buy a subscription or anything funk like that though. Anyway, here’s the link I have, but it may also be available on spewtube as well.
https://www.finewoodworking.com/2018/09/12/sharpening-curved-scraper
I’m curious, Paul, what burnisher is that you are using? I’m in need of a new one and that looks unlike most that i have seen.
https://paulsellers.com/2019/07/my-own-scraper-burnisher/
But he also has a post on the Poor Man’s Burnisher , which can be any hardened tool in your kit. His example is a nail set.
https://paulsellers.com/2013/08/poor-mans-burnisher/
Andi have used a axle rod for the feed rollers I pulled out of an old pc printer for years. It was very hard and highly polished. All I had to do was put a handle on it.
I would like to know the same, what burnisher is it and where can one be obtained.
Always learn something new from your videos
Hi Ben,
Paul says:
It’s one I made, not really available so you’ll have to pick from those available.
Kind regards,
Izzy
One question about the stones – what grit are they and can they be replaced by equivalent sand paper from 3M?
Thanks,
Arvind
Hi Arvind,
More information on the stones can be found here: https://commonwoodworking.com/buying-diamond-stones/
Although using abrasive paper is the cheapest option initially, it is the most expensive option long term so we would recommend investing in the diamond stones.
Kind Regards,
Izzy
Thanks for the response, Izzy.
What about the thickness of the metal? I’ve looked at a few scrapers on Amazon and there does not appear to be a standard thickness. I imagine that thinner allows for easier bending of the scraper, but is that a desirable feature? Or, do the thicker scrapers take deeper shavings? Will someone please discuss this?
The thinnest scraper that I made was from a blunt Razor saw blade. It’s so thin, that I can run it on any curved wood and take shavings of the entire half round wood shape. Scrapers don’t do well with “deep” cuts. The whole idea of the scraper is to minimise the cut of the fibers so that a tear out on reversing grain is minimal…
Terry, you are correct that they come in different thicknesses. I have a set from Veritas that has 6 thicknesses. You’re also correct that the thinner ones allow for more flexion which allows one to get into hollows easier, whereas the thickest works better when I want the rigidity to make sure I am keeping the surface flatness intact, or when I want to be especially careful not to round over edges. The thickness does not change the shavings. That comes from the quality of the edge you have prepared, and the angle at which you hold the scraper.
thank you for the response………I would like to try a scraper, can someone recommend a thickness of the metal that would be a good “middle ground” starting point?
I suggest a pair, one a bit stiffer (thicker) and the other a bit thinner. You’ll use them both and appreciate the differences. LN offers a pair that is 0.032″ and 0.020″ and that would be a good set of thicknesses to try. Something like that, plus or minus, and it doesn’t need to be LN.
Hi Terry,
I passed your questions onto Paul and he said:
They do come in various thicknesses, the thinner ones are handy for very fine localised scraping and round edges too. The thicker ones are good for work such as table tops or wide areas.
Kind Regards,
Izzy
I have seen many methods for sharpening a card scraper, but I could never decide what method to adopt.
When I see Paul explain and demonstrate his method, I know the search is over.
You know the theory and you know the steps, but you cannot see the whole picture until you see the master doing it by himself.
Thank you Paul, you are so generous.
Best regards.
Admir: Yes I completely agree with you.
Good afternoon,
Thanks you for the video, now I have no more excuse not starting to use scraper.
I have a question about burnisher, you can have different sections for a burnisher: circular, oval, triangular mainly; what is the one recommanded by Paul and why ?.
Best regards.
Hi Olivier,
Paul says:
Personally I have not found any manufacturers burnisher work any better than any other and the profiles make very little difference.
Kind Regards,
Izzy
I’ve never had any success at consistently sharpening scrapers….until now!!! Thanks for showing us this method Paul. I can now say that I can sharpen scrapers…….yippee….:)
Well, after trying over the years to sharpen a card scrapper and getting poor results, now I have 3 working card scrappers. Thanks to your 5 minute video Paul! Really appreciate how you share your knowledge with others…
I am once again made more capable by you Paul. This is the first time I have used any methodology in preparing a card scraper that worked perfectly the first time. It also works consistently, unlike some other methods I have tried. I haven’t used my card scrapers much because I haven’t been able to have them produce shavings…Until now. I appreciate you and the team very much.
Tom
In another cross over between trades, I use my old oyster knife which was much used in leaded light repair as a burnisher.
Hey Paul I’m struggling getting good shavings with my scraper. I’m getting some shavings but they are coming with tear out. I’m not sure if I’m turning too much burr or not enough. Or maybe my angle of holding the burnisher is too steep? Any input would be great!
use a tenth of the pressure you use when you change your angle to turn your burr. 4-5 light controlled strokes. thats it stop. If it dont work do the consolidating process again
Those of us who used hardpoint saws on construction sites for many years may have a god source of steel for making scrapers tucked away in tool sheds where the saws were left once blunted. I have produced some great scrapers by cutting up the saw and then filing to shape and sharpening them up. Does anyone else do this?
Is there a holder for card scrapers that work? I have pretty bad thumbs.
This one works with Veritas own “scrapers”.
https://www.leevalley.com/en-ca/shop/tools/hand-tools/scrapers/32669-veritas-scraper-holder
Hi William,
Paul says:
The only way to find out if you like to use a holder is to try one, Veritas seems to be a popular make, however I have not used these.
Kind Regards,
Izzy
any recommendations for a poor man’s burnisher? i think my screwdrivers are too soft.
Hi Jon,
Paul says:
I’ve seen them made out of old files and all kinds of things. You can see some different types if you search in my blog.
Kind Regards,
Izzy
How much downward force should I use when final burnishing. I just can’t get it to cut shavings only dust!!
Enough to create a small burr. I know that is not a very satisfactory answer, but there really is no substitute for experimentation. Rather than trying to continually bear down on an edge that is not working (you just end up curling it further), lay the card flat on the bench and push the burr back and then redo the edge burnishing. To help you understand what you are actually creating, try the scraper at different angles, it may be that you have rolled the burr too far and can only get a shaving if the scraper is practically horizontal. Also, check the burnisher isn’t getting scratched, just in case, it may be the softer of the two parts.
Mr. Paul,
I watched the beginning of this video and saw that you used a piece of curly maple for a demonstration and you only used the face grain and not the edge grain. What would happen if you used the card “scraper” on the edge grain?
Parker
Thank you so much for this tutorial. I made the jig and it works great! Love all of your tutorials on using hand tools!