Desktop Organiser
Posted 2 January 2020
This is the introductory page for a paid video series. Want to watch more of this project? Select the best option below to get started.
When you make a box from scraps and it becomes an heirloom-quality piece from your own hands, something magical takes place. When you break it down into bite-sized bytes in digital mastery too, something uniquely beautiful takes place in tandem. If you follow Paul on this one, you will be starting a tradition parallel to apprenticing, because the methods and techniques have been handed from master to apprentice for millennia and now, perhaps, it’s your turn!
Good luck.

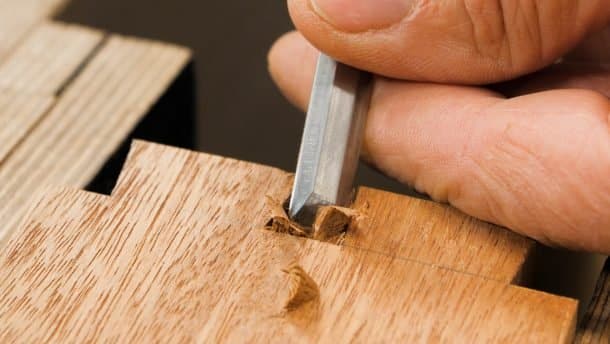
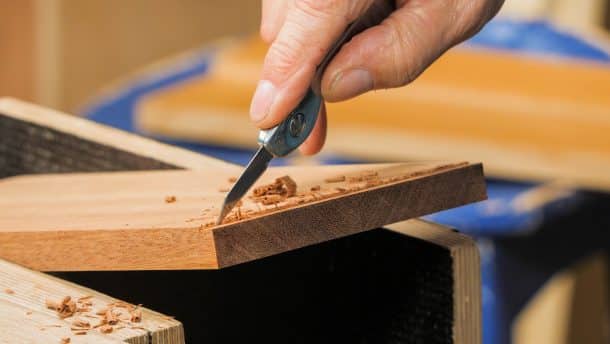
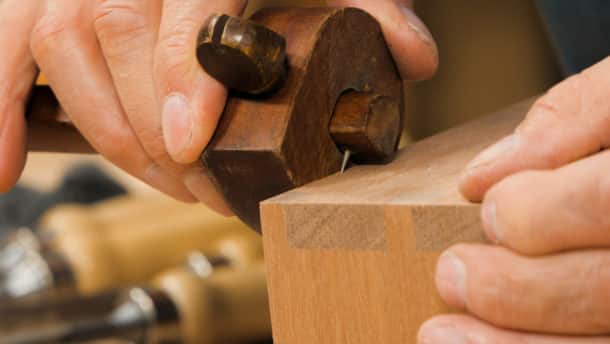
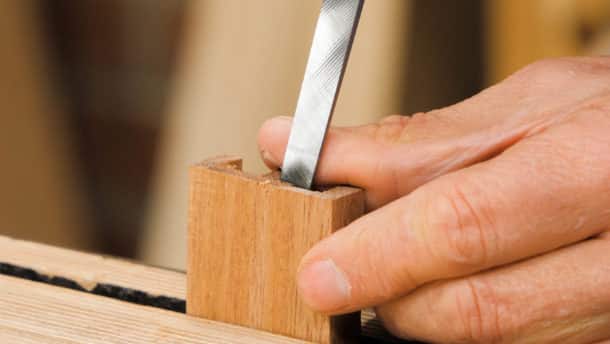
Look forward to having a go
I have recently acquired what I think is mahogany from an old roller blackboard that came out of one of the fire stations at work and was looking for just the right project to use it on and this looks good for it.
Looks like some good fun and plenty to learn/practice with. I pulled out some maple and bloodwood from the offcuts bin at my local supplier that should contrast each other nicely here. Excited to get rolling on this!
Dear Paul,
schools and universities are closed in Bavaria now. I am now my daughter`s ( 9 years old) pedagogue. She wants to be a youtuber by trade. She asked me which tubes I would record to youtube. I anwered: on woodworking but better than Paul Sellers`. She replied: Nobody on earth can do that!
Stay healthy, the commuity needs you!
Kind regards
Alexandra and Claus
from Würzburg, Germany
Great project, thanks guys.
I was waiting for this one. 👍
Thank you for this to all.
Wish to add a Happy Birthday greeting to Paul. All my best for another healthy and successful year.
My step one is complete, Just curious to when Episode 2 will be available?
Hi David,
Episode 2 will be released tomorrow (17th January).
kind Regards,
Izzy
When will episode 3 hit the streets? I have one in waiting and one going together tomorrow. Thx
Hi,
Episode 3 goes out on Friday (31st January) and they are released every other week on a Friday so episode 4 will be released on 14th February.
Kind Regards,
Izzy
Friday 31st
I hopefully add this to some of my other works I built some years back since then I have had an heart attack, an surgery with 5 grafts, later a stroke all this within 10 years and now I would like to get back to some nice small woodworking l just become interested in Japanese tools and have acquirers a nice saw a block plane a Japonese square AndI all ready have a pillar drill a desktop saw a jigsaw and other tools from dad I have 5 Stanley planes which I will have to get them out and look them over all cleaned and sharpened when last out then in tool box before everything went crazy I had 1/4 ton of mahogany planks all in my loft.
I think I could start off with the desktop organizer.
Brilliant video’a
Thank you.
Mick
What time will it be available?
Hi,
This is now available: https://woodworkingmasterclasses.com/videos/desktop-organiser/desktop-organiser-episode-1/
Kind Regards,
Izzy
Hi guys, thank you for the amazing work you always do, and for providing the cutting list to go along with the videos.
I’ve just prepared my stock, but the measurement for the end pieces seems off. Are you sure it’s 127×127, or should or be 127×89?
Thanks in advance.
Tim
Oops, never mind. I see it has been corrected already. Thanks!
Thank you. I’ve been working on my dovetails and precision in anticipation of this project.
can’t wait to get stuck in, I could do with a few of these.
Great project. I used the techniques I learned from your videos to make several of boxes with nearly this exact design over the last few years. Looking forward to seeing if your construction differs from mine – especially with the floor of the upper compartment
This makes me wonder, after a fifty year adventure in working with wood, just how many knock-offs you have cobbled together that might be useful exercises for us all!
Great! Thanks for this one. I have been looking forward to this one. I am sure it will be great.
This will look great on my desk!
Good Day Paul
I am a late bloomer in the area of wood working craftsmanship. I love the smell of wood in my work shop and by following you I have managed to create some nice pieces. It is a great feeling to look at the finished product and know that it was a rough piece of timber only days before. I look forward to following along while creating this box. Wishing you the best for the coming new year.
Great looking project. Just my style. Thanks.
What… getting a new project before the last one is complete? Your team has been busy! But now I need a few extra day off so I can work on two at the same time!
Most of the projects I’ve made have been gifts. Each time I see one or decide to build, I already have the person in mind who will be the recipient. Then when I am building the project, I think about that person either in memory or in plan. So, something special goes into the project while I am building.
Looking forward to this project!
Great way to start the New Year! Pusu’l Puna’ne!
FANTASTIC PAUL….THANK YOU
I’ve been really looking forward to this…..it’s my wife’s birthday 28th Jan. I have loads of wood….so will be making one.
Thank you John 2v
Yes! Thanks Paul
Are the plans available for this? I’d love to make one!
Hi,
The drawings and cutting list are now available.
Kind Regards,
Izzy
Are the dimensions correct for the divider? 11 1/2 inches?
Great project.
Hi Stanley,
Yes, Paul says it is a question of cutting it longer and then fitting it within the recess.
Kind Regards,
Izzy
Is there’s material list yet?
Hi Keith,
The drawings and cutting list are now available.
Kind Regards,
Izzy
Perfect timing! I plan to follow along and also make some modifications to make this a jewelry box.
This looks like a great project and I can’t wait to see it evolve. As soon as we get a materials list I will head to my local wood supplier where they always have bins of shorts, seconds and milling errors that I find to be a great source of wood for small projects. This looks like something that would lend itself to using bits of different woods which is something I love doing.
Hi Dean,
The drawings and cutting list are now available.
Kind Regards,
Izzy
I believe the drawer back and front should be 10 1/2 inches not 11 1/2, correct?
Hi,
Thanks for pointing this out! We’ve now amended this on the drawing.
Kind Regards,
Izzy
The drawing and cut list don’t agree.
I’m glad you’re going to make a video on making this!. Has see it featured on one of your blogs, and wanted to know hoe to make it.
Thanks!
Thanks for doing the detail on the underside (inside?) of the lid, don’t believe I’ve seen you do that before. Looking forward to it. Thanks
Nice paul cant wait…
Drawer slips in the drawing? I’ve been hoping for a while that Paul would give us a project that used them.
Happy birthday wishes Paul. I’ve been waiting with anticipation for this one since it’s announcement as it came within a week of my niece mentioning that she would love to have a place to keep her growing collection of jewelry and I think this just might be what she needs.
I also happen to share a birthday with you, so it’s a nice birthday surprise waking up to the first installment of a project that has been awaited with some anticipation. I really hope I can find an excuse to use the spokeshave I added to my bday wishlist during this project!
All the very best for 2020 to you and your team!!
I have walnut and pine in stock, the project looks really good.
Mr. Sellers, I think you’re really great. Since I have seen your work I have gotten some hand tools, including recently a basic planer.
Translated with Google, I can hardly speak English
Hello Paul, thank you for the beautiful projects you show here!
HAPPY BIRTHDAY!!!! Relax and enjoy your day. I wish you great health and success for this year.
Best regards,
Alex
Hi guys, cant wait to try this project out!
Can you please check the metric conversion for the two end pieces of the main body? I think they should be 127 x 89.
Cheers!
Hi Cameron,
Thanks for pointing this out! We’ve now amended this on the drawing.
Kind Regards,
Izzy
Not sure if I’m jumping too far ahead but the drawer width on the cut list looks too wide as it’s the same as the front and back of the box
Looking forward to having a go at this
David
The drawer front will be “cut to fit” later when the box is completed (I think)
Anyway that is what I would do.
Hi @DAVIDWALTON and @PASLEY,
We have made further updates to the drawing and cut list, thank you for letting us know.
Kind Regards,
Izzy
I really like this design. It sparks my imagination. I see it being particularly nice to size it appropriately to hold things that are different but that go together. Writing paper in the top and envelopes and stamps in the drawer. A brace and bits. Carving gouges and a mallet/sharpening accoutrement.
For non English ,a skip is what USA calls a dumpster.A large garbage bin really.
A great video but I have never Sean so many stop starts in one episode
You really notice the flow of the edits? Thought that this was woodworking, not video production critique. Must have clicked the wrong club
Revised to above, only 4-6
Giddy up, looking forward to this one..
When does episode 2 come out?
Hi,
Episodes for this series will be released every other week, episode 2 is due out on the 17th January.
Kind Regards,
Izzy
Ok, then I’ll stop refreshing twice a day for a while 🙂
🙂 that’s a serious woodworker
Hmmm…I have a nice quarter sawn 4/4 x 6″ x 54″ plank of Ash…..8 of them…..might use one to build a version of this box?
That’s what- 50/60 boxes! Energetic ain’t ya?
All glued up and ready for episode 2. Anytime now…
Hi Joseph,
Episode 2 will be released on Friday 17th January.
Kind Regards,
Izzy
Hi Izzy,
I am very excited. Thank you for letting us know.
-Joseph
Great project. Can’t wait to get started and episode 2. Thanks for sharing as always.
Will Episode 2 be coming at some point? (Or is just Ep 1 in the free library?)
Asked and answered above, January 17.
If you were going to use 2 contrasting wood colours any thoughts on the orientation? Ie. dark for the long ends and light for the short, or vice versa
Hi,
Paul says: I certainly don’t have a preference, and think it’s just a matter of opinion. Always remember that dark tends to dominate so you should consider this an element in good design.
Kind Regards,
Izzy
Thank you
Have picked up a lot of tips from this series that I can use in many ‘Boxy’ type projects.
Many thanks Paul and NO you are not a Novice!
Paul and team
Thanks so much for another great project. After watching episode 2 and seeing the method Paul uses to attach the bottom with glue only I wondered if Paul has ever had problems with this given the cross-grain gluing of sides to bottom? Is the area too small to worry about that perhaps?
Thanks
How do you install the divider that makes for the bottom of the lift-lid compartment, and which separates it from the drawer–especially since it seems the divider is added after the carcass is built. Thanks.
Beautiful–and, for the one developing his skill set–manageable project!
Waiting on the next exciting episode…..mainly for making the drawer….Working with 1/4 sawn Ash, right now….Will try yo get the lid done…
I absolutely love this. Great project Paul! When is the 3rd video out? Looking forward to it!
They are released every two weeks, and then on YouTube a week later.
No hurry on the 4th one now. I screwed up my lid and will have to do that one again. Haha!
I very much enjoy whenever Paul puts out another video. Planning to make a couple of these (after I finish all my other projects)🙃 my question for Paul is this. This is Meranti wood that you’re working with, but in the videos I can’t distinguish it from sapele. Could Paul please expound a bit on the differences some time?
Thanks.
Hi Randall,
Paul says:
The only real difference is that Sapele is more dense and harder than Meranti, that said sometimes Meranti will be hard but generally it’s quite soft.
Kind Regards,
Izzy
Hi Team,
Where did Paul purchase the hinges for this project from? Good quality brass hinges are quite hard to come by first time.
Thanks,
Brodie
Hi Brodie,
Paul orders unbranded ones from eBay.
Kind Regards,
Izzy
Horton Brass is supposed to make decent hinges and they are selling a few on ebay. I ordered some but have not gotten them yet. They are the PB-405 box and clock hinges. They sell on ebay for $12.57 with free shipping. On their website they are more like $15 with shipping extra, I believe. They are 1 inch tall and made for 1/2 inch boards. They are 3/32 inches thick, which is not bad for modestly priced hinges.
This was perfect timing! I’d been thinking about doing drawers with thin sides and slips for the bottom in the next thing I make, so I appreciated seeing it done by Paul.
Are we supposed to glue the divider to the strips? I have a nice snug fit on mine but I’m not sure whether to apply glue on the strips.
Cheers,
Ilir
Hi,
Paul says:
No, you don’t need to glue it. You may find it handy not too because if something got stuck in the drawer you could always remove that panel.
Kind Regards,
Izzy
It looks like most of the box sits on a piece of solid wood. What is the rule of thumb for this sort of construction with regard to wood movement — how wide can the solid-wood bottom be before its expansion and contraction could cause problems? Or am I thinking about this incorrectly? Thanks!
Hi,
Paul says: No. It’s a good question. I usually opt for around 6”. It is shrinkage that results in splitting so drying the wood to around 6-8% is a good option if you want to go wider. There are no guarantees though.
Izzy
This is such a great project. I really enjoyed the videos and actually tried making one of my own. This was my first attempt at one of Paul’s designs and I really enjoyed the process.
Do you have dimensions?
Yes, the technical drawings with dimensions are available above.
Rebate Plane Problems
I’ve learned a great deal from your video tutorials, and have applied your instructions and wisdom to my woodworking projects. My latest effort has been an attempt to make the desk organizer featured in your Woodworking Masterclass. The process is teaching me more about the need for accuracy when making dovetails and the importance of the knife wall. I’d like to believe that my woodworking skills have improved, albeit slowly . . .
. . . so very slowly.
Most recently I tried using the Stanley #78 to cut a field on the desk organizer’s lid. Luckily, my first efforts were done on scrap wood. The photo (left) shows the best of a succession very unhappy rabbets. Notice how the floor of the rabbet slopes downward.
You once said, “It’s a poor man who blames his tools.” The admonishment notwithstanding, I’d like to whine a bit about the ersatz Stanley #78 rebate plane that I bought recently from Amazon. I figured some work would be needed to prepare the plane for service. But I had no idea what “some work” involved! To your grandmother’s adage you might also have added this old saw: “you get what you pay for!”
The rebate plane that arrived in my mailbox was a Stanley, but in name only. (And the name “Stanley” was only loosely affixed to the cap iron.)
I noticed several discrepancies right away. Firstly, the plane iron had the sharpness of a cold chisel, and it took several hours to create a 30 degree bevel.
Secondly, the adjustable fence isn’t perpendicular to the bottom of the plane body, and the rod that joins the fence to the body flexes while I advance the plane along the wood,
Thirdly — and of greater importance –it is impossible for the plane iron to protrude beyond the plane body because of the placement of the lever cap screw.
As a result, the edge of the iron never “sees” the knife wall.
I could pivot the iron around the adjustment screw, of course, but then the iron would no longer be parallel wth the mouth of the plane (which may further contribute to the downward slope of the rebate floor.
What do you recommend?
“Shut up!” he said. “Quit blaming your rebate plane!”
Will my attempts at making rebates be improved by correcting the problems noted above?
Or should I just fuhgeddaboudit — and use the inexpensive rebate plane as a scrub plane. It’s more work, but I could probably use the table saw and the router plane to make the field around the lid.
Thank you for your advice, your inspiration and your continued instructions.
are the deminsions on this drawing the correct deminsions?
We believe they are correct. This project has been made by a lot of our subscribers using the dimensions on the drawing.