Dining Chair – Episode 6
Posted 16 September 2015
This is an episode in a paid series. Want to watch it? You just need to sign up as a paid member, and you can enjoy this video and many other videos we think you will love.
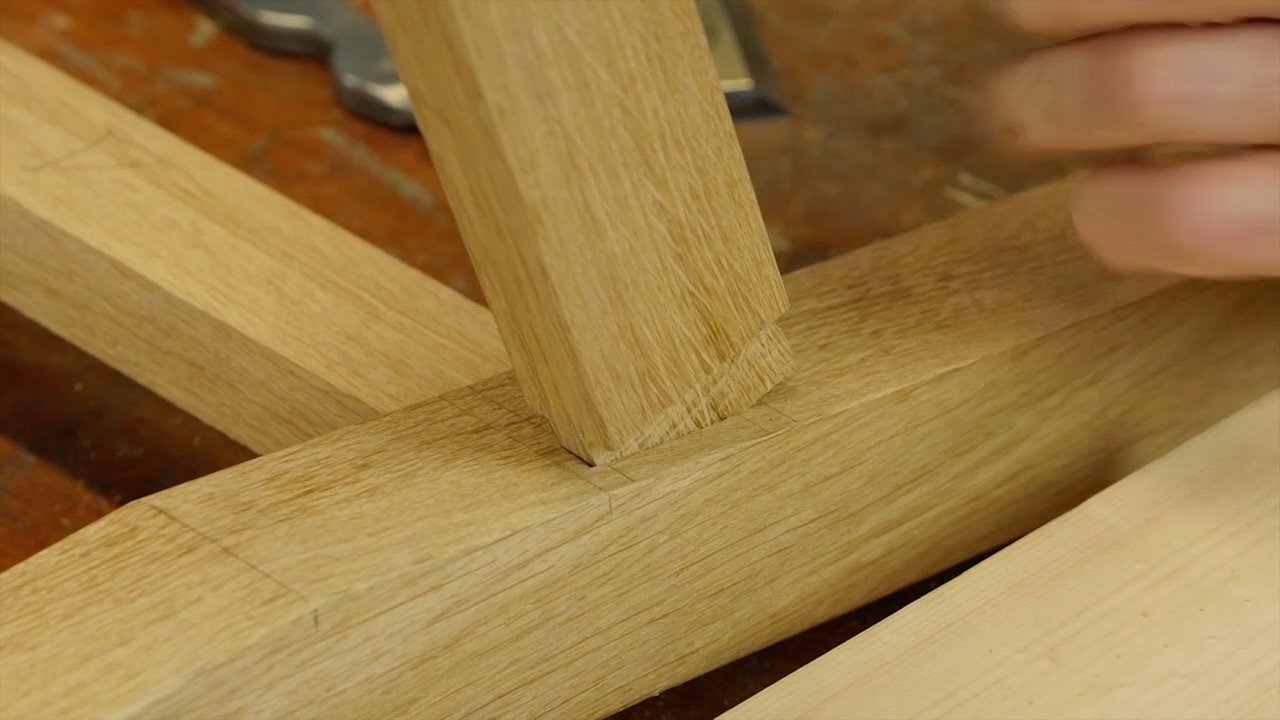
It’s time to address the final tenons on the bottom side rails which have a compound angle. Paul demonstrates how to transfer the angled shoulder line in order to cut the tenon. He then assembles the whole frame and cutting the bracing for the seat before shaping the rails.
Thank you for the lesson.
Paul – great skill demonstrated – very motivational! Thank You!
Complex joinery made simple . Great Great lesson!
Thanks Paul and crew for bringing us this far.
Really very elegant way to produce a beautiful piece of furniture. Thanks
I just love watching this, especially the shaping. I had a guy determined to put me on a band saw the other day but I held my ground and shaped the piece using these methods. It’s so satisfying popping the sections and reading the grain. It was done in minutes and I was delighted.
I totally agree. I did two the other day for a bookcase I’m working on, and despite miss-reading the grain (which has made the unseen side of the arch a little out of whack) and putting a half inch splinter down the length of a finger, it was great fun.
I do need to work out what I’m doing wrong with the spoke shave though. It’s a tool I’ve never really gotten the hang of, and it skips all over the place. A bit of filing and sanding and it’s good to go, but I would be happier if I could get this aspect right without having to spend time fixing it up.
Anthony I have limited experience but I found a couple things with mine. I had to make sure the bevel wasn’t to steep so ended up reworking it to around 30 degrees with a camber. I found I have to adjust the set a lot more frequently with this tool than my Stanley No.4 but that might just be me. Lastly it came down to just using it as frequently as I can to develop the feel for it. I’m often elongating the strokes and trying from slightly different angles to get it to cut well. Someone with greater experience will probably give sounder advice though I’m sure.
Thanks, gives me something to try.
My first step is making the sharpening “helper” piece from youtube to get the correct bevel angle I think.
The best setting for me is to angle the blade in the spoke shave. One side cuts a whisper and the other side cuts a bit more aggressive, but not to aggressive. Takes a bit of fiddling but it works for me. To have Paul’s talent of course is what we inspire to get to.
I’m hoping Paul will do a project on making that yard-long straight edge in many of his episodes.
I agree. I’ve read about the process in “The Anarchist’s tool chest” but I’d love to see it done. Sometimes my 3ft spirit level just isn’t long enough!
Thanks to Paul and Crew. As usual watching him do some of the things he does I pick up something I missed when he does it again. Bevel up, bevel down. reading grain. These are the things he teaches that I need the most work at. Again, Thank you for what you do.
Thanks
Hi Paul,just filled with admiration with your skill. Would it be rude to ask what the cost of the oak used in this project?