Making a Wooden Spokeshave: Info Page
Posted 21 July 2017

This is the introduction for a free series. Want to watch the whole thing? It is free to do so, you just need to log into the site, and you can enjoy this series and many other videos we think you will love.
Wooden spokeshaves are very functional for all manner of shaping and refining of surfaces. Paul has developed a wooden spokeshave with full adjustment that can made using basic tools and materials.
Description
Wooden spokeshaves are very functional for all manner of shaping and refining of surfaces. Paul has developed a wooden spokeshave with full adjustment that can made using basic tools and materials.
For a simplified body, see the video on YouTube. The section on making the blade is identical.
Cutting List
O1 Steel 4” x ¾” x ⅛” or 102 x 19 x 3 mm
Wood: 11” x 1 ⅝” x ⁷⁄₈” or 280 x 40 x 19 mm
4 Screws: 3.5 x 20mm = 6 x 3/4″
Wood Selection
Any wood can work, but we recommend a dense grain hardwood, such as:
Beech, ash, cherry, maple and boxwood.
Be careful with any darker grained woods as they may leave a mark.
Beech and boxwood were the woods most commonly used.
The tools you will need are:
- Pencil
- Tape or ruler
- Square
- Knife
- 10” flat file
- Rasp
- 1⁄2” & 3⁄8” (12mm & 20mm) chisel
- Spokeshave (flat)
- Coping saw
- Tenon saw
- Hacksaw
- Card scraper
- Drill driver or brace
- 3⁄8” (10mm) bit (Forstner or bradpoint)
- Centre punch for steel
- Bits 3mm, 4mm (possibly bigger)
- Countersink bit
- Bradawl or square awl
- Pliers


Oh the irony, of needing a spokeshave to make a spokeshave. 🙂
What came fist, the chicken or the spokeshave? 😁
Will episode 2 be available soon?
Make two. Shape one with the other
I still need a mallet – to chisel the mortice in the Oak Mallet project.
I had the same problem. So I made a three-piece laminated oak mallet in order to be able to make Sellers’ oak mallet. Still haven’t gotten around to it yet …
Excellent! Thank you for this great project Paul
Use a rock.
The main thing is to hit ‘re done.
Is there another name for the O1 steel?
I have a retired blacksmith friend who says he can’t find O1 steel in his reference books, not English nor USA and I am no use saying it is O1 steel “Paul says it is so it is”.
Am looking forward to having a go, when our winter frosts are past; Southern hemisphere here.
John
Oil-hardening steel. Oil-quenched steel. You can find some info in Wikipedia ( https://en.wikipedia.org/wiki/Tool_steel#Oil-hardening:_the_O-series ) . Look for the section, “oil-hardening: the O-series.” Is your friend looking up Oh-one rather than zero-one?
Amazon has it for a reasonable price too. I think it is Starrett and ground to the proper thickness as well.
I ordered an 18″ piece from Amazon that arrived today. https://www.amazon.com/gp/product/B0050R0XE6/ref=od_aui_detailpages00?ie=UTF8&psc=1
I was pleasantly surprised to find it is Starrett. Looking forward to building the spokeshave, but have a greenland kayak paddle to build first…
John, or any other folks who are looking for O1 in the States- check McMaster Carr or any knife making suppler and you’ll see what you need. Blacksmiths who do reproduction work normally use wrought iron if and when they can find old stock, as much difference as between hard maple or ash and pine or similar soft wood.
Upon second look at original post, don’t know where in southern hemisphere you are located, but metal suppliers or knife maker suppliers are likely to have it.
http://www.hudsontoolsteel.com/technical-data/steelO1
Hello all,
as said before, “O1” is the expression used in english speaking countries. It is a tool steel, that has around 0.9 % Carbon.
The german speaking will use a C45 similar tool steel alloy.
Speaking of the intended usage for this blade: any kind of steel, that can be hardened, will work sufficiently in wood. The rule of thumb (in simple words) is, the harder you make your blade, the longer it will stay sharp. On the other hand: the harder it is, the more brittle it will get, the more likely it will break. Therefore, in our case, a somewhat harder state suit us fine.
Due to its shape, this blade is easy to sharpen, therefore it won’t take a long time, to maintain the sharpness of this tool.
If your blacksmith still can’t find a steel, ask him to use an old coil spring from a salvaged car or similar. That works very well and can be heat treated and hardened very easy by the smith. This material will cost your near to nothing. 🙂
Jan
I forgot the international identification numbers. O1 should be similar to 1.2510. If you can obtain, you can also use 1.2842 (O2, 90MnCrV8) or 1.1730 (C45).
Merry Christmas
Jan
Hi,
I have some Oak recovered from some pallets I am recycling. Is Oak a suitable wood for making a spokeshave? I do not see it mentioned.
I plan to make one, which I intend using to make some cutlery with some Black Wattle I got from a neighbour who removed a tree from their garden. I have about eight logs approximately 20/30cm in diameter and about 60/80cm long. Enough for a number of spoons, ladles and salad servers.
Thanks,
Marc
Hi Marc,
Oak’s high Tannin content means that it reacts with Steel to produce a Black Staining effect in the wood ,
(Quite often any Screws used in a piece would have been made of Brass because of this – I’m not sure if the ‘Yellow’ coating on some steel woodscrews is an effective barrier)
I know its pretty straight forward however I keep looking for one of Paul’s wonderful project sketches of the spokeshave.
The tool steel just arrived and I am anxious to get started on this project. I’m also thinking this would be a great start for a travisher, but I’m curious if there are any suggestions about shaping the steel.
Annealed O1 bends pretty easily. The sites I’ve seen just have you pressing the blade in a vise between two blocks of wood curved to your chosen radius.
The key seems to be to bend the blade first, then cut the wood bits with the blade as the pattern. Several good sites. Start here:
http://cminihanwoodworks.blogspot.com
Thanks!
Amazon has it for a reasonable price too. I think it is Starrett and ground to the proper thickness as well.
Excellent work as always Mr Sellers, thank you for taking the time to present it.
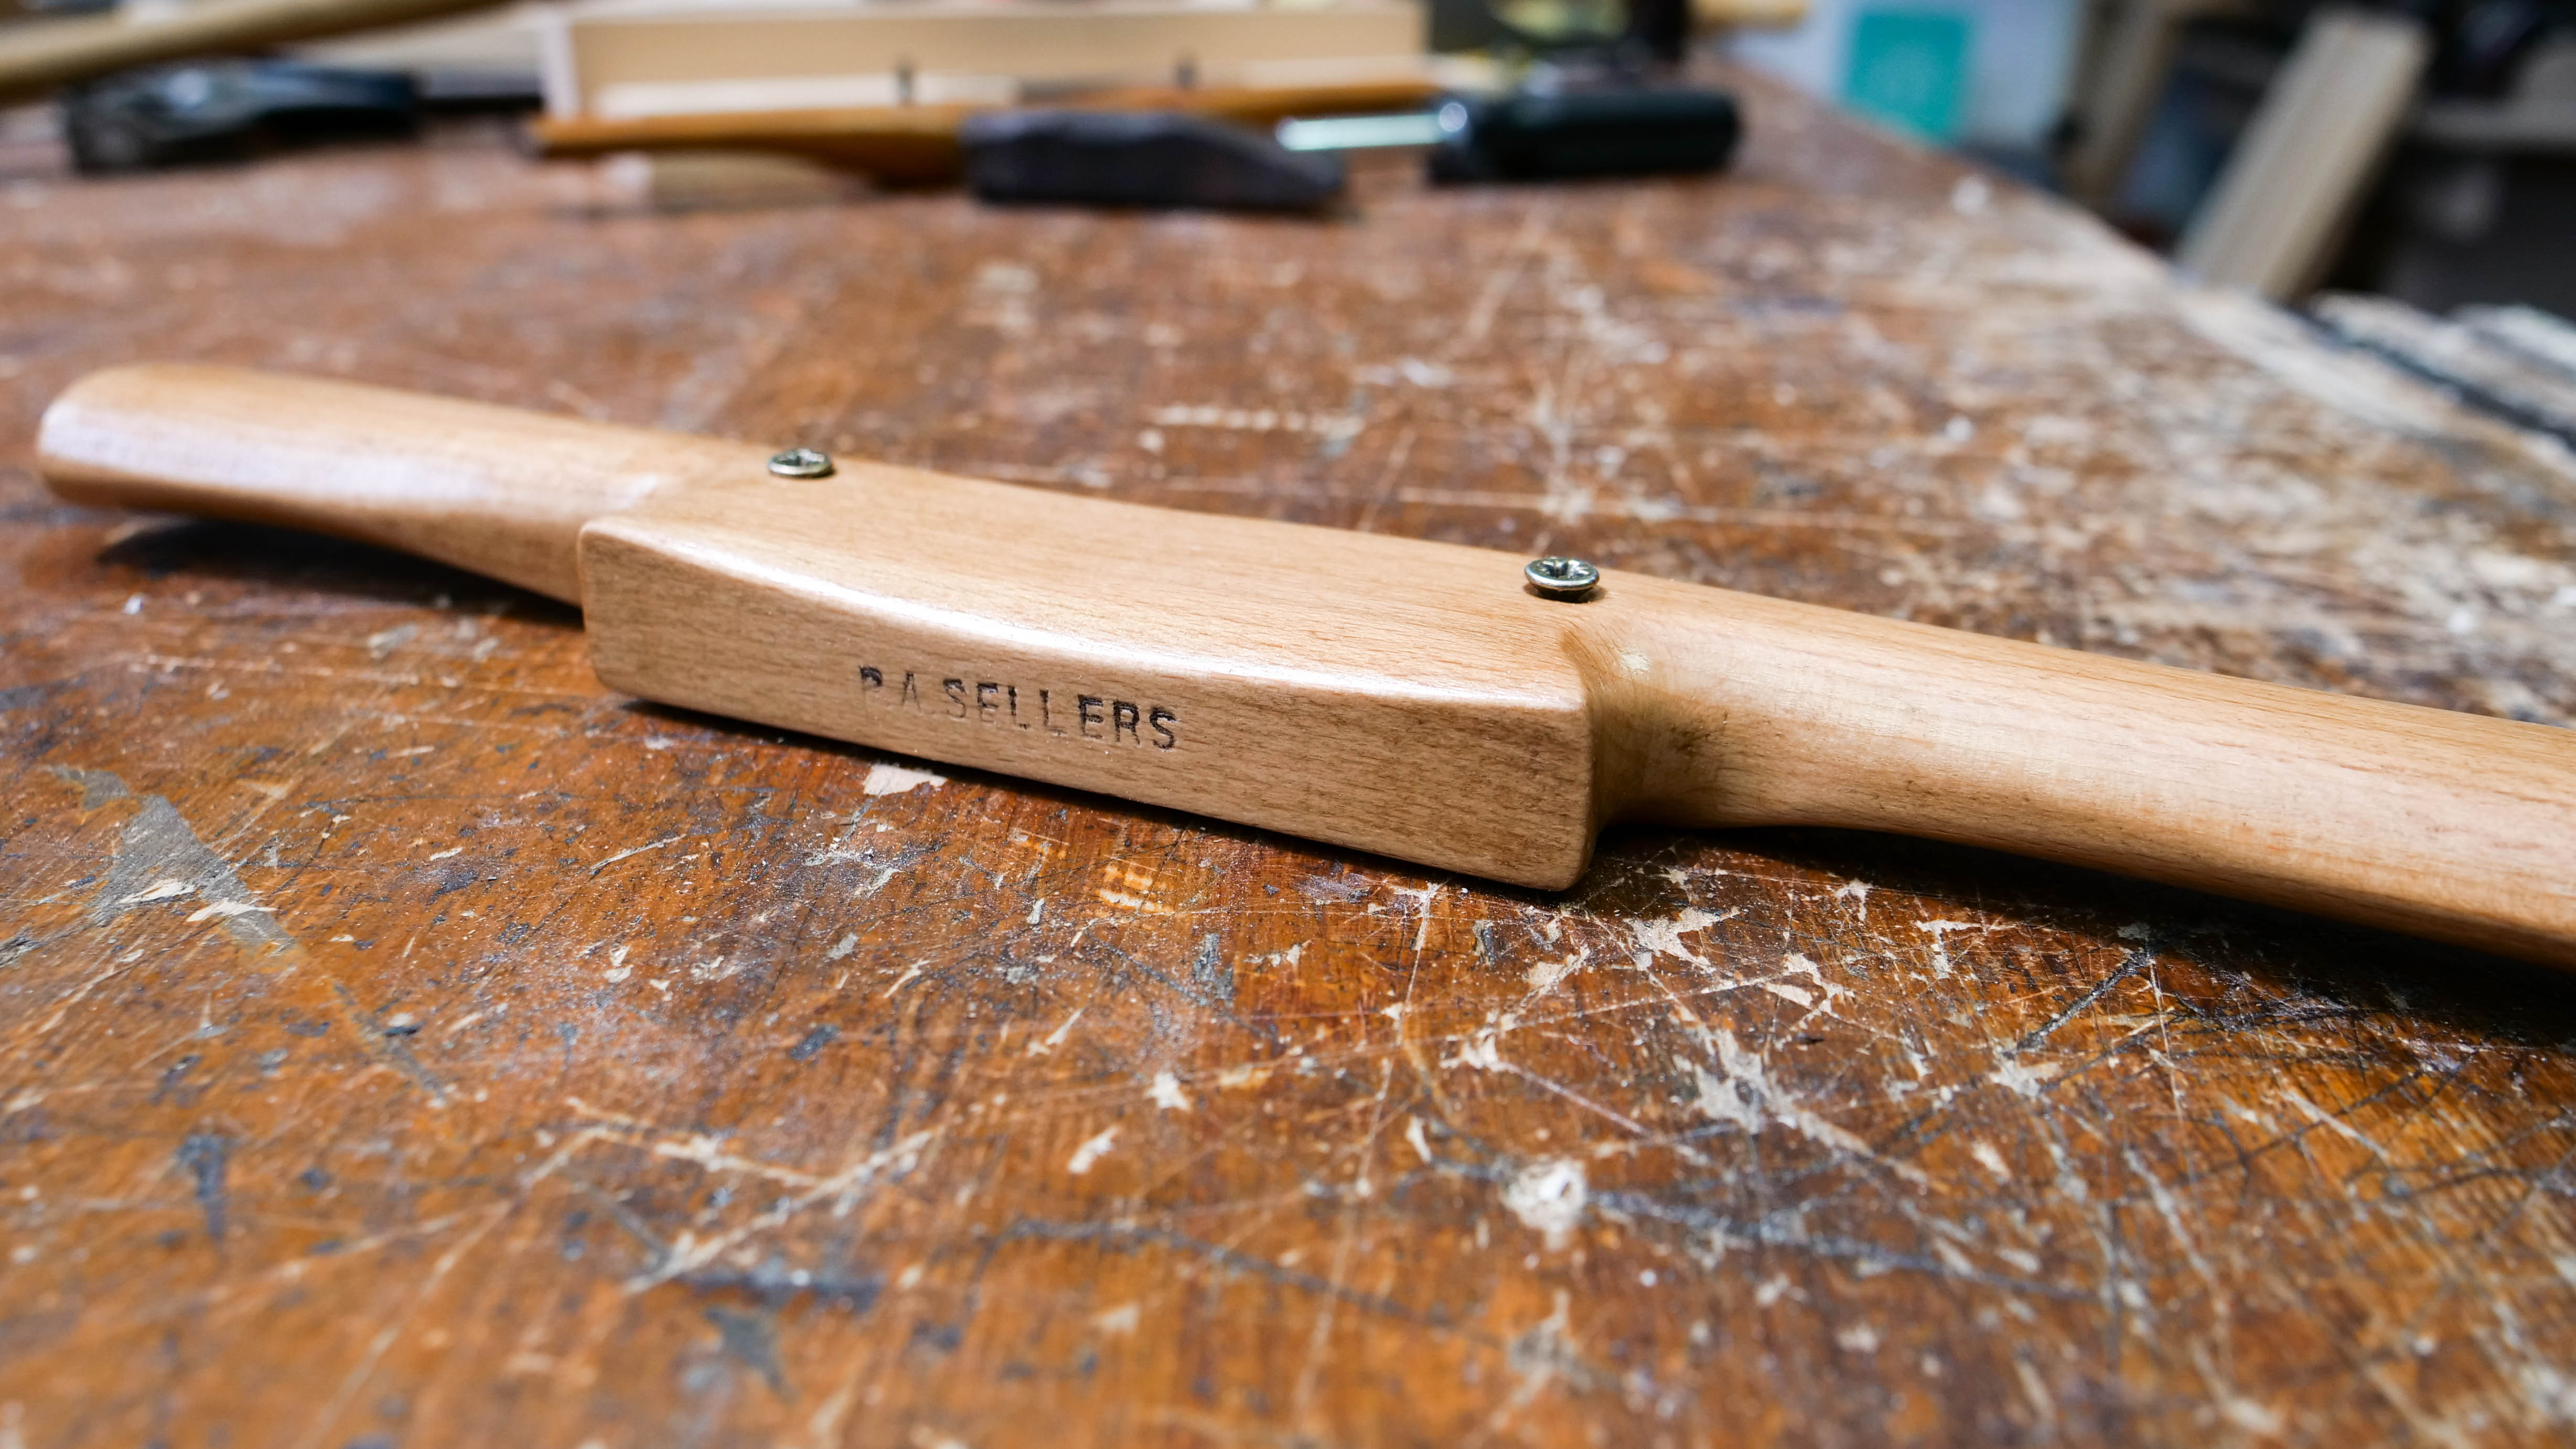
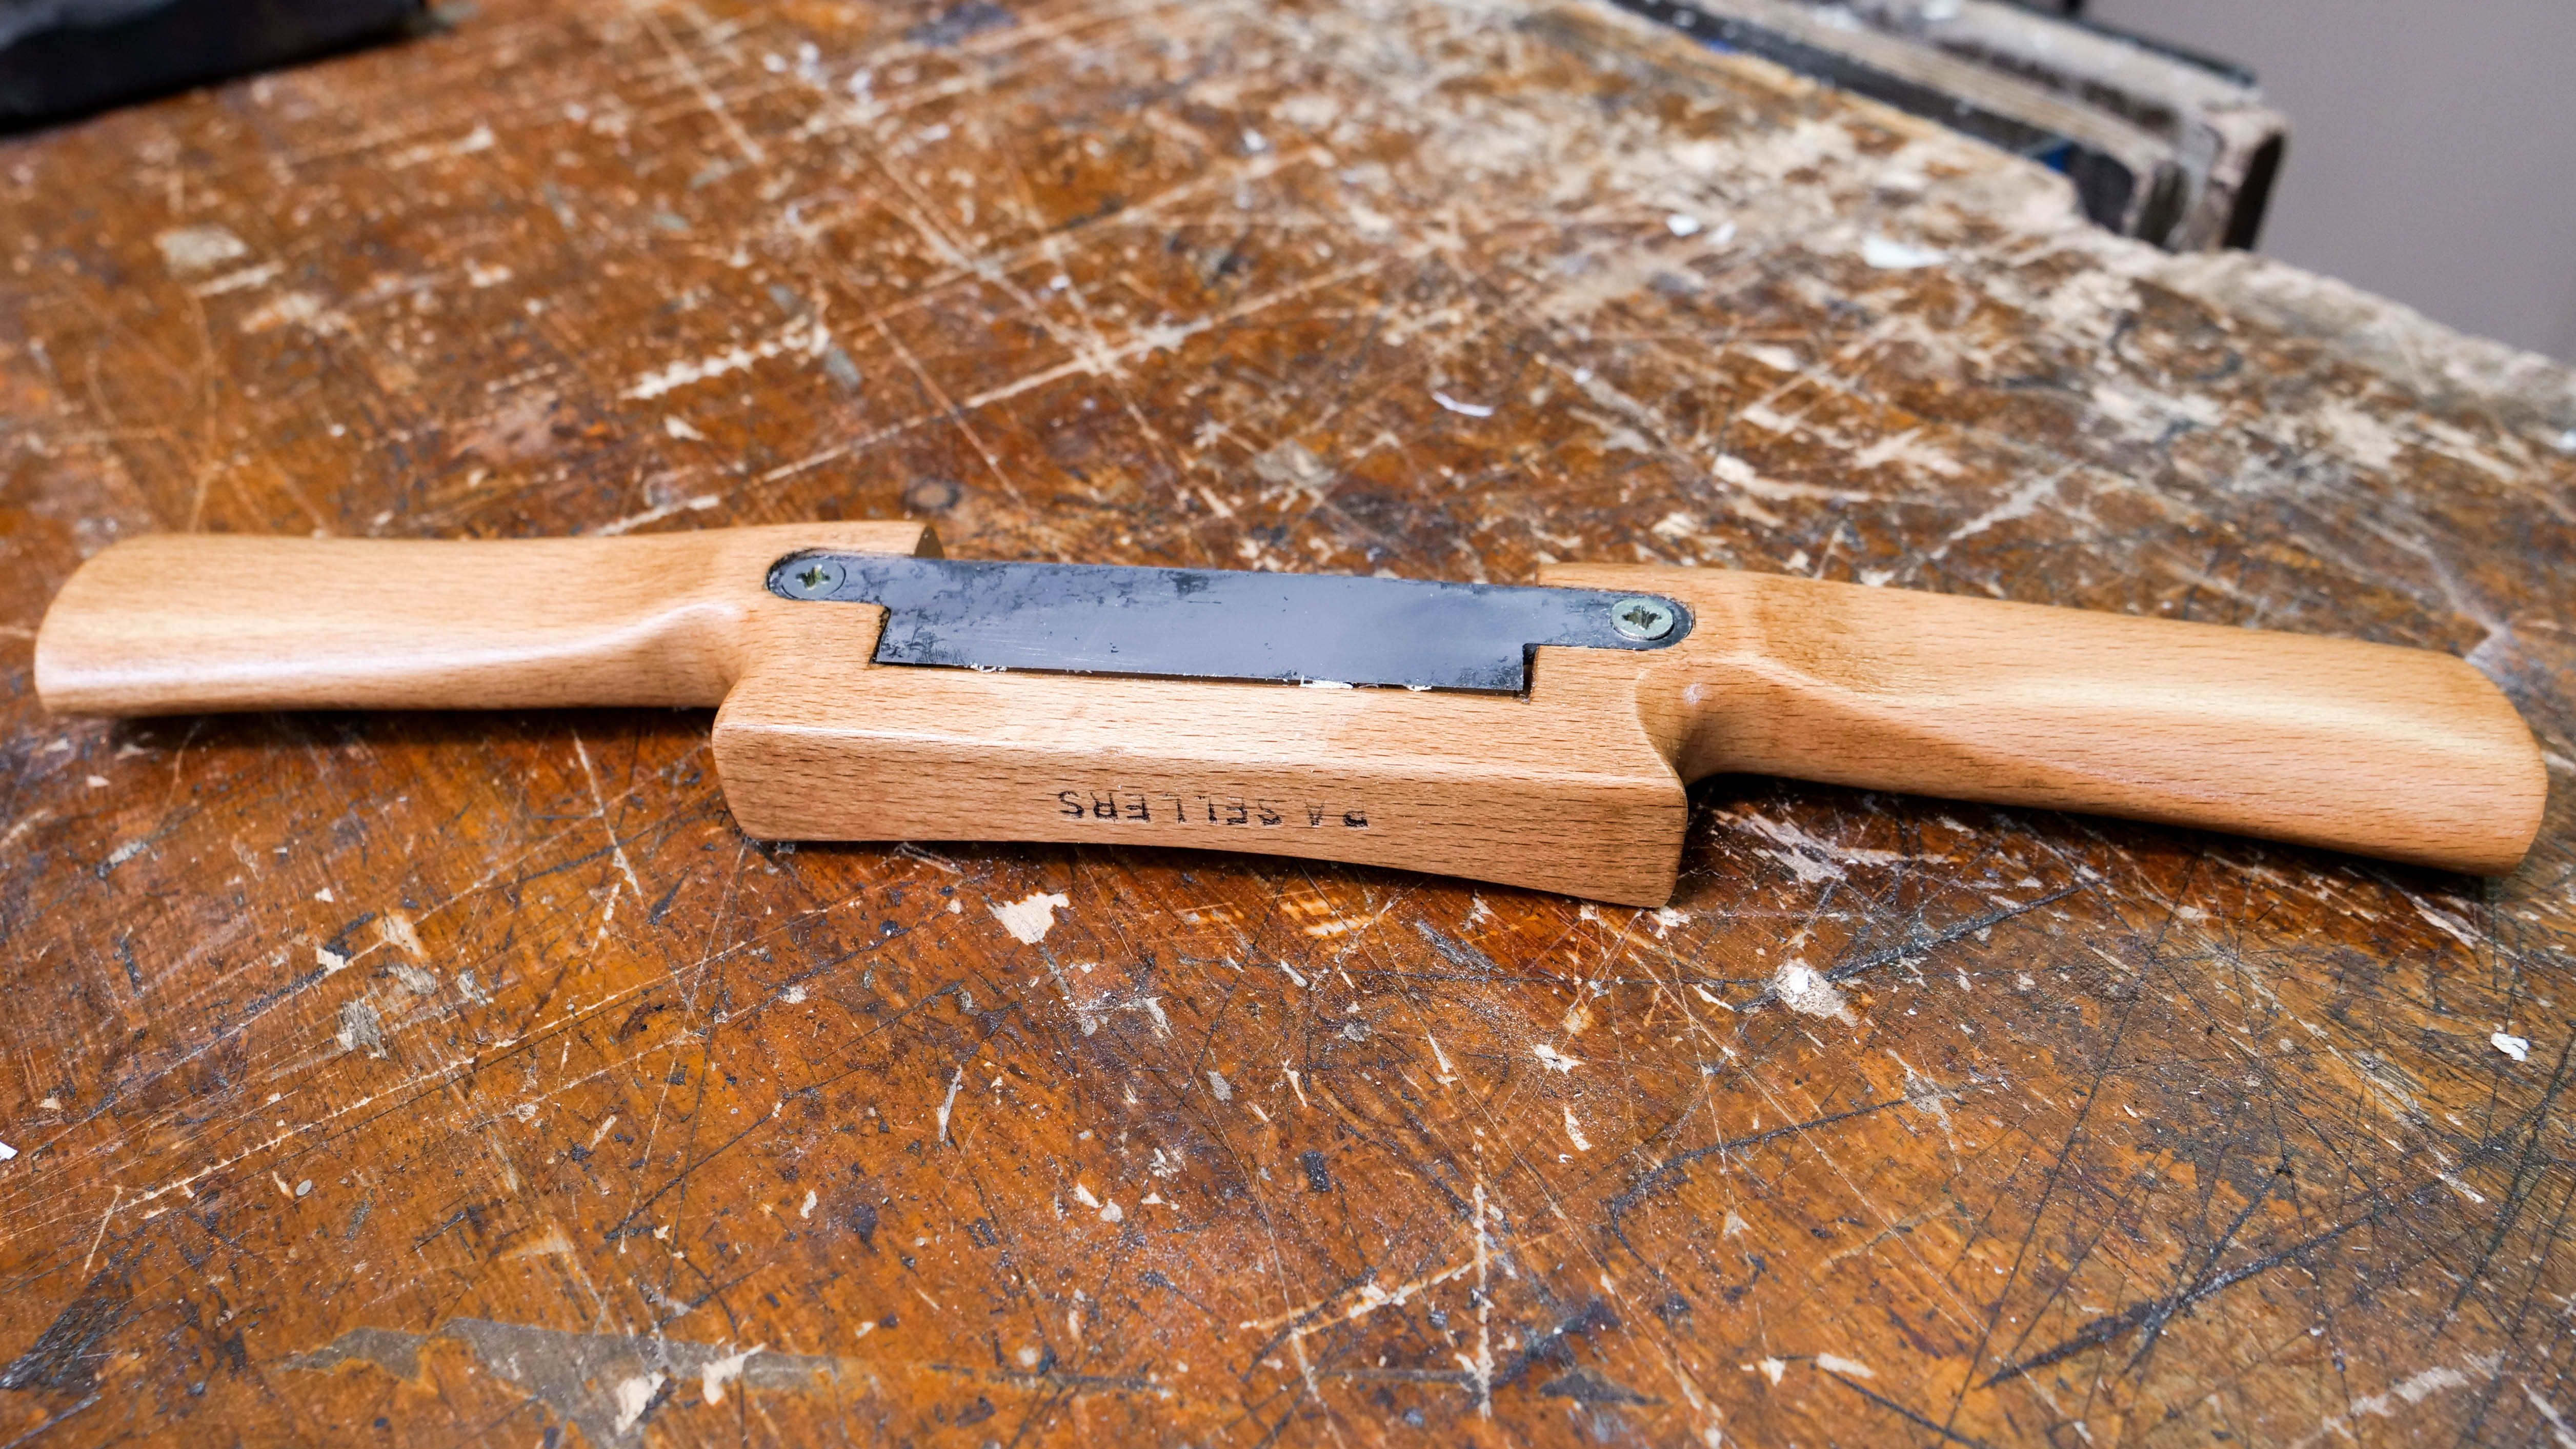
I have a question if I may ask, about the blade holding/adjusting arrangement:
Does the blade stays flat and level after it is screwed tide in place, or it is arched in the mid section?
As the setting screws pushing the blade outwards while the retaining screws pulling the blade’s ends inwards, bending forces applied to the blade.
I suppose that after the steel is hardened it wouldn’t flex that much, but I run a test with a 3mm blade before hardening it and it was deflecting when screwed in place (even when lightly screwed).
Best regards, and thank you for your inspirational work
Fedor
Hello Fedor,
There will a little flex in the blade, but not enough to significantly impact the use of the spokeshave once hardened. That is what we found at least.
Thanks, Phil
Philipp,
Thank you for prompt the reply
I already quench the blade and flex is significantly reduced
Best regards.
Fedor
Small update on the subject
I tried to copy the Veritas design, where the setting screw is hollowed and coaxial with the retaining screw.
For the setting screws I used the stems of bicycle inner tube valves, they worked fine. I went with Dunlop (Woods) valves as I had a few old tubes, I am sure the French valves (Presta) would work as well since they also are threaded all the way.
For the Dunlops I drill a 7mm hole and use the valve’s stem to tap the wood.
For the retaining screws I used M4 with nuts.
The setup works fine as long as the holes are precisely drilled perpendicular to the blade.
Regards
Fedor
I am just wondering, but I made a spoke shave this weekends, and my shave looks much thicker than yours. When reviewing the screws, at 3/4 in, the wood at 11” x 1 ⅝” x 1 3/16” would be way to thick. I elected to reduce the wood stock to about 1 in (might have been closer to 3/4). This seamed to work well. It gave me 1 in less 1/8 for the steel, or 7/8ths need for the screw to press on the blade to make it adjustable. So, I am wondering if the dimensions for the wood were incorrect?
Thanks
Brian
Hello Brian, just re-reviewed it as it was pointed out that it should be ¹³⁄₁₆” (or 21mm) rather than 1 ³⁄₁₆”, so have corrected in the project video and will get it changed in video. Thanks for the heads up.
Thanks Philip. Yes, 13/16ths would make a difference. Thank you for making the change. I will probably make this tool again because I messed a few things up (not sure how both my dad and I did not notice the error when measuring), so the corrected directions will help.
Regards
Brian
Information on materials is here:
https://woodworkingmasterclasses.com/videos/making-wooden-spokeshave-info-page/
Hello, I was wondering if I was making a round bottom version would the measures be good for that also or should I change something?
Hi,
Paul says no, I think it’s fine to use the same size material, the only difference is on wooden spokeshaves is we generally only round the fore edge and to the whole sole as with metal ones.
Kind Regards,
Izzy
Ok, so I do everything the same except round only the fore edge. Does Paul have any recommendation for the distance down from the blade to start the round over and/ or radius?
How about the last question?
Hi Jarno,
Paul says no, if you just make a smallish radius then try it and then you can increase the size of the radius as you feel after the appropriateness as to the radius you are working with.
Kind Regards,
Izzy
Ok, thank you. I will try it.
Hi, I made one of these last weekend and was having trouble getting it tuned properly. The spokeshave will cut, but I get chatter which leads to a less than acceptable finished surface. I used some oil from my rag in a can which helped, but didn’t eliminate the chatter altogether. I’m wondering if the angle of the champfer on the spokeshave body is too steep, or if the bevel angle on the blade itself is too steep. The bevel angle on the blade is about 30 degrees and the champfer angle on the spokeshave body is about 10 degrees.
Best wishes,
Jayson
Hi Jayson,
Thank you for getting in touch.
Paul thinks you may be taking too much off, try with almost a zero cut on one side of the blade and set the other side to perhaps half a mm and work in between the two extremes and see how this affects the cut.
Kind Regards,
Izzy
How would you modify the design for a round bottom for use on convex and concave curves? is this even possible? What if you don’t have a square awl or a coping saw but have a bandsaw?
Hi Alec,
Paul says:
Wooden spokeshaves, unlike metal ones, have a flat sole as per the original but the leading edge, the part in front of the cutting iron, is rounded which means you can tilt the spokeshave to any appropriate curve.
Kind Regards,
Izzy
Could I use walnut for the body of this spokeshave or is it too dark of a wood?
Paul said: “Walnut isn’t the best wood for the spokeshave because it is brittle and not very resistant. That said I would say that I treat my wooden spokes shaves as long term disposable. Simply because they do wear.”
In his book “The Unplugged Woodshop”, Mr. T. Fidgen uses black walnut to make bench planes. So, probably no obstacle to use black walnut for a spokeshave.
Firstly, I’ve enjoyed your series on poor man’s tools as I have all of the videos I’ve seen so far.
Are there any alternative options to buying the steel for the blade you can recommend?
After much searching I’ve found that either buying locally or online cost more than just buying a spokeshave.
As I’ve already made the router and rebate planes I would love to add this tool to my collection and feel I will be missing out if I don’t make it myself.
I asked Paul and is suggestion is below:
Heat an old file and let it cool in the air (not quench it). That will soften the steel which you can cut with a hack saw and file. Cut it to shape and put bevels on it. Then heat it again to cherry red and quench it using peanut oil.