How best to repair a split backsaw wooden handle
Welcome! / Forums / General Woodworking Discussions / Tools and Tool Maintenance/Restoration / How best to repair a split backsaw wooden handle
Tagged: Disston
- This topic has 13 replies, 9 voices, and was last updated 4 years, 9 months ago by
 Rafael Herrera.
-
AuthorPosts
-
 23 September 2019 at 7:35 pm #611220
Hello everybody,
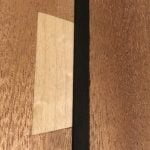
I got a hold of a Disston mitre box backsaw and while I was cleaning the handle I noted that there is a split at the base of the grip. It is not cracked through, though. If I flex the handle I can see the hairline split. What would be the best way to repair the handle? The first thing that ocurred to me was to drill a hole and place a screw to keep the handle together. The splict is not wide enough to insert glue in it. I’m attaching a picture of the handle.Thank you,
RafaelAttachments:
You must be logged in to view attached files. 23 September 2019 at 7:54 pm #611222
Gluing together, using thin cyano acrylate glue or warm epoxy glue, is perhaps an option. Both are very good at penetrating also hairline cracks. A dowel would add further strength, I imagine.
23 September 2019 at 8:06 pm #611225I’m flexing the handle relatively hard to make the split show in the picture. I’ll test again if I can make the gap a little wider without breaking the handle.
I’ve dealt with cracks like this using regular wood glue. First, I get a drop of water onto my finger tip and dab it along the crack and work the crack a little. This serves to keep the wood from drawing the moisture out of the glue so quickly and very slightly thins the glue in the next step. Next, either put a drip of glue on your finger or onto the wood and start rubbing the glue into the crack. At the same time, try to hold the crack open to the extent that it feels safe. As you rub, relax and let the crack close, then open it again. Keep on with the rubbing and alternatively opening and closing the crack. You likely will need to keep adding a drip of glue now and then. If successful, you start to see that glue squishes out each time you let the crack relax and draws in when you open it. Sustaining this causes the glue to be worked deeper and deeper into the crack. I’ve even put another little drop of water on my finger. At some point, you decide you’ve moved the glue as far as you can, at which point clamp lightly. Don’t go crazy with the clamp and force all the glue back out. You may even decide that no clamp at all is best.
If this can be made to work, I prefer it to CA because CA shatters when shocked. Sometimes, CA is the only option, though because it penetrates so well. If the crack has a gap when relaxed, then I’ll use epoxy. If the crack has a tiny gap, then I decide how much I care, the point being that most epoxies are viscous and won’t penetrate very far. One exception is West System’s epoxy which is quite thin and takes substantial time to set, giving it time to penetrate. I’ve had cracks that ran through and the West would run out the back side, draining the crack of glue! So, a bit of tape on the low side(s) was needed to keep the glue in. The problem with West System is that it is expensive. Since I don’t use it much, it isn’t worth buying a real container of it, so I bought little squeeze-out packets (like ketchup packets) of the stuff. This elevates it to Stupid Expensive, but at least I don’t throw 95% of it away. Actually, for a crack repair, I guess even with the little packets you do throw most of it away, but at least not the whole can!
It’s hard to judge a photo, but I’d likely go after this crack with regular wood glue, as described. If the crack goes through, apply the glue to one side and see if you can just work it so that it comes out the other side. That will give you confidence that the whole interior surface has glue. If it never comes out the other side, then of course try to work glue from that side, too.
23 September 2019 at 10:49 pm #611279Thank you for the advise. I’ll give the wood glue a try tonight.
To Ed’s point, I’ve also fixed a couple of hairline cracks using wood glue. I’d put the glue into a small syringe (the kind you orally give medicine to kids or animals with), then open the crack as far as I could and squeeze the glue from the syringe, at multiple locations along the crack. The pressure from the syringe forces the glue deeper.
When Paul replaced a missing horn on a backsaw handle, he used regular PVA Wood Glue to attach a new piece. Clamped it, then trimmed with a chisel when dry.
Because your crack is so deep, I’d gently pry it open with a clamp, thin wedge, or knife, to be certain PVA coats both internal surfaces.
If it breaks off completely whilst doing that (and it looks as though it might) just glue, refit, and clamp as normal.A wooden dowell could add some strength, but drilling & screwing would be stronger. A wooden plug/cap would fill the screw-head recess to completely disguise the repair.
 26 September 2019 at 4:55 am #612163
You can use a small suction cup to force glue into cracks also and
26 September 2019 at 8:08 am #612186Another trick to getting glue into a joint is to use a Shopvac on the side opposite where you put the glue to draw the glue into the joint.
26 September 2019 at 4:57 pm #612362I’m glad I haven’t tackled this yet, the idea of using clamps to open the gap would let me use both hands to squeeze the glue in.
I don’t really want to break it all the way, since that would cause the bottom part of the handle to break too.Attachments:
You must be logged in to view attached files.My experience with cracks like this, which admittedly is only about half a dozen, is that it is surprising how well the glue works into the crack when you squeeze and release repeatedly. If you want to try a spreader, perhaps have it on hand, but try without it first? If you succeed, you will have avoided the very real risk of breaking the handle. I agree with Dave, you can probably use the handle without doing anything, so my inclination is to balance risk by not using a spreader and then seeing if the repair lasts. Resist the temptation to test it and let it fully cure before trying it.
4 October 2019 at 3:08 am #614673I used clamps to open the gap just a tad. There was another crack at the very bottom of the handle, as you can see in the picture above. I diluted the wood glue with some water and was able to get it to penetrate the gaps.
It worked pretty well, it feels pretty solid.
Thank you for the advise.
Rafael
-
AuthorPosts
- You must be logged in to reply to this topic.