@dionysios
Forum Replies Created
-
AuthorPosts
-
 7 March 2020 at 11:51 am #652137
If you are in the UK you may also try Workshop Heaven. I have used their saw screws on my S&J tenon saw. A bit pricey (£2.50 per screw) but good quality.
31 January 2020 at 12:19 pm #647117The easier way to remove the rivets is drilling them out.
Mark the centre of the rivet cap with a centre punch, so that your drill bit won’t slip and damage the handle, and then drill through the rivet cap.
You may try a small drill bit, say 3mm, at first and then use a larger one to cut completely the rivet head.
It’s easier if you drill the female part of the rivet, which, if I remember well, on my saw was on the side of the handle with the S&J logo.
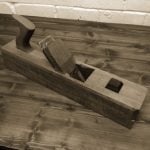
29 January 2020 at 8:35 pm #646954Fortunately the handle has enough ”meat” so you can reshape it to suit your hands and aesthetics. I have done some reshaping on my S&J tenon saw (my first ever attempt to reshape a saw handle, so the result is not impressive). I removed the handle from the saw, striped the finish, reshaped, finished with boiled linseed oil and replaced the rivets with proper brass saw nuts. I think that you can do it without removing the saw plate though. Just take a pencil, draw the new shape on the handle (if you don’t like it erase it and try again) and then remove the excess wood.
If you want to remove the lacquer and the branding from the plate try methylated spirit, it worked for me (I have tried white spirit wihout any success first). After 3-4 years in my damp garage I have no rust problem without the lacquer coat, I just wipe the plate with an oil rag after use.
You may also polish the brass to a mirror finish if you like.
Attachments:
You must be logged in to view attached files.
13 January 2020 at 1:17 am #644458I have a Faithfull 400/1000 diamond stone and after 4 years it still works fine despite the abuse (I tend to press too hard when sharpening). It came dead flat and after the initial wear (common to all diamond plates) it shows no other signs of deterioration.
I also have a Norton India combination stone, which I use for my everyday sharpening as well, and I totally agree with @Dave Ring that it’s just as effective though a bit slower than the Faithfull. It’s narrower than the Faithfull and therefore I have to skew the wider plane irons (not an issue really) but the final surface is better polished, compared to the diamonds, and it’s easier to sharpen very narrow blades due to the continuous surface.
After the stone (no matter which one I have used) I go straight to a strop.
13 January 2020 at 12:33 am #644455@Paul, You may move the frog forward to close the mouth opening or move the cap iron very very close to the cutting edge (don’t do both at the same time because the plane will clog).
Sharpen your iron a give the plane a go with the sole as it is.
Personally I prefer to set the cap iron close to the cutting edge. With a properly sharpened iron I can plane my piece without worrying about any wild grain around knots etc.
Richard Maguire has uploaded this video in regards of reducing the tearout by moving the cap iron close to the cutting edge: https://www.youtube.com/watch?v=1bhh6kxXZOQ
10 January 2020 at 6:35 pm #644136You don’t need to file off the teeth. Just take your file and sharpen the teeth to a cross cut pattern.
It will take more strokes per tooth in order to establish the fleam, compared to sharpening an allready shaped crosscut tooth, but it’s easily done.
One think you may have to pay attention is the tooth rake. On rip cut saws the front side of the tooth tent to be at 90 degree angle to the tooth line, which makes the cut aggressive. On a cross cut saw you may keep the same aggressive rake or you may want to make it less aggressive by changing the rake angle (keeping the top face of the file parallel to the ground i.e.). Personally I tried both and I liked more the less aggressive cut on my crosscut saws.
You may also watch a youtube video by Paul Sellers (Hand Saw Comparisons is the title if I remember well) where he changes a saw from a cross cut to rip cut (you will have to go the other way around of course).
6 January 2020 at 3:42 pm #643372On the sole photo there seems to be a low spot across the front side of the mouth.
If you want to use a plane as a smoother you should possibly keep on with the sole flattening until you eliminate that low spot.
You need the plane sole to press firmly the wood fibers right up to the mouth opening in order to reduce the possibility of tear out.
4 December 2019 at 5:58 pm #633391A breasted saw is supposed to make the use of the saw more comfortable for long sawing sessions, since it suits better to the natural swing of the arm when it comes to full length strokes. Therefore the saw has to be quite long (24 inches and above) so a full arm swing can be utilised.
A breasted saw’s intented use was either long rip cuts of relatively thick stock or crosscut of wide thick boards.
The are also supposed to cut a little bit faster because for the same straight line stroke a curved tooth line has more teeth cutting compared to a straight one.
From my personal experience there was a noticeable difference between a modern S&J 24inch 7tpi (converted) rip saw and an old Warranted Superior 26inch 6.5tpi breasted rip saw when I had to rip thick stock. The difference was even bigger when I ripped thiner boards out of a 12cm thick jarrah sleeper (both saws sharpened and set by me). The breasted saw made the sleeper ripping les tedious (but still it was hard work).
29 October 2019 at 11:58 am #622577In my single skin brick Garage/Workshop the relative humidity (RH) is about 80% most of the time in autumn/winter (Berkshire UK). The bricks seem to act like sponges that absorb water and slowly release it, even on dry days, increasing the humidity levels.
In such an ocasion the dehumidifier should work 24/7 on it’s highest setting, and I am not sure that it will manage to decrease the RH effectively, adding, according to the specifications in your link, £878 to the annual electricity bill.
Maybe you will be better off if you add some sort of insulation first and then consider the use of a dehumidifier or heating for your workshop.
15 October 2019 at 4:14 am #618102The main difference between the French and the English (Paul Sellers version) bench is that the English bench can be dissmantled in case you move house (and subsequently workshop). If you are not a home owner and you may need to move house in the future you must take this into account. Also the English bench (if built using softwoods) is lighter and therefore easier to move from one workshop to another. Regarding the workholding ability, I can’t tell that there is any serious difference between the two bench types. You may have leg vice, metal vice, dog holes, tail vice etc in both types of bench according to your needs. Personally I would prefer the French design based on aesthetic reasons only, but being a tenant with the possibility of a house move any time in the future I built the English (PS) workbench and I am very happy with it (after four years of use still not sure that I like the tool well though).
16 June 2019 at 10:02 am #581483The short answer for me is: All the time!
Most of my tools are secondhand and I have spend many hours to bring them back to working condition.
Some of them belonged to craftsmen in the past and, despite the rust and dirt cover after years of being left in a shed/barn etc, they are tools that have been well used but never abused.
Every time I use them I hear tales from the past. I wonder on what projects Mr XXXX has used the tool, how long ago, in a workshop or on site. I have a plane made during WW2 and every time I use it in my mind comes the factory where it was made by women or children, because the men were fighting far away.
As for my bench, I made it a few years ago following PS instructions. It’s not perfect by any means and when I added some shelving I had to take into account the discrepancies. But I built it from scratch using only two plastic sawhorses and very few hand tools, it’s rock solid and I am proud of it. It’s not pristine any more and it needs a bit of flattening, but I am procrastinating because the marks and the stains tell my story and I love the feeling when I run my hand on the worktop.
8 June 2019 at 4:45 am #579025By coincidence I have also ordered today a Pentel P200 (Pentel Sharp in the US) and a Pentel Graphgear 1000, both 0.5mm.
I am using also:
1) A cheap Rotring 0.7mm. Positives: Very light, no rubber ”ergonomic” grip that will disintegrate and become sticky, cheap. Negatives: It lacks the long metal sleeve of a proper drafting pencil so you have to be a bit carefull when you are drawing lines using a rule. The 0.7mm line is quite thick.
2) Staedtler Mars Technico 2.00mm. Positives: Heavier than the Rotring but still on the light side (you can still use your ear as a pencil stand), excellent balance, it has its own integrated lead sharpener, you may extend the lead a lot if you have to reach a tight space, it will last a lifetime, relatively cheap (about £6.00). Negatives: Needs sharpening.
3) Pentel Graphgear 1000 0.3mm. Positives: Proper drafting pencil made to work against a rule, retractable sleve (so it won’t get damaged when you throw it in the toolbox), excellent built quality, very good grip and balance, silver colour so it pops out on a messy bench, very fine line that aids accuracy, not expensive if you order from Japan and wait a month for delivery. Negatives: Heavy (even if your ears are spring loaded they can’t hold it), very fine line (yes, it might be a negative when presbyopia comes), fine lead tends to break if you are not gentle enough (hence the order of the 0.5mm).
4) Taylors pencil with white lead (wooden). Positives: You can see your line no matter how dark is the wood, cheap, lines are easy to remove, lightweight. Negatives: Soft lead needs frequent sharpening.
The big advantage of mechanical pencils is the consistent thickness of line (does not apply on lead holders like the Staedtler Mars Technico) and therefore accuracy. My main concern is that the thin metal sleeve of a proper drafting pencil can be easily damaged in a workshop environment (otherwise I would have ordered only the Pentel P200)
5 June 2019 at 12:25 pm #578208The only area of the sole that pitting might be a problem is the area around the mouth.
As far as I can see from the photo you may have to work on the sole a bit more to get the mouth to the same level with the toe and heel (but I think you should first try the plane as it is now and see if it’s working ok, it may save you a lot of time).
Regarding the sandpaper grit I usually start with 60 then 80 and I finish with 120. I have tried also 40 but it seemed to be too coarse and on smaller planes (no3, block planes, spokeshaves etc) I might go up to 240.
Finally, the iron. The brand name is DIAMIC and it was initially introduced by Aaron Hildick. I think it’s still being used by Henry Taylor Tools.
7 May 2019 at 10:47 am #558227When it comes to rust removal I use different methods according to the size of the tool, the amount of rust, any presence of pitting etc.
For small parts (like plane or other screws) and tools with pitting holes I tend to use oxalic acid diluted in warm water and I leave the parts in the solution for a couple of hours depending on the amount of rust. Then I rinse and dry them thoroughly and brussh them with a wire brush (handheld or on drill) to remove any rust left and the residue that the accid leaves on the metal surface.
If there are thick layers of loose rust I start with a wire brush or scraper.
On parts like plane irons and cap irons I usually use wire brush on a drill or sand paper flap wheels.
On saw plates I tend to use different grits of sand paper with or without the use of a sanding block.
I have also used WD40 along with wet and dry sand paper, works quite well but I don’t like the smell of WD40.
As a general rule I am trying to use on every ocasion the method that is effective without being too agressive.
Keep in mind that if you use acid on any other liquid rust remover the metal has to be free from dirt and grease for the liquid to be as effective as possible (I have even washed the parts of a vice in the kithen sink with warm water and dish detergent before placing them in the acid bath) .
27 April 2019 at 4:18 am #557232If you don’t mind the dead ugly handles you may try the MHG chisels. They are made in Germany and they have a lot of good reviews (also they are recomended by PS on the Common Woodworking site) and in the UK they cost £80 for a set of 6 chisels. If you can afford the price (and you are prepared to wait) the Ashley Illes are supposed to be an excellent choice at cost much lower than the Veritas or LN. But first try to sharpen a few more times the Narex that you already have to get past to the soft part of metal (as already @deanbaker sugested).
-
AuthorPosts