Carved Mirror Frame: Episode 2
This is an episode in a paid series. Want to watch it? You just need to sign up as a paid member, and you can enjoy this video and many other videos we think you will love.
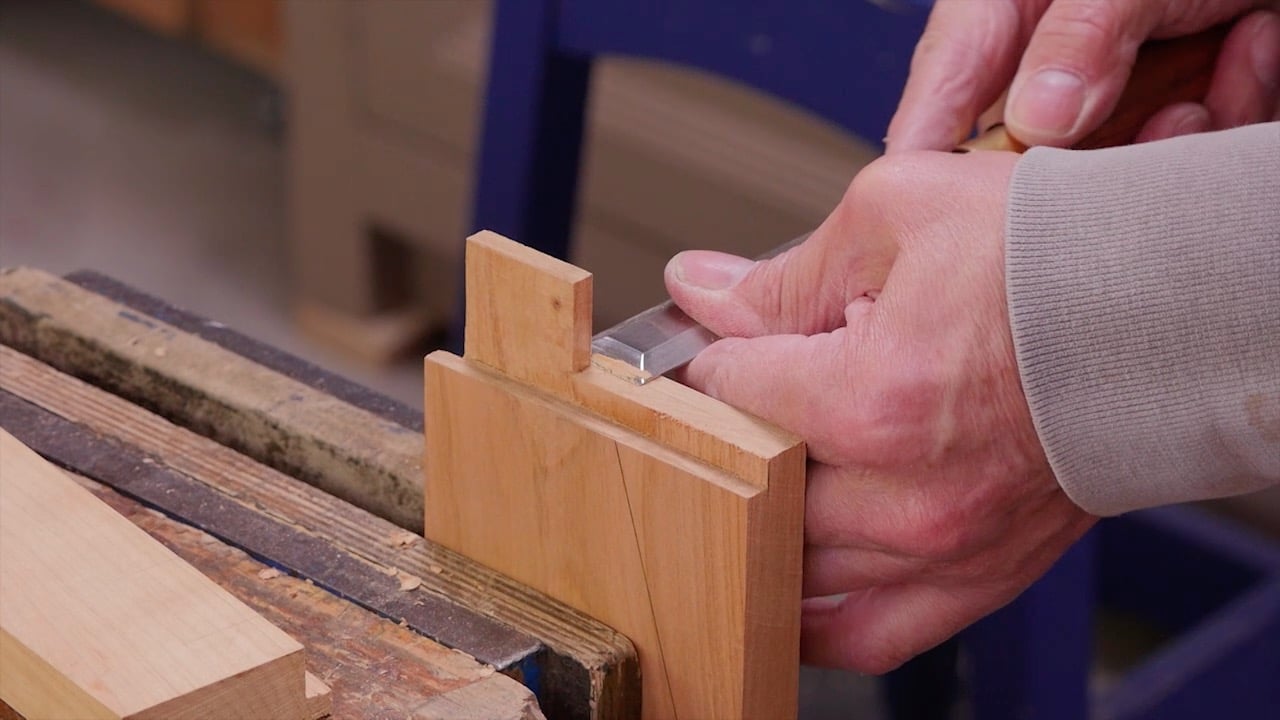
With all the tenons laid out, Paul shows how to cut and fit it to the mortise, showing how to check for and resolve any discrepancy. He saws one cheek and splits another, showing how it lines up with the rebate and how to avoid fracturing the meeting edge.
Good information on this one. I always struggled with what side to pare down on getting a tenon to fit properly. My cheeks were always a bit off. I think this will help me a lot. Thanks for what you do guys.
Thanks master Paul.
That was a great info on tenon mortise joinery near that sloped top corner.
Great information as always. I have a question about the clamp you used. Did you make the wood inserts that run the length of the clamp channel or were they purchased that way?
Thanks.
I remember master Paul mentioned about these wood insets in the previous videos—these are add-ons that stabilize the clamp bar.
Have a look at this blog post:
https://paulsellers.com/2011/11/4473/
Thank you for the lesson.
Why do you have the wooden sole on the router plane? I’ve never seen that before. Thank you
I can only speak for myself.
1) it doesn’t leave scratches like metal can do from time to time
2) you can make it wider than the metal sole and create wider rebates or tenons that way
Wesley