Carving a Rosette
Posted 4 April 2017
This is a free video, want to watch it? Just log into the site, and you can enjoy this video and many more!
Description
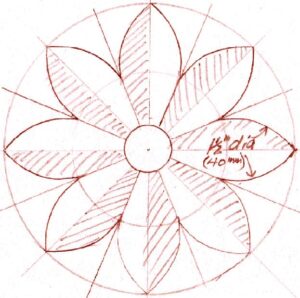
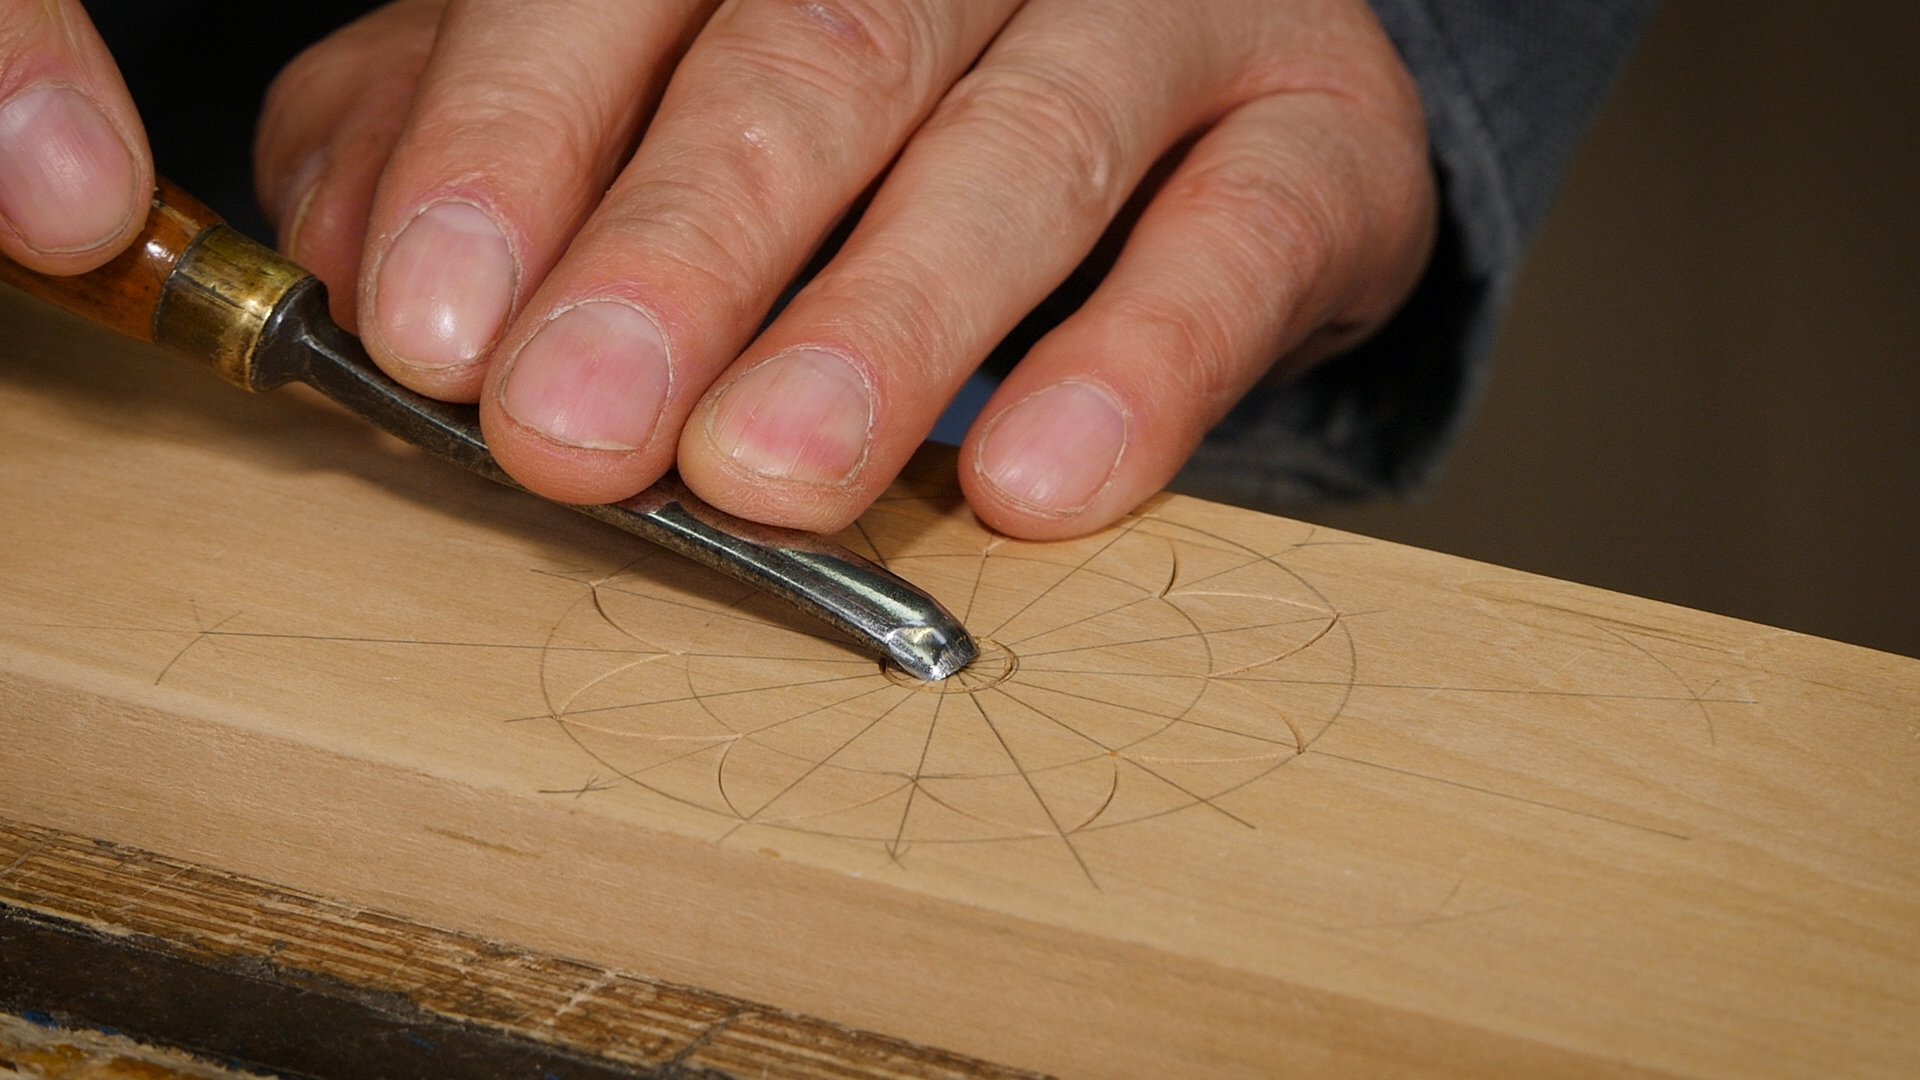
This project introduces some techniques that can be used to carve a rosette. Paul uses a basic set of gouges and a knife to show some skills that are transferable to many projects. Key to this project are careful layout and sharp tools.
Tool List
Pencil
Square
Ruler
Compass with pencil
Knife (freshly sharpened: https://youtu.be/bailuQUh2mY)
Gouges: ⅜”/10mm No 7 sweep and ¾”/20mm No 5 are what Paul used. (He uses another No 5 which is more rounded, but this is not essential).
Click here to download the technical drawing for the rosette


Paul,
You don’t talk much about grain direction here. With a piece of maple (I think?) is grain direction less of a concern than with working with a different type of wood, say oak? Or, are the methods you are showing less likely to breakout due to carving with/against the grain. I am thinking of trying my hand at relief carving an oak quilt ladder for my wife and have done a bit of practice. However, I have often slipped and craved the wood along the grain. I’m sure I need more practice, but I’m surprised you didn’t call attention to the grain direction in the video.
I appreciate all you do!
Justin
Check out Mary May woodcarving videos on YouTube
Thanks Amelia,
I have, and she is quite great. She has a similar video, but done much differently. I appreciate both approaches and recognize that Paul’s method may be a bit more beginner friendly. I wonder if the selection of wood plays any role into Paul’s approach.
Mr P. Sellers is using lime-tree (linden; Tilia Europea), which is very close to basswood (Tilia Americana); both well recognised as very suited for carving, While for that, grain direction doesn’t seem to be very critical, linden is very unforgiving on planing against the grain.
/soj
I other videos he stressed working down grain instead of up.
Hello Justin,
Close grain woods like lime do carve more evenly, and grain is less decisive than, say oak, which is quite open grained. This does mean you have to be more careful to work with the grain for such woods to get a smooth finish. The best advice is definitely to practice before you go for the final piece.
“You got to watch skew chisels, because they often take you in a way you don’t want to go.”
I can think of a few other things that I ran into in my life that the same could be said for.
I’m having a good morning—thanks Paul & everyone who made the video.
Can I ask what wood you are carving in the video?
He mentions that it is Lime, which I believe is what we call Basswood in the States.
No, they are two different woods. Lime wood and Bass wood
I believe Paul said it was Lime. He mentions it in passing at some point while he is carving with the knife.
Thank you WWMC team!
It is easy to see that Paul’s tools are razor sharp, and the wood is chosen for both grain and firm but not excessively hard. With harder woods the use of a mallet helps with control and being mindful o.f grain direction limits tearout.
Great intro lesson from a great teacher.
So I ran downstairs and got a piece of pine, sketched out my rosette and grabbed the only gouge I had a #35 with a 7 sweep with an outside bevel and a 15mm with a 6 sweep outside bevel.
What are you using? My #35 is way too big, you don’t specify sweep but maybe I missed something in the instructions?
The PDF above ( under the heading “Layout Drawing” has all the information on knives and gouges.
Loving the carving Paul!!! I hope you do some shells or claw and ball feet in the future. Wonderful job as usual.
agreed!
Paul, another great video. Thank you!
Question … After we’ve practiced the carving technique, and assuming we want to make a carving on a drawer front for example, would you suggest carving the front piece before or after the piece’s joinery has been completed? I imagine there are pros and cons either way.
I second this question–I would assume that decorative work would be done post joinery but pre glue-up so that you can still use your vise. And given that you are likely to make micro-adjustments as you build your piece and do the joinery I would assume that doing the decorative work afterwards would ensure 1) minimal risk of fingerprints/dirt marring the decorative work and 2) that the decorative work will be in the precise location you want on your final piece.
But that said, I don’t know the exact answer and found myself wondering the exact same thing as I’ve never really done any carving in any of the (limited) pieces that I have made.
Paul said that he would tend to do the joinery first, then the carving. However, if you are a beginner carver, he recommends doing the carving first incase you need to re-do it.
I’m glad to see you’ve not only not slowed down with age, but instead gotten faster!
Beautiful carving. This is another area of this craft I hope to get into soon.
Paul,
My eyes can’t help but notice that saw vise in the background. Maybe that could be a project at some point? It seems like a good design, I assume it’s made to go in the bench vise?
Gary,
Plot “saw chock” into the search the site box and you’ll find a post on how Paul scquired the vise and at least two posts on building one like it, with dimensioned drawings.
Paul wrote a blog about about the saw vise with a few sketches:
https://paulsellers.com/2012/06/solid-saw-chocks-simply-made/
I built one discussed here:
https://woodworkingmasterclasses.com/discussions/topic/saw-vise-build/
Hope that helps.
what make of knife are you using.
the directed web page seems unavailable
Hello Roger,
The knife that Paul is using is one he made, but any basic carving knife will work:
https://paulsellers.com/2011/12/my-minimalist-tool-list-the-woodworkers-knife/
They are ‘sectors’ not ‘segments’ 🙂
I really enjoyed that; I’m just getting back into woodworking and as a one time time-seved bench joiner who really enjoyed the early years, life passed my by chasing my tail to move from the tools and earn better wages to bring up my family, and now they’ve all sodded off to do pretty much the same, I’m rebuilding a full compliment of hand tools, whether second hand or made by hand I’m really looking forward to it. I feel I made some really nice bespoke items in my youth, but looking back I can see where a nice touch like some carving would have made all the difference. More caring tips and techniques please Paul…
I enjoyed your instruction Paul but the video kept stopping.It is not my internet speed as it ran at a constant 116Mbps throughout which is quite fast.
Hello Christopher,
Glad you enjoyed the instruction. We try and keep these comments for woodworking questions, so I have emailed you about your problems viewing this video and will remove this comment in a few days.
All the best. Phil
pdf link on https://woodworkingmasterclasses.com/videos/carving-a-rosette/ is not working.
Great video & intro carving project.
I’ve been carving wood (& building furniture, etc. with hand tools) for almost ten years & I’ve found it very difficult to source limewood or Linden in the US.
I’ve only had the pleasure of carving lime once so far & it was great. I’ve always wanted to have more access to limewood over basswood because of that experience and the saying I’ve heard from so many UK & European woodcarvers, “the best basswood carves like limewood, but the best limewood is unbeatable.”
Derek,
If you live in the South, try Tupelo.
It carves nicely and holds detail well – I think better than Basswood with less tendency to split.
The only issue with it is I find a noticeably variation in density from board to board.
I try to pick the lighter pieces for easier carving without a mallet.
Larry,
I had to look up Tupelo. See, for example, https://www.extension.purdue.edu/extmedia/fnr/fnr-298-w.pdf . The name is associated with species that are hardwoods and softwoods, swamp growers and uplands, and ranging from FL to ME. When you’ve used it in the past, was there ever any additional information that might help with selection for carving, since I’d likely have to order it online- no ability to handle and select for lightness. Do you know if it is suitable for chip carving?
Ed,
I should have been more specific.
The Tupelo I had in mind is Nyssa aquatica, also known as water Tupelo, Tupelo-Gum, yellow Tupelo, yellow gum, large tupelo, Wild Olive(? It’s nothing like olive wood), and a couple other local names. It grows in an arc along the Mississippi watershed from the missourri border south along the northern gulf coast and up the Eastern Atlantic seaboard to Virginia in swampy areas. It has a large swollen base which gives a big chunk of wood for carving. Waterfowl carvers and especially power carvers like it because it doesn’t fuzz up and holds detail well.
I’m fortunate that one of the local dealers brings it in to Portland periodically, probably for some enterprise that orders carloads of it for casting patterns or something. They put the off cuts in a bin for the rest of us.
It looks somewhat similar to basswood in color.
https://www.wood-database.com/water-tupelo/
I’m told that black Tupelo (Nyssa Sylvatica) is similar. It’s not really black, just a bit darker and maybe softer, but I haven’t used that. And there is another gum, Nyssa Biflora, sometimes used for carving. I have no experience with either, though. All are used by carvers.
I mentioned to look for it in Southeast because it’s utility species there, nothing special or exotic. It’s often used for crates and boxes. When it’s cut into blocks for carvers I bet the price skyrockets.
And be cautioned that I find a variation in density. I don’t buy online, but pick the pieces I want. The denser stuff is noticeably harder than basswood, but the lighter stuff feels a lot closer to it. For something like carving a rosette with gouges, even the denser stuff would be easy to carve. If you are using knives, however, you want the lighter stuff with a lower ring count ( faster growing).