Clothes Airer: Episode 2
Posted 14 November 2018
This is an episode in a paid series. Want to watch it? You just need to sign up as a paid member, and you can enjoy this video and many other videos we think you will love.
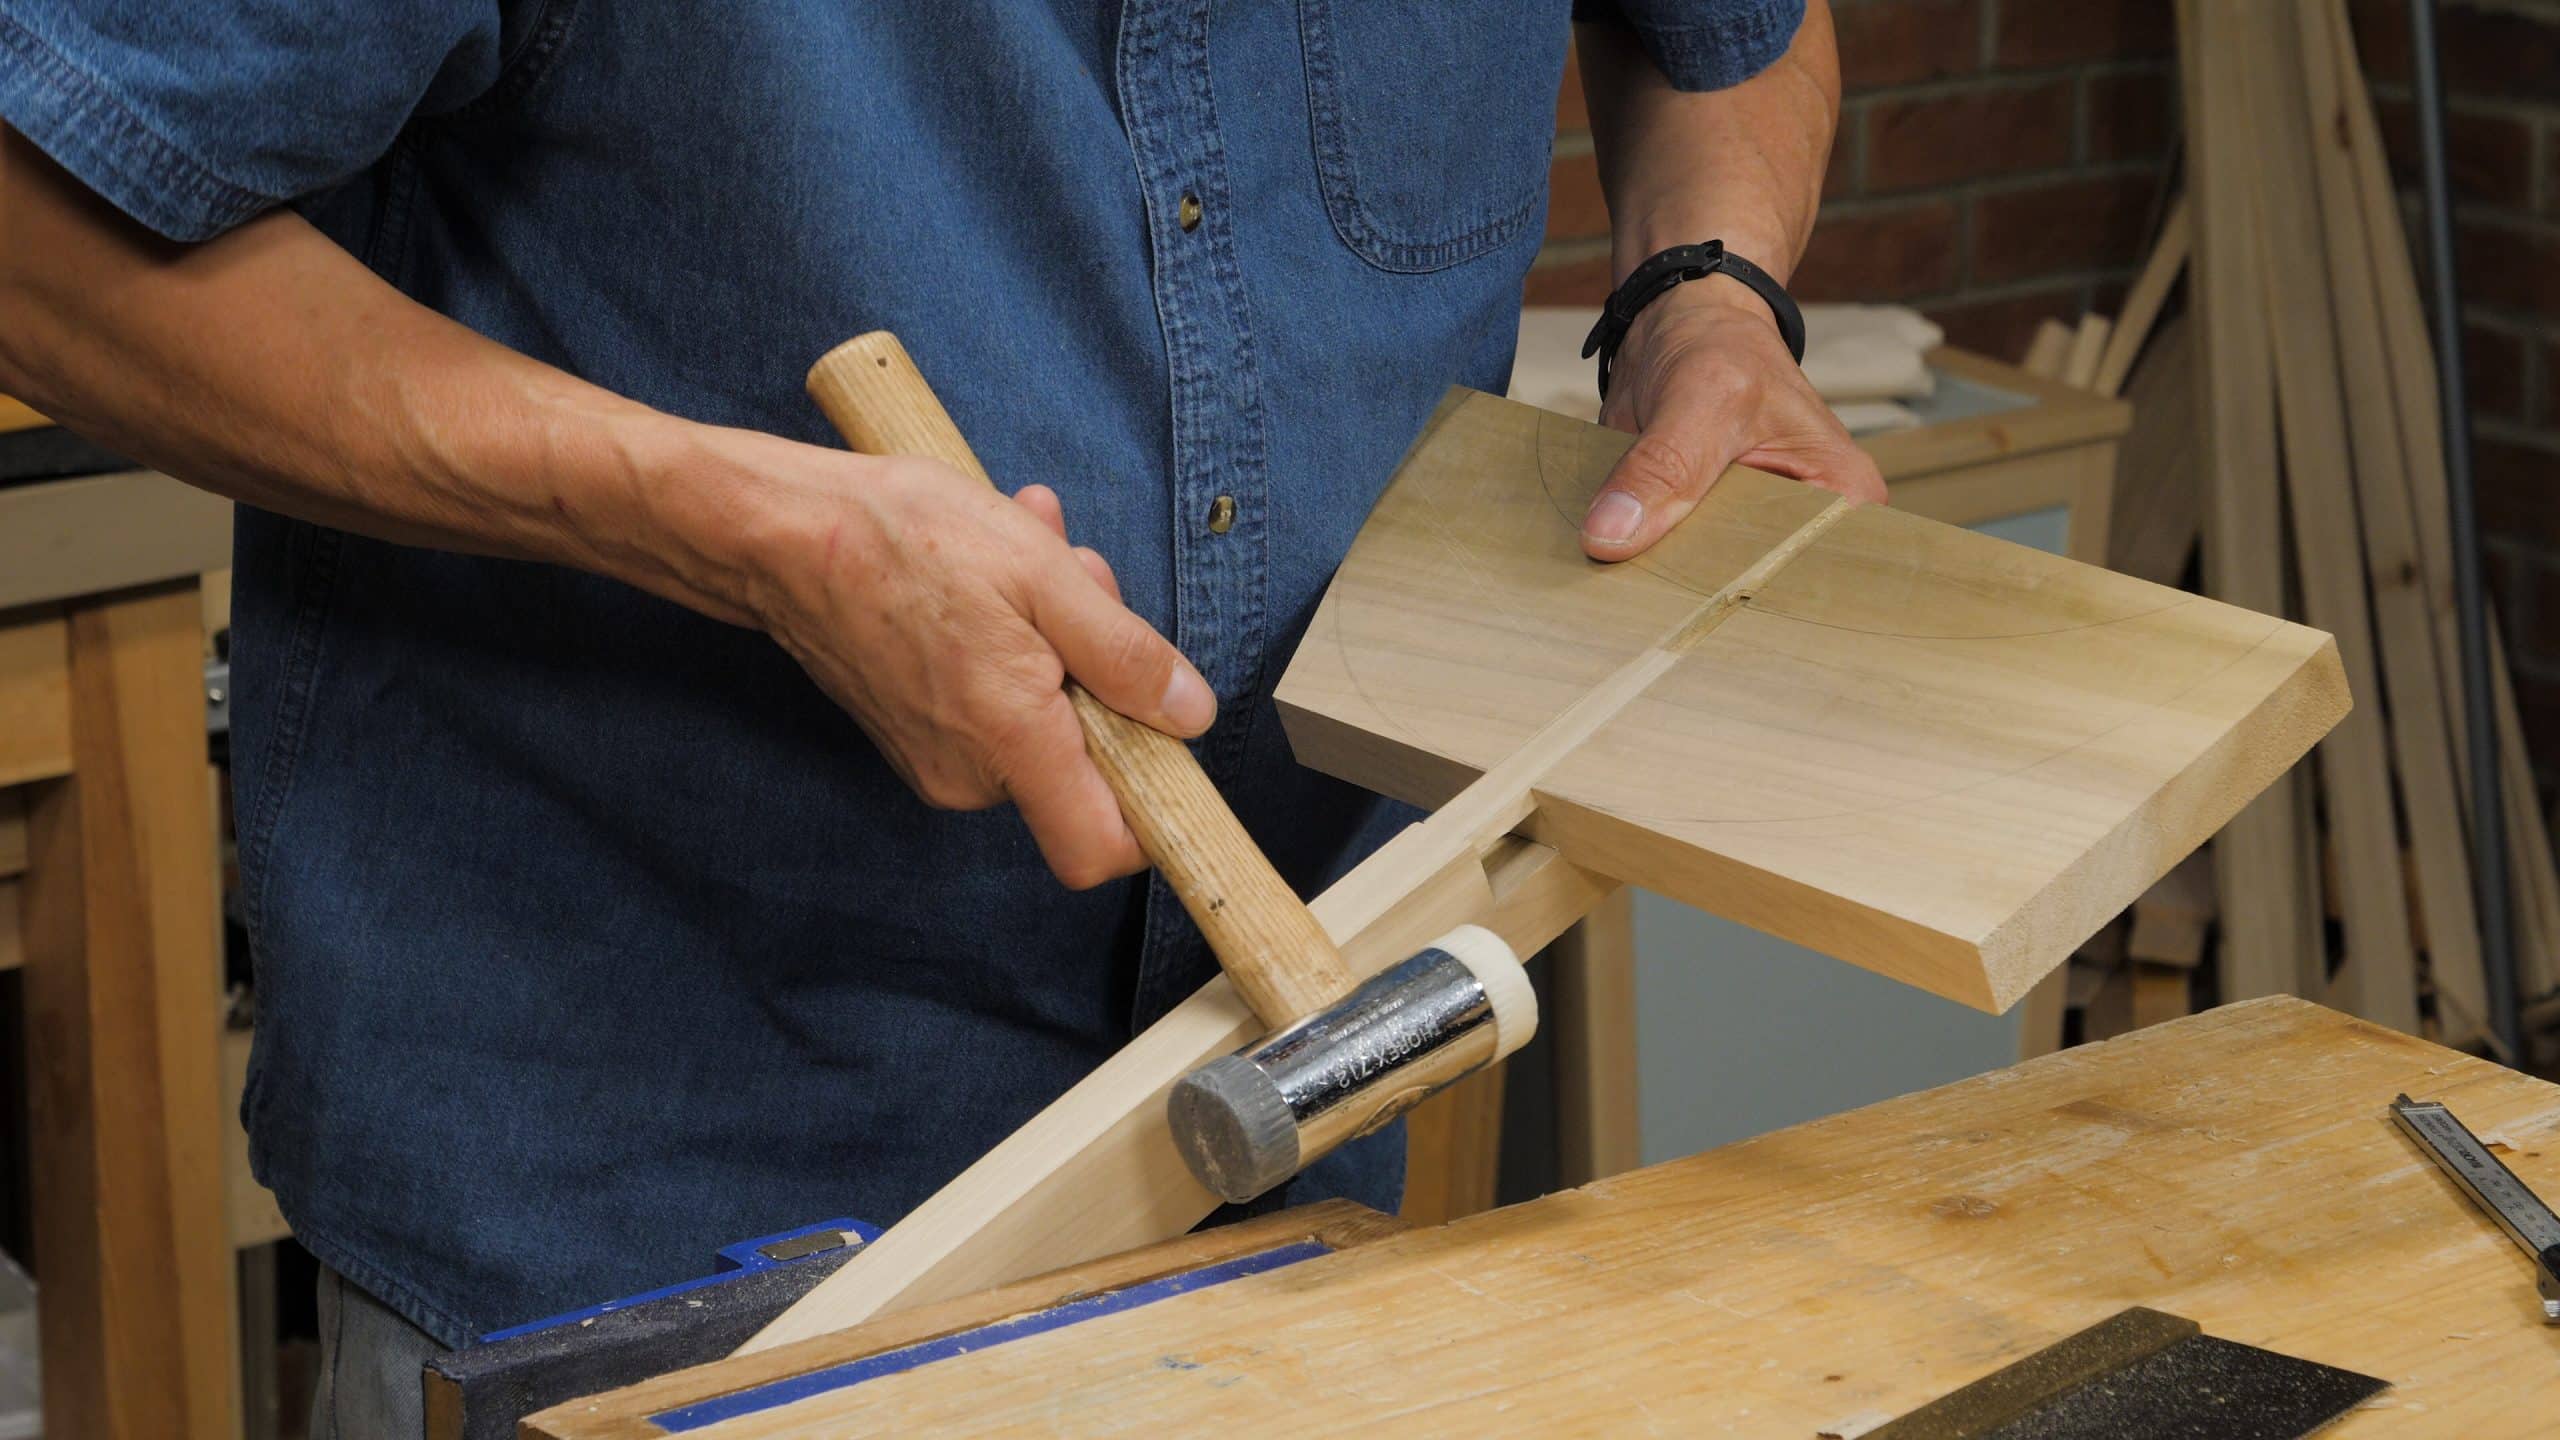
To start off with, Paul lays out the sliding dovetail with a knife for accuracy. Then he cuts down to exact depth with a combination of router, saw and chisel. Then the housing dado is cut in a similar manner, before the joint is carefully adjusted for an exact fit.
This is a true masterclass in the art of patience. The in-out, in-out repetitive correction is a joy to watch. I can learn so much from this. Thank you Paul and team.
I’ve enjoyed this so far – can I make 1 comment, though – it wasn’t until Paul started fitting the joint that I had any real idea how it was going to look. Could I make plea for more previews of where the work is heading, rather than me sitting guessing what’s going on! It would then make more sense of what Paul is saying as he cuts the joint.
Thanks to everyone for this and all the projects I have watched – there’s always a moment, watching Paul in real time, where something he does just clicks in my head and I know it will help down the line.
Check out drawing 3 of 3 in the intro. That would show you where the joint was headed.
I still can´t see where he´s going with this…
As I was watching Paul meticulously work the sliding dovetail to fit, and as I was feeling my patience being tested, the thought occurred, if I’m impatient just watching, then how in the world am I going to patient enough to actually handle when working the wood? Lesson to self: patience.
Thanks Paul. Your valuable lessons from your teaching are coming to me fast and furious.
If your main goal is the finished project, your patience might be tried by this joint. But, for me what is interesting and fun is learning to make the joint — I do not really need the finished clothes airer! I have spent two days so far practicing just the joint. My first effort was a complete disaster. My second was not a disaster. It was merely really bad. Tomorrow I hope to do one that rises to the level of genuine mediocrity. And from there, the sky is the limit, perhaps even the coveted and (right now) seemingly impossible level of “kinda ok.” Once I get to that point with this joint, no matter how many efforts it takes, I will be ready to tackle a similar trajectory with those round, through tenon joints.
I must be missing something here. This joint seems awfully contrived to me. In over 30 yrs. of furniture making I’ve never seen anything like it. More importantly it doesn’t even seem to be the best fit for the application. This is a classic application for a standard mortise & tenon joint or some variant thereof. A simple bridal joint without the sliding dovetail would work just as well and could be executed In half the time.
Seems like a lot of fussy improvisation for an impractical joint.
At first I was thinking Michael had missed the point, in the introduction Paul explains that it is a joint that we might use in future projects. As I watch I know that at several points I would be gluing the dovetailed tongue back in place as it snapped off with my sawing or fitting!
I love dovetails but I appreciate that they tend to be a joint made to stop spreading.
Paul and Michael both have many more years experience than I so I am interested to read the outcome. As a very keen amateur who is embarking on making and designing furniture for my home I’m interested in the engineering but with an eye to the aesthetics.
I think the reason behind the dovetail in this joinery is due to the fact that wet clothes may wet the wood and therefore cause warping, cupping and all the things we fear. Perhaps Paul thought about this when designing the piece. Although even non-wedged dovetail would also work, in my opinion, however you’d have to add a fox wedge to it.
Sorry Jake, are you talking about the joint in this video? Did you mean a non wedged tenon?
I was talking about the sliding wedged/tapered dovetail tenon piece.
I suspect the joint selection was because of aesthetics. He wanted the appearance he gets rather than a plain foot. A M&T would have been simpler, but would have looked different. Suppose you decide to achieve the final appearance with an inlay. The inlay takes up some thickness of the mortise wall. If you decide the wall is too thin now, you move the mortise over to thicken it up. Now, it’s thin on the other side. So, move it further…in fact, make it be a housing.
That’s my guess for why he did it. That, plus giving us an exercise in accuracy.
In answer to a few of the queries above: Paul’s main reasoning behind choosing this joint was for teaching purposes. The joint also works well for uniting the sliding dovetail to the recess, as the glue isn’t pushed out by the adjoining piece. This is because it doesn’t make full contact until it is fully seated. Hope this helps clear up any uncertainty regarding Paul’s choice of joint.
While I certainly appreciate Paul’s passion for teaching, and did hear him mention this early in the video, it doesn’t change the fact that this is the wrong application for this joint.
Sliding dovetails have a place, and Paul has used it previously, largely in carcass work. It is used on the ends of shelves or drawer dividers to impede the sides of the case from spreading..
In this application someone is going to drag this piece across a floor, the foot is going to catch, and this very thin and fragile dovetailed tenon is going to split right up the side of the leg and render many hours of labor wasted.
There was no need here to reinvent the wheel, when the wheel ( mortise & tenon) was the perfect application in the first place.
Michael Ostrander–Do you really think that scenario will happen when the joint is properly glued? Didn’t Paul allude to the “fragileness” of the joint but also extolled its strength once properly fitted and seated? If it works (and works well), who is to say it is right or wrong?
With all due… ,
I think Mr. Ostrander is pointing to something quite relevant.
What separates teaching from demonstrating is that in the former the learner also acquires an understanding of why/how a certain modality was chosen or works (e.g. the understanding behind long division, vs. the “mechanical” skill to carry it out. [Yes, but why]?).
Despite a decade of hobby woodworking, I am obviously the ‘lanterne rouge of WWMCs’, as I can’t cut a sliding dovetail joint by free-hand sawing, nor can I, for this project, comprehend the virtues of such a joint relative a fairly long tenon-and-mortice joint, which – after all – seems to be the historically preferred for trestle legs.
In summary, I believe that all WWMCs projects should discuss how the ‘making’ aligns with form and function; as well as whatever virtues jigs and fixtures can provide.
/Sven-Olof
Interesting, Michael. This must be a Paul teaching moment: a joint, for some later use … somewhere else.
The basic rule is KISS = keep it simple stupid. Let’s see how this unfolds. (I keep wondering why this unique joint doesn’t have equal “meat” on both sides of the split.)
Paul,
Why the need for two routers when they often have depth stops? I have a router with a depth stop and I’m sure in past videos we have seen you go down to the depth stop as you have taken a dado out.
You certainly don’t need two routers, but it is convenient. Even with a depth stop, there can be a tiny difference in depth, but they can be useful.
A number of people have commented on the joint attaching the post to the foot. I have made a half dozen practice joints so far and find it an enjoyable joint to work on. But Michael suggests that it is not as strong as a mortise and tenon. Maybe, but maybe not. We have a foot that is one inch thick. So if we use an M&T to attach the post to that foot, the whole thing will be one inch thick. (Roughly 1/3″ for the tenon and 1/3″ for each side of the mortise, or whatever.) But Paul’s post is 1 3/4″ thick. It wraps ‘thickly’ around the 1″ foot and once glued up creates a joint that is a full 1 3/4″ thick. If dragged over the floor, a 1 3/4″ joint must break rather than a mere 1″ joint. Does that make sense? If it does, then this approach lets us use a relatively hefty post on a relatively delicate foot where the post, and not the foot, dictates the strength of the joint. Just a thought.
Thank you for your comments and questions. An interesting discussion. Paul was really looking for a pleasing joint which was valuable for education. He believes that uniting the sliding dovetail with the housing dado creates a rigidity that matches (maybe surpasses) that of a mortise and tenon, so doesn’t feel the strength of the joint is compromised. There is certainly no harm in using a mortise and tenon if you wish.
This is great seeing your tweaking ( or fettling ) instead of right off the saw perfection. Corrective measures are the tools needed to get it as good as possible. Great series!