Craftsman-style Tool Carrier: Episode 1
Posted 6 May 2020
This is an episode in a paid series. Want to watch it? You just need to sign up as a paid member, and you can enjoy this video and many other videos we think you will love.
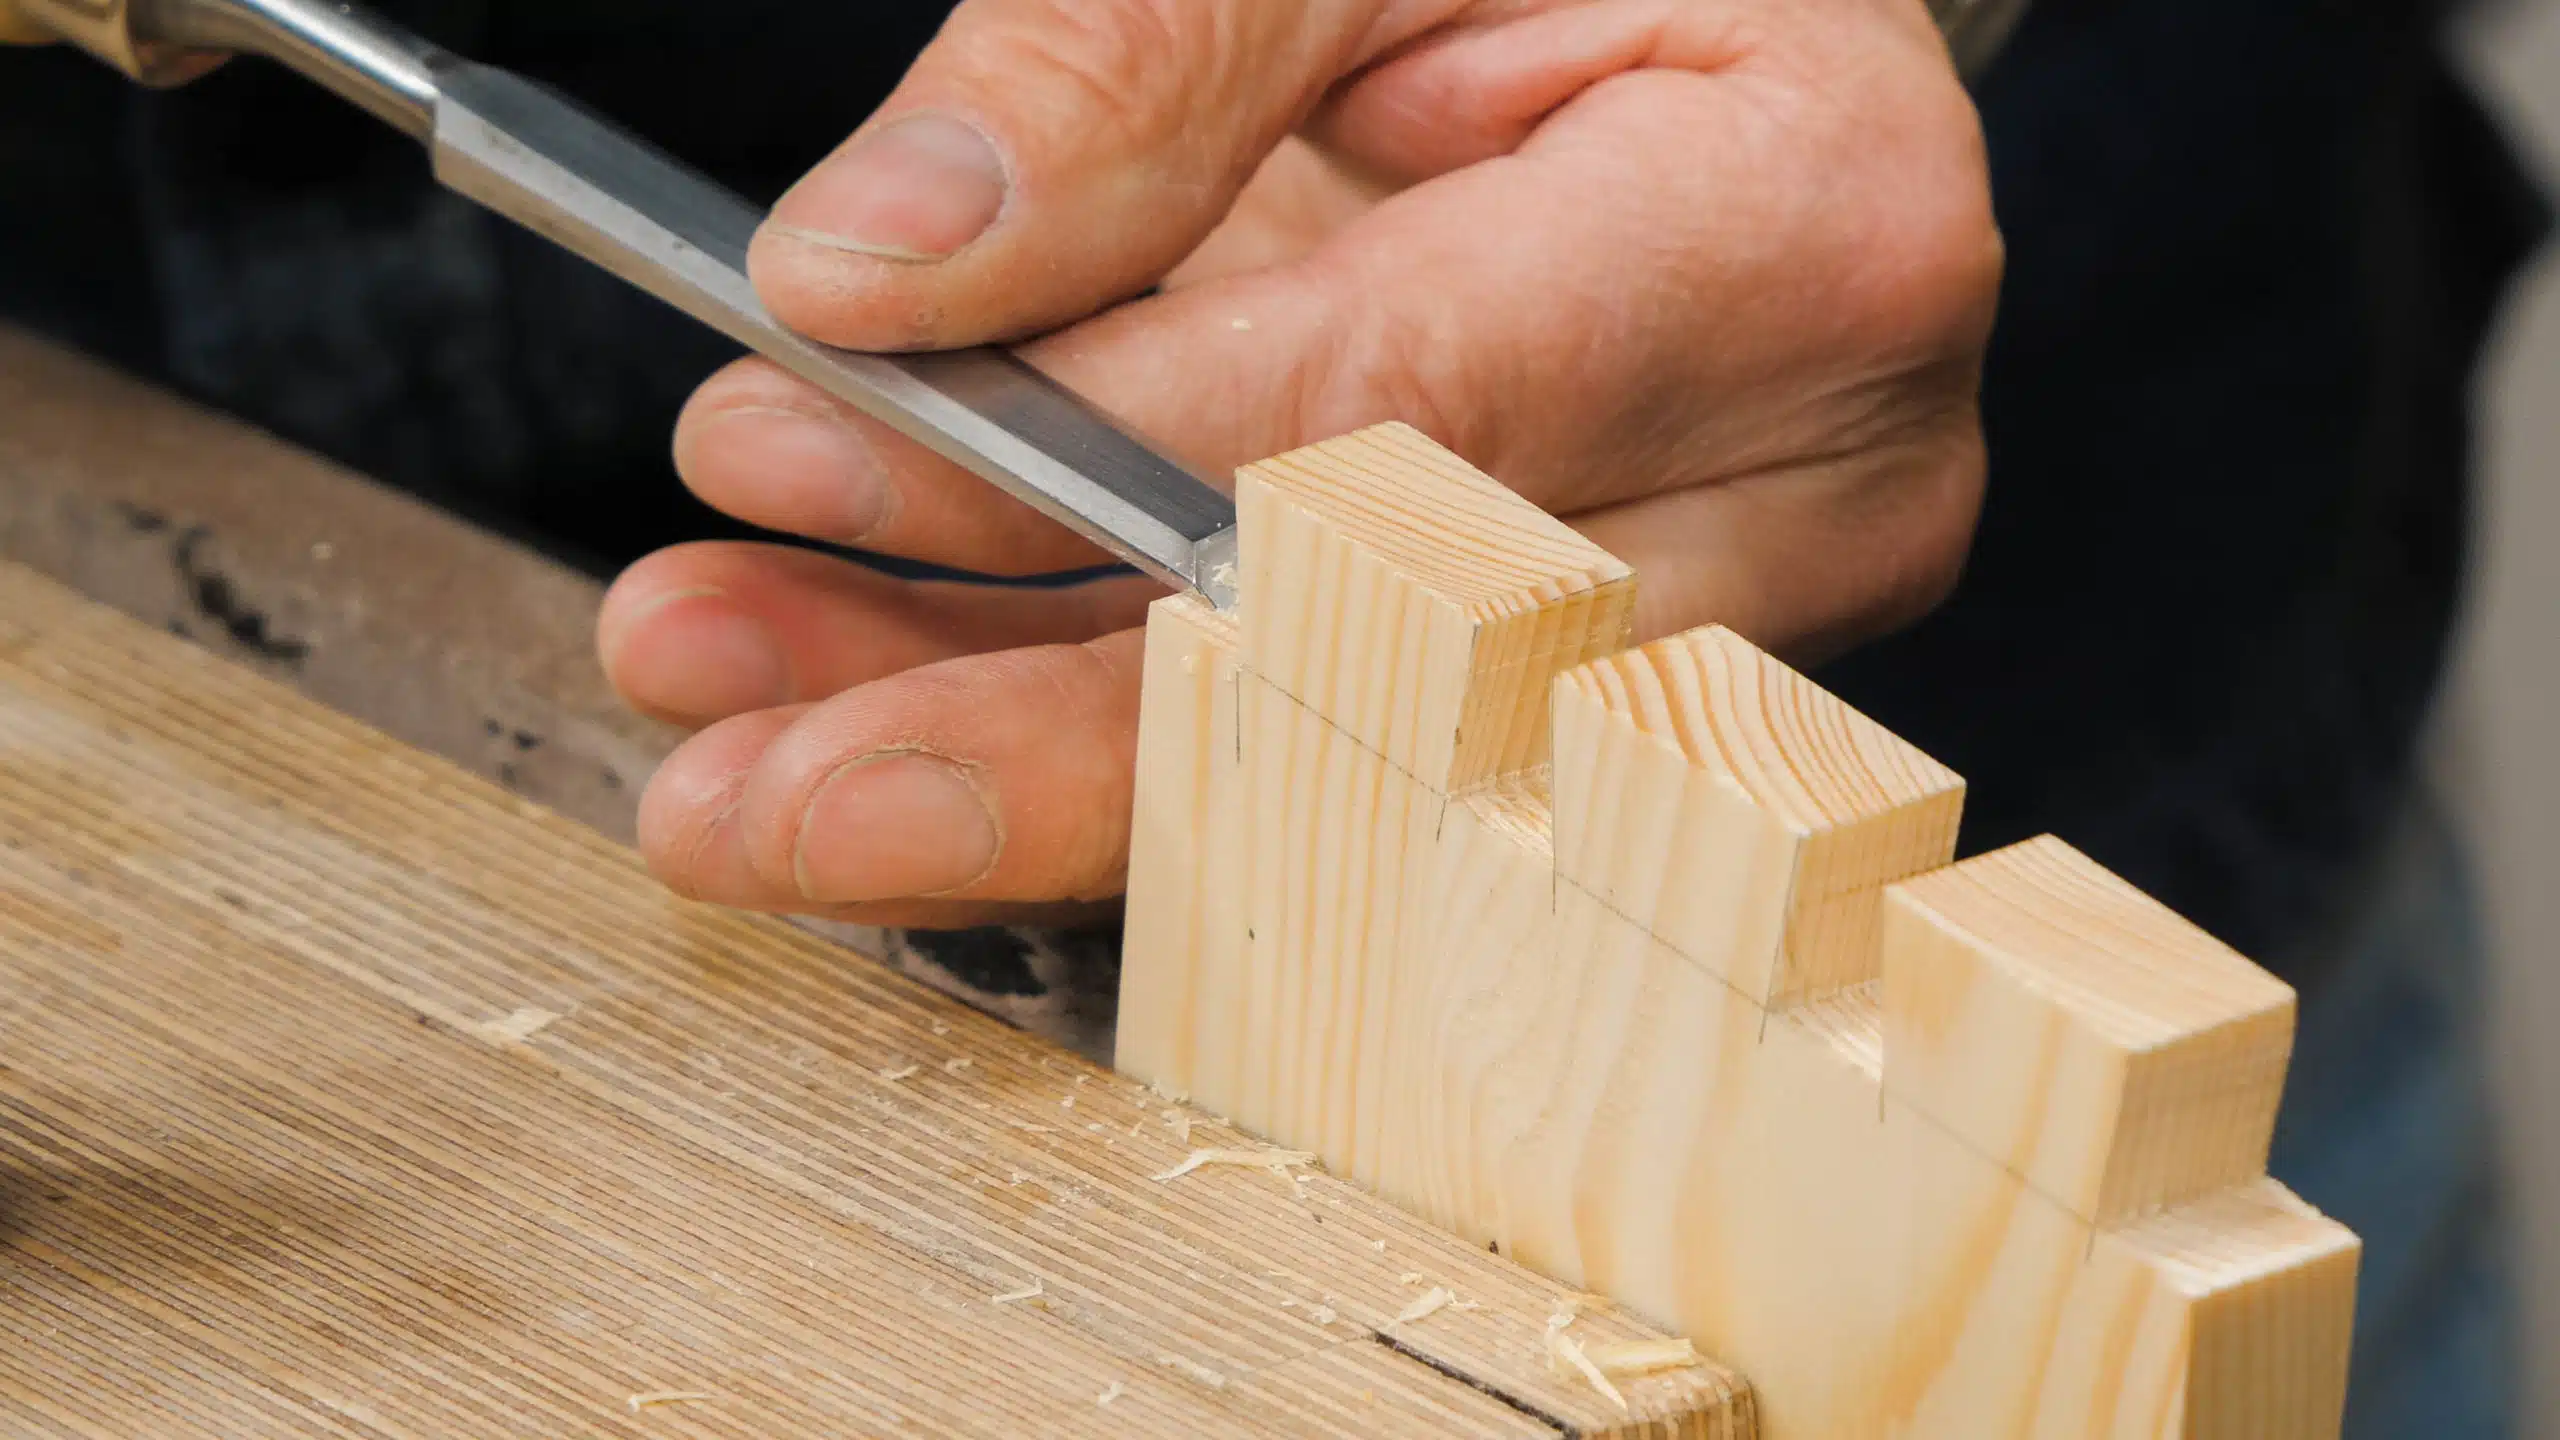
This opening episode walks you through the triple dovetail layout ready for cutting. Paul talks about a variety of techniques he uses and relies on. There is a lot of good information to glean from, and the result is dead-on accuracy and four successful dovetails.
Hi all-
The closeup shots are fabulous. Thanks for this project. The final product will surely beat the cheapo bags I bought at the big box store.
— Steven.
My thoughts as well regarding the close up shots. After watching that, how could anyone want to use a machine router to make a dovetail.
They’re all good but this was probably one of the better dovetail instructional video’s I’ve seen Paul do!
I love these practical and instructional projects! Not too complicated, very little specialty woods needed, but great skill building!
I’ve already made two of the desktop organizers – one in the original dimensions, and one 2x the size. I’ll do the same with this tool organizer! Well, maybe not twice the size, but maybe sized up for longer objects.
A real joy to watch and learn with Paul Sellers!
Great close-up photography … makes for a far more visceral instructional experience
Poetry in motion, a pleasure to watch. Thanks Paul. Regards Jim
Ive wanted to make a tool box carrier for a long time so i shall be watching this with great interest ,thanks Paul.
Skills.
I wonder what Paul thinks of the technique of using dividers to lay out dovetails. That technique is shown in a number of videos on the web and seems pretty efficient especially when your dovetails and pins do not come out to nice even sizes. In fact, using dividers, you do not even have to know how wide your dovetailed boards are or how wide your tails or your pins are. The main thing you need to know is how many tails and pins you want on your piece. Of course, the divider technique gives you exactly even dovetails and so you cannot use dividers in certain cases, e.g., when you want dovetails of varying sizes. Oh, laying out dovetails withe dividers is especially useful for those of us who are numberly challenged — I both add and measure things with a reliable inaccuracy!
I do use dividers too to mark my tails after i’ve decided the size of my pins, I think it’s quicker than trying to figure out the exact size of the tails. I would like to hear Mr. Sellers opinion about divider too. I would still use them whatever it is, but i’m curious!
@ Sanford
You might wan to take a look at Paul’s video on how he lays out dovetails.
https://youtu.be/67OJXcEh4lQ
I don’t think I’ve ever seen Paul use dividers but I haven’t see every video he has ever done. I quite like using dividers for the same reason you do. In terms of how many, the video @LORENZOJOSE below posted is quite good. I use that as guidelines as to how many and with dividers I likely target spacing similar to what Paul generally strives for but I don’t formally measure it.
Having seen the results of the method Paul uses, I’m quite happy to use that. 🙂
A pleasure to watch such skill.
Using the chisel rather than the coping saw “consolidates the wood?” Can you elaborate a bit in that. Thanks.
I think this is because when you chop with chisels, the bevel side tends to push the chisel against the wall behind the flat face and it compresses wood fibers there. This is my understanding. And if you chop too heavily on early stages, you can move the knifewall away because there isn’t much support behind the flat face of the chisel.
I’m guessing here: Chiseling with the flat side perpendicular will tend to drive the chisel into the shoulder. Paul cautions to take small hammer blows to keep the wall from moving. But there will be pressure built up regardless. When the joint is glued, this pressure is released as the water in the glue causes the wood fibers to expand. This should help close up the joint. Ishitani in his YouTube videos hammers tenons before glue up, for the same reason. I’m not sure technique is called, but apparently it’s common in Japanese woodworking. There’s not much native hardwood in Japan so their traditional woodworking is adapted to softwoods.
The closeup shots are fabulous. They make me feel that I right behind Paul, hiding and watching all the movements, and I have some perfect eyes. Amazing, please carry on with this.
Thank you for this poem.
excellent as usual. Who’s the music by?
Hi Mike,
This is ‘Fresh Fallen Snow’ by Chris Haugen.
Kind Regards,
Izzy
Do you ever cut dovetails on two boards at the same time?
@upnorthbob
It can be done and is/was done…….. in old days when cabinet makers were on ‘piece-work’ ( paid by the amount they made) it was commonplace.
However ganging up a series of four or six boards to make a single cut demands greater accuracy with sawing as any errors in your sawing angles are greatly multiplied at the far end.
Even with two pieces it needs a great amount of acquired skill. Not impossible, try it!
Might Paul someday show us how he glues up” woodwork for pallets?” Sounds like a great idea,
Does Paul ever use the “twirrling compass” to site dovetails?
Hi,
Paul says:
No, I have occasionally but with so many options for laying out dovetails I just stay with what I know.
Kind Regards,
Izzy
I have never seen him use the compass method. I have only noticed him using the diagonal ruler spacing method. I think that it is the traditional method and it’s the way I was taught to lay out dovetails. I’m older than Paul so it’s the “old method”. Once I saw the compass trick I never went back.
I just needed to comment on this… the music in this and some of the other videos is great. someone is ridiculously talented.
Jim,
Having worked on a few early 19th century pieces I can say with some certainty they usually eyeballed dovetail spacing.
Hello dear Paul Sellers! I am a big fan of your creativity. I’m from Russia and I can’t buy your paid course, how do I get the drawings of your toolbox? Thank you.