Desk Chair: Episode 2
Posted 28 August 2019
This is an episode in a paid series. Want to watch it? You just need to sign up as a paid member, and you can enjoy this video and many other videos we think you will love.
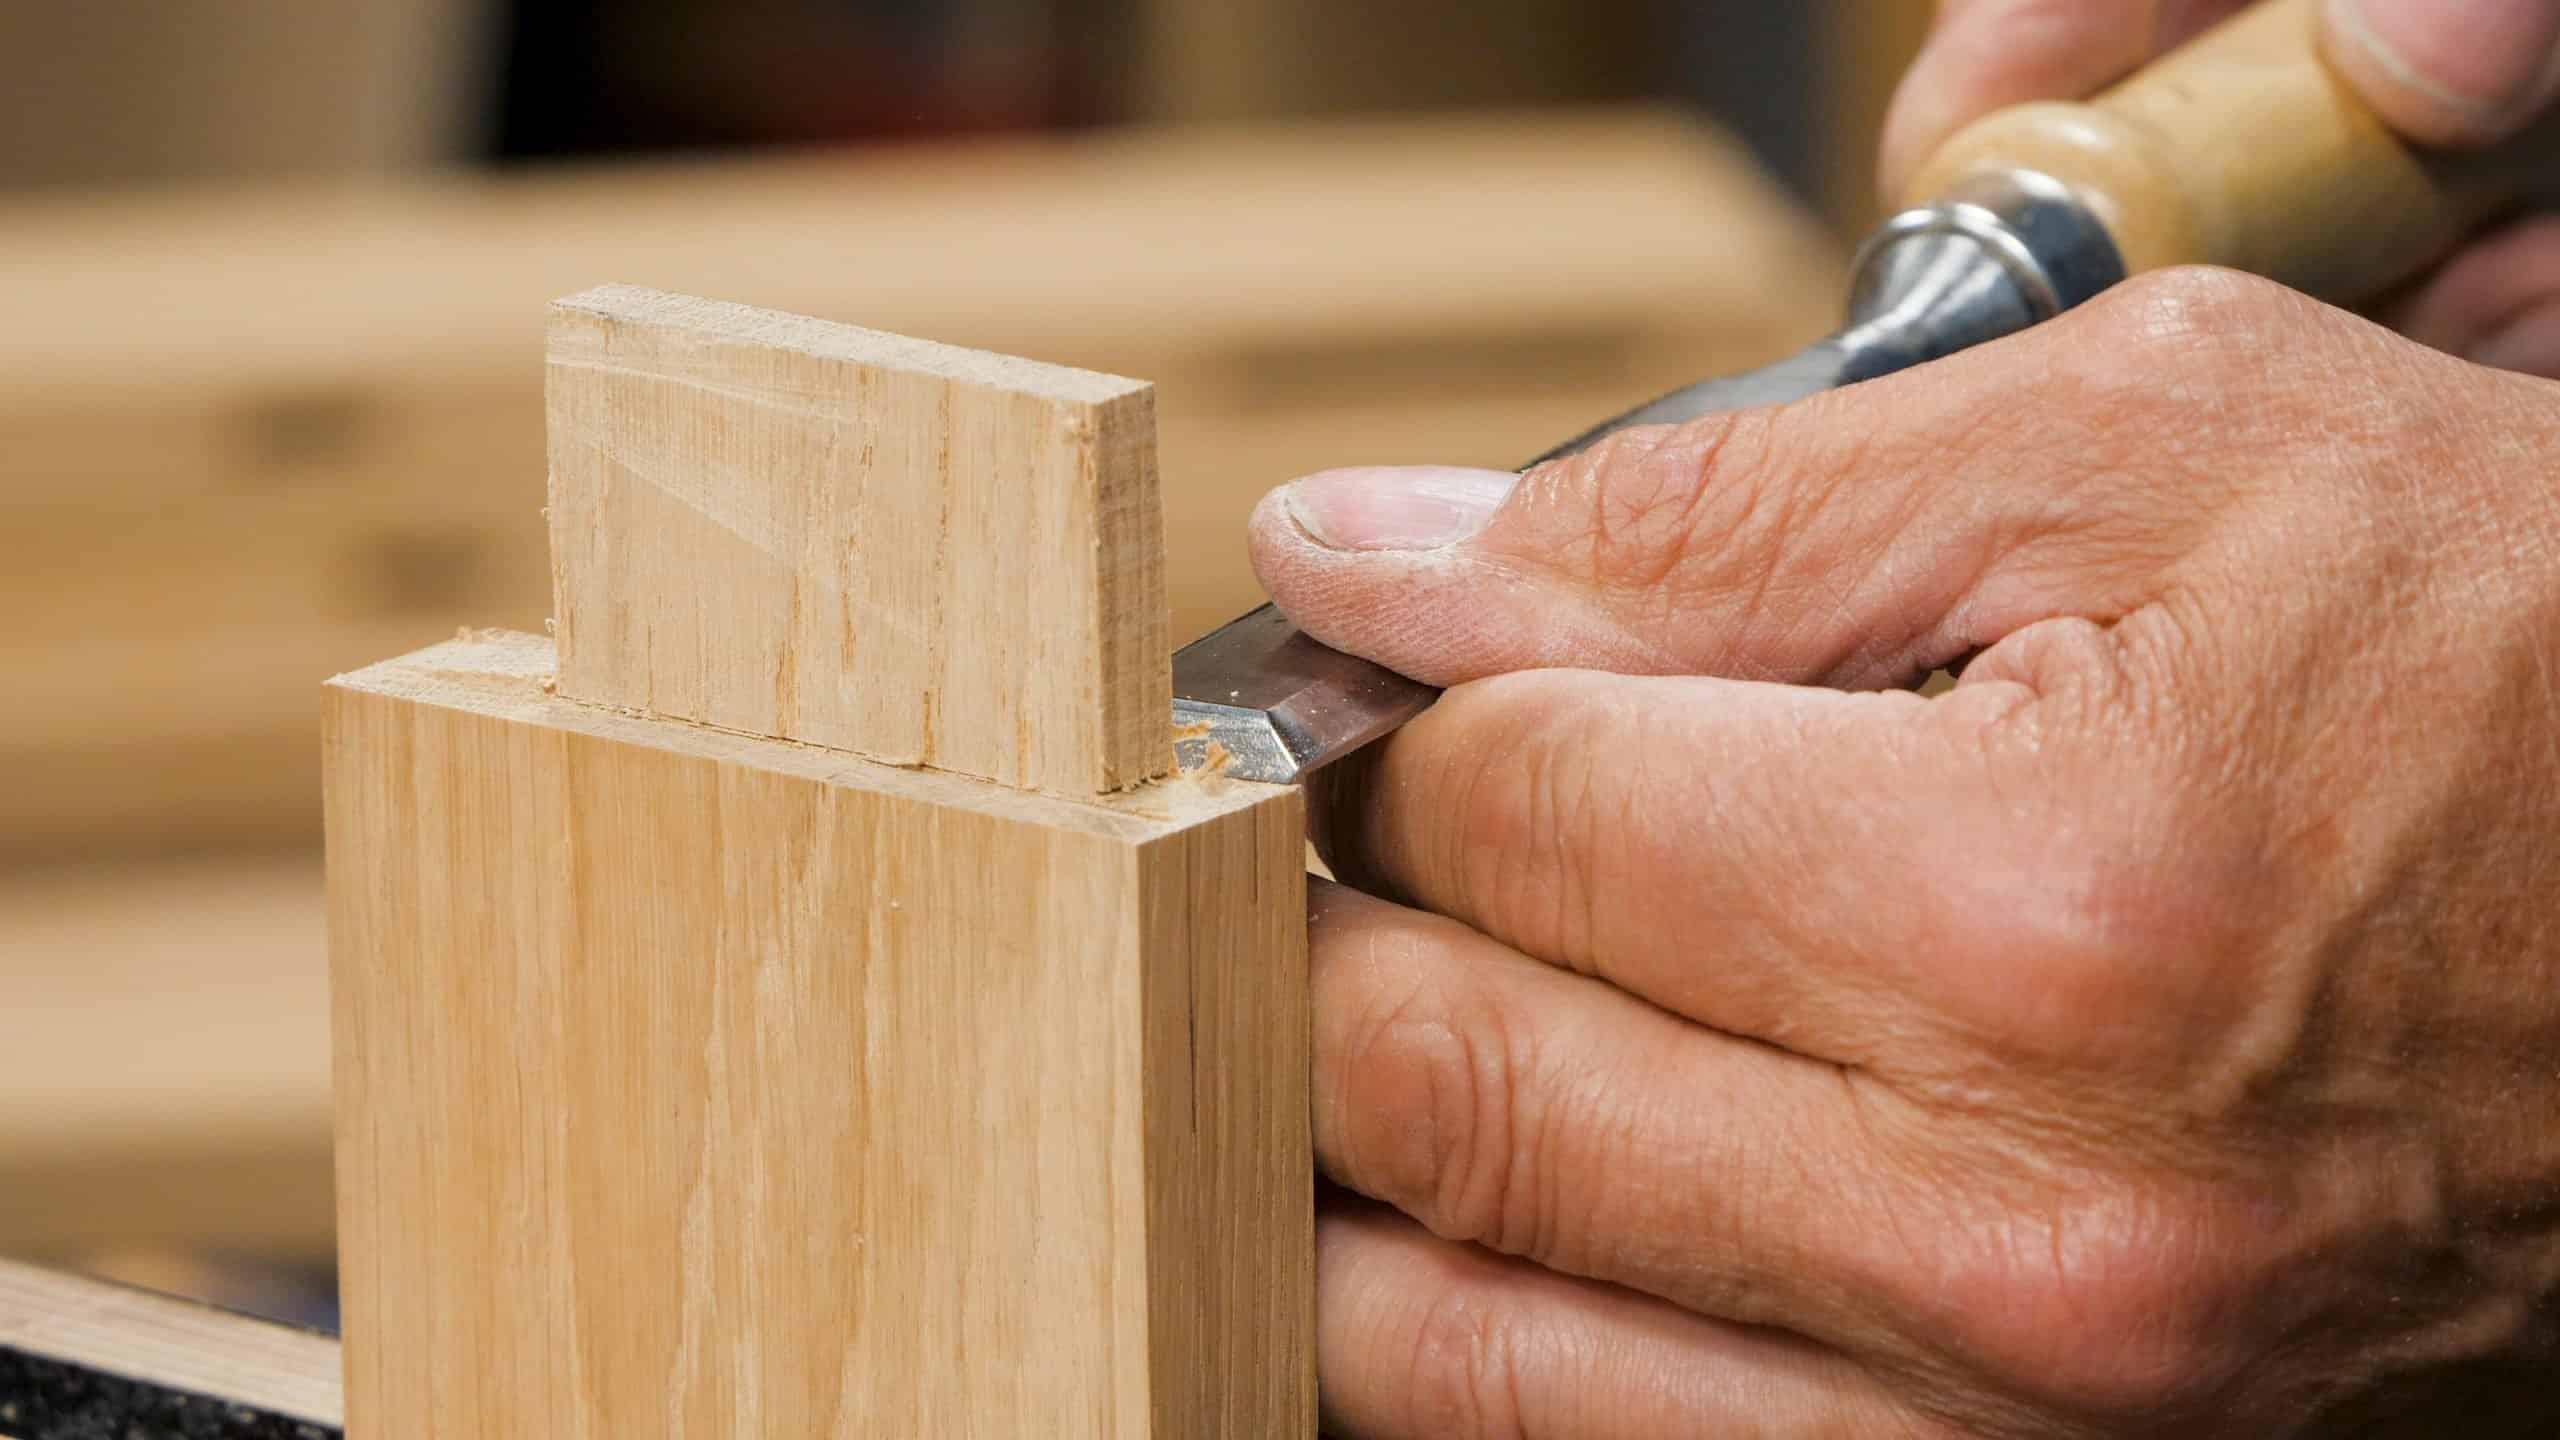
What goes with mortises? That’s right, Paul now moves on to laying out and cutting the tenons. He runs through a couple of techniques for cutting two of the tenons that will make up the side frame. There are 16 mortise and tenon joints that make up the bottom part of this chair, but once you have the first two under your belt, you’ll be well on your way to a full set.
As always, very nice tutorial / explanation of the process!
Excellent and enjoyable as usual, thank you.
Thank you Paul. From your videos I have a pretty good feeling for the desired fit. How loose is too loose in a mortise and tennon fit where you would no longer want to rely upon glue? How would you fix it?
Hi,
Paul says:
If a tenon is too loose, it’s best to replace the part. If that’s not possible, you can thicken the tenon by simply gluing another piece of wood to the tenon and recutting it. I do prefer that both walls make good contact, some woods will allow a tenon to be slightly fatter than the opening because of the compressibility of the wood in both the mortise piece and tenon piece. Knowing your wood is paramount. That comes by experience and I can’t give you that.
Kind Regards,
Izzy
Here’s a question that is bothering me just a bit. Why did Paul make the mortises/tenons different depths/lengths? The top mortises were 1&1/4 inch deep, the bottom mortises were 1 inch deep, with corresponding lengths of the tenons. But I don’t see Why they couldn’t all be the same, perhaps all 1&1/4?
Never mind. Paul explains his reasoning at time 29.30. I didn’t watch long enough.