Dovetail Caddy Episode 3
Posted 13 May 2013
This is an episode in a paid series. Want to watch it? You just need to sign up as a paid member, and you can enjoy this video and many other videos we think you will love.
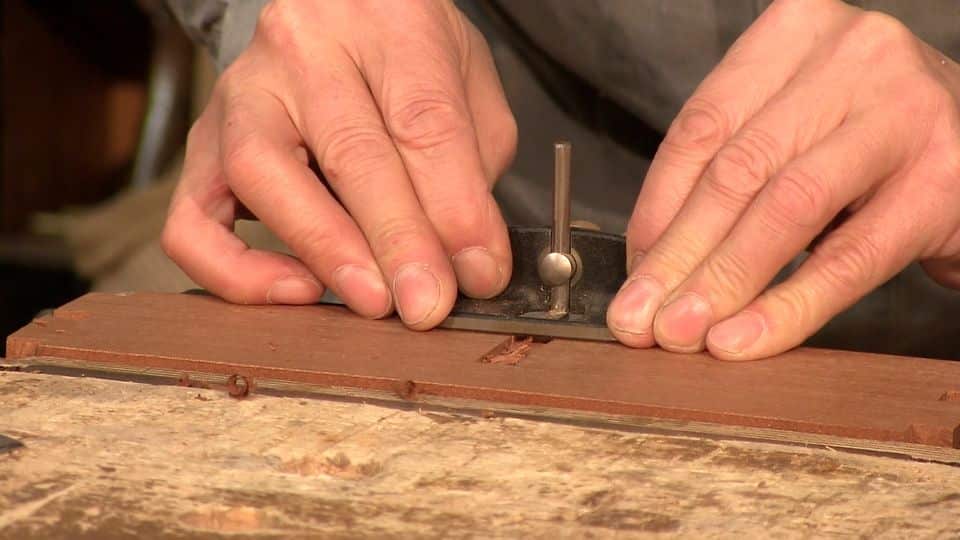
In this episode Paul shows how to add the divider to make the caddy have two sections. He does this by creating a small housing dado to house a small divider.


Every time this videos are more and more part of my daily stressless therapy.
Another great pacefull video. Thanks guys.
Ken, where you has been. I miss you 😉
Great job guys, many thanks for this one. 😉
that final little tap home make it all worthwhile another perfect presentation guys 🙂
Gran maestro y gran trabajo. Un saludo desde España
Great stuff make it look so easy 😉
I agree with Oscar. The amount of zen in this kind of work you do, is bringing my pulse down. Wish all television could be like this, and the world would be better from it.
Thank you so much for the inspiration!!!!!!
you noticed the chime of the clock in background. Just wonderful.
Yes, I have a hard time sitting through any movie or tv show these days without getting bored after 20 minutes. But I can watch 2-3 of these videos in an evening and it’s like no time went by at all. I just have to remind myself to get down into the shop once in a while to do what I’m learning, not just sit and watch all night.
It is always pleasure to see Master working and hear him speaking.Now , that’s what I call a GREAT LESSON: Lots of knowledge in few words.
Thank you .
hi I have nearly made this all but how do I attach the bottom?
Michael, It will be glued on just like the small boxes buddy.
Looking forward to the next episode of this.
How come dado and groove housing is not used to secure the carcass?
Have we forgot about this one guys.
Cheers 😉
Hello everyone. I’ve just recently discovered this site. Wow! It’s great to be able to see the work being done in real time. I definitely agree with the Zen comments. Thanks to Paul and everyone involved for making all of this available. I’m a “glass is half empty” type of person so it is great to be be able to trust your instruction at face value since you aren’t using your lessons to sell product. What a relief! I saw a few really good tips that Paul sort of glossed over. Having the divider piece on a slight angle when marking the second knifewall of the dado is a crucial tip. It would guarantee a tight fit since you are slightly decreasing the horizontal measurement across the dado. A2+B2=C2. If you were cutting a deeper dado, would you start it as a 3/32″deep dado (like the video) to mark the second knifewall and then just work it deeper in stages until you reached your router depth? I liked the tip of looking down the length of the work piece to see if the divider was acting like a wedge in the dado. I never would have thought of that. The idea of using the router as the marking gauge intrigues me as well. It seems that it would save a lot of fussing around later when finishing the dado. I’m probably like a lot of you that have also been wanting to get started in hand working wood, reading everything I can get hold of. Watching these videos makes me feel like a kid that was standing outside of the candy store with his faced pressed up against the glass. I have to go now, the owner of the store just waved for me to come inside. See ya later.
Well, after four dovetail boxes plus the dovetails on this caddy, my last dovetail joint was PERFECT. I keep saying I learn a little bit on each one. I think it all just kind of clicked on this one. But we’ll see what happens on the next one. 🙂
it’s worth all the stress when it finaly clicks isn’t it keep up the good work Keith
Keith, I’ve made dozens of dove tail joints fighting fit the whole way. Then it clicked for me… I was trying to saw to the final fit when what I should have been doing was leaving my pins heavy and trimming with a sharp chisel to fit. Amazing!
I’m looking for a related video to this one that showed the partition with a dovetail/dado visible from the top front edge. It is the same method as used with drawer dividers(dust shelves) on one of the dresser videos. Anyone know if that variation of this video is still here somewhere? Thanks
Could it have been the shaker style dresser/Chest of Drawers project?
https://woodworkingmasterclasses.com/videos/chest-drawers-info-page/