Handy Stool
Posted 5 September 2019
This is the introductory page for a paid video series. Want to watch more of this project? Select the best option below to get started.
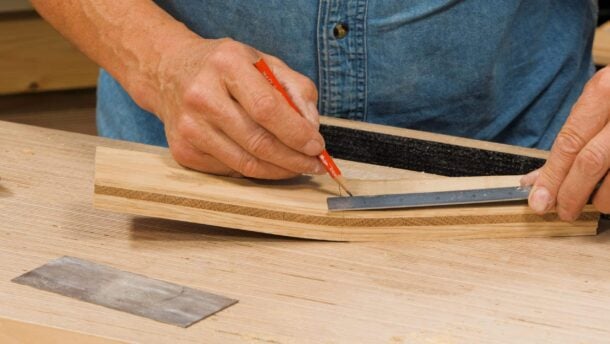
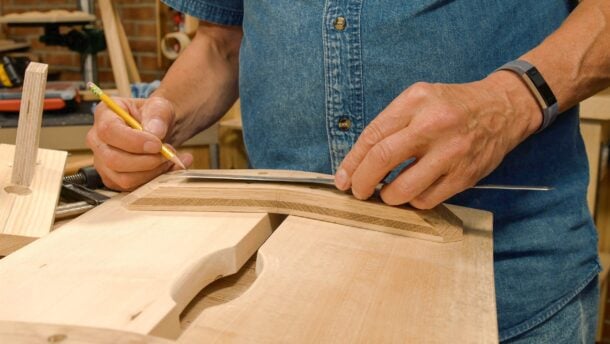
Introducing the Handy Stool, a versatile piece which includes laminated underbearers and handcrafted, octagonal, cross-wedged legs.
Paul created his first laminated project back in 1967 and has since used lamination throughout his life, creating that which might be impossible without the technique. Combining different techniques into a single project makes us think about other options we might want as we develop our skills and knowledge. Paul has taken methods from his working knowledge of over almost six decades and has come up with this unique design. The skills presented in this project can be used in other projects such as bench seats, occasional tables and so on. Whether placed in the bedroom, living room or put to use when picking your tomatoes in the garden, this would be a perfect addition to any home.
Update to Cutting list 15th January 2020: Changed length of undercarriage bearers to 12 ⅜ “ (314mm)
| Quantity | Length | Width | Thickness | |
| Top | 2 | 20″ (508mm) | 7″ (178mm) | 7/8″ (22.5mm) |
| Undercarriage Bearers | 8 | 12 ⅜” (314mm) | 2 3/4″ (70mm) | 1/4″ (6mm) |
| Legs | 4 | 17″ (432mm) | 1 1/2″ (38mm) | 1 1/2″ (38mm) |


Looking forward to this one Paul.
Beautiful!
I’m going to make one of those.
Cant wait for this one. Going to be making some raised garden beds and this would be a great stool for gardening in them!
Beautiful!
I like that design. Looking forward to it!
Looks like another opportunity to use some of the bits of wood I have cluttering up my garage. Bring it on!
Looks great.
Looks like just the project for me. Thanks Paul and company for sharing your hard earned knowledge.
Hi Paul, I love all the nuances of the build on this stool. Looking forward to working along with you during this project. Cheers!!!
Absolutely lovely
Thanks Paul cant wait
This looks like it could be a great design for a shower bench made from black locust lumber.
Looks great. I will follow along and build one. Very clever design. Looking forward to how the bent lamination is done.
Thanks for this.
I hope this design along with correct choice of timber will allow the stool to be regularly stood on, load say 100Kg?
Not sure it’ll be ideal for that application, given the slope to the two planks and the hole between them. Maybe look at Paul’s other stool designs?
Nonetheless I’m pretty sure you could make it strong enough, if you use oak for the laminations and perhaps add an extra lamination to the thickness.
Peter- I would think that if you stood somewhat near the legs whilst going up and down from height the build would be more than sufficient. If you think you might have doubts, I’m sure that a friend or relative would more than love having one. Build, test, report.
@Peter Owens
It should be possible to adapt the stability of the seat for standing on if you avoid the slope and lay the two horizontal parts out level…….. not sure what that does for the aesthetics of a piece as it’s intended as a seat.
Ensure that the leg-splay and the loaded centre of gravity is adequate for the amount of reach when you are mounted on it.
But, as others have said, standing-stool designs and two-level steps are also available.
I’m interested to see how the bend in the laminated undercarriage section is formed.
This couldn’t have come at a better time. Our garden needs some new stools for the firepit surround. Great, looking forward to this one!
Thank you so much, great to sit and sketch and many other uses can’t wait.
Lovely design.
Looks wonderful, Looking forward to this one.
I’m just starting out wood working so I don’t have bits and pieces laying around. I’ll have to buy the material to make thins but I’m looking forward to giving it a try.
I don’t need one of these at all, but I don’t care. That’s such a nice looking project that I’m going to build a couple and then worry about finding a use for them afterwards. A really exciting project – can’t wait.
I love it !
So where is the actual build video then?
It will be released next week, the normal pattern is for a trailer to be posted a week before the first episode.
Who told you about my tomatoes?
Great design and useful project! My scrap wood bin is full ; now I put it to good use instead of in the fireplace. Plan on reducing the dimensions to a child’s size for the grandkids. Oh yes and one for myself! Thanks,Paul.
Great project and so useful! Plan on reducing the dimensions to child’s size for the grandkids.
Great project to try. I’ve got the undercarriage laminations glued up and waiting for the next lesson.
I also have the laminations completed, and I have the seat and the legs milled and ready for finishing. I am happily waiting for the next lesson. This is a fantastic project.
Looks like a morvian stool I made a few years ago which I still have
I am starting this stool, eucaliptus grandis is going to be my choice of wood. From pallets I collect on the streets of Buenos Aires.
Great project to learn about how minute differences in an angle can affect something. Long story short…I’ll be making another seat and laminated stretchers section since I did not “quite” get my primary leg hole angle jig lined up when I drilled it. Amazing how one corner compounds the angle mistake while the other subtracts from it. I’m not really all that upset since these mistakes are a priceless learning experience which is more important (to me at least) than had it turned out correct the in the first place.
Love your instruction and manor! My computer skips when I view your videos. Are there hard copies of the variour plans available?
Frank
Hi Frank,
I’m sorry to hear you’re having trouble viewing the videos. Have you tried watching these at a lower resolution? Unfortunately there are no drawings for the Handy Stool.
Kind Regards,
Izzy
While waiting for some sapele to arrive to build my cabinet I gained some 35mm oak boards with a good wind over the 8ft length however cutting them to shorter lengths for making the stool reduced the task, after a week of evenings planing a face side then ripping down to thickness planing the reverse side I now have the seat boards and one bearer in the vice glued up, thicknessing the 6mm laminates and planing was also time consuming, with the effort involved to turn this piece out it will be another favoured piece in the house. Suffered some wild grain on one of the oak seat boards and have some tear out any finishing tips on dealing with this.
I turned the board and planed from the other direction however the tear is too deep to be planed out.
Very tempted to by a thicknesser now, will i be banned from the forum 🙂
Great project, loved making it and my Mrs says its a perfect foot stool for watching the TV. I’ve now got to make another one!
I made all the undercarriage bearers for two stools before you changed the dimensions on 15th January 2021. Thus they are 15 in. long instead of 12 3/8. Then, COVID 19 prevented me from proceeding. Can you please provide me with the original instructions for assembling the undercarriage bearers so that the stools can be completed now that I’m able to do it.
Thank you for your consideration in this matter.
Andrew Meyer
[email protected]
Hi Mr. Sellers,
Don’t know if you will see this but I really appreciate this plan (and all of the others) as I am “self-teaching” myself woodworking and I couldn’t do it without guidance such as yours. I have now made the three legged stool and this one. My wife loves it and I am really happy with the outcome and the skills learned. I love your philosophy on woodworking and life and hope to learn and enjoy many more of your plans/blogs. Now to make hand mirrors for my wife and daughter and learn a few more skills!
God bless,
Dave M
Hello,
I was making the stool as a free project and now it pays. There are no free cabinet project now ?
Thanks for answer,
Ludovic
There was an announcement yesterday about this. The free videos are now much more limited than they used to be.
Paul R
Well, I’m disapointed! I didn’t see the announcement anywhere and I was in the middle of a project… Not cool.
Thank you for your feedback and for letting me know Paul Rowell
Ludovic