Hanging Wall Shelf: Episode 2
Posted 3 January 2019
This is an episode in a paid series. Want to watch it? You just need to sign up as a paid member, and you can enjoy this video and many other videos we think you will love.
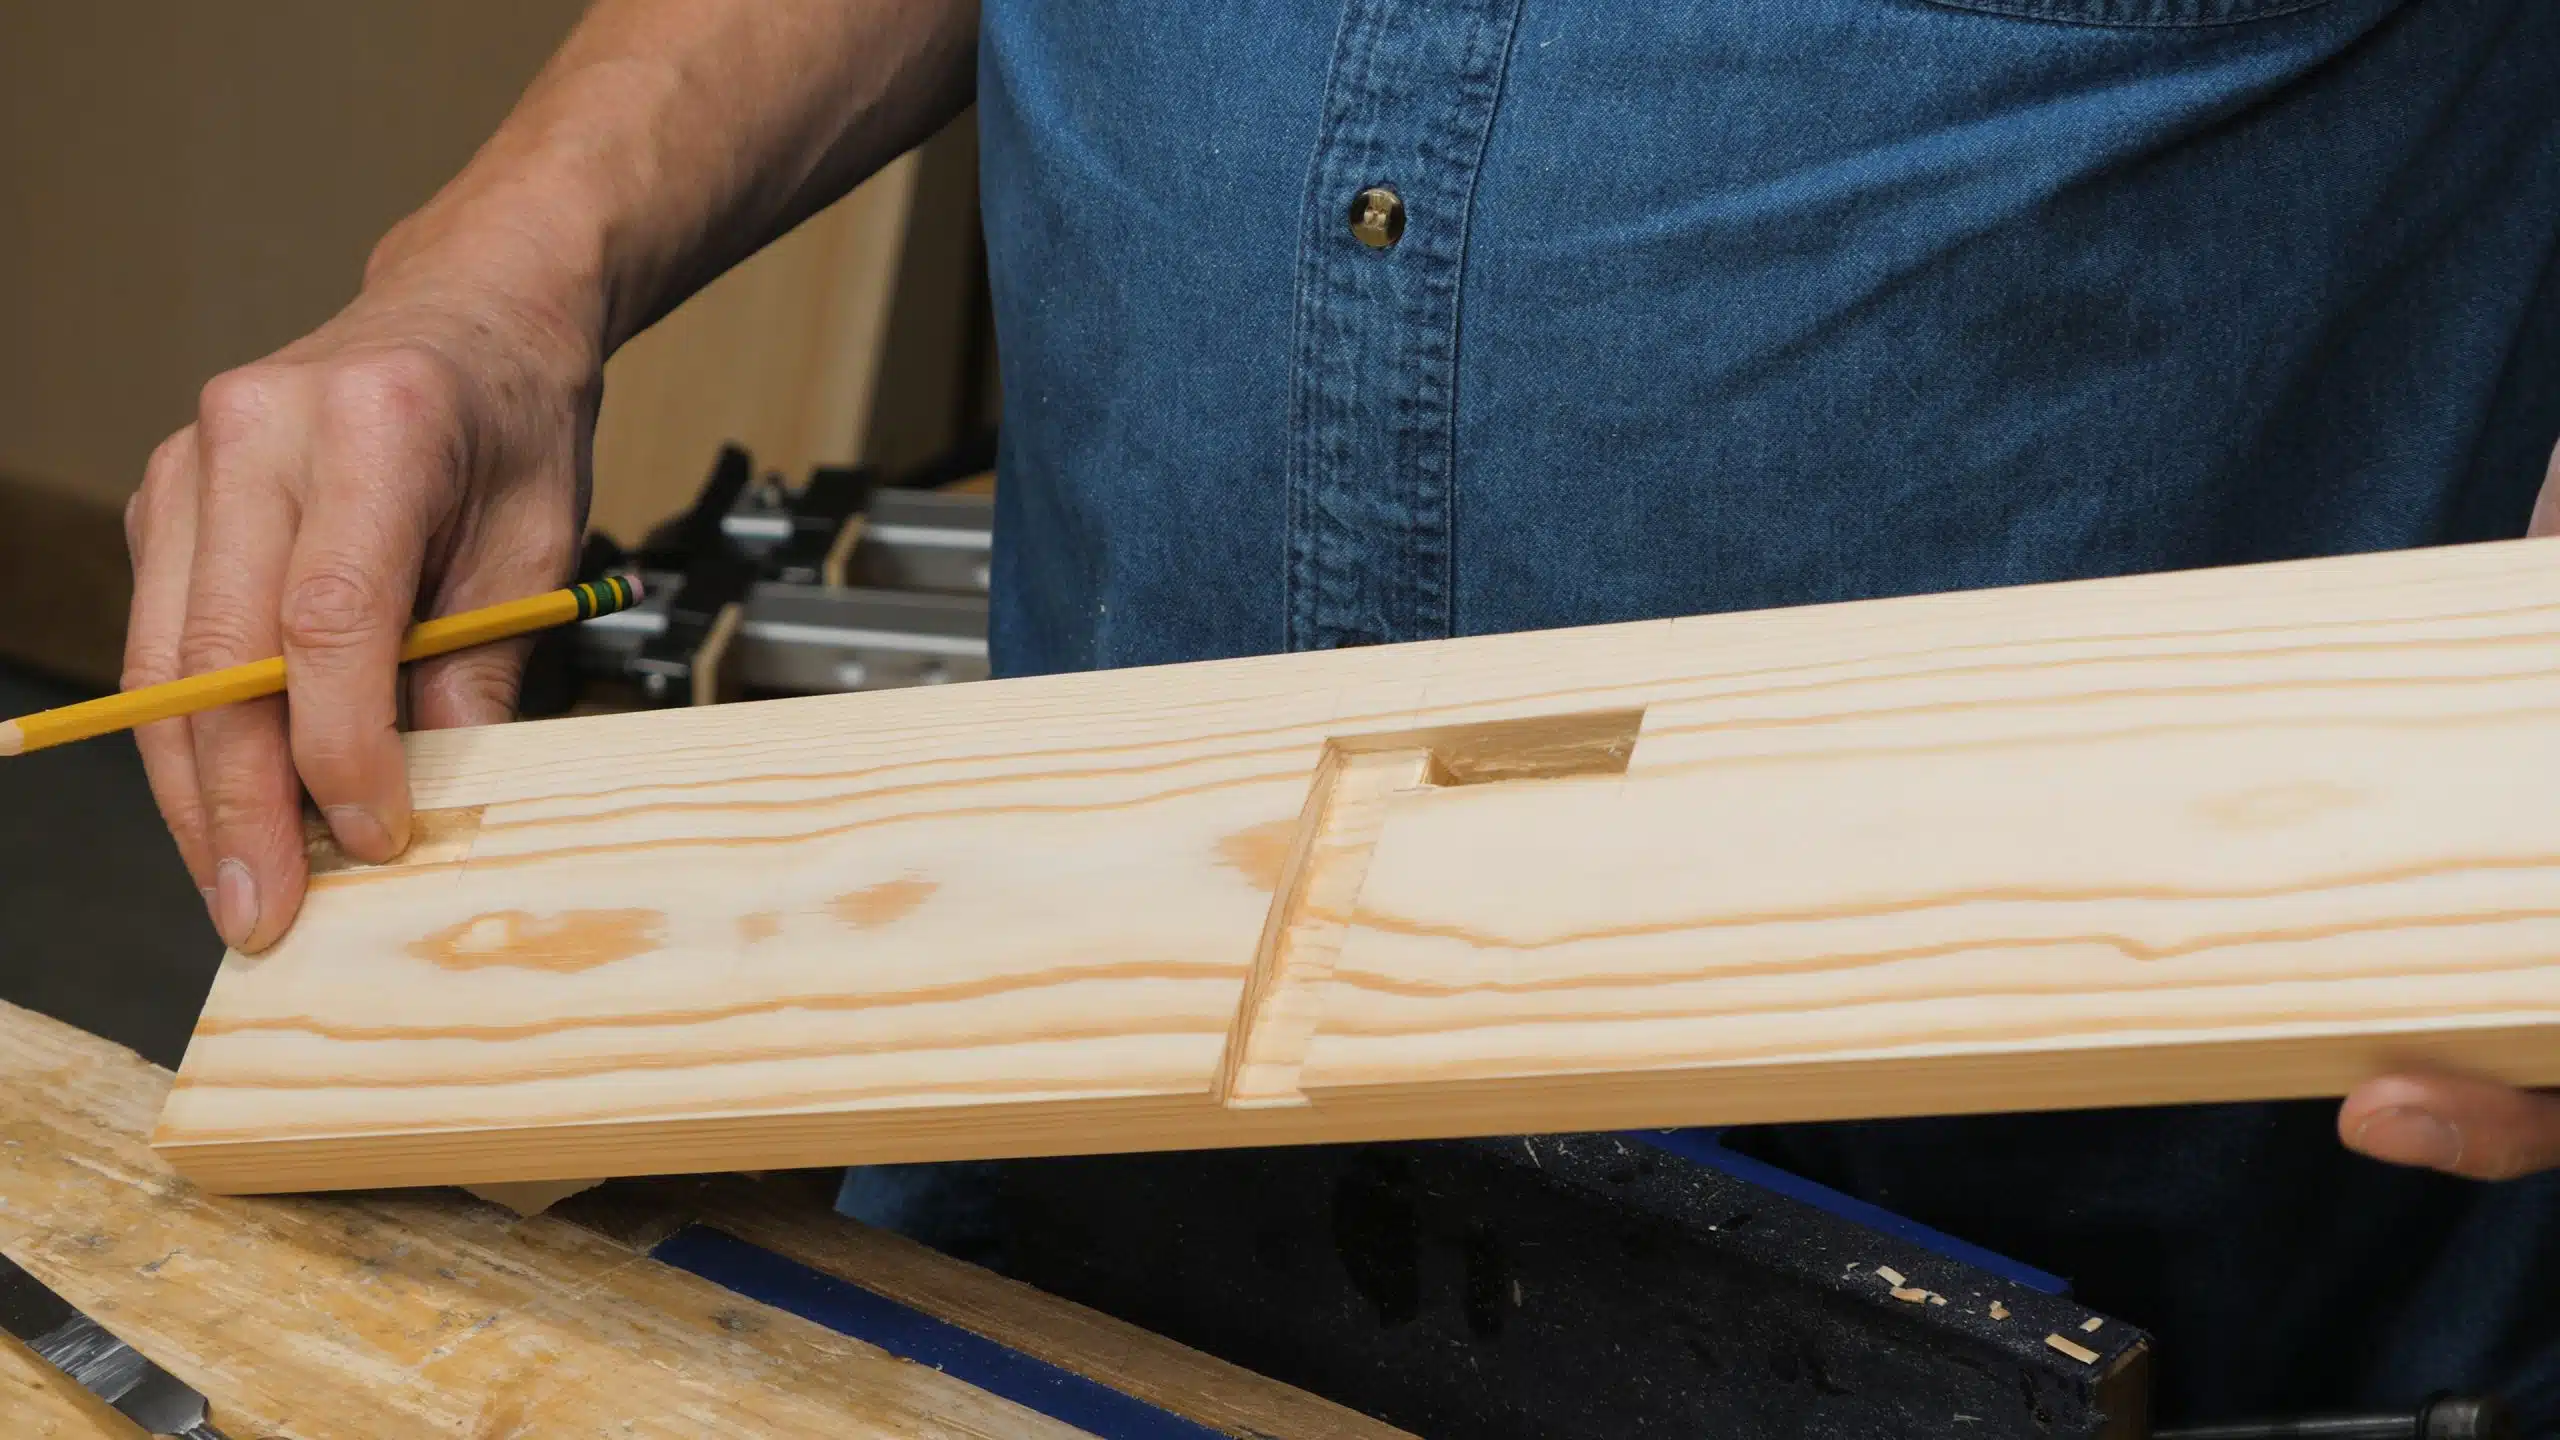
Even though the shelves in this project are really short, we are still going to give them the support of cross-rails. In this video Paul shows how to position and lay out the mortise and tenons that position the support rails under the shelves. There are two different types of mortise and tenon used in the project but Paul takes you each step of the way in simple, achievable steps.
To see the beginner friendly step by step version of this episode on our sister site, Common Woodworking, click here.
Very nice, thank you Paul
Brilliant thanks guys. Happy New Year
Great ,thank you to Paul and the team.
thank you so much for this site and sharing your years.
All the very best in the New Year
I was working on cutting my Rail (arch) pieces to length and just noticed that the Top Rail is listed on the Cutting List as being 14 1/4″ long. It’s actually 13 1/2″ long, as is shows on the drawing.
Jim
This is so over-the-top for a small set of shelves. I love it.
Thank you Paul for this series. Happy New Year.
Michael W. O’Brien
Alabama, USA
Bravo. Still doing the work from episode one but I’ll get here soon enough. Some times previewing ahead gives me a shot of motivation. Thank you for the very enjoyable lesson.
Got finished with Video #2. Started a thread over on the “Projects” forum: https://woodworkingmasterclasses.com/discussions/topic/jims-hanging-wall-shelf/#post-554256
I hope others will as well.
Jim
Hi Paul,
Is there a reason you tend to not use a shooting board?
Thanks!
Matt
He’s a link to Paul’s blog where he talks about shooting boards: https://paulsellers.com/2012/01/shooting-boards-revisited/
I’m thinking you’re referring to where he trims the middle shelf to his knife lines by just putting in in the vise and then planing from each end to his lines. I think there’s an experience factor that enters in here. I’d of done it with my newly constructed shooting board, but then I don’t have 50 years of experience doing hand woodworking to draw on.
Hi Matt,
Yes, Paul says this is because it’s quicker and with skill is more effective and the idea is to develop the skill and not to substitute for it. Shooting boards really work best on small pieces where it’s difficult to register the sole of the plane to the short surface.
Kind Regards,
Izzy
Hi,
Why are all the boards 3/4 thick? It’s not that pleasing to the eye.
Jim
Probably because that’s by far the most commonly available thickness of DAR (dressed all round) pine.
Not sure what’s so unpleasing about it visually? It seems well balanced to my eye, neither skinny thin and weak-looking nor over-engineered and fat.
I suppose one could do 1″ shelves, or perhaps 9/16″ sides, but both would be a pain in terms of material sourcing and/or prepation for many, and I’m really not sure it would add anything visually … and may indeed subtract.
Maybe you can sketch (or better, build!) a differently-dimensioned version to illustrate your point?!
Agreed. I built mine out of clear pine I milled to 3/4″. I think it looks just fine. I would think, if someone wanted it a different thickness, it wouldn’t be that hard to do. I don’t feel that any of the project dimensions are set in stone…………….and neither does Paul.
With a to certainty approaching probability, this wood is Scots Pine (Pinus Sylvestris), sometimes named redwood, which it is not. Scots Pine in UK is more likely to come from northern Scandinavia (or Estonia) than from Scotland.
Produced flat and straight to 21 mm thickness, it will invariably cup and belly when stored at indoor conditions (around 21°C, and constant humidity), demanding some dressing: ¾” thickness the end result.
Others (e.g. Bill Hylton and Robert Wearing) have pointed out that placement of furniture is important to consider in the design process. With the upper part of the shelf above eye level, the top of the wall shelf will appear thinner than what it is. Similarly, the rounding off will have the same effect for parts below eye level.
In addition, it appears that the camera in front of Mr. P. Sellers has some magnifying effect, sort of. The #4 plane to the right of Mr. Sellers looks a lot like a #4½.
/Sven-Olof