Shaker Stool – Project Info
Posted 8 July 2015
This is the introductory page for a paid video series. Want to watch more of this project? Select the best option below to get started.
Description
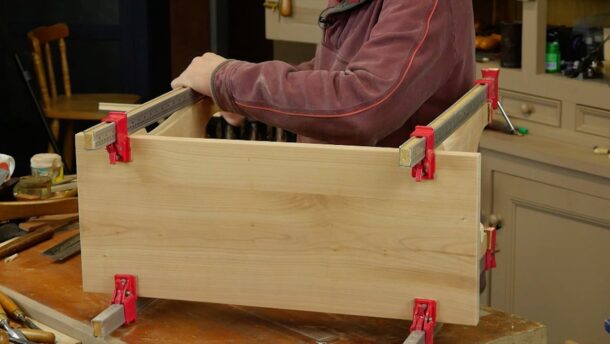
This shaker stool is a very adaptable design that you make to fit your requirements. It uses some unique sliding dovetails that are both strong and in this design enhance the aesthetic of the stool. The scale and length of the stool can be adjusted. It is a very solid stool that can have any number of uses.
The tools you will need are:
- No 4 Plane
- 1″ Chisel
- Chisel hammer
- Tenon saw
- Panel saw
- Knife
- Tape measure
- Combination square
- Marking gauge
- Sliding bevel
- Hand router
- Spokeshave
- *No.80 Cabinet scraper
- *Straight card scraper
- *Rasp/file
* = Optional
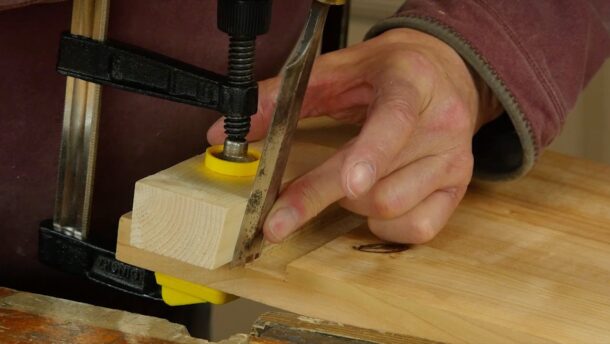
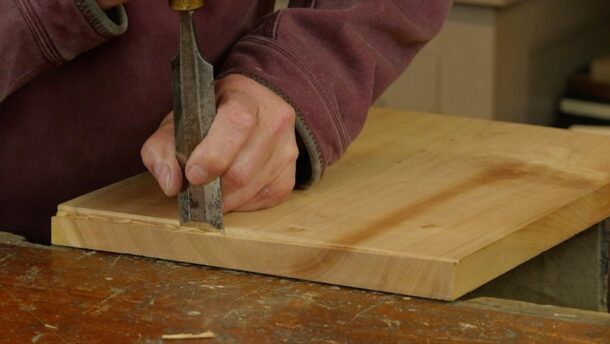
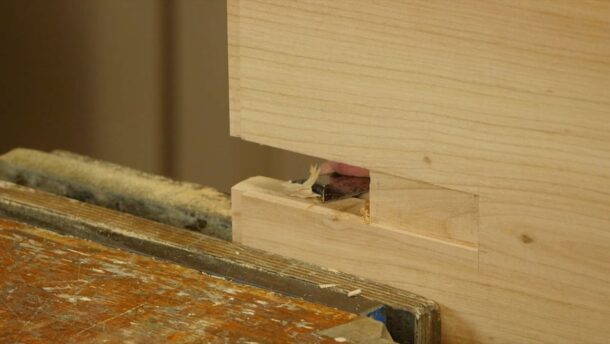
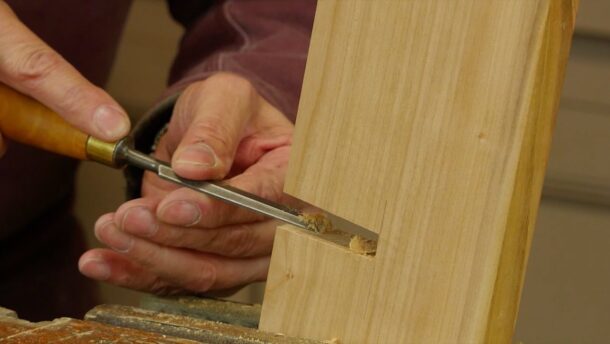
The joints used in this project:
- Tapered sliding dovetail
- Sliding housing dado
Very interesting project!
I think the drawing is a very good idea, used in conjunction with video instruction, would be an instant visual reminder.
I believe it is a first, if you have time Paul, would be a very good idea to use on all future builds.
The seat appears to be more than one board joined together, did you buy it this way or make your own.
Thanks John
Hi @cornflowers,
We have had the drawings, expertly drawn by Greg Merritt, for over a year. If you go back to the ‘Project Info’ page for each of the recent past projects you will find the drawing link near the the top of the text.
We are going to continue including drawings in the future.
Best,
Joseph
Thank you Joseph, sorry I did not realise, will look forward to going back. Again certainly a good idea.
Best John
Joseph
I don’t see the drawing link for this project – is it on another page, or am I just being thick?
Jonathan
Yes, I’m being thick. A thousand apologies.
🙂
Jonathan
Could this design be upscaled to make a say 5ft bench for a dining table? Or would it need additional legs underneath?
If you’ll watch the introductory video you’ll hear Paul say this project will scale “up to 30 or 40 feet assuming you have a 1X4 that long.” so I’m guessing it can handle 5′.
Oops!
Paul said a “1X11” not “1X4”. That bugged me all night until I went back and double checked.
Have a great 2017!
I have supplementary questions regarding upscaling. I am also planning a bench over 5ft long and around 18″ high to complement the trestle table nearing completion.
A: Is increasing the width of the top to 14″ suifficent to maintain stability of the bench and
B: At this length should the height of the rail also be increased or made of thicker material in order to improve the stiffness, however this would also raise the centre of gravity and alter stability.
I will be using Oak.
I would be grateful for your comments
Geoff Taylor
Paul says that all sounds fine. You don’t need to increase the width or thickness of material, but you can if you wish to.
Sounds like a nice build. Hope it goes well.
i like this stool without glueing or nails.
but, is this doable for a beginner woodworker? it looks complicated and not much room for error.
Hi,
Paul says:
It depends on your skill set. I would give it a go, use it as an exercise then if it doesn’t go well it’s not wasted.
Kind Regards,
Izzy
I have a question about the timber for this project. Are the pieces each one single wide board, or several boards laminated together? If laminated, what width was used?
Two questions…
Hi Stephen,
The drawings and cut list for this project can be downloaded with a premium membership by clicking a link below the video.
Kind Regards,
Izzy
Thanks Izzy. I am paying the subscription. It is not clear from the drawings if the pieces on the cut list are intended to be single boards, or narrower laminated boards. As it is, the widest board I can readily obtain in Brisbane Australia, is 250mm, so I will be laminating. So the more important question is how many boards would be ideal to achieve the required width?
Kind regards
Stephen Tyrrell
Hi Stephen,
Paul says:
It doesn’t matter how many boards you use, laminated last a long time so it won’t be an issue.
Kind Regards,
Izzy
This is an excellent project and one worth returning to every so often. A nice historical reference for this bench is “The Pine Furniture of Early New England” by Russell Kettell, published 1929, plate 63.
Subtle but important differences are that Paul’s version uses slope sided bridals as opposed to standard bridals, and a tapered dovetail as opposed to a non-tapered version.
Do you have actual 1×11 boards over there? Here in America their actual dimensions are 0.75 x 11.25 inches… Will this be sturdy enough for my rump?
Regards
Beautiful project! Could anyone please explain why a tapered sliding dovetail doesn’t inhibit wood expansion when joining components whose grains intersect in direction, as here? And whether the presence or absence of a stop on the dovetail matters? I would be grateful for a response, as I haven’t been able to find an answer and don’t have experience with the joint.
Pardon—I just realized, looking at the picture of the project, that the intersecting pieces in this case will expand and contract in the same direction.
This is a very attractive stool. I happen to have a couple of pieces of spalted maple that would look great as this piece. However, is there an alternate to the dovetail construction? Would glue on a housed dado hold? I have not cut a successful dovetail of any kind since I sold my router dovetail jig. I see no reason to think I could cut one, and I don’t want to waste this beautiful wood.
It doesn’t really matter if you haven’t cut a dovetail yet.
That is what the project is for.
You could always practice on some cheaper wood first and have a second stool as a bonus.
I do see reasons why you would succesfully do it: the instructions are very clear and the sliding dovetail isn’t that hard to make if you follow those.
Good luck!
Hello Paul, I’ve bought an old table top from a charity shop. There’s plenty of wood, but it’s 7/8″ thick. Would you keep the depth of the sliding dado at 5/16″? Similarly would you narrow the taper below 3/4″?
Hello Paul. How would you saw dovetail dado in a board wider than a saw and preferably stopped dado? I know old technique from my country, where we use special saw “svlakovka”, because “svlak” is the name for this specific joint. It looks similar to what you may know as kerfing plane, but with higher blade. I just wonder how would you do that in a board for table, let’s say 35 inches wide?