beginners corner, the work bench
Welcome! / Forums / General Woodworking Discussions / Projects / beginners corner, the work bench
Tagged: beginner, wood choice, work bench
- This topic has 49 replies, 12 voices, and was last updated 6 years, 1 month ago by
 Ecky H.
-
AuthorPosts
-
 13 February 2018 at 12:38 am #470467
Hi people,
Some of you will just shake your head, some will say “gee, me too”.
I am a beginner, made a few small boxes. First ones pretty sad, but the later ones were turning out very nice. Made a step stool, turned out real nice too. But on to my first big project, the work bench.
Watched Paul’s videos several times to get the steps in my head. Still refer to them as I go. Good lord, he makes it look easy. 50+ years of experience does that I guess.
So onto my build. First off living where I do here in Colombia, my wood choices are limited. Oak, Teak, Cedar mostly. If there is more I haven’t found it yet.
So I decided on Teak, thought it would look pretty and hold up well. It is pretty wood. But I was thinking it was a hard wood. The Teak I get here is anything but hard. And worse, the grain of the wood is like a steel wool pad, it goes every which way.
I started the table top as suggested. This is when I found I was going to have a problem. No matter which way I tried to plane the wood, it wanted to gouge unless I went cross ways to the grain at almost a 90* angle. I struggled along and got by face surfaces level with a few gouges.
I got my plane super sharp, I mean really super sharp, and set the cut very thin, really thin. Got a few gouges anyway. Not sure if it’s me or the wood. I was using a low jack plane. Tried my #4 but was having better luck with the jack.
Ok, I got ready for the glue up. This has take about 3 days so far, I’m not in a hurry. If I get tired, I take a break. The glue up was a disaster. I mean the boards glued together supper, but where Paul’s were almost perfect even, mine were anything but. As much as a 1/8+ variance or more in board heights, glue all over the floor. Well, good practice for planing them flat I guess.
That took a few days in itself. I tried a scrub plane and very quickly realized not going to work. It would plane along just fine then dig out a gouge. So, back to the Jack.
I found I could not plane long ways in either direction. Wood or me? I think it’s the wood, but it could be me. I have planed Oak, Pine, Cedar, Walnut and a few others and did just fine. But this teak is something else. Cross plane, slight angle at best. Very little tear out that way.
Ok, I had a lot of planing to do and it took quite awhile, days. But I got the top and bottom nice and flat. Yes, a couple gouges, but unless I figure out what I’m doing wrong, I’m just going to have to live with it. Now what surprised me was when I cut the table to length, originally was going to be 5 foot, is now 4 foot, I cut the ends straight and square with only a Stanly tool box saw. I’d die for a good set of saws. Later for them.
Planed my aprons, each was a 2×4 and 2×6 glued together. To my surprise they came out very nice fairly easily.
Onto the legs. I guess I should tell you what I order in wood size wise and what I get can be two different things. These mills here are all small mom and pop type operations. The hired labor gets paid about $10 a day. Quality is what it is. Not gripping really, it’s just not like in the States. One thing, the wood here is a whole lot cheaper. Very rough cut though.
I ordered 6 foot lengths of 3 1/2 x 5. I figured this would give me some play room to work around knots. What I got was 4 foot 10 inch lengths, 4×6 strong. Got a couple knots to deal with now. Hey, good practice. I could have gripped about the wrong size, but why? The wood is more than good enough and it’s partly my fault as my Spanish isn’t that good.
So on to planing them. Again cannot plane any direction but across the grain. 2 legs planed out rather fast though, the third was hugely out of square, bellied, humped, twisted. been working on that one for 2 days now. I got one surface nice and flat, referencing all to that. These aren’t 8 hour days either. We are still moving into new house and I have lots of honey do’s to do.
4th leg has a split running the whole length, not useable. Will have to get another piece.
Well, that’s where I am at this point. will update as I go.
I’m going to finish this table, even with all the hardships of the wood. (or is it me?) And then try it all over again with Oak or Cedar and see if I have the same troubles.
Self given grade at this point. A+++ for effort, man I’m really trying. A+ for squaring the table top, it is spot on square. D- for finish work, the gouges are killing me.
Gary

Well, I am interested to see your work and I would love to have some teak to work with. A hardwood bench seems luxurious if one has the wherewithal to acquire the materials at reasonable prices, though I don’t know if I would have the heart to beat up a bench top like that. Making mine out of 2×4 lumber from Home Depot doesn’t make me feel bad to ding it up and put screws into it.
Regarding your planing difficulties, I don’t have any experience with teak but the grain certainly sounds challenging. I’d still be curious to see pics of your plane, the wood, etc… I have often had more difficulties planing some hardwoods vs. softwoods but I think my issues may have been. More related to the angle of my cutting iron and perhaps the hardwood being less forgiving…
-
This reply was modified 6 years, 2 months ago by
 David B.
 13 February 2018 at 3:01 am #470558
I was planing some teak the other day. It was hard and oily, grain was interesting, but not as troublesome as you describe.
I ran into something like what you are experiencing with some maple. Ideas are:
(1) Go cross grain as you have been to get to dimension and flat, but then switch to a scraper to get your final surface. That should let you work along the grain. One problem with this is that the edges can spelch off while planing cross-wise.
(2) Not only get super sharp, but set your cap iron really, really fine. Come back from the edge only 1/32 or even less. Of course, you can only take really fine shavings with the cap so close to the edge, but you may find it helps. I think it does. Also, make sure the cap iron is polished in the last 1/2″ and oil the sole of the plane.
(3) Repeat #2, but this time, sharp. 🙂
You could try a back bevel to fake a York pitch (look at Paul’s blogs), but I don’t know if it will help and it may be more of a commitment than you want to make.
By the way, sharpen, take a few passes, then feel the back of your blade to see if a burr has mysteriously reappeared even though you just sharpened. You need to take the cap iron off again to do this…sorry.

Hi Gary!
I think the link below is right for you. Read the thread, there are some pictures and a short description on how to tweak the plane. You will also find a link to the video describing the physics of the issue.
It really works.Influence of chipbreaker on tearout (Kawai & Kato with verified subtitles)
Good luck
14 February 2018 at 1:48 am #471184Hi Misha,
That was some video. Haven’t had a chance to continue work except for a few minutes as I pass by the shop. Did get my new wood ordered to replace the split leg. Glad I had that split now. When I went back to the mill, they had some really fancy wood ready for pickup. Next trip in I’ll get some.
More info and photos when I get started again on Thursday. Visitors from Florida tomorrow.
Thanks for all that info.
16 February 2018 at 5:50 pm #474302Your suggestion of using a scraper for the finish is an excellent idea.
16 February 2018 at 6:09 pm #474343Oh boy, got my 4th leg replaced. Like I said, what I order size wise and what I get is not always the same. My new 4th leg ordered the same size, 4 x 6 is a 3 3/4 x 5 3/4 this time and perfectly square. Problem is my last order of 4 x 6 legs came out 4 1/8 x 6 1/8 +/-
So that means I got a lot of planing to do to get the other 3 legs down so size. And like I said, this wood is not easy to plane. Lessons via internet vs in person, a in-person instructor could see my wood and what I and doing, possible offering a life saving solution. Alas, England is just too far away.
If I were applying for a first apprentice position, this would not be a good start.
I am going to finish this project, good or bad, period. 1, I’m not going to waste the wood, and 2, I’m learning a lot for the troubles.
But part of me is wondering if I should let go the “perfection” this time and just finish the bench. One leg smaller than the others. It would still work, just ugly. And then start with a different wood, Oak or Cedar. Or maybe the pretty yellow / black wood they had in stock last week.
Well, I’m not frustrated, or ready to give up. Just wondering which way to go right now. I did get some oak and cedar when I got my 4th leg for other projects. It planes so easy.
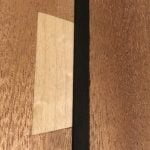
Attached is a picture of my wood, the new leg to be exact. You can see pard of the bench top too. If you can see from the picture, the grain is going back and forth, and knots.
-
This reply was modified 6 years, 2 months ago by
 5ivestring.
Attachments:
You must be logged in to view attached files.
16 February 2018 at 8:25 pm #474578Ok, had lunch, gave it a lot of thought, went out to the shop and looked the pieces over, lined them up looked again.
If I had a good saw, perhaps I could rip a lot of waste off, but I don’t. Next on my list to buy.
Well, it’s going to take a lot of planing, but I got to do it. Otherwise every time I look at it I will feel I didn’t give 100% and let it defeat me. So, I’m going to be planing for quite awhile.
I guess this is one way you learn about wood.
17 February 2018 at 12:18 am #474929No, it’s not wet. It goes from a almost white to brown to very dark brown. Can you see the way the grain changes direction in the picture? Every few inches.
Yes, I can. I believe that must be some very knotty wood and while that would make it a very hard surface, it is going to be very difficult to plane (and making the bench requires A LOT of planning). It will also require a lot of grain reading if you’re going to continue with it–the grain most likely changes direction on every other side of each knot so what is smooth in one direction is going to have tear-out as soon as you get to the other side of the knot (as you noted in your first post, planning at a skew is probably the best approach but is by no means foolproof). That is one reason why we generally look for wood that is as knot-free as possible when selecting wood for projects. Knotty is also more difficult when it comes to chopping mortises/dadoes/etc. for joinery. I’m not saying it is impossible but you have certainly given yourself a mighty challenge and if you persist and succeed you will be very proud of your accomplishment, though it may not feel like it is worth it.
I guess I’m jaded by big box stores but you have no access to simple pine/cypress construction 2×4’s anywhere near you (for the benchtop at least)?

I am an absolute beginner, and my workbench is the first project I’ve made with hand tools. Although there are a couple of things I don’t love about my bench, it turned out great. Most importantly though, although the boiled linseed oil isn’t even fully cured and my vise isn’t lined yet, but I’m already using my bench to create other things. This bench will teach you to use your tools and give you the confidence you need to make anything you want, and the design is forgiving. This project is meant to inspire us and show us that we really can create amazing things by hand.
That said, I wonder if your stock might be holding you back. I’ve planed some oak that had some crazy grain, and every direction I tried to go, I got tear out and it was just impossible. I was trying to make a straight edge, and it became clear I wasn’t going to end up with a straight edge. For a while I thought that was just the way oak is, but then I ended up planing another piece that planed beautifully. Some wood is just easier to work with than others, and for this project I think you really want something that’s easy to work. Down the road when you have the confidence and experience to navigate the crazy grain on your teak, you can use it for a beautiful patio table or something like that. But for now, maybe try cedar. Find some with some nice straight grain, and I think you’ll have your bench together in no time.
17 February 2018 at 4:01 pm #475617Hi Erin,
We have a HomeCenter down here, similr to HomeDepot. But the wood selection is nothing to write home about. You can’t pick through it either. A piece of pine for example comes in 12″ width, 2+” thick, and 20 feet long.
When you go to the ma /pa millers, you order, they cut, you get. Again, no sifting through pieces for what you want. I’m still finding better ways to get wood here though. Just keep asking people.
Ya, the stock is making it a real workout, grain changes every few inches.
I got to say though, I have learned a lot working with this wood.
17 February 2018 at 4:20 pm #475629Boy howdy, I sure do miss the selection of woods in the States, just took it for granted it was like that everywhere.
It took a solid 8 hours but I got 2 sides of 2 pieces planed down and darn nice too. One more leg to go, then I’ll attack the other edge. On the other edge, all I have to do is match the new leg to the other 3, so that should go much faster.
I’ve have learned so much planing this wood. As said before, I have planed other woods with ease, just like in Paul Sellers videos. But with this project, I have 1. learned that even with this crazy wood, I can still get it done.
I was planing away last night, plane set fine as not to gouge. Going slow, will take forever. I was going through Paul’s videos in my mind, watching how he did it, just wasn’t going to work here. Then I changed my mind thought. Said to my self, “What would Paul do in this case?”.
Then it came to me, Paul would often use a chisel to remove large amounts of waste. So, I got out a nice sharp chisel and gave it a try. I was able to cut away a large amount of wood in minutes. Well, a lot of minutes anyway, but it went way faster.
I had to be careful not to let the chisel try to dig in when the grain shifted, and did end up with some tearout, but I was careful to keep it above the final depth. The planing went 5 times as fast then.
Kept trying the Scrub pland and #4 now and then, but the Jack just seemed to work the best. I learned a lot more about listening to the plane, feeling it work. As you can see by the picture below, the legs came out good. I’m happy I decided to see the project through with this wood.
Everyone tips and experiances has been very helpful too.
One more leg with 2 sides, and the new leg face to go, then I’m ready for the next step.
Attachments:
You must be logged in to view attached files. -
This reply was modified 6 years, 2 months ago by
-
AuthorPosts
- You must be logged in to reply to this topic.