@humanic
Forum Replies Created
-
AuthorPosts
-

Hello Tizzie and welcome,
This is how I save all the videos:
## Projects (in order by date)
1 – Wall Clock
2 – Carring Tote
3 – Dovetail Boxes
4 – Coffee Table
5 – Sandpaper Caddy
6 – Breadboard-end Cutting Board
7 – Toolchest
8 – Walking Cane
9 – Bench Stool
10 – Bookshelves
11 – Sofa Table
12 – Craftsman Lamp
13 – Corner Shelf
14 – Shaker Style Bench
15 – Picture Frames
16 – Occasional Table
17 – Coasters
18 – Joiners Toolbox
19 – Foot Stool
20 – Trestle Dining Table
21 – Dining Chair
22 – Shaker Stool
23 – Assembly Bench
24 – Wall Hung Tool Cabinet
25 – Carved Mirror Frame
26 – Wooden Wall Brackets
27 – Chest Board
28 – Making Table
29 – Sawhorses
30 – Rocking Chair## Tools (without order)
beading marking tool
beading markingtool variations
Cam Clamps
Correcting the Zona Saw
Curved Scraper Shaping
Gouge Sharpening
Joiners Mallet
Large Mitre Box
Making Rebate Plane
Making a Small Square
Making Chair Devils
Making Saw Chocks
Making the Frame Saw
Making Winding Sticks
Making Wooden Planes
Moulding Plane Sharpening
No. 80 Cabinet Scraper
Poor mans mitre box
Recutting teeth
Restoring the Bench Plane
saw sharpening
Scraper sharpening
Scrub Plane
Sharpening a Auger Bit
Sharpening a Crosscut Handsaw
Shooting board
Spokeshave Sharpening Holder
Tapering Jig
Using Chair Devils
Wooden Spokeshave Sharpening
Best regatds,## Techniques (without order)
Clamping Techniques
Edge Jointing
Edge Jointing Thick Stock
Planing Long Wide Boards
Poor Man’s Drill Bit
Preparing Rough Stock
Squaring round nails
Sstock preparation I
Stock Preparation II
Thickness Planer
Timber dog jointing
Turn buttons
Using ScrapersReally, it’s a lot of fun 😉
I hope this helps.
–Óscar
Here I recognize the good sensations of build something by myself without nothing more that a piece of timber and small bunch of tools. Not screws, nor power tools, only my hands and my perseverance to build something useful. Make something for others who I love it’s the essential thing. Here is my soul. No more, no less.
Good to know about it, @David,
–Óscar
One advantage of hand woodworking method is that you can listen classical music into background while you are working wood. Well, this is my personal taste, you can listen rock&roll, but if you are really nostalgic you can plug a power router to remember the screams of your old woodworking methods 😉
Best regards from Catalonia,
–Óscar
@Ken, the real expert on the subject is Bob Easton, who in this modern days resawed by hand a board of sixteen foot. He documented their feat in his blog:
Obviously, he used a frame saw 😉
I think he is member of this forum too.
–Óscar
Hi @Brandon, really it’s a mixture of tool condition and technique.
You can use a regular panel saw to do this work but, definitely, for a wide cut like this, you need a large and sharpen rip saw with a configuration of 4 to 7 TPI and the appropriate set. I recommend use a marking gauge to set the path of the saw around the plank to cut. This is not a really difficult work but something tedious. Remember, this was done over centuries by our ancestors who obviously had no band saws.
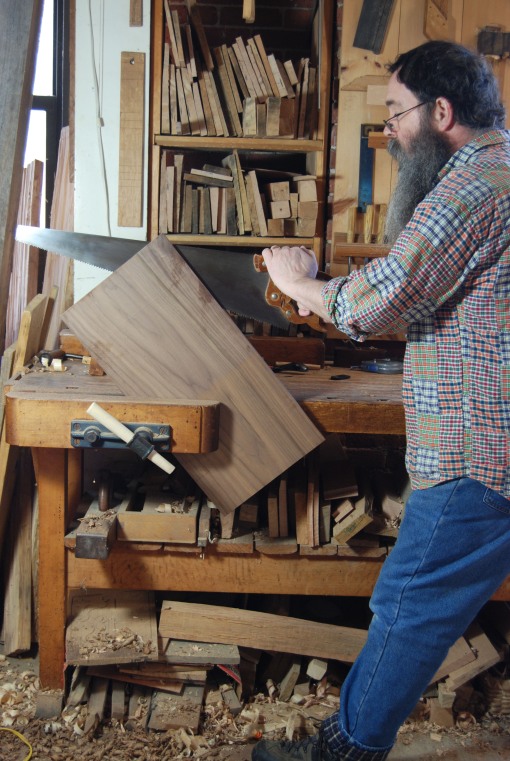
Personally, I use frame saws for this kind of work for various reasons: mine is lightweight, so i’m just less tired, second, my cuts tend to be next to perfect to the line, and finally, if the work needs it, another person can help me pushing from the another side of the saw. But this is only my personal preference.

TIP: Greasing o waxing the saw plate during the process will facilitate the job.
TIP2: When the saw blade sinks into the cut, put a pair of small wedges on the kerf to prevent the saw runs aground inside the board.
Best regards from Catalonia,
–Óscar
Another method, much more traditional and ideal for practice of the hand tool techniques and get away from industry, is fill the back side of cupboards or bookcases with natural wood strips with a special joint, named “shiplap joint”. It’s very decorative and delicate and enhances absolutely your piece of furniture.
Anyway, for the bottom of your drawers, plywood is perhaps the most practical solution.
–Óscar
Attachments:
You must be logged in to view attached files.
This is my technique for resawing thin boards from a chunck of wood using a frame saw (republished here in this format only for clarity):
First, set your marking gauge slightly more than your desired size (10 millimiters in this case)…
//http://cssmosaic.com/images/IMG-20130826-WA0036.jpg
Set your marking gaugeMark your gauge line along the both faces of your chunck of wood…
//http://cssmosaic.com/images/IMG-20130826-WA0037.jpg
Mark your gauge lineRun your line also across the grain in both sides…
//http://cssmosaic.com/images/IMG-20130826-WA0035.jpg
Run your line across the grainWith a chisel cut an small dent in the corner of your saw line…
//http://cssmosaic.com/images/IMG-20130826-WA0041.jpg
Cut a small dentThe magic begins now! Use an inexpensive frame saw to cut a perfect slice of wood following your vertical gauge mark. First, start at the front corner sawing until you reach the opposite corner…
//http://cssmosaic.com/images/IMG-20130826-WA0024.jpg
Using a frame sawNow saw vertically until you reach about the half of your block of wood. Then flip it and start from the oposite corner. Happily the two lines will meet…
//http://cssmosaic.com/images/IMG-20130826-WA0028.jpg
Using a frame sawThen you are here: your panel slide cuted exceptionally straight. The frame saw allows an easy control leveling your cut using both hands…
//http://cssmosaic.com/images/IMG-20130826-WA0030.jpg
Your thin panel cutI build this small frame saw two years ago based on an engraved of “L’Art du Menuisier” of Andre Roubo. Here you can see the artifact disassembled showing its parts. Very simple construction, very effective, and only costs me five bucks by the wide saw hack blade, the long carriage bolt and two small pins…
//http://cssmosaic.com/images/IMG-20130826-WA0023.jpg
The frame saw disasembledFinally, you only need to plane your piece to remove the saw marks using a thin face planing stop…
//http://cssmosaic.com/images/IMG-20130826-WA0031.jpg
Removing the saw marksFinish the surface with a smoothing plane and you are done.
//http://cssmosaic.com/images/IMG-20130826-WA0026.jpg
Smoothing your surfacesNOTE: Excuse my poor english and the low quality images.
Best regards from Catalonia,
–Óscar
Hi and welcome aboard @David,
We discussed this issue about two months ago in this forum. These are the threads:
I hope this helps you. Best regards from Catalonia,
–Óscar
Hi @jay,
An important point is not “bulldoging” the plane. Take it gently and retract the blade more shallowly to take fine shavings. Also check your level ajustment to take the same amount of wood from side to side. This is, perhaps, the most dificult ajustment. At some point you will get the “revelation”. I hope this helps you.
–Óscar
-
AuthorPosts