Keepsake Box: Episode 1
Posted 24 May 2017
This is an episode in a paid series. Want to watch it? You just need to sign up as a paid member, and you can enjoy this video and many other videos we think you will love.
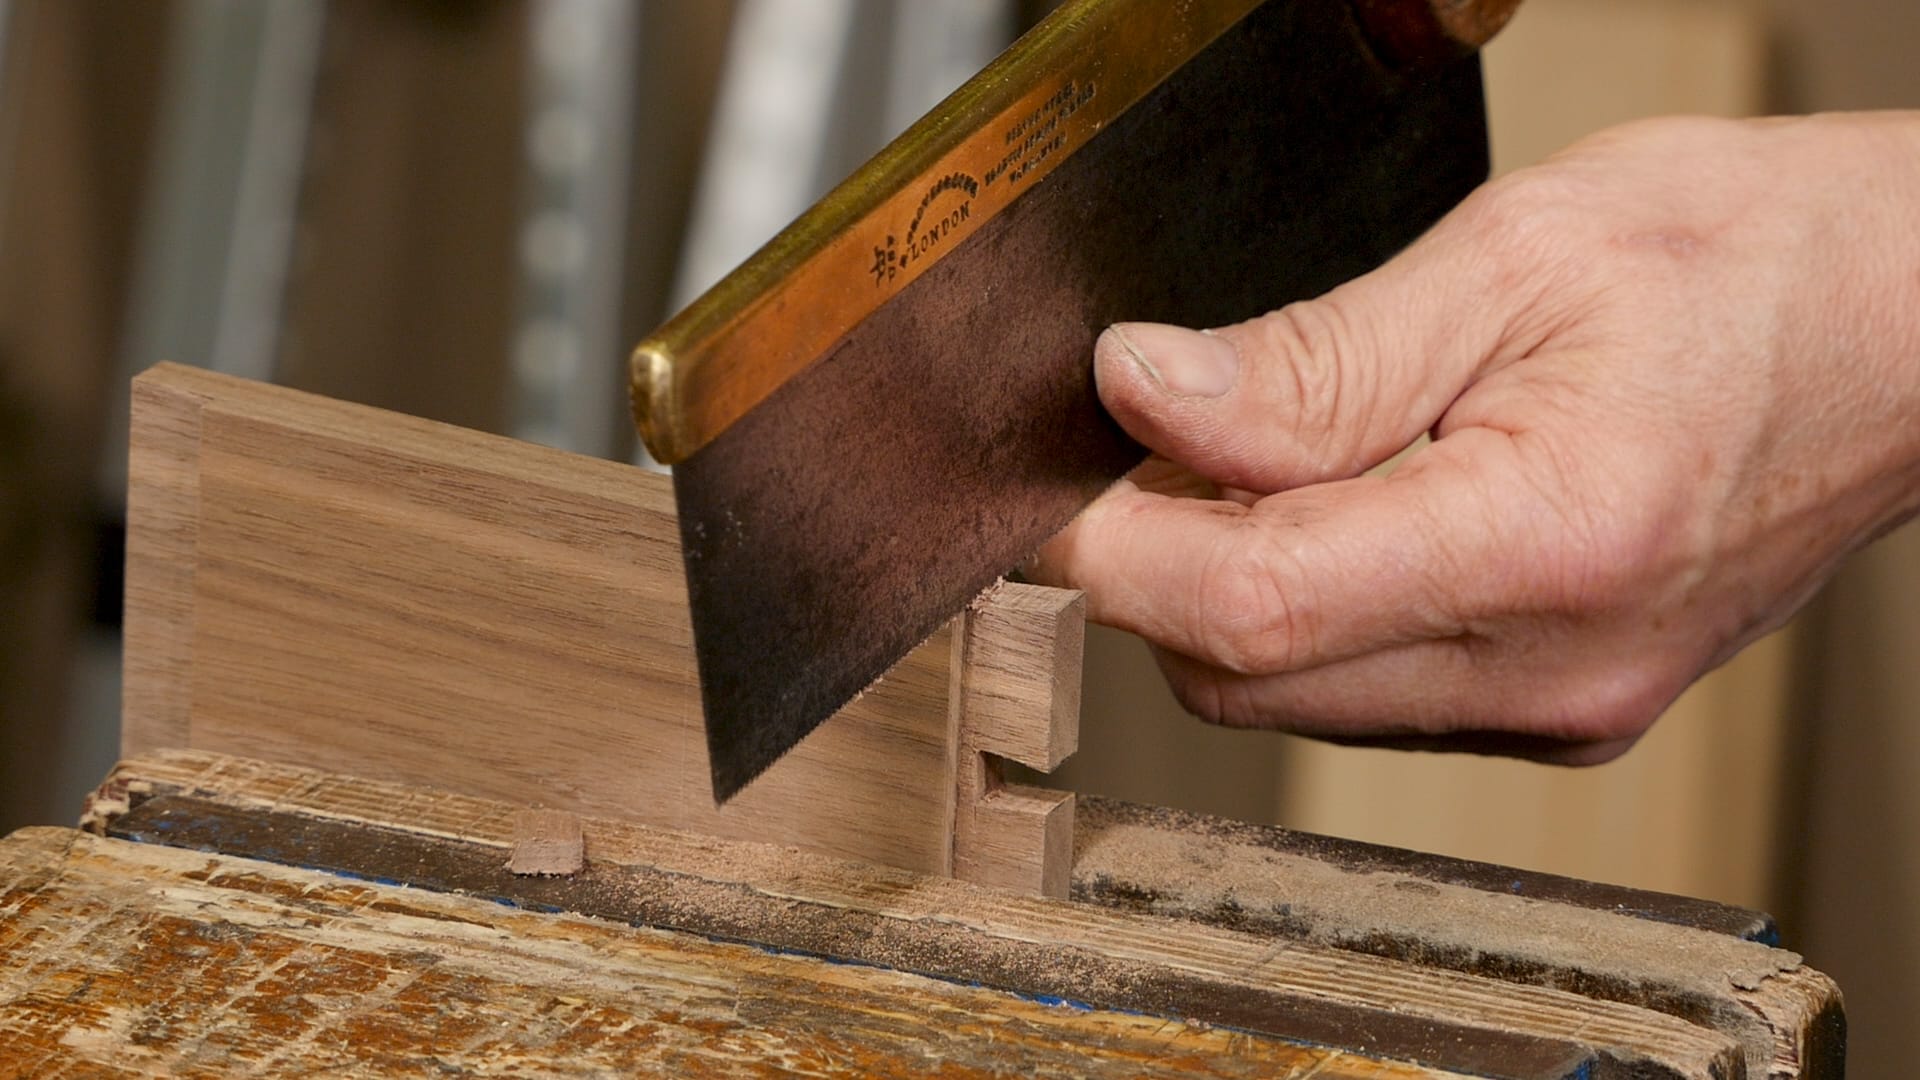
Paul explains the joinery used on this keepsake box, before discussing stock choice. Then the dovetail recesses are cut in order to align the dovetails for layout and cutting.
Question on the floating lid / bottom: You have build other boxes where you just glued the bottom on directly to the sides. At what point does it become necessary to use a floating lid for expansion? I have built some smaller boxes I am not worried about but I have also built some that are somewhat bigger, up to 8″ from front to back (the direction it would expand).
I’m sure the type of wood used is a factor, so lets say a Walnut or Padauk, which I used, and the amount of climate change. But just in general, an average, what should one expect?
This looks like a really fun project. Much more to it than the simple boxes I have built.
Thanks for all the great videos you have done.
Gary
Hello Gary, glad you like the look of the project. Paul said that he wouldn’t glue the base straight onto anything larger than 6″ wide.
Best, Phil
I think the 6″ width is a good guideline. I have had success in that range with no trouble, but going up to 12″ is asking for trouble. I also suspect that the thickness of the bottom may impact it as well. The thicker the bottom, the more internal tension I would think.
Seems to me the 6″ dimension is overly cautious. I’ve heard people who know these things say Ex/Con only an issue over 12″.
What is the name of the router you are using?
Looks like a Stanley 71 mounted on a board for extra extension/stability
Thanks
Hi Eric reference Stanley router…….I have sold mine on eBay for £90…….I made Paul’s poor mans router, it works a treat.
An example of its ability …..I cut a rectangular cutout 9 mm deep by 20 mm wide x 50 mm long …perfect!! (Sides cut with square and marking knife)
In 10 mm thick mahogany stock……yes that left 1mm thick bottom
Paul i am unable to find ref; to the 1in11angel any where on the plans many thanks.
paul explained it in the video .mesure down 11 and over 1 connect the two points .hope tht helps.
what are the measurements of the box in CM?
thx
Hi Edith,
The box is 30cm long, 15 cm wide and 10cm high. Paul has provided pdf plans and a cutting list, which you can download from the previous page (the one with the introduction video for the box).
Hope this helps.
Hi great joinery, will have to have a few dummy runs at this one,to let it sink in to my brain. Paul looks like he’s enjoying himself. Great camera work looking foreword to the next video,
Regards Larry.
Nicely done Paul, just were you in some kind of hurry? I have seen you more relaxed in previous videos.
Marek – agreed. I’m enjoying watching this (hoping to make this project; unlike the last few, where I just haven’t had time), but the pacing seems rather rushed.
I am often conscious of the fact Paul will do something in half the time it’d take me, and at twice the quality; but it always feels very relaxing to watch. This one however does seem like he’s in a bit of a hurry.
Agreed. This was frenetic compared to previous project videos. Considering that the dovetails are recessed AND bevelled, a bit more time spent on the layout and cutting – sometimes, seeing the layout and cutting twice helps remove confusion – would have helped to make this a less frenetic project opener. And would have made the project seem less intimidating.
Agreed. Seemed rush.
My thoughts exactly.
Well….. I have been thinking about what do do for a gift for someone’s wedding. I think I found the perfect project. Time to choose some wood now.
Also…. love the new video and look to everything but I have to admit….. I’m going to miss “super speed” paul. No matter how much I practiced I just couldn’t go that fast. 🙂
Why is one dovetail larger than the others?
He’ll be cutting through that dovetail after the box is assembled to create the lid, so some width will be lost from the saw kerf
I believe to allow for the top section to be cut off and become the lid.
Paul, thank you for this project when cutting the step down on the sides prior to marking the dovetails why do you switch from a dovetail saw to a tennon saw? Mostly curious. To date, I have been just using a dovetail saw for both kinds of cuts. Just trying to understand advantages of when to use a tennon saw over a dovetail saw. Many thanks.
The tendency is to use the dovetail saw with smaller teeth when cutting across the grain or making fine cuts such as cutting the dovetail angel. Then a tenon saw is used when ripping longer or wider cuts as it has slightly larger slightly more aggressive teeth, which is why it is so well suited to cutting tenons and in the example you mention.
Dear Paul and team, your videos just keep getting better and better, thank you for all the work you put in. I like nothing more than to come home on a Wednesday and relax with a mug of tea watching Paul work his magic. What a great project, one that I hope to build alongside each episode as they are released.
Glad to see you doing something in hardwood other than oak–walnut is beautiful!
this project could be used for so many different gift ideas thanks for sharing your new designs with us. Eddy
I love the super close ups at the end. Very nice video work. Keep it up!
I feel like I have seen those dovetail baselines before…. the only problem is at the time I wasn’t trying to make them angled!
Why the step down for the dovetails?
Hello Anthony, it helps to align the dovetails when transferring them to mark out the recesses. It also results in the thickness of the tails more closely matching the thickness of the pins.
Re keepsake box what timber did Paul use eventually?
It is black walnut. All the best.
Thanks Philip
Great video! And I want to say that I really like way the video highlights the steps made after Paul has finished a portion of the video. I prefer this to the fast motion used in previous videos that show Paul repeating what he just did.
Hi Paul and all,
Paul, are those Ashley Iles Mk II chisels you’re using please?
I am on the verge of upgrading to a decent set of chisels and am torn between the Veritas PM-V11, the Blue Spruce and the Iles Mk II…any advice would be welcome. The Iles are very competitively priced, but the Veritas come highly recommended too and as for the Blue Spruce…I think I’ll have to wait until Santa overdoes it on the sherry for those.
Any advice gratefully received!
Love the videos Paul and company…truly inspirational and I’m going to make this project in Purple Heart I think!
Cheers – Matt.
I really like the project and look forward to attempting this myself.
The ends and the front/back are curved, but only the baseline on the the ends are angled. I presume that it isn’t possible to angle both baselines, but the question it raises for me is why not angle the baselines on the front and back panels instead given that the front might be in view more often than the ends?
Also, it seems that the box be made with curved ends, front and back but with standard straight dovetail joint baselines all around. Was the decision to angle the joinery inspired by something in particular?
Thank you very much for any insight about these design choices you might share.
Hello Charles,
Paul developed this way of cutting the dovetails for this project, in order to make it appear that they follow the curve on the ends. This was his own aesthetic choice. He was focused on keeping it fairly straightforward so that others could follow along without it being unachievable by the majority of people. required There are certainly many other alternatives which I would encourage you experiment with.
Paul says that he has planed the four sides dead to thickness and that they are all the same. I wonder if Paul could please tell us what his tolerances are. How flat is “flat” and how straight is “straight?” Thanks!
Hello Joel, Paul gets his stock within 0.05 of a mm of the size he is aiming for when tight tolerances are necessary. He uses digital calipers to do this. This is only for work when that level of accuracy is necessary. As far as flat and straight, you have to get stock as flat and straight as you can so that winding sticks and sighting it doesn’t show anything being out. Sorry that it’s not more definitive instruction on that.
Best, Phil
So does this mean that for flatness holding e.g. my square on the surface there should be no light coming through underneath the square at all? So far I don’t manage that level of flatness yet across a board.
Hello Zeppos,
I would certainly aim for that, and how perfect you need it depends on the project in question. Stock prep is certainly one of those things that you get significantly better at with time.
question…because accuracy is key why didn’t you start 1 eighth away like you have said in the past to prevent the knife wall from moving?..just curious.
Whether this is necessary is somewhat dependant on the resistance of the wood and how hard you chop. There is no reason not to do that, but sometimes it isn’t necessary.
ok thank you
Why did you choose to put the tails on the end pieces? If I were to approach this box without the benefit of Paul’s guidance, my druthers would have been to put the tails on the long, front and back pieces. I’m pretty sure in Paul’s original keepsake box (a much simpler, introduction to dovetails project from years ago), the tails *are* on the front and back pieces. Is it just a matter of taste? My thought is, the box will mostly be viewed from the front, and when viewed from the front, I would like the observer to say “Hey! Those are dovetails!” As built, from the front they could also just be finger joints. Also, from the front, in the current design, we don’t see the baselines following the outside curve like we do on the ends. I think that was a really nice detail (although I’m not sure I’m good enough to pull it off).
Hello Charles,
Where the dovetails will be load bearing, such as in a drawer, they are placed with the tails on the sides so the dovetail don’t seperate with use. Otherwise it is largely a matter of personal preference.
Best, Phil
With the thickness of the box front, back, and end sections at 9/16”(as specified in the drawing), and the 7:1 dovetail ratio, I’m finding that the 3/16” grooves, for accepting the tongue of the top and bottom sections, runs through the inside edges of the four top and bottom dovetail pins on the front and back sections, and the plow plane cutter nicks off the corners of the pins- leaving visible gaps.
Any ideas where I’m going wrong? Thanks
With proud large box joints and ebony plugs this would definitely be an example of a Greene and Greene style box. I think I’m going to build one with only those changes.
Beautiful workmanship, but really over complicated project.
Is Paul using a different workbench? Looks older.
@COLINASHBY ,
Look in the background. The video is filmed during his shop days at Penryn Castle in Wales. All the shop furniture and tools are from those days.
He built the new bench when he moved to England.
Impressive Larry! Yes, this isn’t from Paul’s garage in Abingdon, Oxfordshire but from Paul’s previous set up out at the Sylvia Wood Centre which was after Penrhyn Castle.
By the way, I’ve finally found a way to watch Paul’s videos without being repeatedly and unnecessarily blasted out of focus by the scale conversion pop-ups that happen every single time he mentions a measure. I’m sure those conversions help someone, but I don’t need them and they ruin the experience.
I hesitate to offer my work-around here, because I have an irrational fear that the pop-ups guy might decide to make them work another way and defeat my solution. Why would i say this? Because I’ve commented and offered suggestions before but it all appears to fall on deaf ears. And at one time they got worse with irregular variations on how the numbers were brought on/off the screen.
I offer it to help my brethren who are also distracted unnecessarily by the pop-ups. The trick I use is to load up a small game window and then use that to obscure the portion of the screen where the pop-ups occur. This is how I spend the first few minutes of any of Paul’s videos now, getting that box in the right position to obscure the superfluous information.
Some years ago I’d suggested that they make the pop-ups an option, rather than hard-wired into the video, and I still think that’d be wonderful but not likely to ever happen. I don’t expect neurotypicals to get it, but that’s my way to obscure the distraction. We’re not all NT.
I hope this helps others who, like me, wince every time Paul mentions a measure-dreading the conversion box! Is why I quit watching for a long time. HTH.
Many thanks for your feedback regarding the measurement graphic. As you said in a previous post not everyone is able to think in both metric and imperial. Having a worldwide audience we would not want to exclude them due to the measurements Paul uses. While your idea of a way to toggle them on and off is good the technology to be able to implement that is not available to us. We are always looking how we can make our videos better. While our current system seems to be a distraction to you I am glad you found a, not ideal, work-around.
Thanks Paul. I had watched this video when it first came out and always wanted to build it. Recently I purchased a nice metal 72 note mechanical music box mechanism. It works off of hole punched sheet music so not limited to one song. Want to give it to my wife as a Valentine’s day gift. This box style will go nicely for a music box. Plan to make it out of Spanish cedar so not only will it look nice, it will smell nice inside when she opens it to feed in the music sheet.
Just started two days ago to dimension the stock. Spanish cedar is much softer/more delicate than the cherry I had been using in other projects. I’m so excited to finally be working on this. Since Christmas is 7+ months away, the pressure is low helping to make the build a bit more enjoyable.
Are those Sorby rosewood chisels? I’m looking to get a set or maybe Narex. Also a weird question… what are the 6 or 7 books over to the right of the shot? They look like lab notebooks. Does Paul use them as workshop journals or what?
Thanks
Joey,
Chisels are Ashley Iles Mark Ii chisels.
Notebooks are as you suspected sketch/ shopnotes.
Craig
Joey,
I bought a set of Narex chisels four years ago and I don’t recommend them. They are the worse chisels I own. They won’t hold an edge and are softer than the wood I am trying to chop into. They aren’t as good as the ones I got at Harbor Freight for less money about the same time. I don’t recommend Harbor Freight chisels either. I don’t know of any inexpensive brand that is very good, perhaps someone else will have some ideas. I have some Stanley Sweethearts that are good enough but I think too expensive for what they are. I have one Lie Nelson that is superb but on the expensive side. If I was rich I would buy a set of Lie Nelsons or if I was younger so I could get more good out of them in my working life.
According to Narex, one has to sharpen them a few times before they hold their edge.
see end of this document.
http://www.narexchisels.com/Narex_Chisels/Narex_Cr-Mn_Steel.html
the 1:11 bevel line
the 1:11 bevel line seems like an aesthetic refinement (not functional)
Is the idea original or is there a history of other uses
If there are other examples, where could we see them
thanks
ken
I asked Paul and he said the 1:11 bevel line was for asthetic.
Thank you Katrina,
I noticed that this bevel line goes from a point on the edge determined by the thickness of the piece (the usual shoulder line) to the opposite corner.
Is this how Paul determined the 1 to 11 bevel?
thanks
Ken
In the next few episodes, Paul will be curving the outer sides of the box. The 1:11 is to have the dovetail bases sort of follow the outside curve of the box. Purely for show. Glad Paul introduced this concept to us.
I’m curious. In this (and the following) videos, there are a few visible gaps in the dovetails, even after glueup.
Yet in the last video, after finish, they are nowhere to be seen.
I think a lot of us beginners worry about gaps in joinery, but maybe we don’t have to?
Is there a step I’ve missed, where Paul repairs these gaps, or did they just take care of them selves somehow? Maybe grain-swelling during finish?
Paul knows there would not have been a gap in the joint. “I never repair a joint”.
Sometimes, they mysteriously disappear. Perhaps it is because the finish fills the gap and prevents shadows from being cast? On the other hand, sometimes they don’t disappear. When learning to build, it is important to go all the way through applying finish because the joinery and finish affect each other. So, while people tend to cut a pile of dovetails in scrap and leave it at that, I think they would learn more by applying finish to those test pieces. You can learn to what extent gaps disappear. You can learn how sanding to different grit levels (or scraping or planing) affects the darkness of endgrain to face grain. You can learn how light vs. dark vs. just-topcoat affects things. And, when it all goes wrong, you can learn about wax filler sticks. 🙂
That in itself was worth reading through for. Having cut many tests and scrapped even more, and now having worked couple of projects to finish point, I wounds had I finished my tests to completion how they would have ended up looking once planed and sealed..
Can be grain swelling, can be glue fill, can be clamping pressure closes things a bit more. Gaps can also get exaggerated when the joint is not at the correct angle. Planing afterwards can sometimes cause the wood to spelch and fill in any gaps. It depends where the gaps are. I often make sure to keep a few decent shavings from the preparation stage to use as fillers too. Also, if I am ploughing for a base, I keep all of the pieces I cut off the tail boards so that I can plug the visible ends of the grooves.
Hi all,
Anyone know why Paul did not use simple rebate plane to do the rebates? Is it because this is going across the grain?
Also, why not using a shoulder plane to clean the rebates instead of the router plane?
I asked Paul and he said: “Often I will try to show alternative ways people would never think of.”
Why do you need two specialty planes to do the work of a knife and a chisle. The router plane is optional and is a multi purpose tool. Mearly used as a convience
Hi Dean,
thanks for the answer. I am not saying or implying I need them – I don’t have enough experience to judge so that is why I am asking.
You say knife and chisel. Paul used also a saw (two different cuts) and a router plane.
Since this is a rebate that Paul is making I just wonder why a rebate plane was not used?
The process does seem more complex and prone to error by first sawing across the grain, then ripping to the shoulder, only to then use the router plane.
If I understand correctly all these steps could be saved by using a rebate plane?
Note: Since I don’t have a router plane, nor rebate plane, nor shoulder plane, I tried to do all this with a chisel and the result is very rough and ugly to say the least 🙁
Did not mean it snarky.
The knife makes a perfect wall. As you saw , the chisel made a hole for the saw to follow.
He did use a saw, but he also does a lot of split cutting of tenons and trueing with a chisle.
If a chisle is sharp,the grain is good,and you take small bites the surface will be smooth.
There is nothing wrong with the tools you mention but they are not necessary to do the job.
I have made a rebate as you say you did with your results and found one of the above mentioned problems that when corrected allowed a clean finish. sometimes it does boil down to your wood, sometimes tenique
Thanks Dean, I guess it all boils down to a very sharp chisel, experience, and skill. I will have another go, but I have also just purchased Paul’s HW router set and I will be making Paul’s “Worlds best router plane” as soon as the HW set arrives. I will have another go at these rebates with the router and will share my experience then.
The router plane kit is great.
And it does a bang up job of smoothing recesses whatever they are. A fine cut twice will always do better than a course one with every tool. This was a hard lesson for me to learn.
Hoping to add to this conversation because it captured my interest, and in no way meaning to negate anything said thus far…
The tails with the recess are very much like a tenon, and Paul frequently uses a router plane to finish the faces of tenons. I have found this to be an excellent practice with standard/typical tenons and had not considered this to be any different until David brought it up. I mean, you are basically cutting a tenon and then cutting dovetails into it, so introduction of additional tools aside, why should this be any different, right? It is also critical for the recess to be parallel to the face, which screams “router plane” to me. 🙂
Exactly.
Ont thing the router plane does is guarentee that the tenon or whatever is parallel with the face which is in my opinion very important.
Router planes can also be used to pare away a small amount of the mortise wall too, in case you need a reference surface for paring. Some designs are better than others for this.
@deanbecker @scott m @colindevelen @katrina
I just started another go on this project. The previous one I did (not finished yet, hinges and finish to go…) I did in European Oak. Now I am working with European Ash. I did buy the Sellers Router Kit, just did not get to doing it. I also bought the Veritas Large Router – and that is what I used today on the Ash to finish the recesses, as paul demonstrates. To my dissappointment, the wood split in two of the recesses I did, taking a chunk out beyond the cut line. The split occured not at the end, but in the middle section. This will show as it is in the tail part of the rebate. Has anyone had the same issue? What could have been the cause? I did follow Pauls instructions, i.e. going/cutting into the wood with the router from the outside edge first. I suspect it might have been because I was taking too deep of a cut with the router, but I have not seen Paul going at it in different depth of cut at a time, he just used one cut… Or maybe the type of wood? But then what should I have done to avoid this? Any ideas from experts will be appreciated!!!
Did you sharpen up a lot. Thats required in ash. And finer cuts. Last but not least did you saw your shoulders before routing ?
Thats tough wood you are using.
Hi @deanbecker Thanks for your feedback. Unfortunately I have to reply “No” to your first two questions. I did not sharpen as the blade appeared to me very shart straight out of the box. But I will sharpen on my next try for sure to 6000 grit. I did take off thick chunks, next time I will go bit by bit. And yes, I did saw the shoulders but not all the way down to the line. But I feel a bit better now that you say the wood is difficult, I will have to do a third keepsake box in wallnut to use Paul’s wood type chosen for this project. But first I will finish the first two boxes. Wish me luck 😉
There is a difference between sharp and shiny. It took me a bit to figure that. When you get the ash done the walnut will be like butter. Best of luck.
Ten thin shavings are better than one thick one attached to a chunk.
Hi @deanbecker, I now sharpened the router plane blade to 6000 grit and made sure I am cutting thin slices. What a change, works so much better. Thanks for the advice.
You are most welcome. Glad i could help.
Dont forget to pose a pocture of your work when done.
You will have created a masterpiece.
I agree! Looking forward to seeing the finished box.