Sellers Home Dining Table: Episode 3
Posted 9 February 2022
This is an episode in a paid series. Want to watch it? You just need to sign up as a paid member, and you can enjoy this video and many other videos we think you will love.
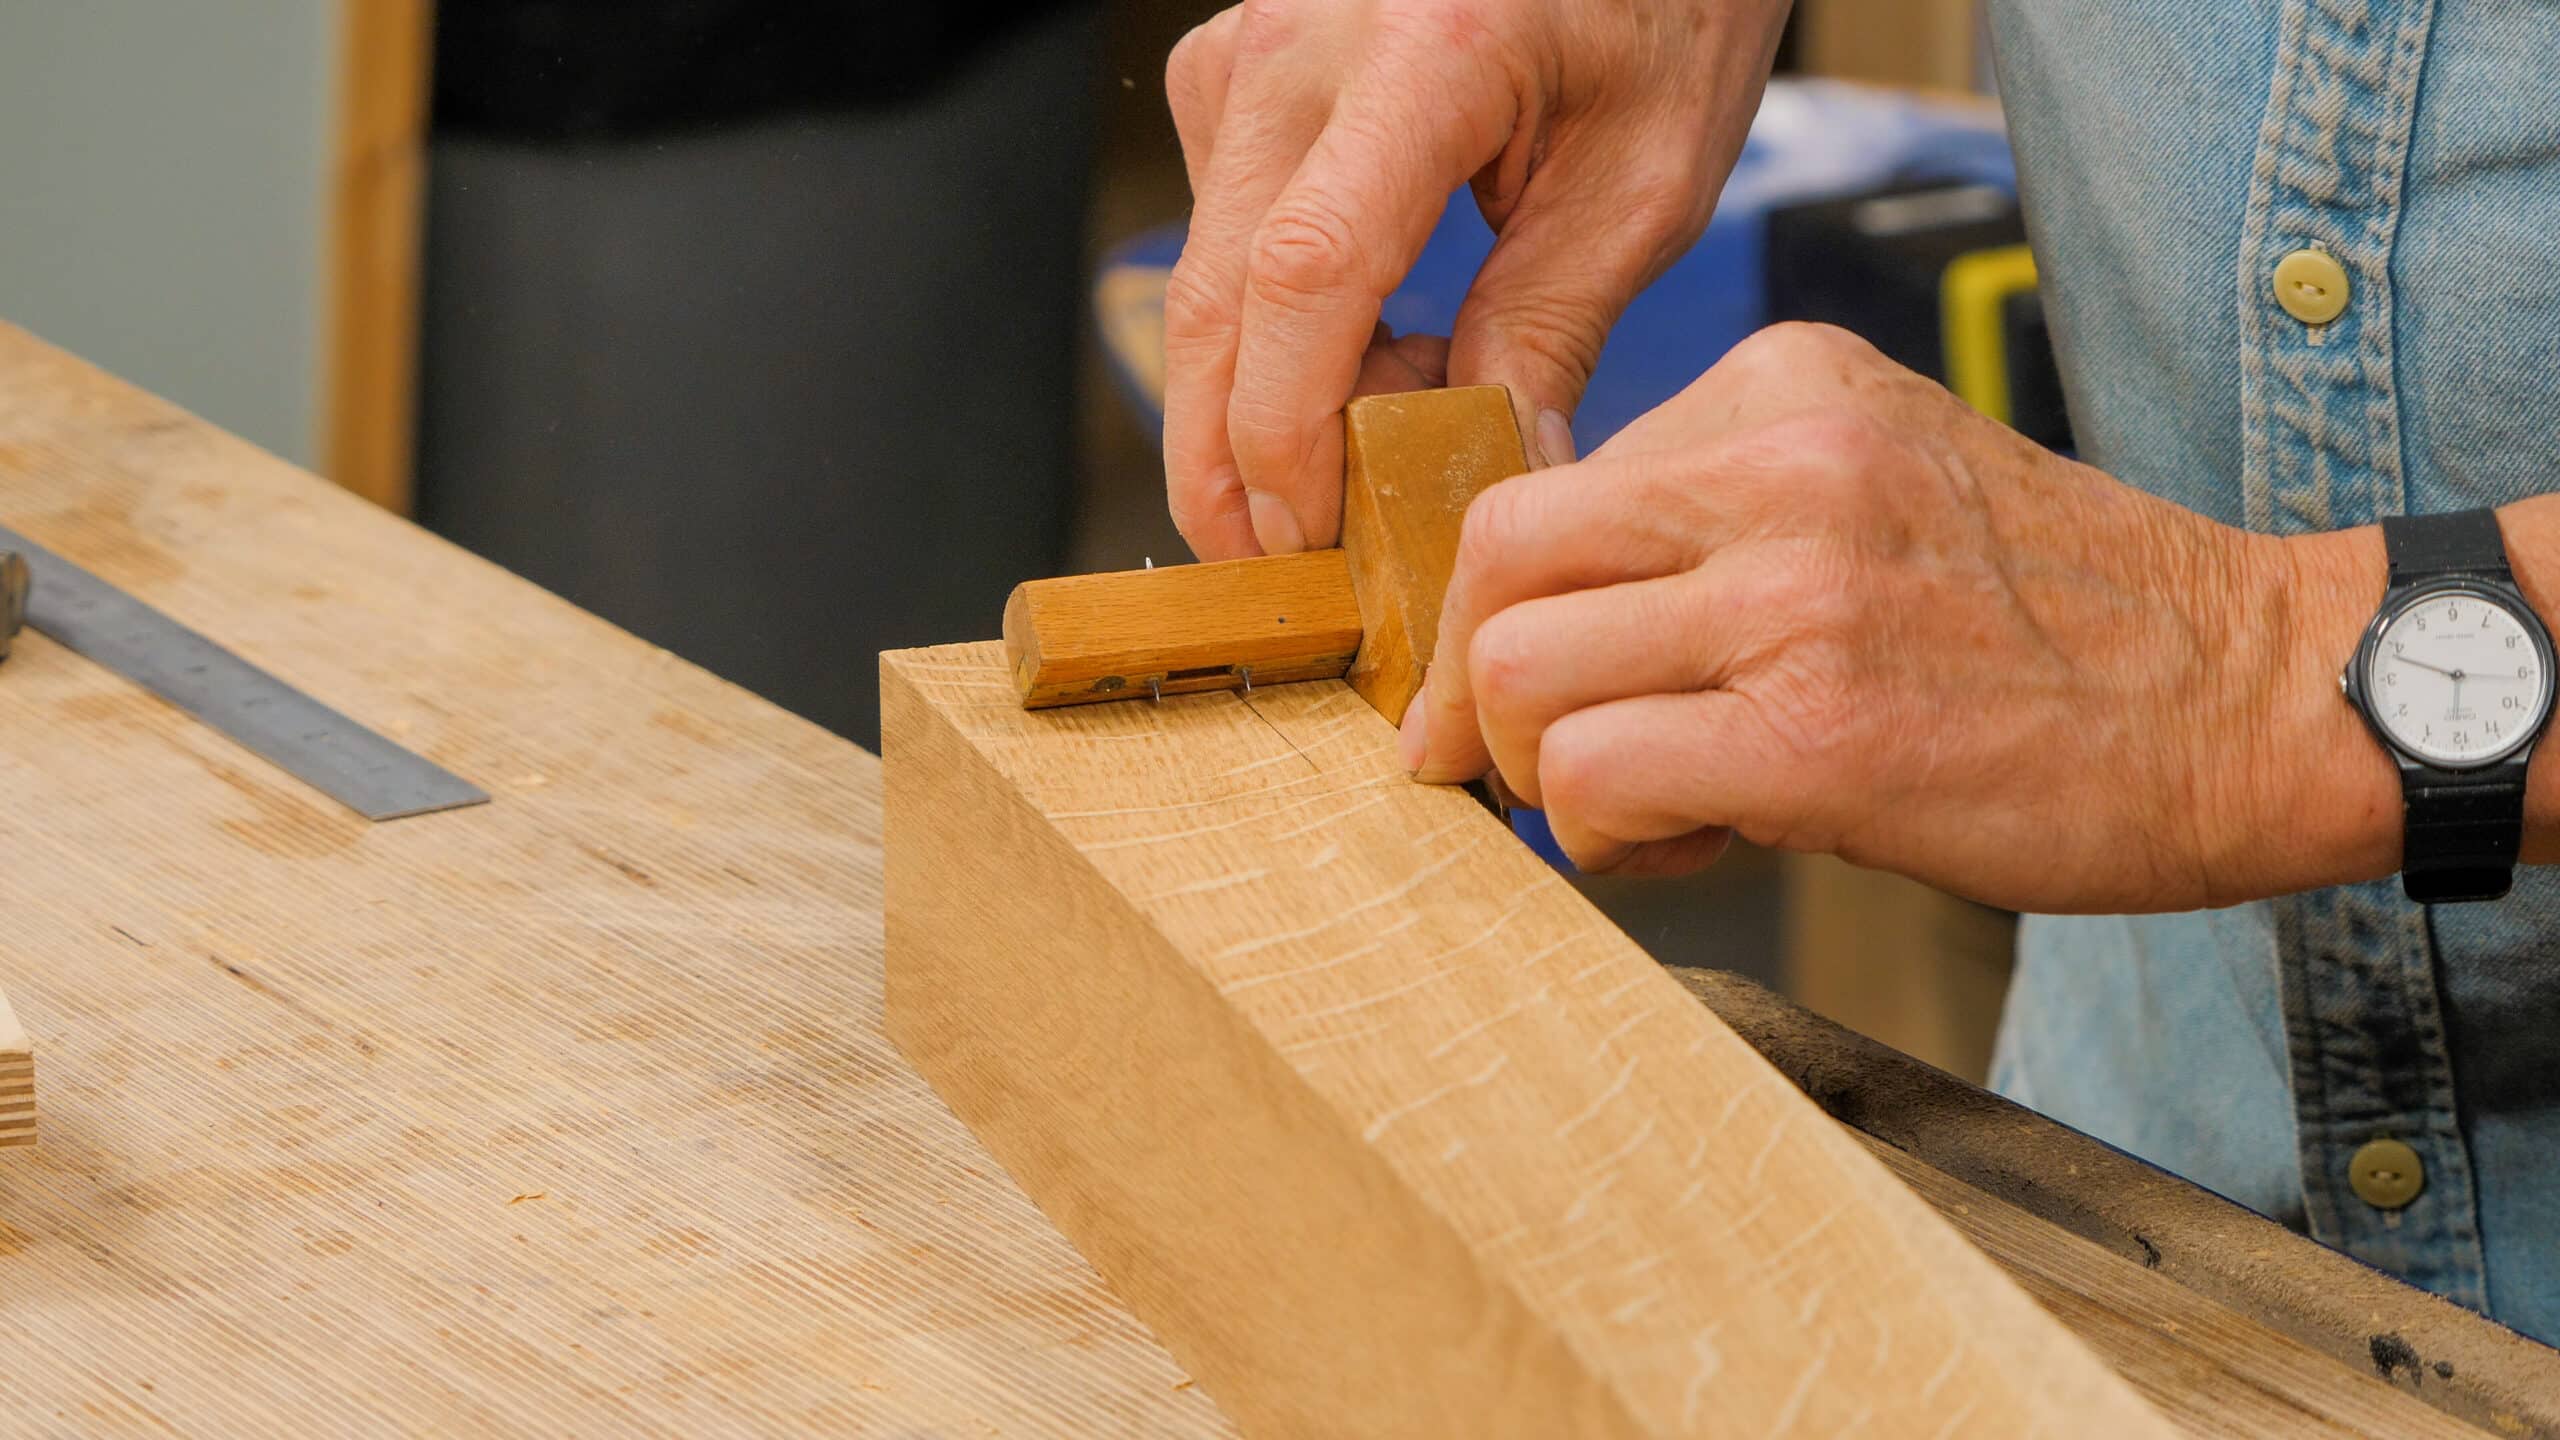
This episode opens up the whole system Paul uses for planing the stock foursquare using five different planes in quick succession — something you may never have seen before. It is the quickest method he knows of without using machines, if that is what you want or need to do. We quickly go into the layout of the joinery and then chop out the first haunched mortise with a 5/8″ bevel-edged chisel. This prepares us for the mortise and tenon joinery to connect the apron rails to the legs.
Great video. What is the benefit of using the 78 scrub and the no 4 scrub?
Robert you might want to take a look at the blog Paul has written on this:
https://paulsellers.com/2018/05/the-stanley-78-scrub-plane-what/
What do you do with all of that amount of shavings?… What are they useful for?
My son uses shavings as bedding for his various pet rodents. I use them to light the boiler or the fire. Generally best to stuff them in an old toilet paper cardboard inner, poke a few holes in it for air.
I was also asked one time to make some nice long thin shavings as table decorations for a friend who was getting married. They may be also useful for craft classes at the local school.
Shavings are great to use for kindling to start a fire either in a fire pit or a wood burning fireplace
I happen to live in an area of the country where hiking and backpacking/camping is very popular. I make fire starters out of some of them. That certainly doesn’t use all of them but some is better than none, I guess.
Would it be possible to post high quality photos of the blades from those planes viewed from the bevel side and from the back?Push them up against a flat block as a reference. These photos will demonstrate the cambers Paul likes to use across the widths of the various types of blades. Showing the bevel side will help especially with the smoothing blades to show what his knocked off corners look like. Even though he adjusts this aspect of the planes to the task, it will be helpful to see them as they are at the moment. Maybe a blog post would be a good mechanism? He’d be able to add sketches, if needed. Much of this is in various blogs spread over the years, but I don’t think it has ever been collected together for comparison in this fashion and shot with functional, straight-on photos.
Brilliant idea! That is definitely information I would love to see side by side.
Could someone from the team offer this idea to Paul and let us know his level of interest? I do think it would be valuable especially given the context of this video.
Thank you for the suggestion however this particular system has come about through small adjustments, trial and error and the feel for it. To plane like Paul the best way is not to see photos but to do as he has done and begin to experiment for yourself. A natural evolution would be to camber your blade until you reach a sweet spot it with it.
Why didn’t Paul use the string method to check the straightness of board faces?
How does he know that the board faces are completely straight, since the winding sticks are only for checking the twist?
I asked Paul and his answer is below:
I don’t know! It didn’t matter. The reason it didn’t matter is if there’s a slight bow in it the turn buttons will pull the table straight. With woodworking and hand tools we have many options and we chose minute to minute without any conscious decision.
When surface planing the boards for the top – did Paul bring them all to the same thickness? He mentioned that he would plane to a marking gauge or pencil line or just smooth wood but I’m wondering if all the table top boards were planed to the same thickness