Picture Frames: Episode 1
Posted 24 September 2014
This is an episode in a paid series. Want to watch it? You just need to sign up as a paid member, and you can enjoy this video and many other videos we think you will love.
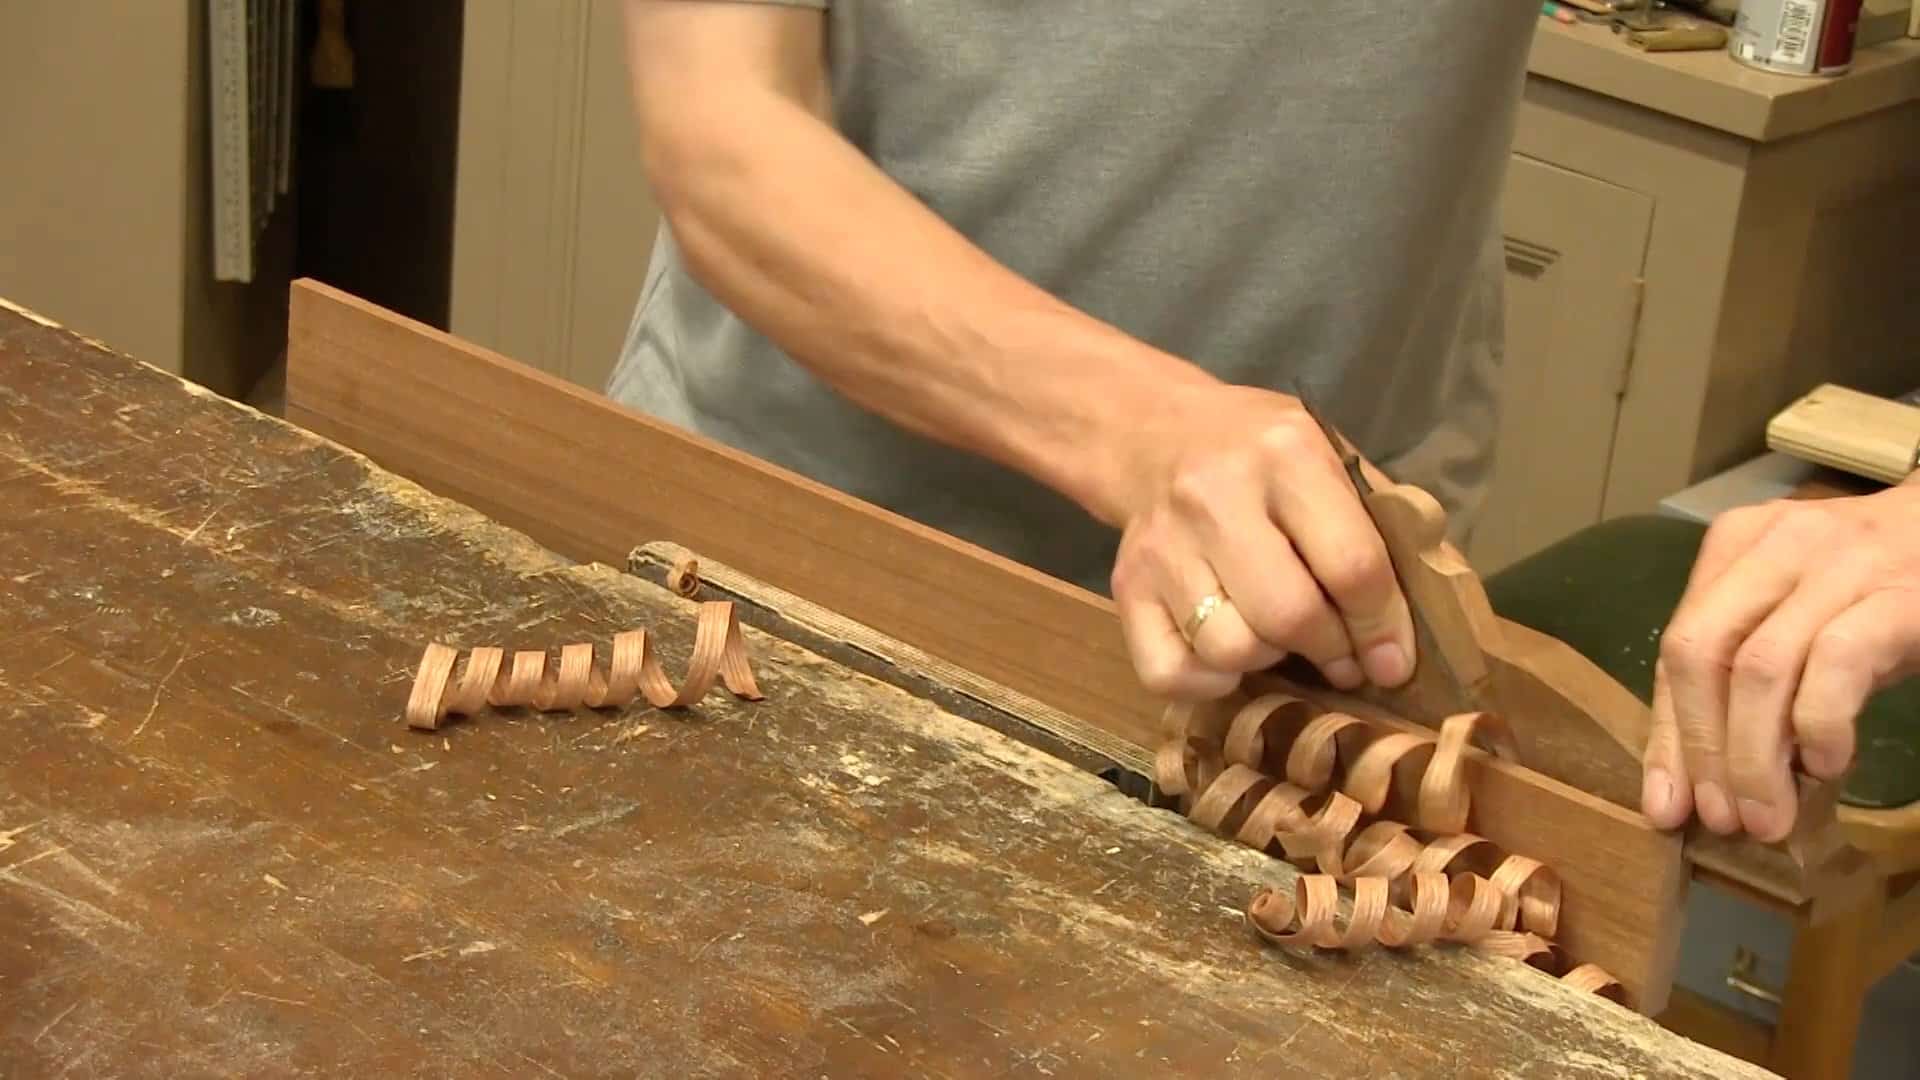
The first step in making the basic picture frame is working out the sizing based on your picture and glass. Once that is done Paul shows a couple of options for using a rebate plane to rebate the frame. There will be other methods for those who don’t have a rebate plane in later episodes, or watch the Making a Rebate Plane video. Then it is time to use the mitre box and shooting board to get accurate and crisp mitred corners.
Thanks for this series. I am looking forward to making the frames for some of my favorite photographs.
I like small projects like this. They help me build confidence with the basics, before tackling the larger projects.
Paul,
I’ve been looking forward to this series most of all. After many failed attempts at making frames with power tools; making complicated jigs, clamping fixtures and other nonsense, I had given up on the task.
The simplicity of the hand tools shines here.
I was writing to request a blog post on the lovely rebate plane you used, but as I typed I received the email about the video of just that! Always one step ahead of the game.
Best regards,
Joshua
This project came at the perfect time! Thank you very much.
Paul, is there going to be secod video for making mallet?
thx Seb
I’ve made many picture frames with the table saw and router table. I’m looking forward to making them without the noise and mess. (My friend Bill the cat thanks you as well 🙂 ).
Thanks for this, now I can make frames instead of buying, my Wife likes to give special “occasion” photo’s and is all ways looking for in – expensive frames, this is the ticket. And also give me something to do.
Steve
I wish I would have had known about the simplicity and effectiveness of a shooting board when I did trim carpentry. It would have increased my productivity and quality of my work. Trying to get a perfect 45 degree angle straight from a power miter box is impossible
Hi Paul
Making the picture frames has really caught my interest not just because you end up with great frames but that I think the skills are going to be very transferable to adding trim to cabinets and the like too.
Just one query: it didn’t seem to matter that a substantial portion of the frame was sticking above the shooting board and was therefore unsupported when the plane swept past. I can’t help but think that I’d get breakout if I tried it that way! Is it just that your plane is very sharp indeed or am I missing something?
Many thanks
John
Hello John, the plane does have to be sharp and be set very fine, but you also only push a very small amount of stock past for the plane to take off. Then there doesn’t seem to be a problem. Kind Regards,
Phil
Looking around for that plane… can’t seem to find any with those attachments/modifications. Any suggestions? Thanks.
I want to build frames out of walnut and cherry, 1 ½ to 2 inches thick. While I have no problem with pine, the hardwoods are almost impossible to plane on the shooting board. Do you have any suggestions? Thank you!
Hi Stefan,
Paul says:
I don’t think you should have a problem with a sharp plane as these woods plane easily. It sounds as though you may not have your sharpening technique down perhaps.
Kind Regards,
Izzy
@JANSTEFAN I’m uncertain what plane you’re using in your shooting board, but I’ve used as big as a No. 7 if I have a very thick piece. You could give that a shot.
Otherwise, just scribe a knife-line onto the ends as necessary, clamp them in the vise and plane the endgrain down. Mr. Sellers has used this technique many times on camera. Unfortunately, I don’t have a ready made example for you off-hand.
Thank you Austin. I even bought a low angle no. 62 jack plane for this (before I saw Paul’s assessment on bevel-up planes ;-( ). It weighs (only) 4 ½ pounds. The miter angles are very close, but a bit wavy where the iron keeps getting stuck. So I will clamp in a vise and use a more circular motion with the plane.
Like in all Paul’s video, these instructions are both essential and rich.
My only mini-complaint is that it would have also been great to see the other side of the mitre gauge when Paul cuts. Seeing one side only makes things a bit less clear for a total newbie.
Valentina, in the archives paul has a video of making one. Called poor mans miter box
I love this project and have recently started making my own frames – I’m amazed at how strong they are!
What I haven’t seen is how the glass, picture, and backer board are held in place. Any suggestions?
Thank you
Jason