Tool Drawer Organiser
Posted 21 February 2019
This is the introductory page for a paid video series. Want to watch more of this project? Select the best option below to get started.
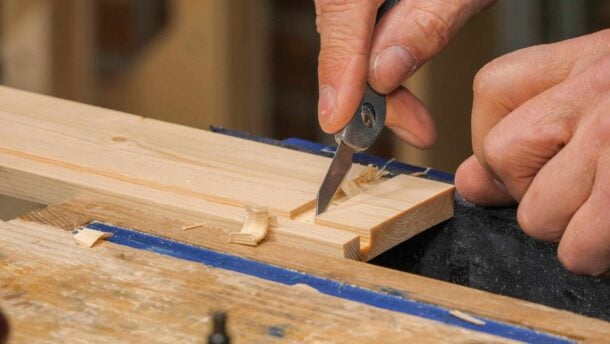
The Tool Drawer Organiser is a perfect training project for anyone wanting to take the plunge into their first half lap dovetails. At first, it may appear a simple project; however, this piece encompasses many interesting complexities such as tenoned housing dadoes for drawer backs, ultra long housing dadoes, ploughing grooves, drawer sizing and fitting, and much more. Paul made his first one over two decades ago and it has since become an indispensable part of his workshop. This design proves that something utilitarian can be both functional and beautiful. Designed primarily as a home for special hand tools, the project is scalable and could also make a good unit for storing fine art equipment, leatherwork tools, knives for violin making and all manner of other things.

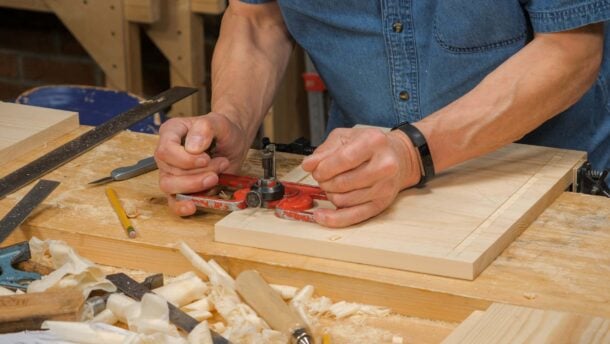
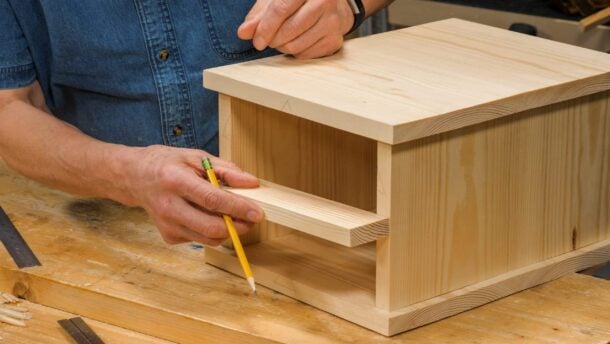
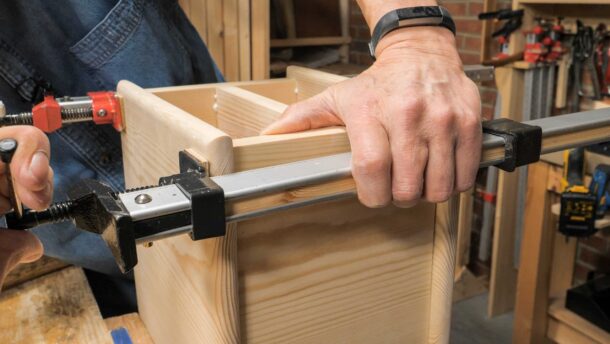
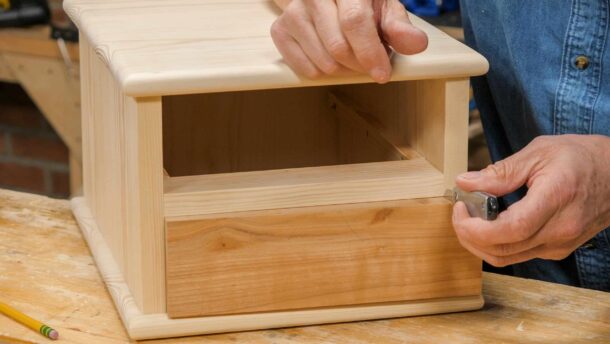
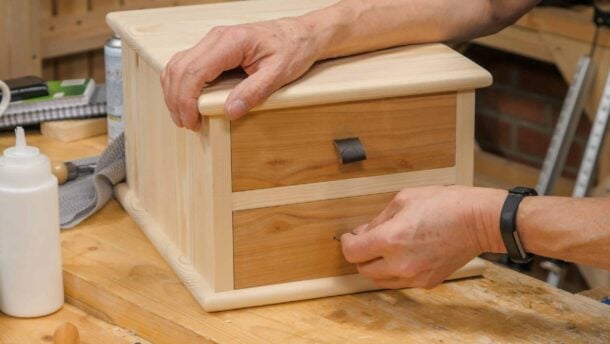
Interesting piece of book-matching on the drawers…………. deep-ripping work for a band-saw, perhaps?
Hi,
Paul says:
On such a short section of wood, it’s not too difficult to do by hand using a handsaw. But if you have access to a bandsaw, no problem with using that.
Kind Regards,
Izzy
Looking forward to seeing this project. Relocating my garage workshop and home. Can’t wait to get going again.
Regards Larry.
This comes at just the right time. I work in an environment with other individuals and I have found that some like to “borrow” my tools that I don’t have room for in my lockable tool chest. Therefore, I seriously need a container for the extras. I do have one request, could you address how you would lock both drawers. Would you use one lock or two? Thanks.
Hi William,
Paul says:
The problem of course, is that there are so many different makes of drawer and till locks available and not all locks are available to all. Unfortunately, it’s difficult to install a lock in this project once it’s fully made and assembled. What I might suggest is you pick the lock you want, dry assemble all the parts and leave gluing up until after the lock is fitted.
Kind Regards,
Izzy
Many thanks Paul and the team,I am looking foreword to making this one I liked the look of it from the first time it was seen on air many thanks .
I’ll second that. I’ve been freeze framing videos just to appreciate the simple elegance of the design. I’ve already put aside some figured cherry for the drawer fronts, and now that I have the (excellent) drawing, I’m off to get some nice clean Radiata Pine.
The technical drawings show the groove for the back on the wrong face of the side piece (at least based on Paul mentioning that the rabbet at the bottom of the side piece removes wood from the outside face of the side piece)
Hi Filippo,
The drawings have now been updated.
Kind Regards,
Izzy
My new plough plane arrived yesterday. I was going to build the clock to try it out, but now will learn to use it on this great project. I haven’t tackled cutting dovetails yet, so this will be a great project for that as well.
thank you. looking forward to making this. is there supposed to be a tongue on both edges of the sides to match the grooves in the top and bottom?
Paul, would you consider doing some videos showing the preparation of your drawings, end to end? You showed us how to do perspective, but I get lost trying to make something like your PDF plans. Look at Drawing 3, for example. There is a lot to figure out and organize to draw this especially if you want the various parts to be to scale.
What I’m suggesting is that it would be educational for us if you would be willing to work from blank paper through to the end of preparing the set of drawings for a project like this, including coloring. It may be a substantial amount of video. I’m not asking for you to show the design process (design concept), just the drawing of the design you’ve settled on.
I just completed a cabinet and made several errors in the construction. Almost every one of the errors derived from me not having made drawings that were good enough.
I too would love to have more help getting started in technical drawing! My sketch pad is terrible.
The drawing on page 1 appears not only to be geometrical but also to perspective. I would be very interested in a video series teaching that by pencil, square and ruler.
Sven, I have also requested that Paul do a video on how to hand draw common woodworking joinery. I have tried it on my own with less than optimal results. I even took a online drawing class thinking it would help. It didn’t
Here’s a link to a video about drawing that Paul did: https://www.youtube.com/watch?v=lUHgKsnTfxM This looks like a good start. He has other posts on his blog, as well, about drawing. If fact his blog is well worth reading for the wealth of info it contains. I started at the oldest post and have worked my way to page 100. It answers a lot of the questions that folks are always asking (faq).
Many thanks Jim!
/Sven-Olof
Hi Ed,
Paul says:
I think this is a whole sphere of education that we would love to cover but it would be impossible to add to our already full schedule.
Kind Regards,
Izzy
I understand and appreciate that there’s only so much time. It makes sense for Paul to focus on other aspects since there are likely good drawing presentations elsewhere. Thank you for the reply.
It looks to me (by adding up the measurements and looking at the parts list dimensions) that the only thing missing in the drawing is the tongue on the other side of the side.
Hi Jim,
The drawings have now been updated.
Kind Regards,
Izzy
Good evening
What species of wood you recommand for the different parts ?, is pine ok for the carcass ?
Best regards
The one Paul is showing in the picture & video certainly has a pine carcass, as does the original …
I think the lightness and cheapness of pine are a hard to ignore virtue, at least for my skill level where mistakes are not unlikely.
Arguably it’d be unnecessarily heavy (ie overengineered) in most hardwoods if you use 3/4″ stock.
I think pine would be a great wood for this project. Personally, I will use wood I happen to have on hand already. That means it will have a Oak carcass with Cherry drawer fronts. I could use Oak for the drawer fronts as well, but a little contrast would be nice.
Hi Olivier,
Paul used pine for his and he loved it.
Kind Regards,
Izzy
I came across a couple of issues with cutting list Tool_Drawer_Organiser_drawing_v1.pdf:
– the Qty 3 Drawer Rail should be1.
– the Qty 4 Back Panel should be 1.
– missing line entry and dimensions for Qty 2 Drawer Runner.
Partly agree – it puzzled me at first that the drawings don’t depict any horizontal front-to-back drawer supports. Then I realised that the THREE ‘drawer rails’ supply both the front and the two side rails (although at 22 seconds in the video, the side supports don’t look to be 2″ wide, as the front rail is, unless it’s just a scrap stick being used to obtain the exact length required?)
But how will the drawer side supports be attached? There’s no housings/dadoes in the sides and nothing to indicate that the side rails will be tenoned into the back edge of the front divider. Just glue? I guess I’ll just have to wait and watch the videos!
Agree re. the back panel though – it looks as though the compiler of the cutting list switched from ‘quantity of items’ to ‘item number four’ going down the list!?
I think the quiz on Paul’s blog a few days ago indicated the drawer runners we’re secured with two screws (no glue). That works, as long as one of the through holes in the runner is enlogated to allow for wood movement in the sides. You could use dadoes if you needed to store heavy stuff, or the drawer was a great larger.
In balance:
There is no need to elongate either of the holes. In my experience the grain inside the holes drilled to receive the screws with absorb pressure to a point of compression according to any exchange of moisture content in the wood. I would go as far as to say that movement up to a distance of 3/16″ would be accepted. Additionally the screws themselves will have tolerated movement by bending or flexing too. The greatest distance between the front and back screws is 8 1/2″. Of course we need to make sure the wood is not green. Re weight issues. I doubt you could ever put enough weight in the drawers to affect the drawer runner supports.
Please dont play noise in background.
We come to listen to Paul and can play our own music if we want to.
For those of us with hearing problems this spoils the video completely.
Seriously?
You can’t turn down the sound?
I had to go back and listen to even notice that there was music. Geez……… it’s an introductory video……..they often have music. To me it adds a lot. Once the real work starts I wouldn’t feel the same way.
For some people, mixing voices and music makes the voices hard or impossible to pick out. They won’t be able to follow what is said. It’s a legitimate point to raise because the crew may not know. It’s like telling a designer to be aware that some people are color blind and can’t see the lettering in a design while you say, “get serious. I can see them fine,” because you have normal color vision. At least, I think that’s what @woodruss is saying.
FWIW, I too found it distracting and mildly annoying. My hearing is supposedly good, so its not just those with hearing problems. On a short introductory clip like this it may be tolerable for some, but I would prefer pure unadulterated voice of Paul plus the usual background sound of planing and sawing and tools falling, any day :).
Woodruss – I agree.
Even more annoying is the person playing the guitar in every intro and segment change on every video-
They run their fingers up and down the strings, on chord changes, sounding like someone is pulling their fingernails across a chalkboard. There was a time when this was a sign that someone needed to practice the guitar more. We have dumbed down music just like in woodworking by excepting this as “normal”. “Scratching” the strings isn’t any different than those using pocket screws to make a carcase- they work but are not a part of fine furniture.
I would think Paul would want the quality of the music to match the quality of the woodworking he is trying to get us to achieve. Every time an intro plays I cringe at the sound. Now I turn the sound off to avoid the issue (but I shouldn’t have to turn the sound off for every into, because of the scratching guitar person).
This may sound petty but I am really trying to learn so I watch something every day. Scratching and all. The videos are great- the scratching- not so much.
i hear one squeak during the intro. Sounds like brand new strings. If you were recording a big budget album you would try to avoid it whenever you can, but I would not compare one string squeak to pocket holes, more like a small gap, one Paul probably wouldn’t even fill and only other woodworkers would even notice.
Keith, you should listen to more of the videos- there is more than one “squeak”- or I am just over-sensitized?
Definitely over-sensitized! Well ……………not necessarily…………..I’m not listening through your ears. Personally………….. I think Paul ought to use some nice banjo music in his videos!
Nothing wrong with the guitar playing. It’s beautiful. The string squeaking was never a sign that someone needed to practise more. Take a listen to Jose Felicianio for some serious squeaking. It’s most likley due to the type of strings, or that they are new. Or even hard callouses on the fingertips will increase squeaking. Your comment on dumbing down music and woodworking is quite bizarre.
*”…accepting this as normal..,” sorry I had to.
As guitar player, I try to avoid excessive string noise, but it cannot be avoided on some passages. To me, it adds an organic element to music that is missing in today’s highly processed, computer enhanced, massed produced, popular music. Sort of like the tiny, almost imperceptible flaws on a piece created by a master woodworker using hand tools. We each have our own tastes, though. I hope you don’t let something like this annoy you to the point that it ruins it for you.
Sorry I got this far off topic- but this subject has (as I see it) gotten worse over the years and yes Adam, Jose Felicianio’s guitar playing, well I can’t turn the dial fast enough (he ruined great music with lousy/lazy fingering IMO) trying to excuse it as his “style”. Just like pocket holes are the style of so-called professionals slamming out production work.
Why is it you rarely if EVER hear a classical guitarist “scratch” the strings, at least in the olden days that was unacceptable
I guess I view classical guitar fingering the same as traditional handtool woodworking. When I make a “scratchy” dovetail I know I can do better and try the next time for that perfect tight fit. I don’t except the “scratchy” cut as “folksy” or “my style”. No, I know it for what it is- a less than acceptable dovetail joint that can be better.
I seriously doubt that any of you commenting about this would say “I love seeing scratchy dovetails, boy I can’t wait to see more.” To me, the scratchy sound is the same thing and it has the same effect on me as fingernails across a chalkboard. I don’t cringe/ wilt like some people but it can be very annoying especially when it can be controlled and avoided.
Now, sometimes a teacher would scratch the board by mistake but they would make ever attempt and try very hard not to do it. Why should we not expect the same courtesy from the guitarist?
I don’t like fingernails on the board, bad cut dovetails (from me), or scratchy guitar playing. It is just my opinion.
If others want to discuss this further please make a new thread on the discussion forums.
I would have hoped my question below about the carcase back would have received at least one response/answer- that one has actual value and really does matter to me
(this part of the thread is really just as an exercise for me to see if I can articulate some obscure idea I have of changing the music world, that I know will never happen and my kids think is all in my head (or ears). Thanks for humoring me- now can someone take a good stab at my question below, please? I’d like to get my cut list ready before the video drops!
Fair enough, Tad. I see your point. Each to their own I guess. I do think you were a bit hard on José Feliciano though. And I was also under the impression that it was one of Paul’s team that played the music so perhaps I sounded a bit defensive (could be wrong). But I agree /understand JF is not like some of the great classical players or necessarily plays pieces of music to the level they do. Nor a Tommy Emmanuel! Check him out if you haven’t already. He plays with many of the great jazz and classical players too. One of the great virtuosos in my decades-long-guitar-playing-life opinion… he does squeak the strings on occasion 😉
Hell… he scratches and bashes his guitars to the point of destruction only lasting a few months… Lol
Steel string acoustics are more prone, and also the piece of music that’s being played as someone pointed out . Anyway I’m also continuing off topic so will stop now and agree to disagree. But I’m also looking forward to this project and am just about to sign up for it. Can’t wait either, Tad
Good to see the plans were updated and you got your question answered.
Take care
Adam
Historical context is important when critiquing musical performance. Guitar strings, like all string instruments, used to be made of different material than the current wrapped wires. This wrapping adds small grooves that catch the grooves of fingerprints. The sudden release creates the squeaking you hear. I have never heard any guitarist not squeak when playing their guitar with modern strings and I have heard classical guitarists from all over the world. The squeaking on the guitar is as much a part of guitar playing as breathing is for singing or wind instrument playing. Focus on the music and learn to ignore the extras if it bothers so much because the guitarist isn’t able to stop the sound.
I’m really looking forward to making this, thanks! I have been wondering about drawers for a little while, these will be my first. I even have the perfect spot for this in my tiny little shop, it’s going to be super handy.
Do we need “4” “Qty” back panels? Or am I reading this incorrectly? I was working through my materials and putting together my cut list The math for doesn’t add up for me on the back panel of the carcase. Four pieces would make the panel 38″ in one direction or 30″ in the other, Given all the other pieces one should suffice or have four carcase backs?
This all came about because I was trying to figure out the grain orientation (do I match the top/bottom or the sides), keeping in with the shrinkage theme. My assumption would be to match the sides but I thought Paul might be throwing a curve ball to keep me on my toes.
The carcase back isn’t shown in the drawings.
Have you looked at the cut list lately Tad? It has been corrected to show the correct quantity of parts. It was discussed a few days ago in the “Comments” that it looked like someone, when making up the cut list, had gone from listing the quantity to numbering the pieces. Oops! All seems to be well now.
In regards to grain orientation, I was going to start milling out my material, but decided to wait until the first episode is out.
Thanks Jim, The new one just came up on my computer.
I reloaded it yesterday to see if there were any changes but it was still the same, I even cleared my cache thinking that might help.
Thank for flagging me that it was updated
I am just getting the glue up ready and done so I don’t have to wait another day after the video is out. The issue with the back is I have an 8″ board and if the grain orientation matches the top I don’t have to glue. but if it is the other way (which I suspect) I need to do a glue up. I am working with a limited supply and don’t want to waste it.
For Christmas this year, I made a small dovetailed case of drawers for my younger daughter’s desktop. I showed this one to my older daughter, asking if she would like one for her desk (which is flat with no storage but plenty of clutter). Now this is on the project list once the video series concludes. I’m quite interested to learn about the construction method, as a different construction method and visual style.
the pine you used on the version you made in america is so different looking then your European pine
The US version is ponderosa pine and the UK version is Redwood pine. The work about the same but the Redwood or Scotts pine is a little harder.
Where do I find the drawings for this project? Isn’t there usually a link on the intro video to take you to them? I’m not seeing it here.
There is one. The link to download is below the video.
Canoe- they should be directly under the video (right below where it says download video). On my screen it says:
“Click here to download the technical drawing and cutting list for this project. Updated on 26th February 2019 to correct the depiction of the side panels and update the cutting list so it makes a bit more sense.”
Run your cursor over it and it should highlight it- click on it to download
The link is on this page just under the intro video. It has just been corrected so may be you looked when it was part way through being updated.
I really like this project and I’ve started working on it from day 1.
The starting point of the project is a few feet of edge joined boards from which the sides and top/bottom are created. I find this edge joining a difficult process on long boards – there is some information on this on wwmc and common woodworking, about planing 2 boards simultaneously which solves the out of square issue, but it’s demonstrated on smaller boards.
My issue however is that on long boards (145 cm in my case) the edge is not straight, and taking the boards out of the vice to check and then clamping them again as level as possible inadvertently leads to more issues than solutions. I then try to plane just the one board when the gap is small and straight enough, which sometimes messes up the right angle of the edge which causes the board to warp (in rehearsal stage, luckily). And when part of the bard is out of square you’re back to square one (pun intended).
I’m using a Stanley nr5, as sharp as I can get it, with ever so thin shaving all across the width of the blade. Is this something that takes time & practice or is there something else I should look out for when edge joining long boards?
Many thanks for everything!
Mic
If you cut the top, bottom, and side boards to rough length before edge jointing, you’d be dealing with shorter boards. Might not be how you’d like to do it, but might be a solution.
Also, before I got my jointer (powered), I used a Record rabbet plane (with a fence) and a jointer to true the edges on longer boards for edge joining. Worked pretty good.
Jim,
I thought of that approach and that would work, but I’d like to get the hang of joining long boards. I’ll need it at one point or another anyway, for shelves and table tops & such.
With regards to your approach, what do you mean with ‘jointer’ if not the powered one? As in a Stanley 6 and longer? Paul notes that you don’t need more than a 4 and a 5, but even if my 5 takes the smallest of shavings the board is hollow, mainly rising at the ends.
Sorry I wasn’t more clear. Yes, before I got my powered jointer, I used the Record rabbet plane with a fence and a No. 7 jointer plane. With the combination of the two I was able to get a true edge for gluing. I could be wrong, but I think the reason Paul doesn’t use anything longer than a No. 5 is that he uses power equipment to prepare his wood. Maybe someone more knowledgeable will chime in.
Hi Mic,
Paul says I think it is just a question of practise. It takes time but you become more sensitive and relaxing in the grip is key to this sensitivity being developed.
Kind Regards,
Izzy
Thanks again for the pointer guys. 2 things helped:
I found an old wooden (jointer?) plane that I did up and sharpened, that made edge joining a bit easier.
Also, after joining 15 odd boards in pairs of 3 I’m starting to get the hang of it a little. My challenge now is that I have a small gap at the ends of the boards – apparently I’m doing something wrong at the beginning/end of the board (or the planes aren’t as flat as they should be).
Have a good weekend,
Mic
did you watch the video about edge joining with timber dogs? paul talks in that one about spring clamping and or perfectly straight edges and how to go about it a little bit that you may be able to apply what you want to do, or not do as far as creating a belly or hollow
I did remember that one, which left me some confidence in clamping up the last bit of gap I can’t get rid of. Seems to work..
I had a look and found this page: https://woodworkingmasterclasses.com/videos/edge-jointing-techniques/
I’ll have a look at these (again, I think I’ve seen them some time ago) & see how I fare.
Thanks for the pointer.
A question for Paul or anyone else who may have the knowledge to answer!
I’ve been studying the techniques used for building the tool organiser and the chest of drawers. I need to make a large carcass with a single drawer, approximately 24in wide 50in deep and 8in high. The drawer itself will be very long and narrow. The carcass will need to take considerable weight in the centre and I envisage making the top from 1in thick oak. The sides and base from 3/4 in. One problem that I think can be overcome is friction when the drawer is used. Another is edge on gluing so many planks. My main question is whether there are other reasons , particularly with regard to the expansion and contraction of the wood, that prevent the techniques and methodology employed for the tool organiser being scaled up for this project?
Many thanks in advance and any comments, no matter how bluntly expressed, will be much appreciated!
Hi everyone, I’m doing this chest now. As a newbie, I’d like to make some notes to others like me.
Since I have to paint this chest, I decided for an unexpensive wood: fir.
Plus, I have been sold not solid wood, but a board made by strips of fir (3-4 inches wide).
I’m learning a lot… the hard way!
Fir, pine and generally speaking soft woods are not easy to work, nor very forgiving.
You need to have extra sharp tools, ultra defined saw line to cut and a lot of care for tearout and chipping, especially at the ends.
I suggest to try first other woods, as beech (here in Europe beech is not very expensive).